
Do you want to become a better wildlife photographer but you aren’t sure where to start? Here are five tips to help you create beautiful animal photographs no matter your skill level.
Perspective
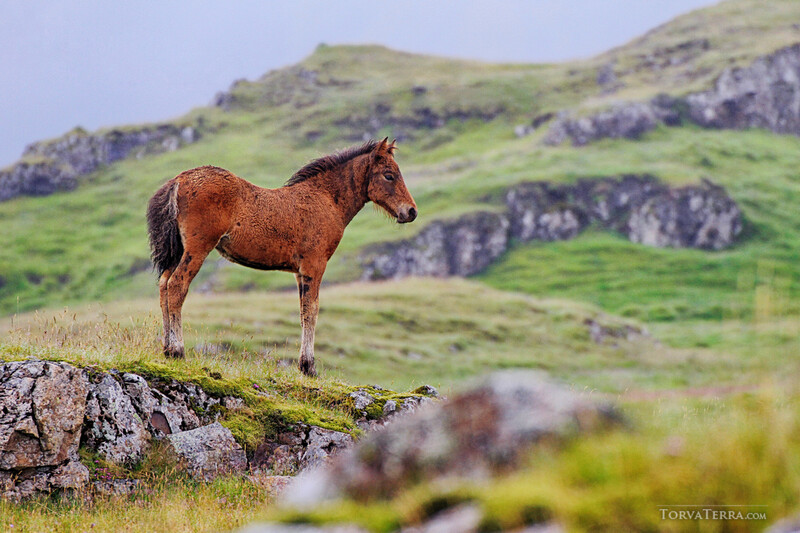
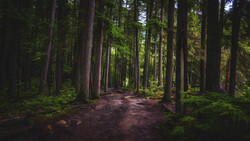
The first tip is an easier one to begin but it is still often overlooked. Start by photographing wildlife at their eye level, not yours. Many photographers, especially beginners, stand up and set their tripod and photograph from human height the whole time. By doing this with most wildlife you are looking down at them and the perspective is unflattering, to say the least. By getting to eye level with your subject, the lens compression will make your background creamier and the focus on the subject clearer. Often I will sit, crouch, or even lie down on the ground to get the proper eye level needed. I feel that this technique turns a snapshot into a photograph by how strong a difference the proper perspective makes in how a photograph looks.
If you have trouble getting low to the ground, a fold-up camping chair is a great tool to have in your kit. This way you get low to the ground comfortably and are more likely to avoid the bad habit of only ever photographing at standing height. With an intervalometer, capture app, or flip-up screen you can set your camera up even lower than you can physically get while using the capture tool to take the photo. If there is a will there is a way.

Play Tricks With the Light
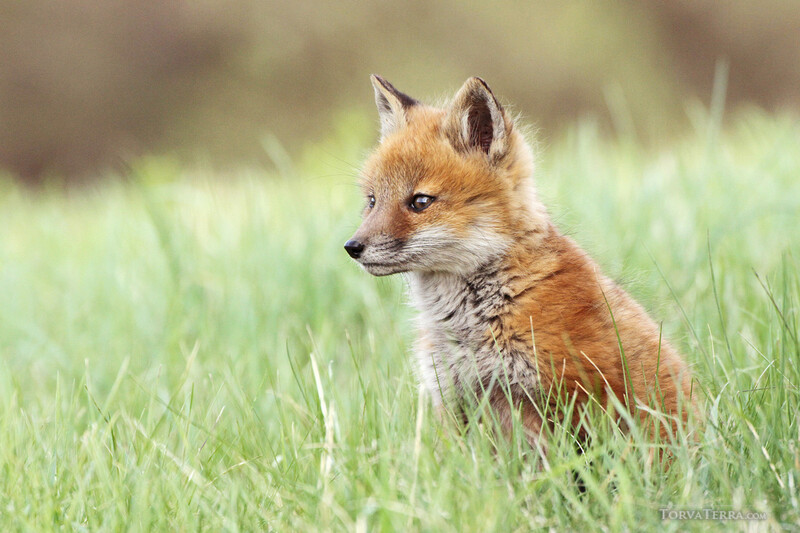
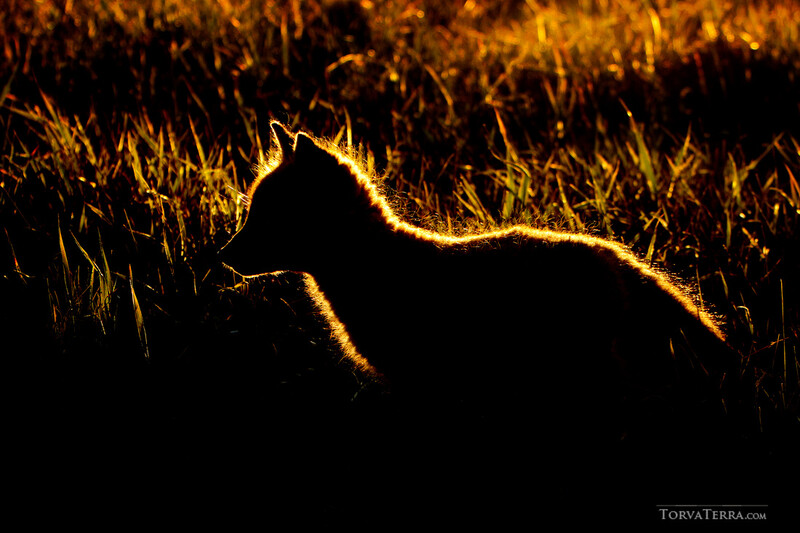
Everyone knows light is the basis of photography. For a well-lit subject outdoors, you want the sun directly behind you and your subject in front of you. This is the basic foundation for using natural light. However, building on this you can completely flip things to use the light to your advantage. If you are facing the sun and your subject is between you and the sun, they will be a silhouette. In the very last light of the day, when the sun is low on the horizon a plain silhouette technique can be taken to the next level. Animals with textures like fur, hair, or fluff will catch in the light creating a beautiful effect called rim lighting. This is where a halo of light will catch in their fur and the edges glow as if painted in gold. I love to use this effect when I am photographing animals with a recognizable silhouette like foxes, wolves, or even wild horses.
Master Wildlife Behavior
The very best way to create high-end wildlife photographs is to understand your subject. You can do this by studying them online, reading guidebooks, spending extra time with them in the field, or all three. Every animal species is different, but they all have their own lives, seasonal behaviors, and repetitive habits. Understanding wildlife behavior gives you the knowledge to know what to expect and be ready for it.
Birds are one of the most popular wildlife subjects so I will share a few tried and true methods that I use to photograph them. The first tip comes down to knowing the signals of when a bird is about to fly. For birds, if they have been perched for a while and aren’t flushed or spooked into flight they exhibit specific behaviors before flying. First, the bird will “lighten the load” so to speak, yes I mean defecate. Then they turn into the wind and no, not for the smell. Birds prefer to take off or land into the wind. This is especially true for large birds like owls, eagles, and hawks. So if you keep an eye on the wind direction you can predict where a perched bird will fly and simply wait there. If conditions allow it put your back to the sun for light, the wind for flight, and wait for the right moment. You will end up with a beautiful series of flight shots as if the bird is coming straight towards you as they take off.

Another of my personal favorite predictable bird behaviors is when they are in the water preening. Birds, especially waterfowl and shorebirds, do this trick and it works every time. When near the end of preening they will dunk their heads repeatedly very fast under the water to toss water onto their neck and back. Directly after this, they will stretch up tall and flap their wings super fast. The water droplets will explode off of them like a cascade of diamonds. When I see waterfowl preening I position myself as close to the water if not in the water, set my camera to a very high shutter speed burst mode, and wait for the flap. Even mundane birds look lovely draped in diamonds. It is a very rewarding trick that works every time.
Never Stop Learning
Even if you are an expert photographer don’t be afraid to take a photo workshop. Some veteran photographers recoil at the idea of taking a workshop, as if that is beneath them. In my opinion, the best photographers never stop learning or growing. Even if you don’t agree whether or not you will learn anything new, there are many photography workshops aimed at getting you in front of wildlife that is hard to find, requires access or special permits, or is simply new to you. I am talking about joining a group with a guide who is an expert on that subject and location. There are whole subsets of workshops that are even meant for seasoned photographers where the goal is portfolio building and getting you access to remote places or wildlife. There are boat excursions to photograph polar bears, eco-lodges to photograph tropical birds, tracker guides to take you to see pumas in Patagonia, the list goes on and on around the world. Even local trips have value if you have an expert guide.
Another aspect of photography workshops is networking. If you attend a serious wildlife photography workshop you are surrounding yourself with peers just as keen as you are to create amazing photographs of wildlife. This is a great way to make friends, talk shop in the off times, and compare notes of what adventures to do next. Even if you don’t need help learning settings you can certainly meet new people, leave all the planning to a professional, have a great photo vacation, and learn about more interesting places to visit.
Collect Good Photographs Not Big Hard Drives
My last tip for better wildlife photography is to slow down when you are in the field. Instead of the “spray and pray” method of photographing everything and going from spot to spot fast, relax and enjoy nature. Be mindful of your light, possible compositions, and backgrounds. Think of your photographs as problem-solving towards the end result. Look around the area and get a feel for the shapes and colors. Ask yourself questions. Could a more clean or vibrant background for your subject be achieved if you just move a few feet to the left? Are there branches in the way and you should try a different angle? Is the foliage actually quite lush and pretty so maybe instead of a portrait you should take a wide-angle environmental photograph to show the habitat? Conversely, is the area busy and confusing so you should zoom in or wait until the animal moves to a better location? You might not have noticed these things if you were rushing and blasting away towards a full memory card. It is only by slowing down and giving yourself time to think that you can solve these problems and create better art.
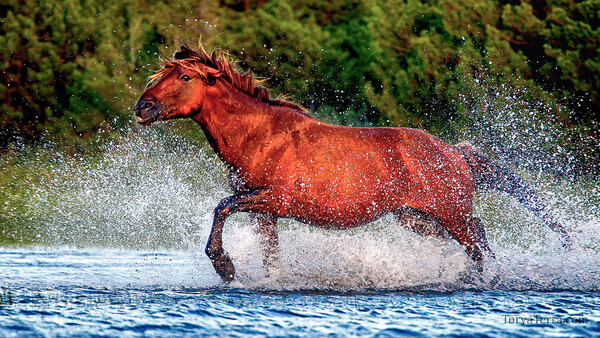
By creating your images mindfully you can also look at ways to capture better moments. The very best wildlife photographs tell a story. The viewer is immersed in the world of the subject and feels something. Photograph wildlife living their lives. Look for times when they are interacting with their young, capturing prey, or facing an obstacle. One example is my lead image of a wild stallion racing through the tidal flats to challenge a rival horse. By spending time with the herd, understanding wildlife behavior, and waiting for the right moment I was ready to capture that photograph.
Do you have any wildlife photography tips or tricks that you use to create better photographs? Share them in the comments below.
Join the Fstoppers community for free
-
Post comments and join in the discussions
-
Browse the site ad-free
-
Share your work and get featured in the community
-
Compete in the photo contests for fun and prizes
13 Comments
I've been trying to get some good shots of a nearby wild horse herd, but my pictures are coming back (especially with my 600mm) with a weird soft aspect, which I think is heat diffraction. Is there anything to be done other than shooting earlier? They're out in an open prairie so I'll always have to shoot from quite a distance but even at 8:30am, my pictures are nowhere near as sharp as when I'm shooting birds in a wetland area.
I am guessing that you're sure that it isn't a lens in need of cleaning or micro-adjustment? The haze or heat shimmer that can cause softness can really only be eliminated by going on a cooler perhaps cloudy day, earlier in the day before the heat has taken hold or just a different season. Unfortunately it's just one of those things.
I just ordered one of those targets with the numbers to make sure my lens is accurate, so we'll see!
Can you post some examples?
This was shot at f/11 and 1/1000. The foal isn't very sharp and the blurred background has a weird texture to it, almost like a mosaic. I am definitely standing far off and the image has been cropped in.
The foal looks pretty sharp to me, based off the image size. Eye-lashes are pretty sharp. I can see detail in its coat. It's definitely sharp enough where you can add sharpness/structure/clarity in post and still look natural.
That said, if this had potential of being more sharp:
1. The heat may be distorting a little.
2. If there was a heavy crop, it may have affected the quality, including exaggeration of the background mosaic effect.
3. Lens diffraction. Based off the exif data, you shot this with a Sony FE 100-400 f4.5-5.6 + 1.4TC @ f11 @ 560 mm. That setting may be where that lens, lens+tc, or focal lenght starts to progressive get softer.
The background, IMO, looks heat related.
Thanks for the analysis!
I am definitely seeing the heat shimmer effect in the background bokeh area of your photo. It has the classic irregular but constant mosaic effect quite like puzzle pieces. The foal does look sharp enough. For your background area the f/11 aperture is just sharp enough to render the mosaic at distance, but just soft enough to be blurry. In your instance I would either photograph only in the early morning, on cloudy days, or try a different telephoto lens (no tc) where you can use a wider open aperture around f/4-6.3. Blurring the background out will help visually soften the shimmer effect. It will also make the subject appear sharper in relation to a more blurred out bokeh/background. I hope that helps!
Thanks for the tips! I'm new to this and get so excited to see the animals that I just want them to be as close as possible in my viewfinder! :)
Heat diffraction is a definite possibility. Could be DLA with a smaller aperture. Some lenses need to have IS turned off when on a tripod. Need the camera, lens, and setting info.
Another possible reason for the softness isn't heat diffraction as most people think (hot day), but simply _different_ temperatures between you and the horses.
There's outdoor rock climbing not far from where I live, but man... So hard to get a sharp image because I have to shoot from across an artificial lake.
If you put the camera on a tripod, go to manual focus and turn on focus assist/zoom, have a look for what looks like a rapid change in focus. If you see that, it's atmospherics :-(
Good luck and I hope you succeed in getting some awesome photos!
Thanks Kate for this excellent article!
Master Wildlife Behavior - For me, this is the most key point. Don't be lazy, don't rush. Wait, learn. If you don't understand an animal, how can you capture the spirit or personality of the animal?
Thank you for writing in to let me know that you appreciated my article! Understanding wildlife to me is the essence of creating a quality wildlife portfolio rather than just a lucky click now and again. A knowledge of wildlife behavior is just as valuable tool as the camera and lens in your bag.