
So, what are the best settings for wildlife photography? Most people would argue that aperture priority would be the best way to tackle shooting fast action like wildlife and sports. It gives you the best balance between automatic camera settings (like picking the correct shutter speed) and manual control (like the ability to compensate for exposure).
Before I go any further, let me just say that I love aperture priority. It’s the first mode I learned to shoot with, and I will continue to keep using it, as it does have a lot of flexibility while hand-holding the camera. In fact, it's probably the best mode to use while hand-holding the camera. However, for fast action, it simply doesn't hold up to the demands that this type of photography requires, especially in situations with poor or dynamic light.
Throughout the various types of photography (landscape, wildlife, portrait, etc.), there is almost always one throwaway exposure setting. And what I mean by that is that there’s usually one exposure setting (aperture, shutter speed, or ISO) whose value genuinely doesn't matter, because the other two values are more important and cannot change.
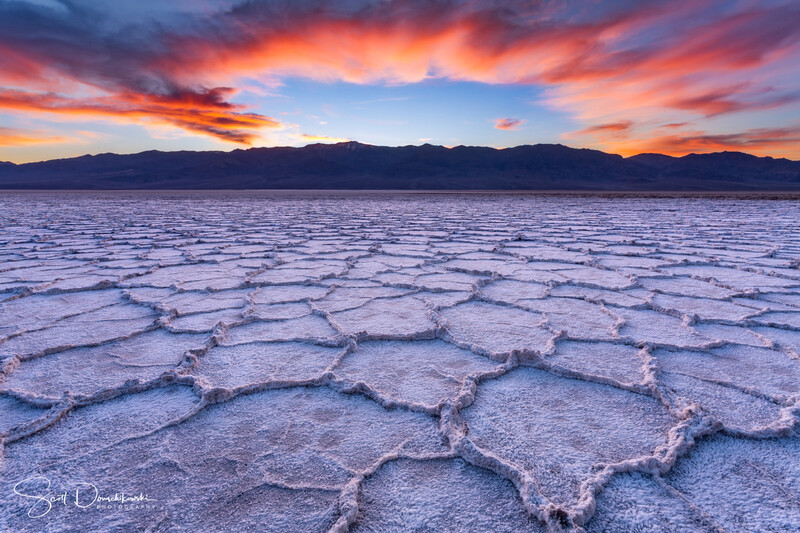
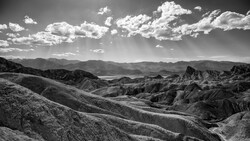
For example, in a sunset landscape photo of Badwater Basin in Death Valley, most of us would likely set the aperture first to control the depth of field and the ISO second to control the noise, but the shutter speed doesn't really matter. Whatever light you are given at that time by Mother Nature you can't control, so the shutter speed can just be whatever it needs to be to get the desired exposure. And in this situation, no one is going to argue about the shutter speed needing to be one second or 0.3 seconds. It just doesn't matter because the other two values take precedence.
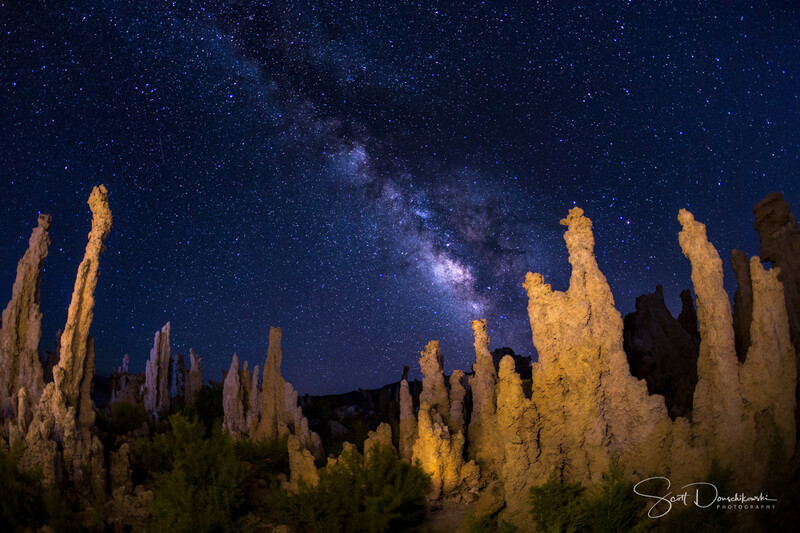
In another example, when shooting the Milky Way, the aperture always needs to be wide open to let in the most light and the shutter speed needs to be fast enough to freeze the stars in the sky, so they remain pinpoints and not blurry. In this example, the ISO value is irrelevant because the other two exposure values are more important to get the desired shot.
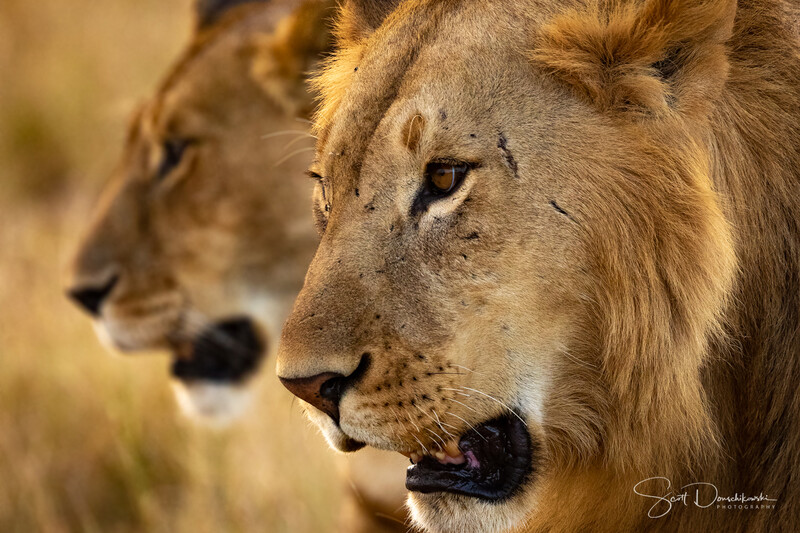
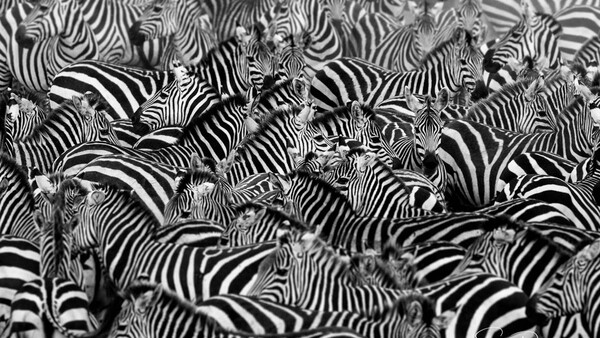
With wildlife and action photography, aperture and shutter speed are also of the utmost importance. The aperture value needs to be lower for a shallower depth of field and the shutter speed needs to be higher to capture the action without motion blur. The ISO doesn't really matter because the other two values take precedence. The ISO value is going to be whatever it needs to be to get the correct exposure. And again, no one is going to care whether that ISO value is 400 or 1,600. You are most likely only going to care that the action was frozen without motion blur.
So, if aperture and shutter speed are the most important values in wildlife and action photography, then why would one use aperture priority to get the shot? With this mode, you are setting the aperture and the camera is automatically setting the shutter speed. But what most people forget is that you are also responsible for setting the ISO. And in fast-changing conditions, being in constant control of two out of the three camera settings can cause you to lose the shot, especially in difficult lighting.
In the past, I was repeatedly disappointed with an inordinate number of my wildlife shots having motion blur due to the shutter speed not being as fast as it should have been. Because of my naive desire to have a noiseless image, I would persistently set the ISO to match the lighting conditions while trying to keep it as low as possible. And in doing so, the camera could not choose a shutter speed that was high enough to mitigate the motion blur of either the subject or my own movement, which was also exacerbated by an increase in focal length. What I failed to realize at the time was that ISO noise in an image can be corrected in post-processing. Motion blur cannot. And I have too many wildlife images with motion blur as proof that this method of shooting can be inferior.

If ISO doesn’t really matter as much as the desired depth of field and stopping motion blur, why not let the camera set it automatically? This was a major “aha” moment for me, like when I figured out that back-button focus was far superior, but that's for another article.
The solution for me was to set the camera in manual mode with auto-ISO. In wildlife photography, you are likely to use a telephoto or super-telephoto lens, and the general rule of thumb is to have your shutter speed be higher than the focal length of your lens. So, if you are using a 400mm lens, you would want your shutter speed to be at least at 1/400 s. You are also most likely going to need a shallow depth of field to isolate the subject, something like f/4 or f/6.3. Now that you have both the aperture and shutter speed locked in, all that's left is to set the ISO to auto and fire away. And since the ISO is in auto, you will never have to worry about changing more than one setting at a time.
I recognize that this method isn't exactly for everyone. It requires a lot of faith in your camera and takes away some of your control. If you are averse to letting your camera set the ISO for you, ask yourself what's more important: a sharp image with no motion blur or a noiseless image? For me, the answer would undoubtedly be a sharp image with no motion blur.
Since I switched to using this method, I can honestly say that it's been rewarding. Auto-ISO has enabled me to focus more on the taking of pictures and less on the exposure triangle. I would encourage anyone reading this to try it out and see if it changes how you take photos. After all, a lot of us got into photography for the images, not the settings.
Join the Fstoppers community for free
-
Post comments and join in the discussions
-
Browse the site ad-free
-
Share your work and get featured in the community
-
Compete in the photo contests for fun and prizes
34 Comments
This function is also extremely useful in all situations with low light and a lot of movement. It has been around for many, many years, a good decade for sure.
You are so correct, it has been around for many years. But surprisingly, in my experience, a lot of amateur photographers still aren't familiar with it.
That is because Auto ISO is usually buried in the back of the manual and at least 2 levels down in the settings menu with almost no explanation of it's purpose or use.
Agreed! Why do they do this!
ISO Auto has so many configurations that you never talked about. The below discussion is for Sony cameras.
ISO- Minimum Shutter Speed allows to still be in A priority still set the minimum shutter speed you will accept and float the ISO from there.
ISO Auto can be set to read the current focal length of the lens and calculate the shutter speed, then select the lowest possible ISO for that shutter speed. It works with zooms and primes. You can set it to match the SS to FL, or one or two stops below if you have steady hands, or 1 or two stops above if you are not so stead. Again, this allows for optimal settings while you remain in A priority.
Or you can do as you suggest and set A & SS and just let the ISO float.
So, as you can see Auto-ISO in its various implementations is a very powerful and flexible tool just as you suggest.
Thanks for pointing this out. With respect, I could write nearly a 1000 word essay on JUST the many auto-ISO configurations, but merely the idea of it was enough to get people thinking about it and maybe even give it a shot.
This site kind of needs to label beginner articles that way IMO. I have never met a single wildlife photographer who uses aperture priority. These aha moments happened years ago. They may use shutter but most use manual with auto ISO and have for many years. Most will limit the ISO depending on the noise characteristics of their camera and the reproduction size needed.
Luckily all Pentax digital cameras have a TAv mode which is shutter and aperture priority combined, with the camera adjusting the ISO within an upper and lower limit set by the photographer.
Is this like Program mode?
I’ve used Auto ISO, for at least ten years now, for everything except tripod work. I just customise the minimum shutter speed and maximum ISO in different Custom camera settings as required for ‘action’, low light, etc.
In your 10 year experience using auto-ISO, how has it changed if at all? Has it gotten more intelligent, faster etc.?
ISO bracketing on ISO invariant cameras is my choice now because I can blend the highlights or shadows.
ISO on all cameras has a sweet spot above the minimum ISO which I strictly adhered to after many tests on my Fuji 800 can be pushed 5 stops I prefer only 3 but pushing is better than 6400 and dealing with the noise.
I would also conquer that shoring action shutter speed Trumps all settings.
With bracketing ISO I am no longer a FAN of aperture priority either in spot or multi mode
I'm not sure I follow. Isn't the whole point of ISO invariance in cameras just that ISO bracketing is meaningless? IE you should get the same amount of noise in the shadows at a given aperture and shutter speed regardless of the ISO, so raising the ISO should not improve your shadow detail in any significant way?
Benefit of ISO invariance is expanding dynamic range. If you shoot at ISO 1600 in ISO 6400 light, it means the highlights which would be blown out with the correct ISO 6400 exposure will be available to you, when you raise the shadows (which will look the same as shot in ISO 6400). Shooting low ISO is effectively an HDR technique, but one which can lead to very good, natural looking results with a very wide dynamic range.
Yeah so what you're suggesting is to just err on the side of low ISO so that you preserve the highlights and you can just boost the shadows in post. This makes sense to me. What I don't follow is where the concept of "ISO Bracketing" comes in here, as like you said, the high ISO exposure doesn't actually get you better shadow noise performance than the low ISO exposure, so you might as well just use the low ISO and do a single shot.
Agreed. If the camera being used is actually ISO invariant at or below the ISO used then the brackets at higher ISO just take up card space.
Funny that Barry would mention ISO Invariance. I wrote an article pointing people towards an Alyn Wallace video about it:
https://fstoppers.com/astrophotography/why-iso-invariance-so-special-57…
It is a shame that more cameras don’t follow Pentax with their TAV mode: this setting allows you to manually control both aperture and shutter speed whilst ISO is left to whatever is needed. You can also limit how much noise is acceptable so that if exceeded the camera let’s you know to modify your settings. Should you choose to go Manual simply press a green button and it will reset temporarily to Auto mode to give you an exposure setting which can then be modified to suit. Lack of these features are what put me off other brands as I use them for 95% of the time. You do of course have Aperture and Shutter priority as well but they hardly ever get used.
On my Sony A7II if I set AutoISO and then shoot in "M": I can adjust the shutter speed and aperture while the camera floats the ISO as appropriate- is this not the same as the Tav mode of the Pentax?
Works well on Canon (here: 77D, but others share the same function) in Manual exposure mode with Auto ISO. ISO can be set to a maximum value, after which it's up to the person behind the viewfinder to make further adjustments.
The 80D and 77D allow you to further adjust exposure compensation when using auto-ISO, but the older T6s/77D doesn't have this feature. Using evaluative metering I find there are many occasions auto-ISO goes too high and overexposes the image, so I cap the ISO below 800 or 1600 depending on the conditions. The metering system thinks it is important to meter the whole scene to look even but this ends up blowing out the highlights which is irreversible. Spot metering might help, but is not reliable for flying birds if they go off-centre.
Every Nikon digital camera for years has allowed you to use M and control both shutter and aperture with Auto ISO. It just isn't called TAV. My first Nikon DSLR was a D100 released in 2002. It worked this way.
I don't normally shoot low-light action. But, when I did, I struggled. I always shied away from auto modes because I mistakenly viewed them as "amateurish" (ironical, as I am an amateur). But, loving photography as I do, I'll experiment and see if auto ISO is something I can add to my toolbox. I enjoyed the article!
Thanks Robert! Many people I have instructed over the years have had the exact sentient as you, weary of putting anything in "auto" because they viewed them as "amateurish," as you said. I was guilty of this too for many years.
I always shoot Auto-ISO for wildlife. I would rather have a slightly noisy image than I blurry one. Like you said, I can clean up noise, if I want to. Sometimes I don't because I don't feel it takes away form the image.
The noise isn't as bad as it used to be either so with most cameras you can get surprisingly high ISO without too much noise being introduced.
I highly agree! ISO noise is no where near as bad as it was when I used to shoot with the original 7D.
Shooting in manual and using ISO Auto is one way to have control of both aperture and shutter speed but I prefer to use Aperture priority and manual ISO, why? Because I can set my aperture and then control my shutter speed by varying my ISO. That way I have control over all three elements of the exposure triangle.
1. Set your working aperture
2. Meter your scene
3. Adjust ISO until you arrive at your desired shutter speed, and if it falls below what you need when shooting, just up your ISO.
Working like this means I can control how far I need to push my ISO to arrive at a workable shutter speed. I think the only time we need to work with ISO Auto is when we need to work at given aperture and shutter speed with no variation in aperture or shutter speed. but for most situations we can afford to have a some small deviation in our shutter speed.
Interesting solution!
I was always confused as to why people are touting aperture priority for wildlife. When I photograph wildlife, it's nearly always from dawn to 2-3 hours after and with my f5.6/6.3 minimum aperture lens I am always wide open. What's the point of aperture priority if I need the lens wide open all the time?
Completely agree. In a situation where you're fighting to keep the shutter speed high, you're definitely keeping the widest aperture and not changing it.
I like to use Auto-ISO in manual mode for fast moving street shots where the light changes between buildings etc, and a further control that is available on some cameras is to then use Exposure Compensation to add the artistic look you want - I don't always want the camera's "default" exposure. On my Nikon and Leica Q, changing EC in manual with Auto-ISO adjusts the ISO (within any limits set).
Yes, in my experience Canon's evaluative metering is terrible and tends to stubbornly go up to ISO 3200 and blow out the highlights. Spot metering might be more precise but is unreliable for flying birds which may go off-centre. I generally limit the ISO to 800-1600 for action shots if I know I won't be in areas of drastic lighting changes. This is one difference between the Rebel T6s which lacks exposure compensation in manual mode and the 80D and 77D which have this feature.
Interesting comment, I have always been impressed by the Evaluative Metering in my Canon cameras. I have completely abandoned exposure compensation because in my experience with the method outlined in the article, I have never had the camera be so far off as you mentioned
(edit) deleted as I see I commented on this article 6 months ago :D