
Fall tends to be a “transitional” season for the astrophotographer. Summer constellations are still visible for early evening, but are quickly fading into the sunset. Late in the evening, some of the prominent Winter constellations are starting to come into view. In a few months these winter constellations will be high in the sky and well placed for astrophotography, so now is the time to do some planning.
These days it might seem anachronistic to continue to refer to the constellations, which actually don’t have any scientific significance, but as guideposts in the sky, they are very useful to astrophotographers. Even though 88 constellations are officially recognized by the International Astronomical Union (IAU), the patterns themselves are not specified, so you may find variations of the constellation shapes in different sky charts. The IAU only specifies the boundaries, which often seem not well placed.
For amateur astronomers and astrophotographers, it is still a good idea to become familiar with at least the brighter constellation patterns, just as it’s good to become familiar with the continents and country boundaries of the world. And note that some of the patterns amateur astronomers refer to are not even the complete constellation or have anything to do with the original historical constellation. For example, the Big Dipper and Little Dipper are part of larger patterns of bears (Ursa Major and Ursa Minor). Similarly, most amateur astronomers recognize the “teapot” to represent Sagittarius (the archer). These informal modern shapes are called asterisms.
Becoming familiar with the constellations and especially with the potential photographic targets in them, can start with computer planetarium simulations such as Stellarium or online static maps such as
https://www.constellation-guide.com/constellation-map/
Personally, I prefer large printed maps for browsing, but these seem to be largely out of print (and expensive) these days.
Ultimately all of these have the problem of not showing you a realistic representation of what you can expect to capture with your own camera. On sky charts, often the Milky Way and gaseous nebulae clouds are represented by unrealistic hard-edged symbols having little relationship to what your camera will pick up. Computerized star charts may overlay photos of objects as you zoom in, but they may have been photographed with large telescopes or include false-color views of infra-red shots.
So my recommendation to new astrophotographers has long been to go through the exercise of shooting your own wide-angle photos of the constellations. The exercise has several objectives:
- Gain familiarity with recognizing where the constellations are relative to each other.
- Understand what times of the year they are well-placed for photography.
- Get a feel for how large the constellation is.
- Gain familiarity with the targets that show up in your photos, how bright they are, the range of colors in them, and give you an idea of the focal length of the lens needed for close-up photos.
It turns out that many constellations fit within the field of view of a common 50mm lens on a camera with a full-frame sensor. Normally for astrophotos I recommend the use of fast prime lenses (faster than f/4 if possible), but for the constellation exercise photos, I suggest using a zoom lens which covers the range of 35 to 85mm, stopped down to f/4 or f/5.6. A prime lens, having less glass, will normally give you a better quality image, but the zoom range allows for some flexibility in framing the constellation, and the stopped down lens matches the range of common telescope f-ratios as well as what is necessary to get reasonably round stars in the corners of decent quality lenses.
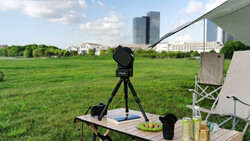
For most of the examples here, I used a very old kit lens Nikon 70 to 210mm zoom at 70mm on an astro-modified Canon RP mirror-less camera riding on a Sky Watcher Star Adventurer tracker. In my particular setup, the old Nikon F-mount lens had to have an aperture control ring on it since it was used with an adapter to the Canon camera. The camera was modified for astronomical use for me by Hutech, a local astronomy equipment shop.
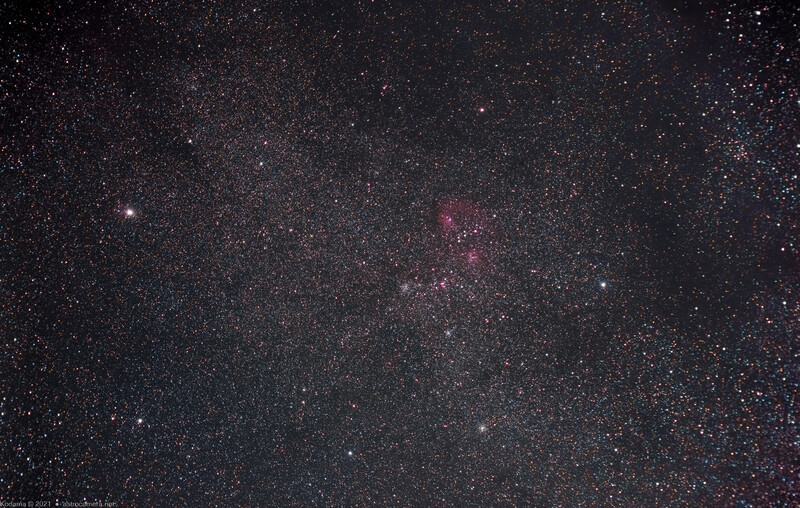
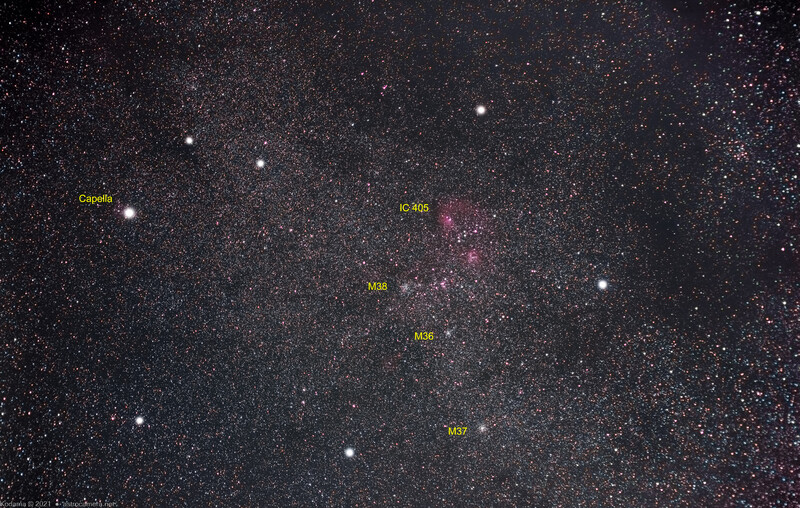
Constellation: Auriga
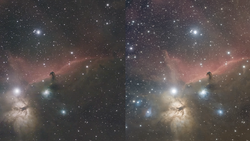
A modified camera is not strictly necessary, but will more clearly show the glowing red hydrogen-alpha clouds which are commonly found in the Milky Way. The tracker is not strictly necessary either, but many more frames would have to be stacked to get decent shots.
With the tracker, I shot 30-second shots and stacked 50 to 100 frames. Using this setup, it’s easy to frame the shot with a ball-head on the tracker, and let the equipment shoot frames for an hour or two. I limited the frames to 30 seconds (maximum built-in camera exposure) at ISO 3,200. This eliminates the problem of worrying about high precision polar alignment of the tracker. At these settings, the frames are exposed enough to show faint details but not overexpose the sky. This also allowed the use of the internal intervalometer function of the Canon RP to be used.
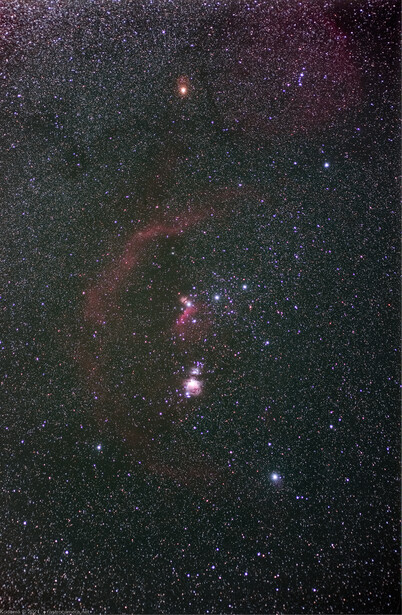
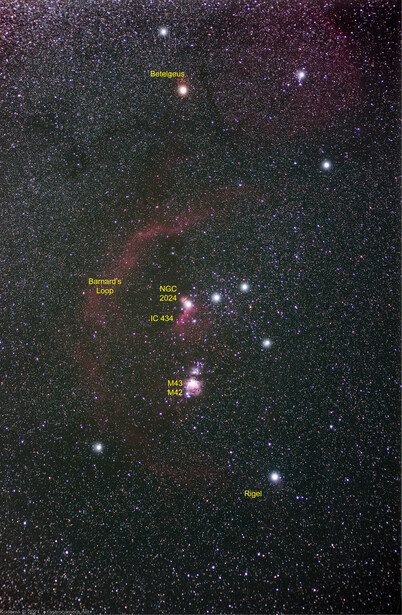
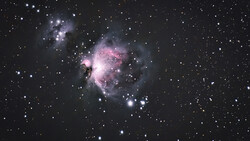
Constellation: Orion
If you’ve gotten deeper into astrophotography, you can also shoot dark, bias, and flat frames to stack and apply them to the stacked image frames to improve the quality of images and gain more experience with processing astronomical images. Doing the constellation photo exercise is a good time to get into more advanced astronomical image processing if you've not already done so. I’ve applied the extra frames to these image stacks for these examples so dust spots and lens vignetting were largely eliminated, but the improvements were somewhat offset by dew on my lens in some of these shots. But perfection is not necessary in these "scouting" exercise shots if you can see the objects of interest.
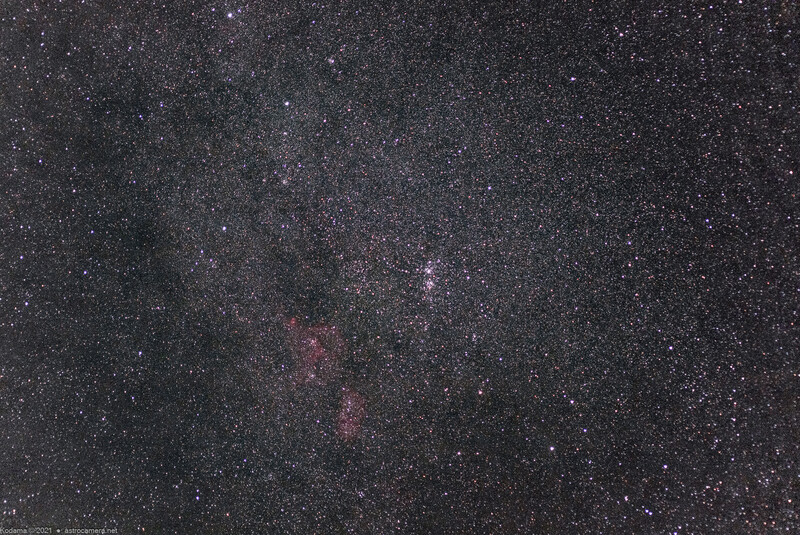
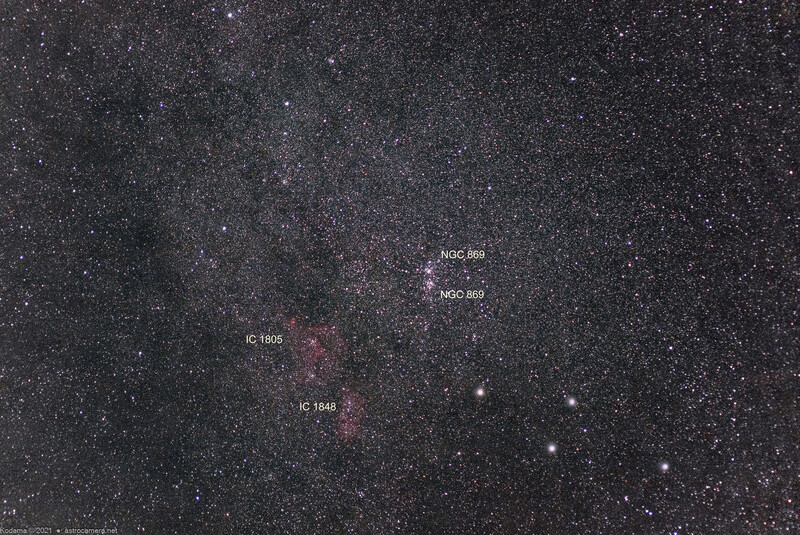
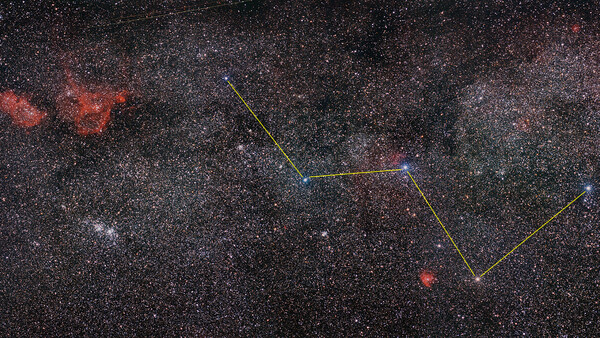
Constellation: Perseus (northern section)
For the labeled shots here, I used Photoshop to also enhance the primary stars of the constellations as they tend to be lost in the sea of stars picked up by even this modest setup. A program I used to stack these shots counts some 15,000 stars in the frames, which is typical for Milky Way regions. As part of the exercise, I recommend using a star chart as a reference and label your own photos for future reference when you are pondering a target for a night of photography. Your own shots will give you a much better feel for what your results will be with your own equipment.
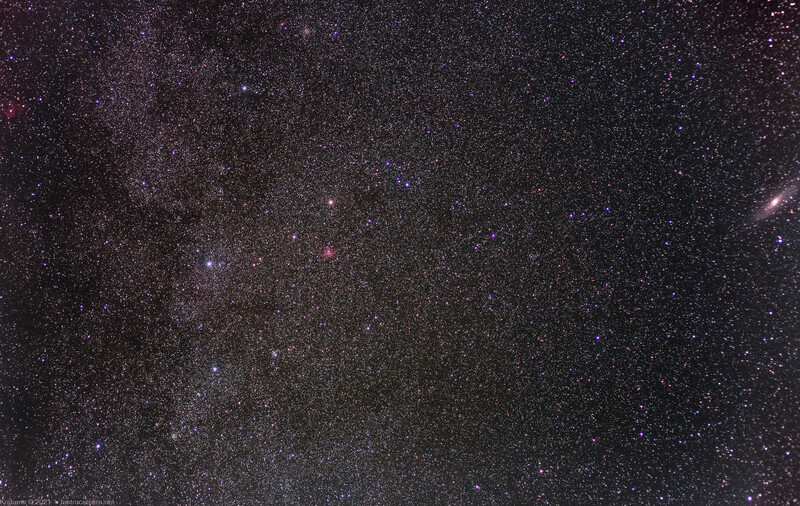
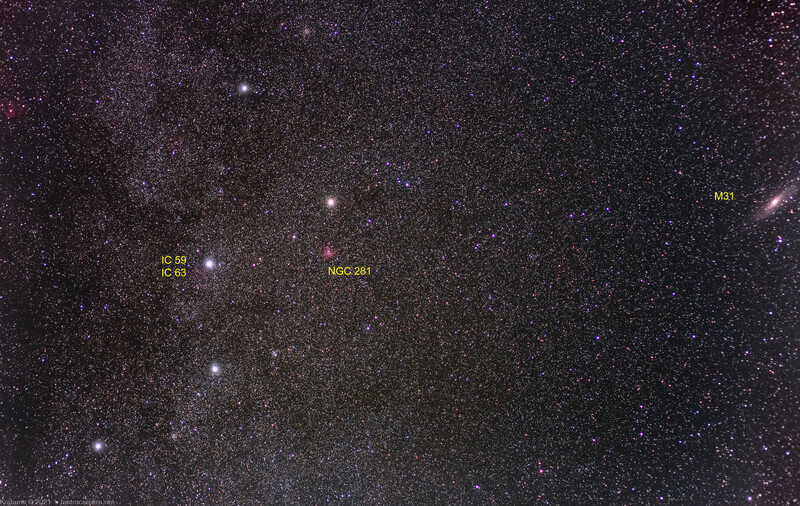
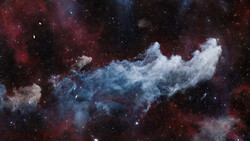
Constellation: Cassiopeia
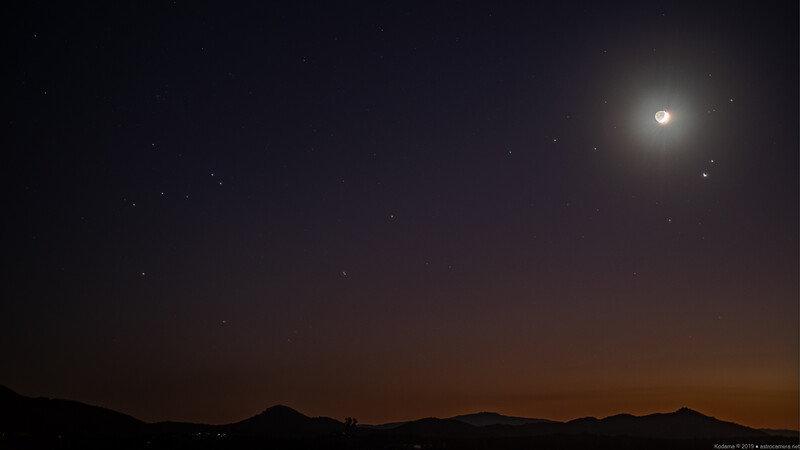
Note: The Andromeda Galaxy (M31) appears at the right edge of the frame. Photographically, this is much larger than the Moon.
In addition to the value of the constellation familiarization exercise, shooting wide-field constellation shots may suggest a larger project in itself. The Cassiopeia/Perseus cover shot for this article is a panorama created from four medium-format (6x9 cm) frames highlighting the constellation Cassiopeia and part of Perseus where there is a rich variety of targets.
Join the Fstoppers community for free
-
Post comments and join in the discussions
-
Browse the site ad-free
-
Share your work and get featured in the community
-
Compete in the photo contests for fun and prizes
No comments yet