

In recent years, technological advances in camera sensors have made it possible to capture incredible landscape images at night, but they still struggle to capture detail when the light is very low or nonexistent without introducing high amounts of noise to the image. This technique, known as "median stacking," will help reduce or even eliminate noise in your nightscape foregrounds, resulting in clean, detailed images that are ready for print or online scrutiny.
Step 1: Capture Multiple Foreground Exposures
Because sensor noise appears in a randomized pattern unique to each exposure, stacking multiple (otherwise identical) noisy images will "average out" the noise patterns, resulting in a cleaner image. This technique begins in the field, so it will require some forethought and planning. However, it can be used to clean up noise in any images you may have already captured, provided you have several foreground exposures that are similar enough that they can be aligned and stacked.
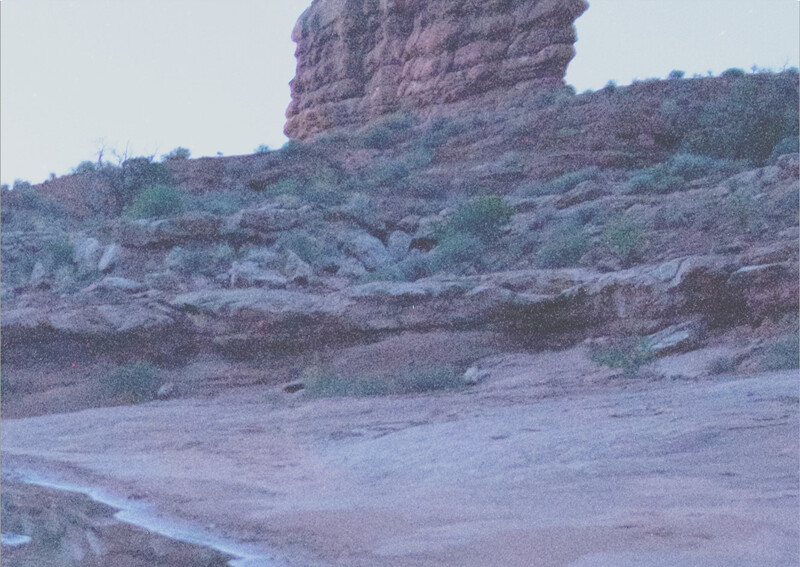
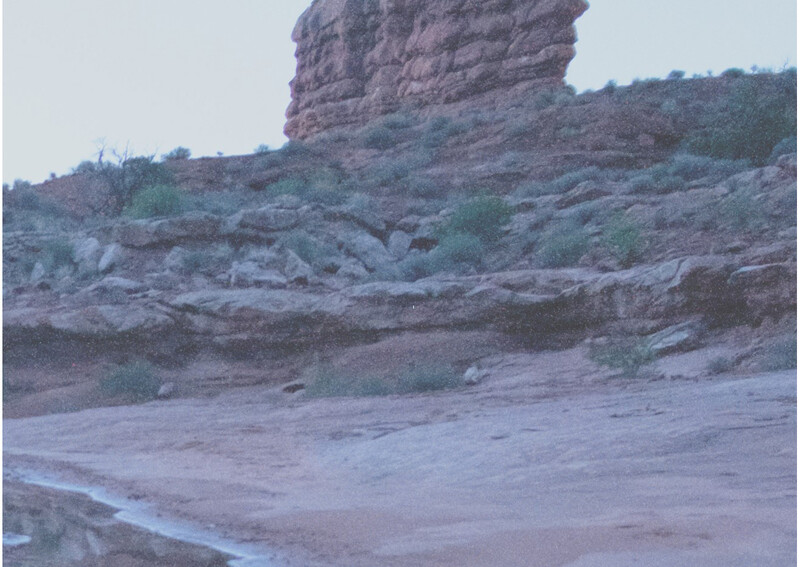
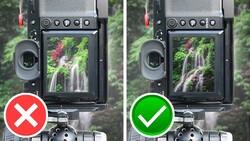
Of course, you will want to begin with analyzing the scene and determining how to get the most light onto your camera's sensor. This means shooting at the widest possible aperture (watch out for close foreground objects that may be out of focus due to the shallower depth of field), very slow shutter speeds, and high ISOs. After you have found the appropriate exposure settings for the scene, capture several exposures with the same exact framing. Generally speaking, the best practice here is to use a tripod and set your camera to burst or interval shooting mode, which will ensure minimal camera movement and proper alignment of the images prior to stacking. It will require some trial and error to determine how many images are needed for the best results. In general, the higher your ISO, the more images you will need to stack. Twenty is perhaps a safe bet (storage is cheap after all); however, the results below are a 100% crop from a stack of only five images.
Step 2: Import Images as Layers to Photoshop
If using Lightroom, simply select all of the images to be stacked and open them in Photoshop (Right-click > Edit In > Open As Layers In Photoshop). If using another program to manage your images, all that matters here is that all of the images end up as layers in the same Photoshop project.
Step 3: Auto-Align Layers
In Photoshop, select all of your layers to be stacked and align them (Edit > Auto-Align Layers). In the dialogue box, leave the settings at "Auto," with "Vignette Removal" and "Geometric Distortion" turned off. If your layers are similar enough, Photoshop generally does a great job aligning them, especially if you used a tripod during the capture phase and kept your framing the same. In fact, sometimes, this step may not be required at all with good technique, but it is quick and easy and helps you feel warm and cozy knowing that your layers are aligned down to the pixel.
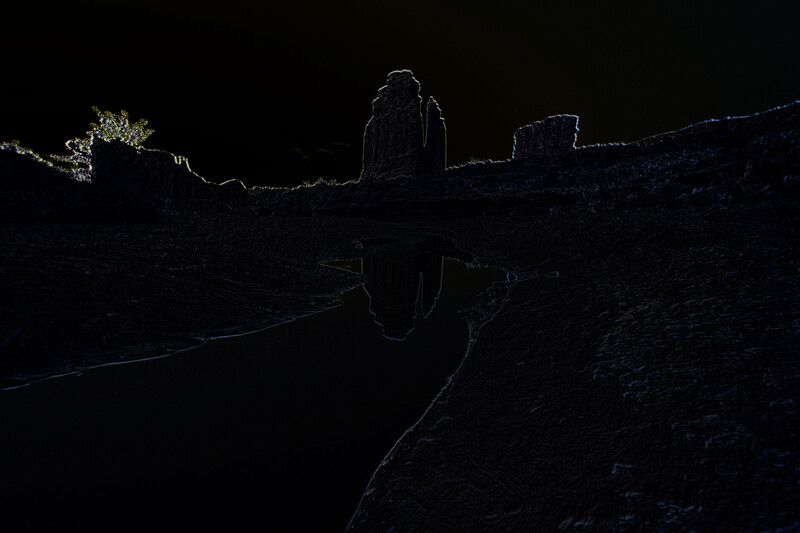
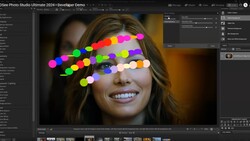
If you were shooting handheld or if you are aligning images with slightly different framing, it's a good idea to check the alignment; otherwise, your results can range from a slightly softer image to a horrendous nightmare collage. Checking is simple and can be done by changing the blend mode of all of your layers (except the bottom one) to "Difference," turning all but the bottom layer off, and then going through one by one, turning each layer on and off to check the alignment. If the layers are perfectly aligned, the result should be a fully black layer. See below for an example of two misaligned images.
Step 4: Median Stacking
Once your layers are perfectly aligned, it is time to create a Smart Object (Select all layers > Right-click > Convert to Smart Object). Because the Smart Object will combine all of your layers into one, I usually like to copy all of my layers first so I can compare the results with the original files. Next, we have to change the stack mode of the Smart Object (Layer > Smart Objects > Stack Mode > Median). This may take a few moments, especially if you are using twenty images, but the result will be the average of all of the pixels in each layer. Because sensor noise appears in random patterns, pixels which contain specks of noise in one image probably contain true capture data in the others. Even with extremely noisy images, you should notice a significant improvement after completing this step.
Conclusion
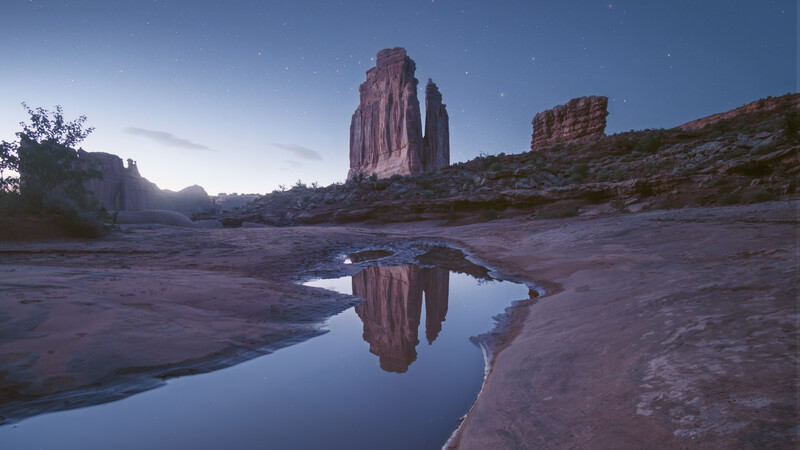
The best method for capturing noise-free nightscape foregrounds is to shoot long exposures at base ISO when there is ambient light in the scene, whether it be from the moon or from surrounding artificial light. The problem with this method is that we often find ourselves in remote areas with no artificial light, and Milky Way photographers typically prefer to shoot when the moon is not in the sky. Given this common predicament, many photographers choose to use the "Blue Hour Blend" method, which is a popular method involving the blending of a foreground shot at "blue hour" (the time period after the sun has set or before it has risen when the sun is still lighting the atmosphere above) with one or several sky exposures captured in the dead of night. This method produces excellent results but can be controversial for some photographers. Not to mention, it requires the photographer to stay in the same location over a period of several hours, which can often be inconvenient. The median stacking method allows us to go out in the dead of night and capture beautiful, natural-looking nightscapes in a matter of minutes. There is, of course, no right or wrong way to make an image, but this method is certainly another useful tool in any photographer's repertoire. Various levels of noise result in various degrees of success, so I'd love to hear whether this method worked well for you in the comments below!


Join the Fstoppers community for free
-
Post comments and join in the discussions
-
Browse the site ad-free
-
Share your work and get featured in the community
-
Compete in the photo contests for fun and prizes
11 Comments
Really smart and simple technique! Can't wait to try this out soon
Thanks Zach! It's a good trick to have up your sleeve, but definitely has it's limitations. For example, it didn't help me much standing atop an overlook in Canyonlands at 2 am capturing the milky way during a new moon. There is so little ambient light in those conditions that even 5 minute exposures were producing a black hole where the canyon should have been. You need a bit of moon or other ambient light (such as city light reflecting off the clouds, or twilight).
Personally, twilight is my favorite time to shoot night skies since you still have enough light for the foreground and you get a bit of color in the sky. But I personally don't shoot milky ways much.
Why is the “Blue Hour Blend” method controversial for some photographers?
Because your having to create a Composite of the shots, Some Photographers think all shots should be captured as one image. Completely stupid to me. A lot of old school film Photographers feel this way. They just fail to embrace the Digital Imaging world. Oh well their loss.
Their loss indeed. Composite photography is still "photography".
Personally, I agree completely. I would have no problem with a blue hour blend. I personally draw the line with sunset sky replacements but don't judge others for doing so. This is a game where we all get to create our own rules. There's nothing wrong with being a purist if that's what you like. What is wrong is demanding that others should play by your rules rather than their own. Kind of like religion, politics, or anything in life, really. Live and let live.
Live and let live, as long as you're honest about what you do! :D
This brings up another question. I think I agree with you for true composite photography, which I would say is more like those images where they've photoshopped Havasupai in front of some jagged mountains with a milky way or something. Like you need to be honest only because people should probably know that place doesn't actually exist.
While personally I don't like to do a sky replacement for a sunset that didn't happen, that's more because of my personal motivations with photography. It's simply not rewarding for me. That being said, I don't condemn a professional photographer who makes a living off selling prints, who has an image hanging in their gallery with a sky replacement. And I don't think they are under any obligation to inform their potential customers of the sky replacement.
I like the disclosure, but even if a photographer doesn't disclose on forehand that an image is a composite at least be honest answering questions -- and don't try to sell it as a single shot image when it's not. Rather not mention anything at all, then try to pretend it's something that it isn't.
I think that's my stance on the matter. :)
And for something like a sky-replacement I'm 100% with you: fine with somebody else doing it, but I don't want to do it myself because it just won't give me the same satisfaction.
I may try to blend multiple photos for effect, for the art of blending, or for focus stacking / dynamic range. But that for me is different than "sky replacements" using skies that were not actually there on that day, on that location!
You seem to be ignoring the movement of the stars during the series of long exposures. If you align the foreground the stars will be blurred. If you align to the stars the foreground will be blurred. The procedure, as written, doesn't explain how to deal with that.
My apologies! You are correct that this would result in star trails if you kept the sky from the median stack. I should have noted this in the article and explained that the solution is to simply blend a single sky exposure back in after treating the foreground using a layer mask. To be quite honest, photographing the night sky is an entire course's worth of information that is beyond the scope of this article, and it was written for those who are already familiar with the processes. Maybe in the future I will do a follow up article for how to capture the stars. This one was just explaining a technique for the foreground