
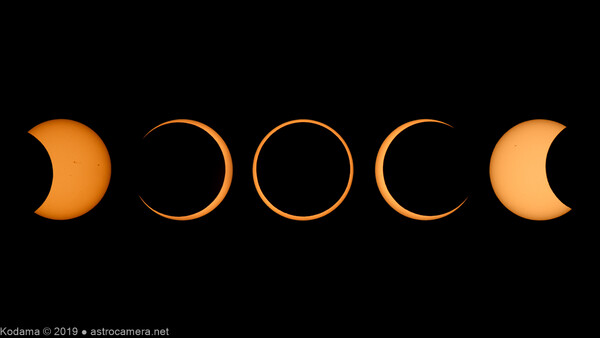
For 2021, the first event of the “eclipse season” is a lunar eclipse on the morning of May 26. The second is an annular solar eclipse on June 10. In an annular eclipse, the Moon appears too small to block the Sun out entirely, so at maximum eclipse, the Sun is visible as a ring (annulus).
The bad news is that the central part of the annular eclipse is limited to the high latitude parts of North America and Russia, and is inaccessible to most of us, especially since travel is limited during this pandemic. But a portion of Europe and the northeastern U.S. and Canada will at least have views of the partial eclipse. While it’s not ideal for these viewers, it’s a good chance to tune up setups and procedures for future solar eclipse opportunities.
Filters for Partial and Annular Solar Eclipses
In an annular solar eclipse, because the Sun is never completely blocked by the Moon, it remains dangerously bright during the entire event and requires the use of an astronomical solar filter designed specifically to block most of the light. Using a standard polarizing or ND filter set normally used for taking long exposures to blur moving water is not adequate. To be safe, a solar filter dims the sun by at least a factor of 100,000 and is designed to also block the infrared (IR) and ultraviolet (UV) light outside the visual band. In photographic terms, this is about a 17-stop (or more) filter. Landscape ND filters generally go no farther than 8 or 9 stops of light reduction.
I have also noticed that lower density solar filters are now available which are specifically designed to let more light in for digital camera imaging. I have not personally used these filters. These are specifically stated to be "unsafe" for direct viewing of the Sun either through an eyepiece or the optical finder in a DSLR.
No matter which type of filter you use, take note of the fact that astronomical solar filters need to be mounted in front of the camera or telescope lens, before the light is focused. In extreme cases, a filter placed in the focused beam can crack or melt, followed by your camera or eye!
Another detail to take note of is that many of the solar filters available pass all of the visible wavelengths equally, rendering the sun essentially white, or at best a pale yellow. My preference is to use a filter that also blocks the blue end of the visible spectrum, rendering the sun a pleasing orange color in-camera. Beyond the aesthetics, in theory, preferentially blocking the blue end of the spectrum should also increase contrast because of the scattering of blue light in the atmosphere and the poor focusing of blue light in lower-end optics.
When shopping for solar filters, another type of specialized filter you may encounter is the Solar Hydrogen-alpha filter. While these provide spectacular views of details on the sun such as prominences, these are meant to be used on telescopes at extremely long focal ratios (f/30+, typically), and isolate a very, very narrow band of red light, and worst of all, cost ten times or more than the photographic filters you are familiar with. Only the most avid astrophotographers go this far, and these are not required for an annular or partial eclipse.
Composition
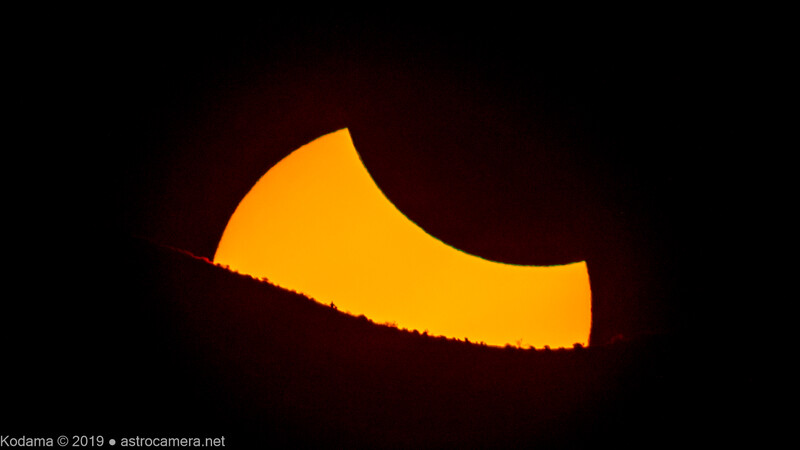
Unfortunately, eclipses provide limited opportunities for creative compositions unless you plan to composite your sunrise or sunset shots with foreground shots taken at a different time. The dense filter needed for shooting directly at the sun precludes getting the foreground exposed properly. An alternative is to use a standard filter (e.g. ND9 photographic filter) and depend on the Earth’s atmosphere to attenuate the sun’s disk enough right at sunrise or sunset. Even so, plan on the foreground elements to be seen just in silhouette. To be safe, use live view to avoid even glancing through a direct optical viewfinder.
Of course, if the foreground is critical to your composition, it’s important to preplan your exact shooting position relative to your foreground feature and the Sun using phone/tablet apps like Photopills or PlanIt, or Stellarium for a desktop PC.
Lens Considerations
The extremely bright target of the sun (even after filtering) can cause problems for some lenses in the form of internal reflections. In general, a high-quality prime lens or telescope will be better than a zoom lens because the fewer the elements in the optics, the less there is a chance of internal reflections and scattering of light. Check these by testing your filter and lens setups at home on the sun to ensure your success at the main event. During testing, be sure to move the sun towards the sides of the frame to make internal reflections more obvious and then bring the frames into a program like Photoshop to boost contrast so that you can search for reflection artifacts.
Camera Considerations
The type of camera you use can make photographing a solar eclipse a major pain or joy to use. In the “old” days of SLR film cameras, looking at the (filtered) sun could literally be a pain in the neck if the sun was high up in the sky, especially considering the hours-long duration of this kind of event. A modern DSLR with an articulating screen is a solution, but remember that though the sun may be partly blocked, your surroundings are still very bright and will make viewing an LCD display difficult.
A better solution is to connect a small external monitor to your camera and place it inside a “cave” made from an empty box on its side. Another benefit of having a remote display for your camera is to allow other people to see what is happening. Running a photo setup (especially with a telescope) during daylight hours inevitably draws a crowd, putting your setup at risk for being bumped during the eclipse. Hint: Wear a dark shirt to keep the reflection from you from washing out the display’s image.
Focusing can be difficult, especially if the Sun does not have large sunspots, as may be the case this year since we are just coming out of a solar activity minimum (an 11-year cycle). Test your camera and lens combination to see if it is able to auto-focus on the edge of the Sun. If so, let it auto-focus, then turn auto-focus off to avoid having the focus hunt when you shift off the edge of the sun or if a cloud passes by. If auto-focus is not an option, you may need to switch to manual focusing. If so, go to a distinct sunspot or the edge of the Sun and use maximum magnification on your live view. Have patience, as the sun’s image can be boiling wildly with atmospheric thermal currents.
If you are planning to shoot the sun as it rises in the morning, keep in mind that you have an additional focus challenge. Ideally, you want to be able to begin shooting immediately. If so, you should try to find the exact focus the day before so there’s no extra time needed to adjust focus during sunrise.
Mounting Considerations
While a solar eclipse can be photographed from a standard tripod, it will require continuous close attention to keep the sun-centered for a sequence of shots (unless you are shooting very wide). A sequence of shots will show the lunar “bite” out of the sun rotating around the sun as the eclipse progresses instead of going straight across the sun. For this reason, a motorized astronomical or star tracking mount is the better solution. This is definitely recommended if you plan to assemble a time-lapse video from your shots.
For a solar eclipse, a star tracker or astronomical mount introduces another problem — polar alignment. Normally these mounts need to use stars to properly align to the celestial pole. But unless you have the luxury of setting up at night and leaving your setup in place until the eclipse, alignment will be a problem. But you don’t need perfect alignment for an eclipse. Determine the North-South line using a map, then make sure your mount’s polar axis is aligned with features (such as a wall or road) that can be seen on the map. Level the mount, then set it to the latitude of your location, and you should be close to polar aligned. If you use the mount’s “solar rate” tracking, you should be in good shape, though occasional checking and adjusting of the framing may still be necessary. Even if you are perfectly set up, if the Sun is low, the tracking may still not be perfect because the sun’s position is slightly affected by atmospheric refraction near the horizon.
For an astronomical mount with dual-axis motors and an auto-guiding input, it’s even possible to get an active solar guider that will compensate for imperfect polar alignment or atmospheric distortion. Live streamers or conventional media broadcasters will find this very handy for hands-off tracking of the event. Note that this is designed for accurate tracking of the sun and is not the same as the trackers used for solar panels.
Additional Accessories
If you have a long focal length setup, it can be surprisingly difficult to point directly at the sun when you can’t sight along with the optics at the sun directly because of its brightness. The quick-and-dirty solution for this is to look at the shadow of your setup on the ground and minimize the size of its shadow. Another solution is to mount a shade with a small hole near the front of your setup and watch the image of the hole on a projection screen at the back. A commercial version of this is marketed in various forms as a solar finder.
And for More Fun...
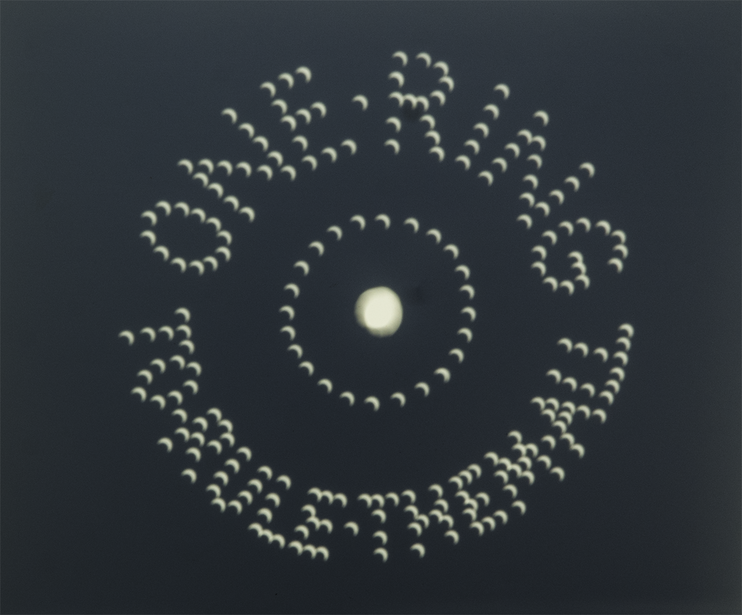
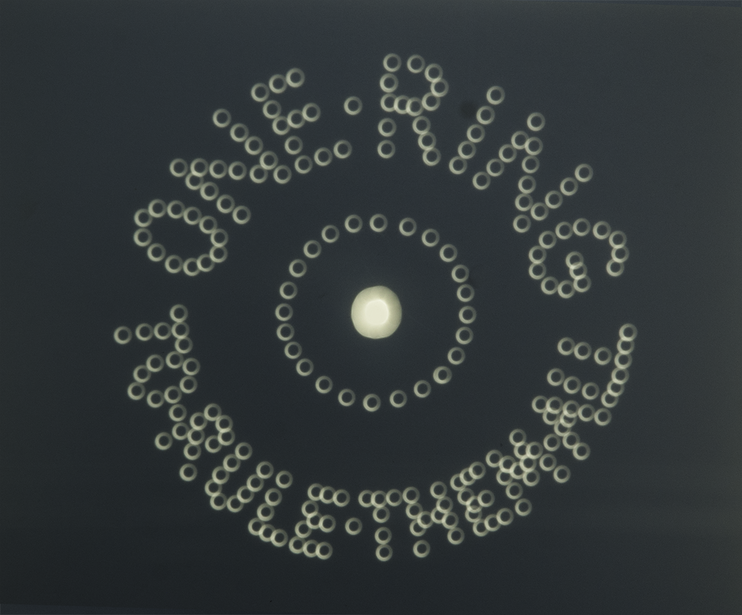
For more entertainment during a solar eclipse, punch holes in aluminum foil and project the sun’s image to a screen behind it to create a pinhole camera obscura. Use multiple holes to project a pattern of solar images and watch the change in the projected images during the eclipse.


Join the Fstoppers community for free
-
Post comments and join in the discussions
-
Browse the site ad-free
-
Share your work and get featured in the community
-
Compete in the photo contests for fun and prizes
No comments yet