
In this article, go behind the scenes of a recent shoot and see how I shot, lit, and edited this 1920s inspired shoot.
I have always been inspired and moved by history. There is just something magical about our past. My personal favorite era is the 1920s. I love the fashion, the culture, and the overall aesthetics. It was the "Golden Age" to be alive. The fashion was sharper, and the colors were bolder.
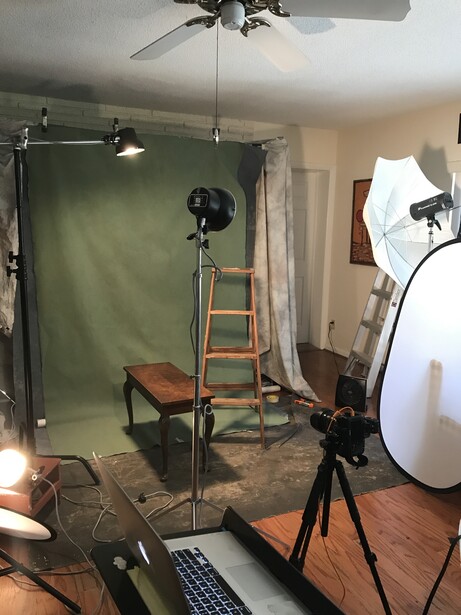
As artists, we have the ability to create our own worlds, where anything is possible. I wanted to push my creative juices, in regards to my lighting, styling, and set design. So after a few weeks of planning the concept and gathering the crew the shoot started to come together.
For this shoot, I knew I wanted to stay true to the time period. Although the technicalities to an image are important, so is the feeling it conveys. I set out to capture the emotions I feel when thinking about the 20s; playfulness, sadness, and mystery.
The Crew
However big my dream was, I couldn't pull it off alone. So I reached out to first time model and friend, @naomibluthphotography who graciously supplied every prop from vintage cameras, to dresses and old hats. Film maker @markuscohn_photo put together an epic behind the scenes video breaking down the setup. The project wouldn't be possible without the incredibly talented hair and makeup artist @madeupbyshayna to help bring the vision to life. It's incredible what you could do with a crew who are equally as passionate, that's when we create magic.
The Camera Settings and Equipment
Novatron v400d (x3)
Gravity Backdrops (x2)
For a majority of the shots, the settings on the camera stayed for the most part very consistent throughout because I was using constant lights. The settings were:
1/250 s, f/5.6, ISO 400
The Lighting
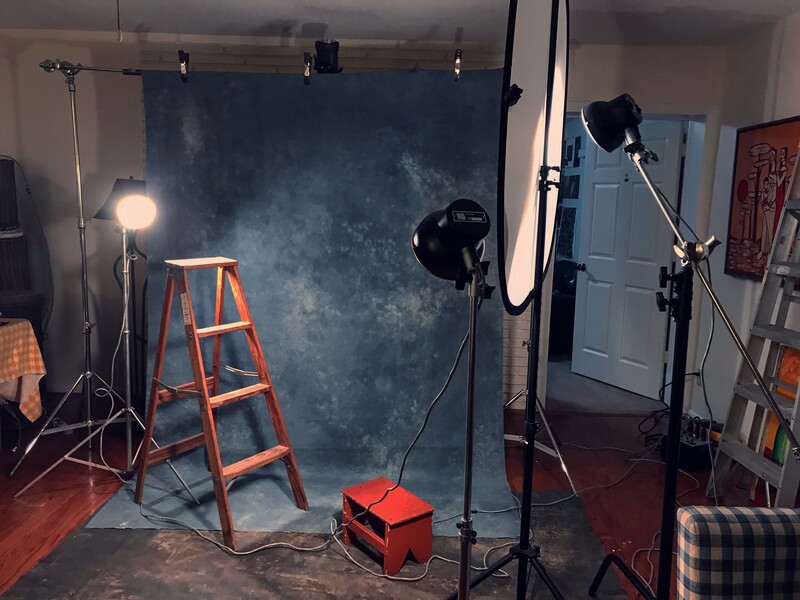
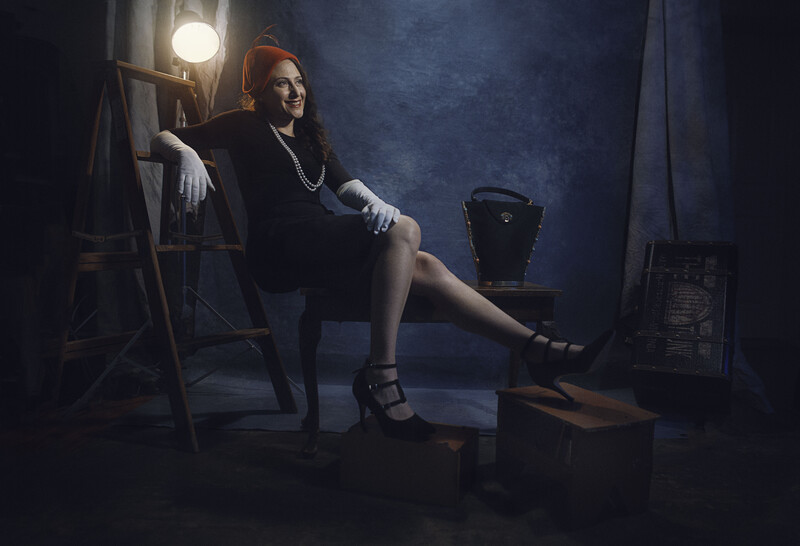
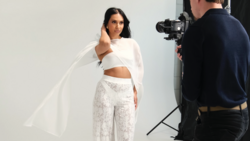
For the three sets, I kept the lighting relatively simple and clean. In my first shot, my key light was placed camera right and shot through the white side of a 5-in-1 reflector. This acted as a large scrim. Shooting a small light source through a five foot diffusion panel, made my light source larger, thus giving me a much softer spread of light. My backlight was placed directly behind the model and it was warmed up with a full stop CTO gel. The remaining two lights were acting as fills. I have one light boomed directly overhead to create a spotlight effect on the model and her purse. The last light was placed on axis with the camera which was giving me a soft fill on her feet and shoes.
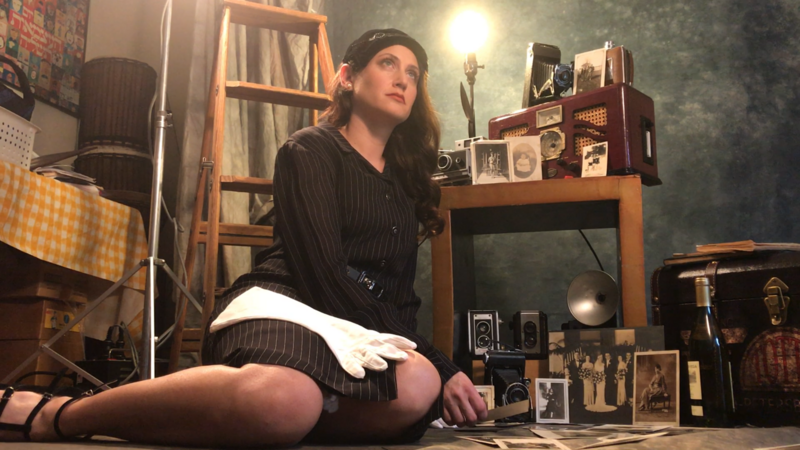
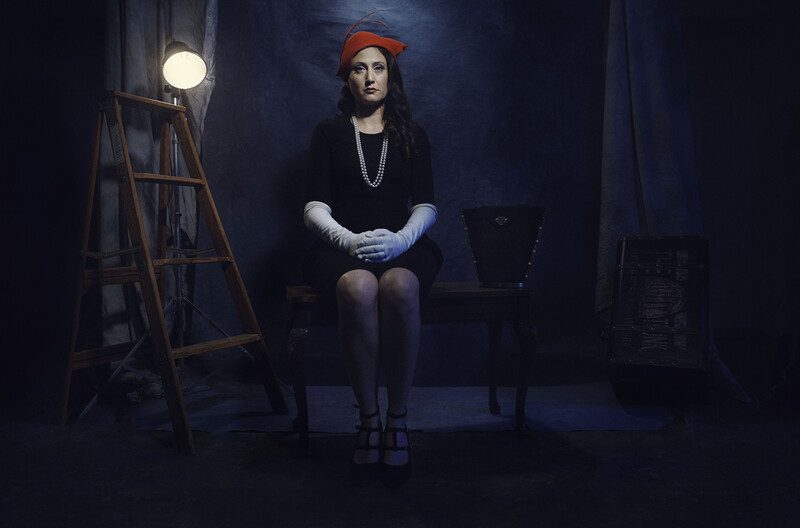
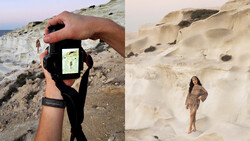
In the second set, I wanted a dreamy and airy effect. Since I don't own a fog machine, I had to create the look in camera using lighting techniques. To start, I wanted a soft and even key light. So like in the previous setup, I placed my key light 45 degrees camera right, on axis with the model and shot it through a white reflector to give me a more even spread of light on my models face. Next, for my kick, I placed the light in the scene right behind the model. Then I placed a old house lamp in the middle of the set to give off a soft glow around the cameras and old pictures. Lastly, to create the misty effect, I placed my third light around one inch above my lens, letting the light seep into frame. I was able to control how hazy the light was based on how high I placed it above my lens.
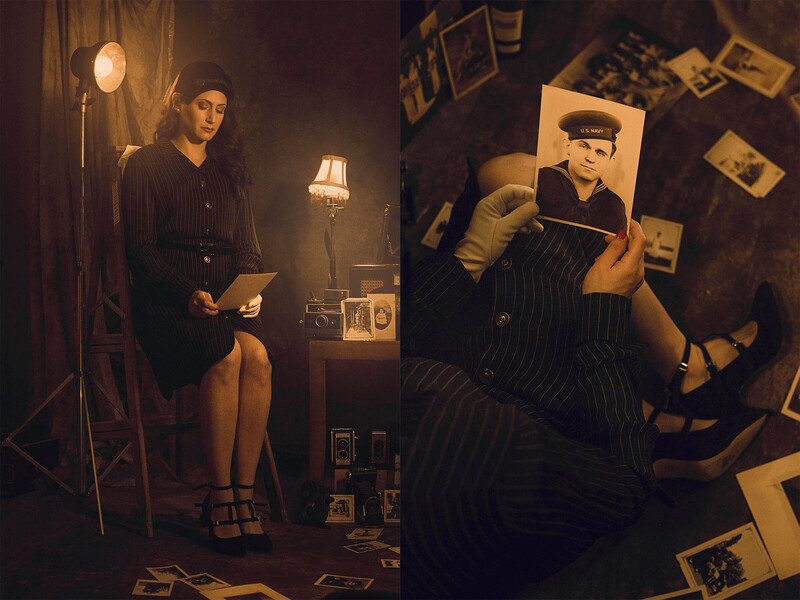
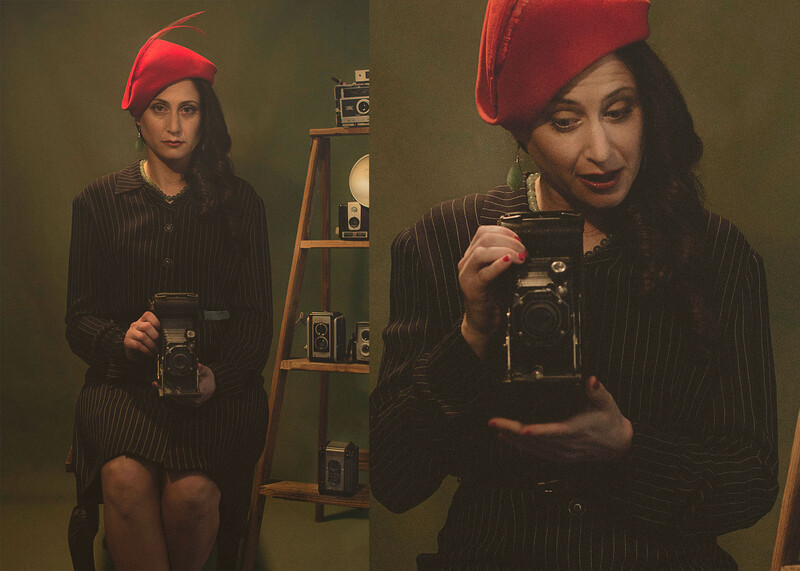
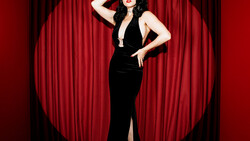
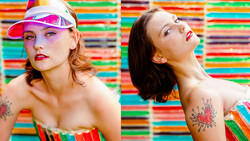
For this third set, the goal was to have even light illuminating the scene, giving me a painterly vintage effect. My key light was placed 45 degree camera left without any diffusion. This gave a nice shape and structure to her face. This also helped illuminate the old cameras in the scene. To make her stand out from the background, I boomed my light directly overhead, giving her an even rim light on the top of the hat and this helped create a spotlight effect.
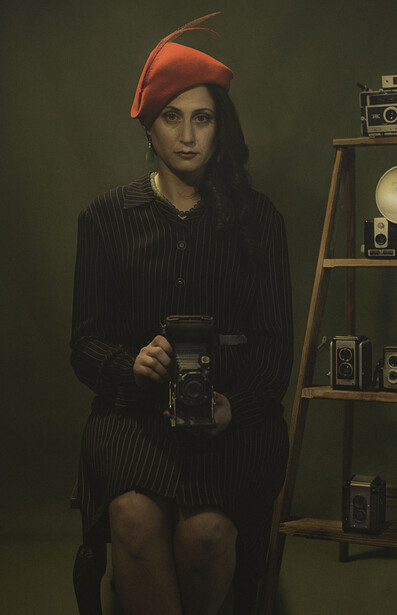
The Final Photos
Do you have any questions regarding this setup? Leave them below in the comments below! I would be more than happy to answer them!
Join the Fstoppers community for free
-
Post comments and join in the discussions
-
Browse the site ad-free
-
Share your work and get featured in the community
-
Compete in the photo contests for fun and prizes
7 Comments
Too bad none of those cameras were around in the 1920s. Also, that's not how you hold/use that folding camera: Why does she touch the bellows? What is she looking at? And why is the viewfinder all crooked like that?
Don't get me wrong, these pictures look good and it must have been a lot of work, but as an avid vintage camera collector (and user) I'm can't help but notice and be a bit disappointed by these small details.
Thank you for your feedback. Yes I missed some of those props, but I remember stating that "Although the technicalities to an image are important, so is the feeling it conveys." It may not be perfect but conveys the feelings I felt. I hope you learned something else from this article.
Oh, absolutely, it was am interesting read. I'm totally nitpicking here. I'm sure 99.9% of people won't notice the camera thing. And you may not care that much about historical accuracy because it's not the point of your pictures. I get it. Like I said, it's because I'm a camera collector and I can't help but notice this kind of details.
I totally understand. Thanks for commmenting! Glad you got something out of it. If there is anything I could improve on for my next articles please let me know! Cheers!
that light and light stand in your shots really turns me off to this, other wise they look great
i think that the lights are't flash light because if it used flash for backlight it cause the flare and need to grid or photographer has used low power light and not flash. if it not true then one person explain why the photos don't have flare.
Hi! Thanks for your input and comment. In regards to the continuous lights being used, I used them because they provide a quality of light that can't be replicated by strobes. It's a more even spread of light. They also are low power which is like yoj said nice for backlights.