

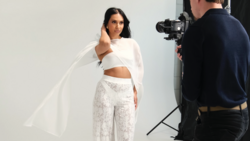
As a photographer and an artist, one of the most rewarding accomplishments you’ll have is when you see your work featured in some type of way, whether it is in a magazine, an art gallery, an advertisement, etc. In this piece, I will take you behind the scenes of the exciting and riveting experience of a fashion editorial, from the preparation, to the actual shoot, post-processing, and beyond.
The Three P's
Any photo shoot I do is really broken down into three important steps that I call the “The Three P’s”: Prep, Photo, and Post. Preparation involves the brainstorming, coordination, planning, creating a team, scouting, etc. The photoshoot is pretty self-explanatory, involving executing the plan and taking photos. Post-work involves not only photo-organizing, editing, and retouching, but also submitting the work to a publication. Having all your ducks in a row in each phase will ensure a great, successful photo shoot. I will go though these steps and show you how my team and I put together a successful fashion editorial.
Preparation
Preparation is the not-so-glamorous and often overlooked phase of photo shoots. With that being said, this may be the most important step in this process. To get the ball rolling on the editorial, I decided to reach out to a local stylist in the Tampa Bay area, Janelle Lafond. After contacting and agreeing to collaborate with her, we came up with a concept and a magazine to submit to. For a resource to find magazines submissions, Lindsey Alder put together a great list of fashion and beauty publications you can download from her site.
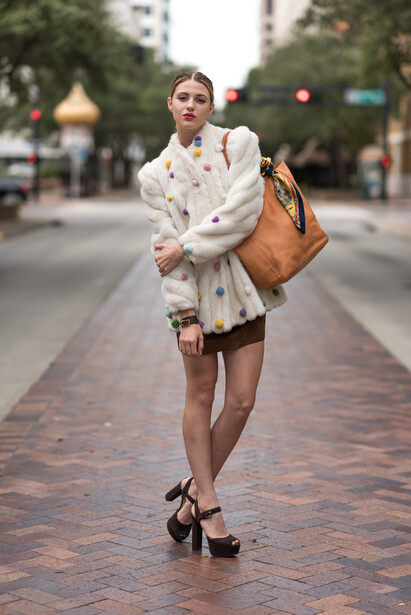
My stylist and I then threw ideas around for a concept that would not only fit the magazine style, but also fit ours as well. We decided on a winter street fashion concept. The stylist and I went back and forth with a few ideas to mold together a mood board.

After moving forward with a concept and some ideas, we then needed to select a model that would fit our look. Many magazines require legitimate agency-signed models for their editorials. After shopping around models and agencies, we pitched the concept to a reputable agency in Orlando. We gave them a short list of models that we thought fit for our concept and from that point selected our model. We planned on only featuring one model for our editorial.
Our final title and concept for the editorial would then be "Until We Meet Again," and the back story would be:
After being stood up by her own spouse, she wears her emotions on her sleeve.
She rebels and takes the city by storm.
With fortitude, she conquers the streets with power and elegance.
It’s always better to write a back story, I believe. They may not even use the story, but it shows that you put a lot of time, thought, and effort into your submission and sets the stage. The goal for this shoot was to bring NYC to Tampa and give it that Midtown feel. Those who’ve been to Tampa know doing that would be a tall task.
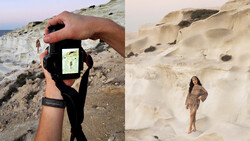
After setting a date, finding a hair and makeup stylist, an assistant, and assembling a final team, the next step in the process would be pulling looks that the stylist would handle and scouting areas, which would be my responsibility. The day before the shoot, I scouted all of downtown Tampa by foot. After confirming everything with the team, we were fully prepared for the next day.
Photoshoot
Now, for the fun part, shoot day. For this shoot, the nerves didn’t really kick in at all. The reason for that is because I knew we had a concrete plan in place, and we were fully prepared for our shoot. It was all about executing at this point.
That being said, our first obstacle presented itself when everyone met at the scheduled time, except for our makeup artist. Unfortunately, it turned out she was having car issues and ended up being an hour behind. Luckily, I scheduled an hour early in case someone had any issues. One thing that I learned about photography is that something will go wrong; you just don’t know what it’s going to be. You have to learn to not panic, react, and use your problem-solving skills to make it work.
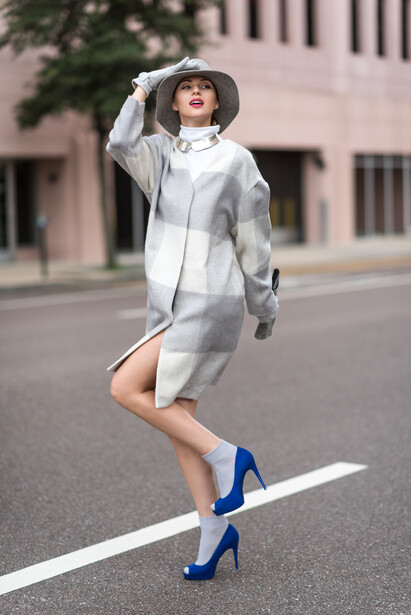
Makeup and hair turned out great, and we were off and running. Our model, Madison, did a great job for us and emoted well. She really catered to the mood of the shoot for each particular scene. The general idea behind every scene was a woman who felt heartbreak, went on to rebel, and took the city by storm.
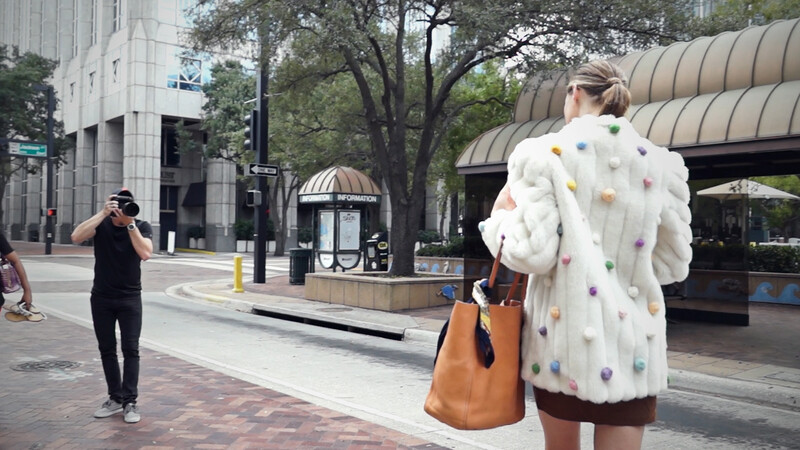
Some scenes were a little sketchier than others; in one scene, I was shooting in the middle of one of the busier intersections, and so, I had to coordinate the traffic lights as our model walked the crosswalk. We cut it close with the sun dropping around 7 p.m., but we made it just in time to complete our sixth and final look at dusk. All in all, it was a success, and that’s mostly because we were prepared, and all we needed was to execute.
Post
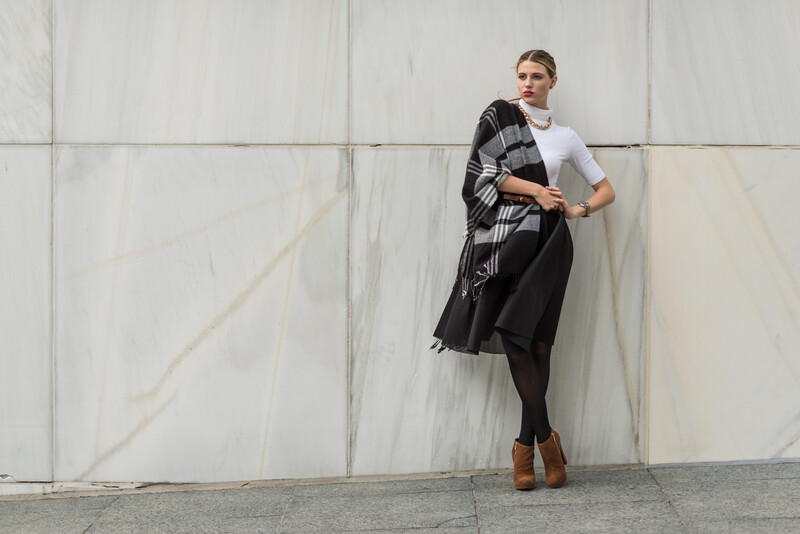
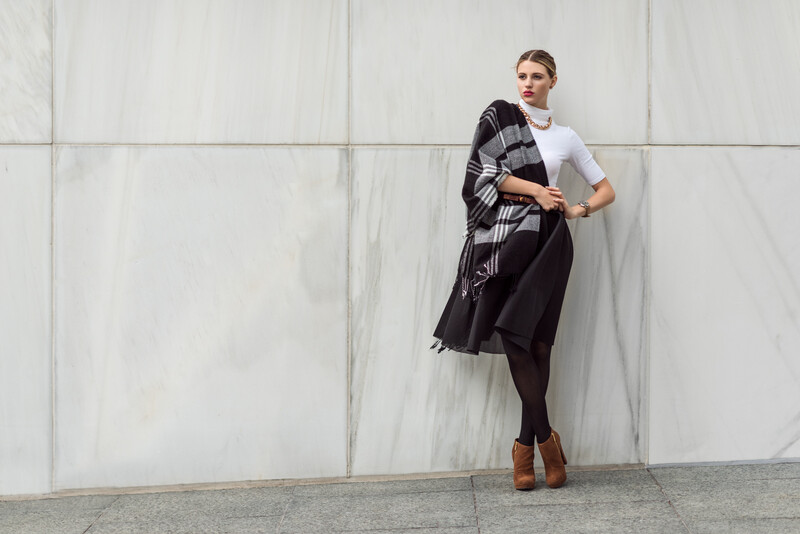
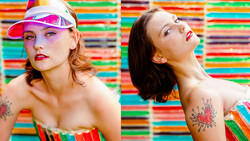
Post work involves not only culling and retouching, but also submitting your work properly to the magazine. For retouching, I really wanted to keep it simple and not go crazy with the toning. I wanted to keep a natural, sophisticated look for our final images.

In this particular image, I really loved the movement in the photo, but her arm was not showing and was behind her back. I ended up taking her arm from another frame and inserting the arm into the final frame:

After retouching all 12 final images, I was ready to submit to our desired magazine. This is where things get interesting, as at first, you are relieved that your work is done, but at the same time, uncertainty kicks in; now, we have to wait to hear back from the publication.
Unfortunately, we did not get accepted to our target magazine, although I did have a conversation with the Editorial Director of the publication. She said it simply did not fit the direction the magazine was going. Hearing “no” is something you must get used to, especially in this industry. A rejection letter does not mean the work is not good.
We did have a backup plan; we submitted to another reputable magazine and heard back the next day that we’d been accepted to the Elléments December Fashion Issue. Although gratifying, you truly don’t know you’ll be used until you actually see your images in the magazine. That is what makes the wait so riveting; luckily, we did make it, and we loved our 6-page spread.
That's A Wrap!
After everything is complete and you finally see your hard work featured in a magazine, it’s a very rewarding experience. It’s a combination of a great team, talent, preparation, and effort that results in something special. The process I’ve presented is pretty much how I approach all my shoots. I encourage everyone to put a lot more emphasis on preparation and paying attention to detail. The amount you put in is what you’ll get out of it.
The Editorial Spread


Join the Fstoppers community for free
-
Post comments and join in the discussions
-
Browse the site ad-free
-
Share your work and get featured in the community
-
Compete in the photo contests for fun and prizes
28 Comments
Great article and results, it is always a challenge to hit that target publisher but never the less.
I spend a ridiculous amount of time in location scouting and visionary prep for some of my location shoots yearly and indeed once you've nailed that and with the right model and team wonders abound.
Congrats on making print from all the hard work. Love the natural look in editing.
Thanks Glen!
I'm not dogging on your article or work, it was a good article, and for those looking to get pointers on shooting for publications. But I don't understand... did I misread the title? I thought I read "How I Got Published"... but the parts mostly mentioned are the prep/shoot/post... how to actually finding the publication(s) willingly needing or wanting your work before hand or after the shoot has been completed how do you get to them and get them to actually publish it?
Granted you mentioned a little of not getting your target magazine, but then getting a back up... how do you get that back up? I know I've researched this myself. And part A in getting published is of course your work, but part B is reputation on you, people skills, salesmanship, building those connections and maintaining those relationships. Sadly I am not there yet as I do lack those salesmanship and people skills at this point, but I was hoping to get some pointers on this article as I expected when I read the title, but its cool, I really hope a 2nd part is coming to share those insights on how you obtain those connections (excluding an agent, which is an obvious but difficult pursuit for vast majority out there).
Without speaking for Nick, I think his point is that putting in the work in the three areas he mentioned will greatly increase your chances of being published; that is, by doing good work as a photographer, he made the result of being published almost a foregone conclusion.
Oh I agree with what he said, just expected the article to go into a different direction, which I hope will have a 2nd part to reveal difficult pointers to find, building those connections and maintaining those relationships with photo editors/editors (without an agent). "Breaking in..." basically. I've been trying but without an agent its been feeling like I've been pushing a planet and obviously no movements.
Hey Chris, appreciate your input and thoughts. Lindsey Adler wrote a great article a little bit ago that I believe will help answer your question further:
https://fstoppers.com/editorial/5-pro-tips-publishing-your-first-fashio…
I also have a link attached in the article that is a great resource for finding magazines to submit to that Lindsey Adler also put together.
Thanks, that was intensely helpful!
Yo, I loved everything about this.
Dope article man! Ill take you advice as I am about to do my first string of submissions!!
Yes I agree 100%, the clothes matter more than any other facet of a fashion editorial. Thanks for your input and thanks for reading!
I will be the bad person and say, that there are very visible healing brush strokes on the second post image.
There are strokes, but when you don't have something to compare... And who cares anyway :)
I figured the wall has that marble texture that isn't consistent anyway, so why waste time.
Great work really like the end result. Looks like you kept things simple yet so effective.
Thanks Lee!
So dope that this quality type of work/model/look can be done in other city's not just the "Big" ones... Goes to show what preparation,dedication and talent can do. Great job Nick.
You can do whatever you put your mind and effort into! Thanks Eloy!
ahh this was so good.
nice,
Thank you so much Nick. This is one of the best and informative articles I have ever come across. Really love your style as well. My goal is to work with various publications and I feel like this article is right up my alley!
Thanks Terry! Appreciate the great feedback!
Read the article, loved it, but what happened to the video? I saw it yesterday and now its gone. LMK where we can see it again.
thanks
Nick, thanks for sharing this good piece and congrats on your success. How is Tampa, street permit-wise? Here in NYC I see tons of quick run and gun shoots with models and 1 or 2 people in the crew. But if anyone gets hurt on one of those shoots up here you're in the deepest soup for running an "un-permitted operation" which makes the lawsuit much worse. Often your deal with your insurance company is that you have all permits covered. Is Tampa as strict as NY? Also, do you pick a backup location? We did a shoot last year on an out of the way city street (with permit) for a Sunday morning that was perfect, only to have a city gas truck take our set to inspect for a leak. This was a Sunday morning with no traffic and ideal weather and we were dead in the water. The gas truck trumps our permit. Thanks for sharing your experiences, it's a good read.
Thanks Jim, we really had the whole city to ourselves. Tampa is not very busy, especially on a Sunday, we also strategically picked our date to avoid any major events going on in the city. We did not have a permit since we kind of "runned-and-gunned" per say. We did have backup locations just incase. I would understand NYC being a little more strict in that regard and if I plan to shoot one in NYC will definitely look into taking the steps you made in receiving a permit.
Cool. I always wonder how it's done elsewhere. Good job all around.
Little off subject, but does anyone know how to create the before and after sliders in these articles??
Very nice. Was all this natural light? If so do you only shoot at a specific time or use assistant with reflectors?