
This is one of my most favourite test shoots I’ve done to this date, not only based on how we got the shot but also how they turned out. Here’s how we shot it, how it was lit, and everything that came together to make this shot happen.
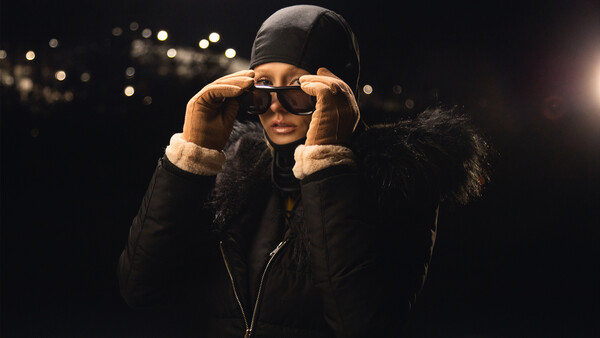
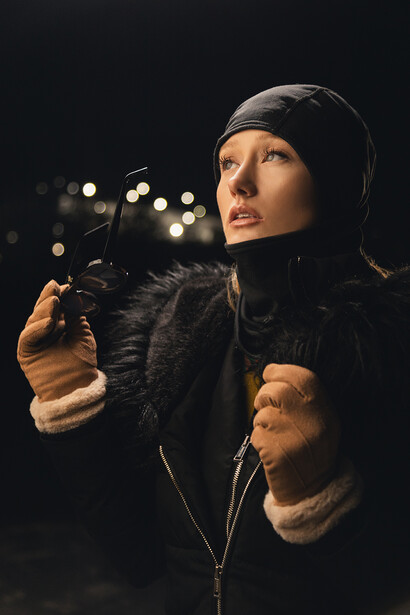
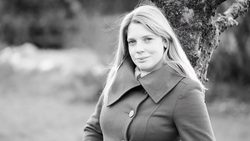
The subject for this shoot was a very good friend of mine and super talented model Ash Kalyn. We’ve worked together quite a few times, and it’s always a blast. The photos you’re seeing were taken on a farm where there’s a ski hill in the background illuminating some of the snow. This also allowed for beautiful bokeh to be behind Ash’s head, creating more depth in the background.
I have to commend Ash for this, as it was -21 degrees Celsius at the time (-5.8 Fahrenheit for readers in the US). Suffice to say, it was cold. As I always come prepared, we had a warm-up vehicle off to the side so she could keep warm between setups and shots. It helped that she was able to have a thick parka on for the shots as well. Fortunately, I layered up to an insane degree, so I was mostly fine the entire time. Looking at this realistically, could I have shot this in the studio? Honestly, yeah. Sure, it would have taken more work in post to make it feel authentic, but it could be done. For example, I’d have had to put little lights in the background to throw out of focus or add them in post, as well as adding a hint of white in the background to give the idea that snow was on the ground. Lastly, I’d have had to add in the breath. It would be more work, but still doable. Even with that in mind, I actually wouldn’t have shot these differently because we were safe and prepared about it. Even though it was cold, everyone was being taken care of, and we’d warm up the moment anyone started feeling really cold. It ended up being a really great time and enjoyable for everyone.
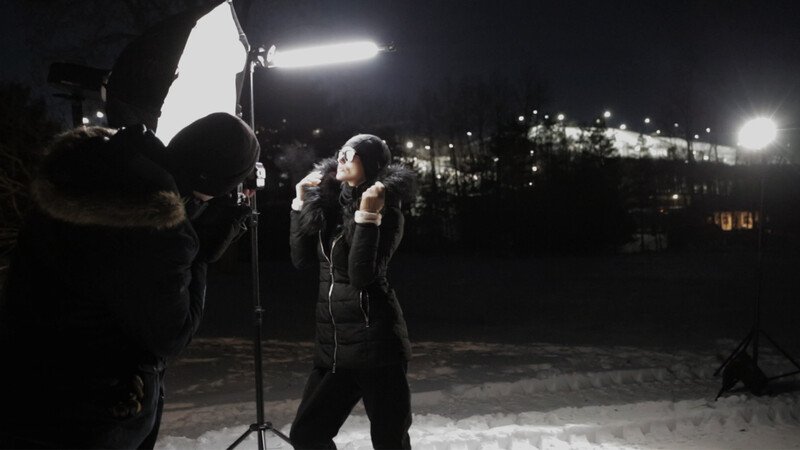
Now, the lighting is really what helped to make this stand out, so let’s break it down. This was ultimately a three-light setup (minus the ski hill lights in the background). For my key, I was using a Godox AD600 into a 36” octabox placed pretty close to Ash. I like to build up my lighting setups personally, so I started with that, and I noticed her balaclava and coat faded into the background, and you couldn’t make out any detail. The ski hill lights were great for bokeh and illuminating a bit of the snow far off in the background but really didn’t serve to separate the subject from the background. To fix this, I put a second Godox AD600 with a 7” reflector on it on the camera right side behind Ash to give her a rim light, separating her left side from the background. But it still wasn’t quite enough to do what I needed. The all-black look was fantastic, but when you’re shooting at night, you need a lot of light to separate your subject from the background; otherwise, you just get a big black blob. To solve this, I raised a 2’ long Nanlite Pavotube set to daylight (matching the Godox) lengthwise over her head to act as a hair light, thus separating the balaclava from the background.
Now, if you read carefully, you realize I’m mixing two strobe lights with a constant light at night in a very dark environment. You would be correct, at least at first. The Godox lights are great because of how they can be quite powerful for a decent size. The issue occurs in that even at their lowest power setting, they are still way too bright to work for this shot. There are a couple of reasons for this. First, to have Ash properly exposed, I would have had to darken past the point of having any ambience from the environment or even the lights in the background (they would be barely visible). Secondly, I know what you’re thinking - yes, I could move them further back. But I wanted a really soft, flattering light on her face from the octabox, meaning moving the key farther back would make the light harsher and would no longer work for the shot. The other option would be to add ND gel or extra layers of diffusion, which in my much larger kit I do have, but unfortunately didn’t have in this particular circumstance.
Even with all that, I still did have a solution - a bit of an unconventional solution, but one nonetheless. The Godox have a three-increment modeling LED lamp inside them. Now, it’s not really bright enough for a majority of applications - I wouldn’t really use it as a video light unless you were in a pinch and needed an accent. That said, however, when you’re in an otherwise very dark setting, they can be quite bright. Enough to even compete with the tube light.
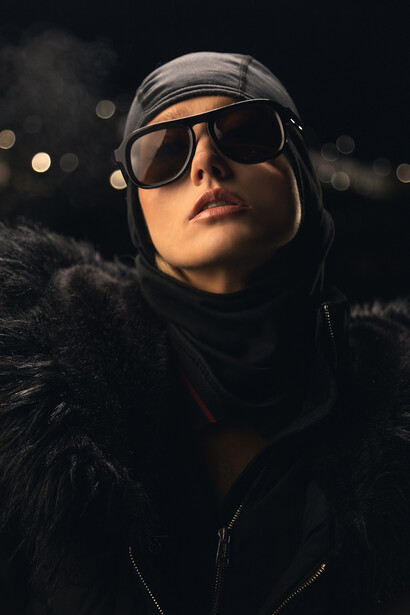
So, that’s exactly what I did. I had each strobe with the modeling lamp set to its highest setting, the Pavotube’s brightness level adjusted to match, and with a shallow aperture, these shots are the result. The other benefit is that the tube and rim lights acted as a backlight for Ash’s breath, so what you’re seeing is what was naturally captured in-camera.
This ultimately became a test of using your gear in slightly unconventional ways to get the result you want. Sometimes as photographers we have the right tool for the job, and sometimes we have to make it work. In this instance, I love the way we made it work because it came out better than how I had envisioned. I’ve always loved a challenge, and from the location to the weather to the light, there were challenges abound, but we pushed on, stayed positive, and came away with a solid set of images to boot. So, I would use this as a way to remind yourself that even in less than ideal circumstances, with a little creativity, you can still come out on top.
Join the Fstoppers community for free
-
Post comments and join in the discussions
-
Browse the site ad-free
-
Share your work and get featured in the community
-
Compete in the photo contests for fun and prizes
2 Comments
Joe McNally likes to say 'photographers are problem solvers', and you've demonstrated that admirably! And I really liked your ability to break it down, explaining your thinking along the way. :-)
I couldn't agree more with that quote! Thank you for reading and the kind words!