
If you have ever been assigned a full-day catalog shoot for a big retail brand, you probably know about the hectic process, especially if you are not working with a producer who deals with everything. Besides, a catalog shoot consists of innumerous steps from creating the concept to delivering the final images, and if you don’t have a producer ready for you, there are some steps that you need to consider before start shooting.
If you are hired by a designer label, you probably need to shoot around 15–30 pieces, and you can even finish the whole shoot in a half day. On the other hand, if you are willing to shoot more than 100 pieces of garments with several angles for a big retail brand, you need to plan every step carefully in order to complete the shoot and deliver the images before the deadline. You might think that you can split the shoot in two days and complete it successfully, however most clients would like to finish these kinds of shoots in a day so they don't double the costs such as the rate of photographer, models, hair and make-up artists, etc. Therefore, once again, it is the photographer, who has to deal with everything in a tight deadline.
Step 1: Client Meeting
If you have a new potential client, tell them about you and your team’s workflow during a shoot day in order to convince them about meeting the deadline. While the total pricing and your portfolio are the two important factors for you to be hired, additional details might be useful to be selected. So, having a couple of different scenarios ready for both the concept and pricing might be handy.
Step 2: Production
Assuming that most of the photographers aren’t lucky enough to work with a producer, they have to make their shoots’ production on their own. While this sounds disadvantageous, the reality is generally the opposite. Surely the pricing is the key once again, and unless your client isn’t a big Italian fashion brand, no one cares if you are working with a producer or not, cause all they want is to get the shoot done and the images received on time. And, if your client is a major Italian or British fashion brand, then you will already be working with a producer and in the meantime your representatives will be dealing with all the mess. Anyway, depending on your concept, even it is a white-background studio shoot, finding the suitable make-up artists, hair stylists, and models within the client’s production budget will be your responsibility. Just don’t forget to add your commission to your daily rate for your efforts and time.
Step 3: Casting
Different model agencies have different policies about castings; While most agencies don’t charge for castings, some might, so before spending your production budget, make your pre-selection by asking the agencies to send you the photos (or “Polaroids” and “set cards” in agency jargon) of the available models in town, and share with your client prior to your second meeting. When the second meeting comes, try to arrange the casting with sample products from the client and shoot your own casting photos. This will help you and your client decide afterwards.
Step 4: Concepts and Creating a Mood Board
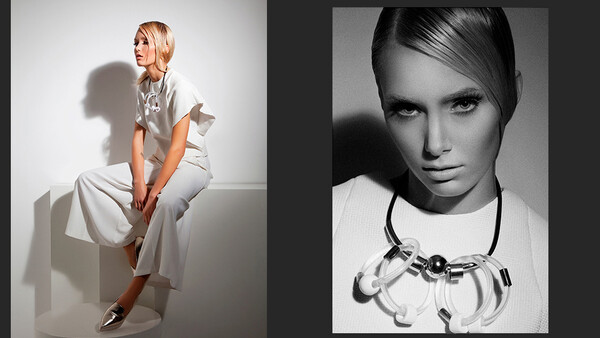
Before the shoot day, create your own mood board with your stylist, depending on the client’s approved brief. While this will help you during the shoot in terms of posing and inspiration, it will also help the make-up artist and hair designer with getting the overall concept. Always remember, on the shoot day, nothing exists before you and your team start creating, therefore, you will need all kinds of visual references in order to achieve the desired result.
Step 5: During the Shoot
There is one simple rule that eases the postproduction flow: always try to fix the problem during shoot, and avoid leaving it to the retouching. Most photographers skip this due to stress or laziness, but spending 5 seconds on fixing a garment on the model can prevent spending 20 minutes in Photoshop. Therefore, always try to fix a problem on time.
Step 6: Treats
Another point is whether you are shooting outside or in the studio, make sure that there is always fresh coffee and snacks ready between the meals. Little treats help you to keep your team and the models in a positive mood. Plus, keep in mind that this is a social business, so try to be positive as a photographer as well and avoid showing sign of stress.
Step 7: Selecting the Images
Your client may be experienced in selecting the images but you are the photographer, so if your client selects a bad photo, suggest alternative shots and explain from a photographer’s view. Because at the end of the day, your final work will be remembered as a reference and also it will be a part of your portfolio for your future clients.

Step 8: Retouching
Most of the final images are used online, but there are still a majority who also use prints. Therefore, before proceeding to the retouching process, start with the color management considering the printing and digital use of the images. This is the part where everything can be messed up easily. Imagine you are shooting a denim catalog with 40 different tones of blue and your client wants to see the correct colors as much as they can. It is not impossible with the correct workflow. All you have to do is have a color managed workflow that includes use of color charts during the shoot and color calibrated monitors during retouching.
If you are not working with a third-party retoucher, then most of the time you have to deal with hundreds of images. This might sound scary but creating your own actions and workflow for the specific shoots may be helpful. If it is a single background color look book shoot, then you are expected to keep the overall tones and contrast the same throughout all the images. Another challenge is keeping the background tones indistinguishable as colorful garments may reflect their colors and cause tinting on the background. To avoid different toned backgrounds in a series of images, you may have to make local adjustments. And finally, before delivering the images, it is better to check all the images once again for any issues.
If you have a similar or different workflow please share your tips in the comments section below.


Join the Fstoppers community for free
-
Post comments and join in the discussions
-
Browse the site ad-free
-
Share your work and get featured in the community
-
Compete in the photo contests for fun and prizes
5 Comments
I just glanced over the text, isn't missing step 6?
You are right Joacim lol! Fixed that
Could you tell us how you lit the images of the model against the white background? You achieved excellent separation while getting very good lighting on the model, along with the even BG. Was the BG stripped in later? And how did you get the skim light on the (viewer's) right side of the model's jaw?
nice u r right