
In the last decade, drones have created a completely new genre of photography for the average consumer. Their biggest hurdle has been poor resolution and dynamic range but with these few tips, you can get a lot more detail out of your drone photography. We have come a long way since the first drone I owned, a Phantom 2, which didn't even come with an equipped camera and you had to build parts of it yourself. In a very short amount of time drones went from a bit of a DIY hobby to so easy to use that grandpa can buy one to play around with in retirement. Jokes aside many of us use drones to mix in with our grounded photography and open a completely different world of perspectives. I've even met a few people who specialize and only shoot drone photography as if it was a genre like wedding or portrait photography.
Assuming you're not flying a heavy-duty drone that carries a fully-fledged mirrorless or DSLR camera then you have likely struggled to be completely satisfied with the image quality coming from your drone's camera. Recent drones take great images, certainly good enough for social media, but when you want to print those images or edit as much detail out of them as possible you might find yourself struggling to get the results you desire. Here are a few quick and easy solutions that should absolutely improve the image quality the next time you go fly.
Exposure Bracketing
Exposure bracketing is an advanced technique used in landscape photography that allows you to capture multiple images as different exposures to enhance the dynamic range of your final image. I wrote up an entire article on why and how to use exposure bracketing in landscape photography that I highly recommend you read if this is new to you. I go in-depth to explain what dynamic range is and why you might want to exposure bracket your images.
Dynamic range is the measured amount of light between the darkest part and brightest part of a scene. Thus, the higher the dynamic range, the wider amount of luminance values you can retain in an image.
All cameras have a limited dynamic range, especially the camera that is located on your drone. This means that when you take a single photo there might be parts of the image that are simply too bright or too dark to have any information in them.
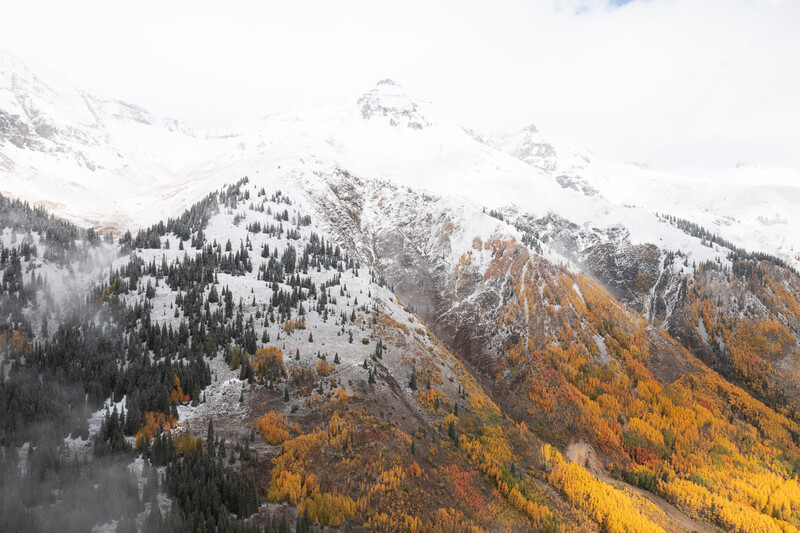
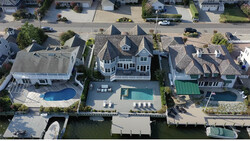
Notice in the image above that we have all the detail we could ever want in the darker regions of the photo, but to do so we had to completely overexpose the brightest parts of the image. That is our camera's dynamic range limiting what we can capture and to help with this we can exposure bracket our images. All this means is that we'll take multiple images instead of just one image to add a few stops of dynamic range to our final image and the best part is, it is built right into most drones!
I'll be using a Mavic 2 Pro and DJI GO 4 for all the explanations here which should cover the majority of drone users. Once you're connected to your drone, open up the photo settings.
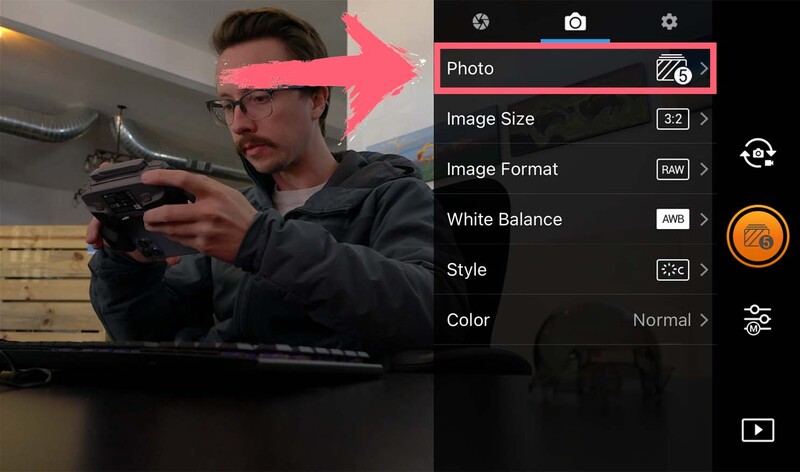
Select the camera icon at the top. Also, make sure your image format is set to raw. Tap "Photo" to open the photo mode selection.
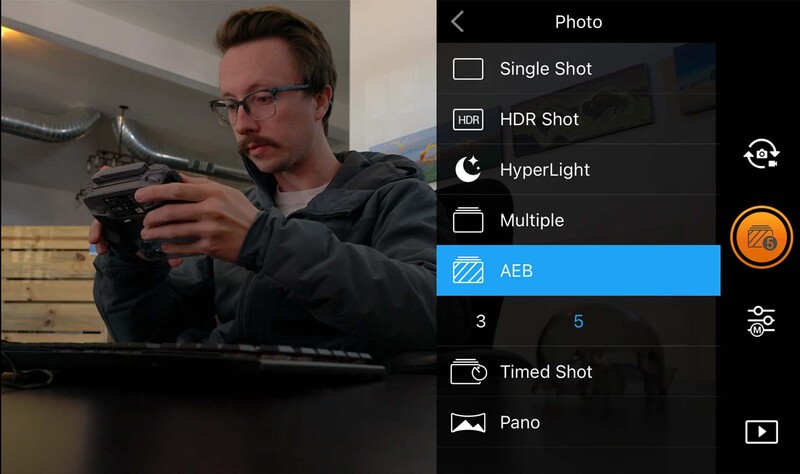
Select AEB (Auto Exposure Bracketing) and select 5 shots. If you select 3 shots you'll only walk away with 2 extra stops of dynamic range rather than 4. Now every time you snap a photo it will take 5 images: a -2EV, -1EV, 0EV, +1EV, and +2EV. Keep this in mind because those images will add up quickly. We technically don't really need the -1 and +1 exposures but there is currently no way to only take the -2EV and +2EV exposures thus we must use this and end up with a few extra photos.
Make sure not to use the HDR setting on your drone if it has it, as the processing for these that is done automatically can be detrimental to the quality of your images. If your drone doesn't have an AEB setting, you can do this manually. Simply take a photo at 0EV, -2EV, and +2EV by changing the shutter speed between shots as quickly as you can.
Panoramas
Okay now that you know how to get more dynamic range in your drone shots, how do we get more resolution? The answer is a lot more simple: panoramas. But we are not limited to only taking photos from side to side, we can take photos in a grid depending on our composition. Panoramas are a bit different in execution than exposure bracketed images since you'll either need specific scenes or to change the placement of your drone so that you can take multiple images, usually, this just means getting closer to your subject. If you're unfamiliar with panoramas feel free to get yourself up to speed here, but it should be easy to follow along if you've never taken one before!
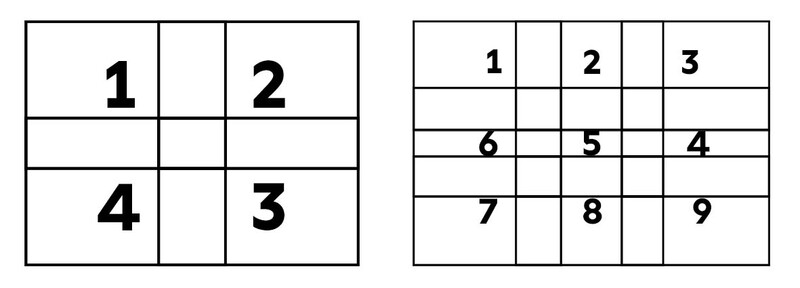
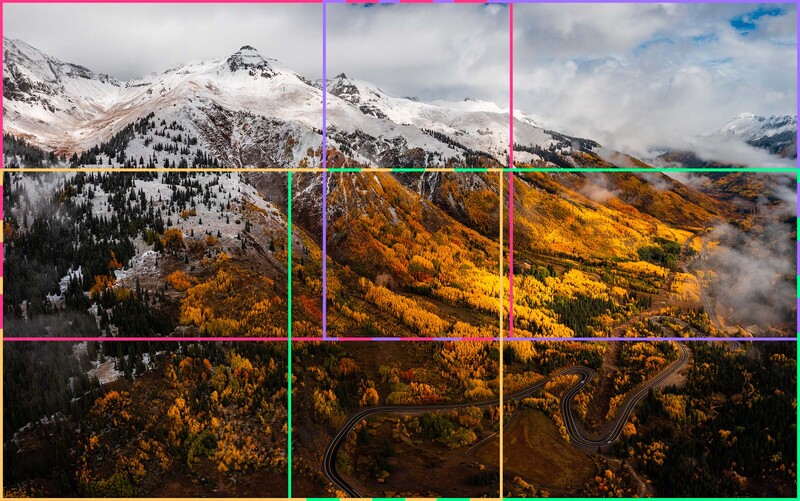
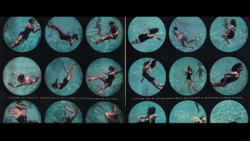
The rule is simple when taking panoramas, just make sure the images overlap by about 30-40%. Thus you'll take your first image, turn your drone right or left and continue across until you tilt your gimbal down and then go back across. I've created a few examples above of panoramas you can take. Obviously, you can take as many as you want in whatever pattern necessary but just make sure you take them quickly so that objects that might be moving in your images are easier to blend together.
Many times you'll fly so far out that you capture an entire scene in one image but if you want more resolution all you need to do is fly closer to your subject and take a panorama that captures the entire scene.
The Magic
Now that you know how to exposure bracket and take panoramas it's time to combine both techniques into a single scene. All you have to do is make sure the AEB setting is enabled when you go to take a panorama — that's it. This means you'll end up with 5 images for every part of your panorama, so even though hard drive space is cheap these days don't go overboard with all the images you take.
It's time to take all of our images and combine them together. We'll use Lightroom Classic for this example but Photoshop and Lightroom CC can also do this. I'm sure other programs can as well but these are the ones I'm familiar with. Once you have all your images imported, you'll need to find the start and endpoints to an image sequence within your library. I do this by adding a star to the first image and 5 stars to the last, just to help me know where a single composition begins and ends.

Select the first image in the sequence and while holding shift select the last image. Right Click and go to photo merge, HDR Panorama. Depending on how many images are in your shot and your computer, this could take a while.
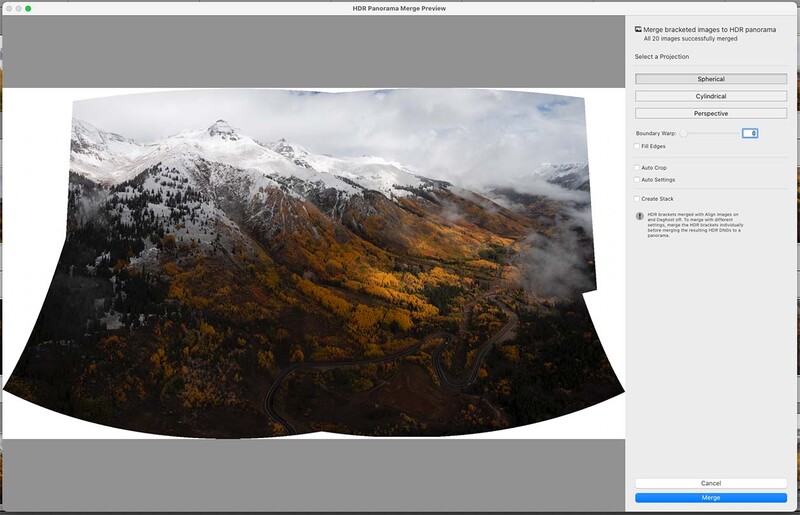
This will bring up your panorama preview which I break down in-depth in my article for all the settings. First thing you need to do is make sure all your images processed in the top right corner. To keep things simple I'd try the spherical and cylindrical projects, typically cylindrical gives me the best results on a grid-style panorama from my drone, and then boundary warp to 100. You might have noticed I used spherical projection for this particular image. A great reminder to not follow these blindly and play around with what looks best for your photo,
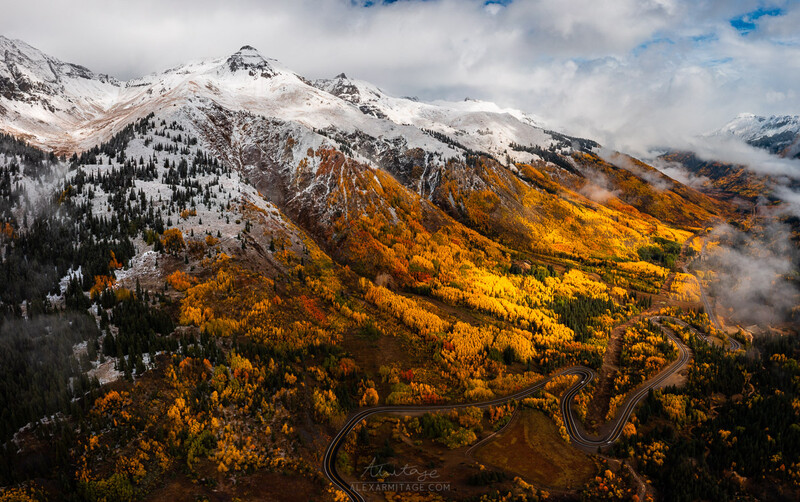
And voila, we are done! You now have an image with much more dynamic range and resolutions that rival or beat modern-day mirrorless cameras. Would love to see your results or any advice you might have from your experiences in the comments below! As always thanks for reading and hope this sheds some light on new information for your photography journey.
Join the Fstoppers community for free
-
Post comments and join in the discussions
-
Browse the site ad-free
-
Share your work and get featured in the community
-
Compete in the photo contests for fun and prizes
9 Comments
Great article Alex. I've had this feeling for a while that the Mavic Zoom is actually still the best drone for landscape photography because of the ability to zoom in and make a panorama, without needing to go crazy wide with the field of view like you do with other drones that lack optical zoom. I've only owned the Mavic 1 and Mavic 2, but if I get back into drone photography I'd probably try out the Zoom. The fact that it can be found quite cheap now is an added bonus
I wish the zoom lens on the new mavic 3 was better. I can't justify the upgrade when that camera is basically useless and they made the mavic so much bigger I'd have to rethink my backpack strategy.
Yeah I was stoked when I found out about the zoom lens rumors and then at release I just lost all interest instantly when they said it doesn't output raw files and the sensor sucks
Beautiful footage! I traveled through the Million Dollar Highway back in May 2011, but, it was snowy and sketchy. Looked nothing like what you captured.
It is far easier to do a pano by doing 1 top left, 2 mid left, 3 low left ... 4 top middle, 5 middle middle, 6 low middle, 7 top right, 8 middle right, 9 low right.
If you do it this way using the gimbal degrees exactly the same for all tops, all middles and all lows then you only really have to worry about the left to right overlaps once instead of all the shifting left and right.
Both PTGui and Photoshop understand how to handle that order.
Are there any methods of getting AMAZING detail in drone camera shots that don't involve taking multiple exposures and stitching or stacking them together? How can we get a single exposure from a run-of-the-mill drone camera to show truly amazing detail?
Exactly like with any other camera. Have a good eye for composition. Understand how to expose and have a drone with a camera good enough to capture it. Capture in raw, learn how to capture sharpen properly and how to edit the photo. There isn't a magic answer.
Oh, yeah - these things that you mention are pretty much a given for any photography, aren't they?
I was asking specifically about how to get an "amazing" amount of resolved detail from a single exposure form a very ordinary (relatively low resolution) drone camera sensor.
See above ... "There isn't a magic answer." It is exactly the same as it is if the camera were on the ground.