

I love shooting on location and am passionate about deep blue skies. Usually I would use CPL and ND filters to get the best skies to my taste. A detailed article about how to get dramatic skies is described in my previous article, "The Ultimate Guide to Dramatic Skies in Portrait Photography." After the shot is taken I always play with the luminosity and saturation values of the blue tones. One issue I often face while darkening the skies via luminosity is having a white outline appear around my model. Today I will take you through a short tutorial of how to get rid of that quickly and effectively, without the need to compensate on your luminosity.
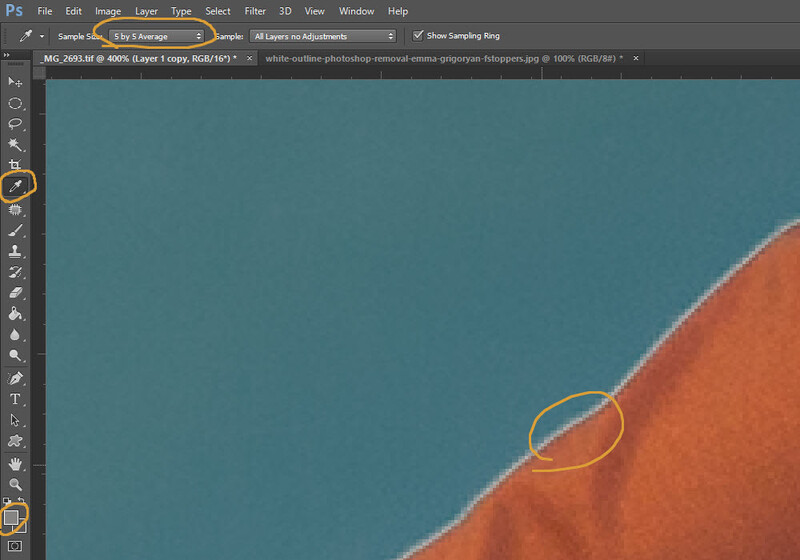
Now you have to find an image which has this issue. Open the file in Photoshop and zoom to 200–300% to have more accurate results. Activate the eye-dropper tool and click on the white fringe (any color) around our subject. I recommend using 5 by 5 px Average range, as your fringe is not a solid color.
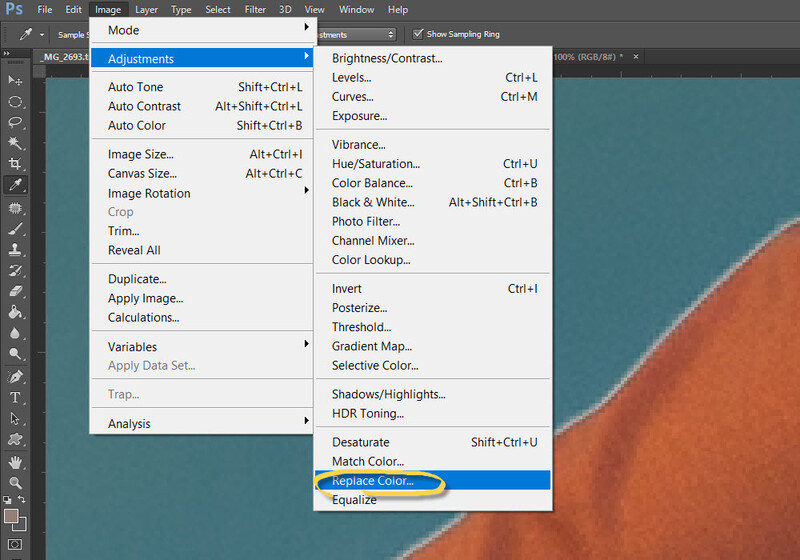
Once you have chosen the color to be replaced, navigate to Image > Adjustments > Replace Color.
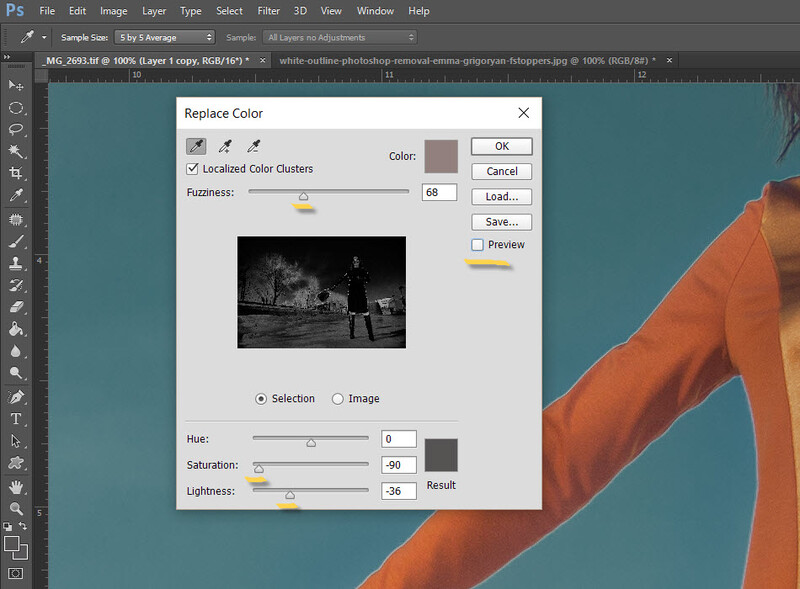
The selected color is already in the Color box, but you can change it anytime during this step for better results. Just be sure you click the right color box. Now comes the tricky part. Each image is different and you have to play with the box. Move the Fuzziness slider to the right slowly, until you start to see the selected color fringe. Your selection will appear white in the Fuzziness box. As said above, the selected color is not solid all around your subject and you want to have a uniform result. For that I bring the Saturation slider to the left, desaturating the color range I selected. In addition, you might want to play with the Lightness slider based on your image. Here I had to move it to the left to make the bright whitish outline more diffused. In images where, for example, you have a blue fringe, you want to move the Lightness slider to the right. As you can see, the result is obvious. It might take a little time to get used to it, but it's well worth the time playing with this. You can get some really clean results.
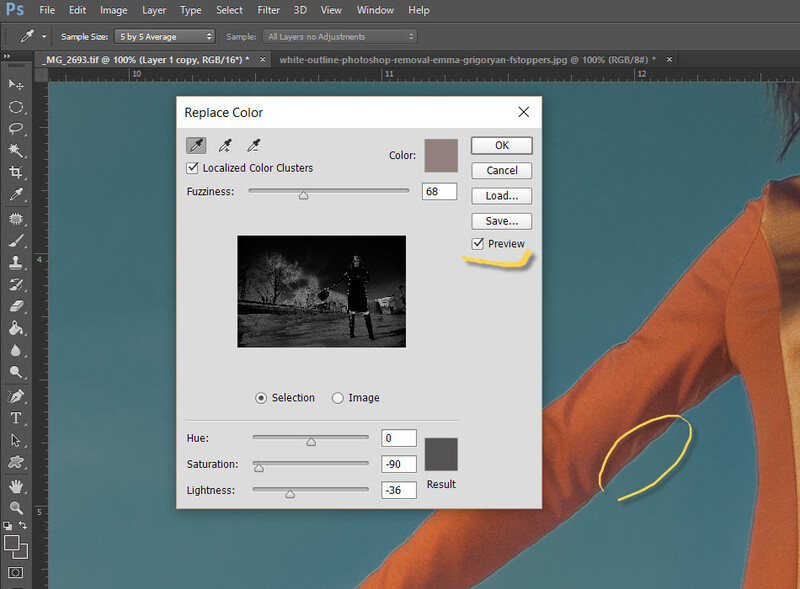
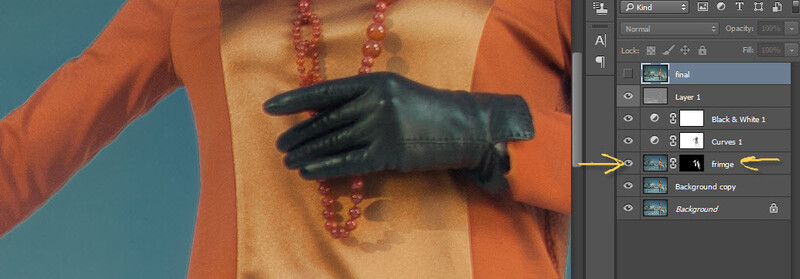
I am very sensitive to colors and aim to keep every tone possible. The above described steps will also affect parts of the image where you have a similar color as the color range you selected to change. The problem is solved when you play with Fuzziness slider, but sometimes you might run out of the range. It was the same with this image. The trees were also affected by this change. However, it is super easy to fix by masking out anything you don't need.


There are million ways of solving this task, but this is what I use in my workflow. Feel free to share your knowledge and tips in the comments.


Join the Fstoppers community for free
-
Post comments and join in the discussions
-
Browse the site ad-free
-
Share your work and get featured in the community
-
Compete in the photo contests for fun and prizes
10 Comments
Never occurred to me to use this method before, thanks!
this issue only occurs for me when i was trying to use D750/D810 Nikons, never happened with Canons and Sonys
that sound interesting, however I believe this is not a matter of camera brand, but rather the lighting and luminosity. I am a Canon user.
I'm considering this issue with some of in-camera applied adjustments.Anyway thanks a lot for your tips, it's really helps.
most welcome. an probably I was not too clear. The RAW file straight out of the camera had no line, but as mentioned above, it appears when I play with the luminosity. The transition becomes too drastic, and there you have the line )
Oh, thanks for additional info)
Thanks for clarifying as I had never seen it during capture, only in post from the processing. Interesting tip.
I always tell people to avoid adjusting the luminance values of HSL for this very reason. You are much better off making a mask in Photoshop and darkening it that way. You will be able to refine the mask with much better accuracy than anything you could have done in LR/RAW. You are just making more work for yourself with this tutorial!
Here's a way that I use. I saw it a while ago in one of Aaron Nace's tutorials. So usually the sky (the background) in these cases is darker than the model (the foreground). I add a new layer and change its blending mode to 'darken'.
Then I pick the clone stamp tool, sample it on the model (the foreground object), and paint over the bright line I want to remove. Since the background is darker, only the bright contour will be changed.
This looks like an excellent method. I will be keen to give it a go. Thanks for sharing it!