Fog in the San Francisco Bay Area can bury a scene in seconds and hand it back a minute later with trees, towers, and light arranged in ways you won't see again. Shooting it well means working quickly, reading the direction of the light, and resisting the urge to stick with the first composition that looks good.
A fog bow bright enough to show its full spectrum is rare. Michael Shainblum found one after hiking up and down hillside trails until the arc finally lined up with a layered tree line. He captured it handheld at 16mm in a single exposure, using a polarizer to make the colors repeat in bands. Turning that filter strengthens some sections of the bow and fades others, so one scene can give you several different images within a few seconds. He also removed the polarizer and shot a three-frame horizontal panorama to gain room on both sides, then zoomed to 35mm for tighter frames of the ridges. Facing away from the sun meant none of those needed exposure blending.
The geometry of a fog bow explains why the hunt took so much walking. Like a rainbow, it centers on the antisolar point, the spot directly opposite the sun, which is where the shadow of your own head falls. Its radius is close to the 42 degrees of a rainbow, so the full arc spans more than 80 degrees of sky. On a full frame camera, a 16mm lens covers roughly 97 degrees horizontally, just enough to hold the whole bow with a little room at the edges. Because the droplets in fog are so small, the colors spread and wash out, which is why most fog bows look nearly white and a saturated one is worth running for. The light in any rainbow is also strongly polarized along the arc. Rotating a polarizer will darken the part of the bow aligned with the filter's angle and leave the rest bright, and you can use that effect on regular rainbows and even sea spray. When you see a bow, put the sun at your back, find your shadow, and move until something interesting sits in the line between you and the arc.
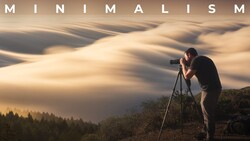
Once the fog thinned, Shainblum moved into the trees with a 100-400mm lens at about 100mm, picking out small sections of forest at f/16 with short long exposures on a tripod. At the next sunrise, the fog rolled through a valley and revealed small groups of trees for a few seconds at a time. His settings there were simple: ISO 100, f/6.3 because everything sat at infinity, and whatever shutter speed gave a proper exposure, with the self-timer on to avoid shaking the camera. He suggests shooting several variations of each scene. A frame you've locked in at 2:3 may lose something when you crop to square, 8x10, or 16:9 later. For time-lapses of moving fog, he uses a 1-second interval and lets the camera fire off 400 to 500 frames.
On the drive down the mountain, light rays broke through the fog and the trees, and he stopped to shoot them. He stacked an ND64 and an ND1000, about 16 stops combined, to get a 30-second daytime exposure. Smoothing out the texture of the fog can make the rays easier to pick out, so he shot both short and long versions to compare. His last sunrise brought low fog to the Golden Gate Bridge. From one exact spot, he lined up the Transamerica Pyramid inside the bridge's frame, with backlighting that flattened the city into simple graphic shapes behind the vertical cables. He had tried for that image at night, at twilight, and in different weather over many years. He then switched to a 10-stop filter for a smoother take and moved closer to the bridge for tighter abstract frames of the north tower and cables at 200mm and 400mm.
Shainblum lines up the Transamerica Pyramid inside the Golden Gate Bridge near the end of the video.



Join the Fstoppers community for free
-
Post comments and join in the discussions
-
Browse the site ad-free
-
Share your work and get featured in the community
-
Compete in the photo contests for fun and prizes
1 Comment
Fantastic images. My favorite is the full band of fog at the 3:10 mark in the video. The bridge picture is awesome too. I prefer the shorter exposure with a bit more texture in the fog.