
Hasselblad was one of the first that used super resolution techniques. Today it can be found in many cameras, producing resolutions that are up to four times higher than the pixel count of the sensor. You can also do this with your camera. This is how it works.
The Olympus OM-D E-M5 II used the super resolution technique to make a 40 megapixel photo with a 16 megapixel sensor. For this it shot a series of images in a row, and shifted the sensor a little bit between each shot. By adding these images in a very smart way, the resolution is increased. Today the technique is found in a lot of cameras, making it possible to end up with amazing resolutions.
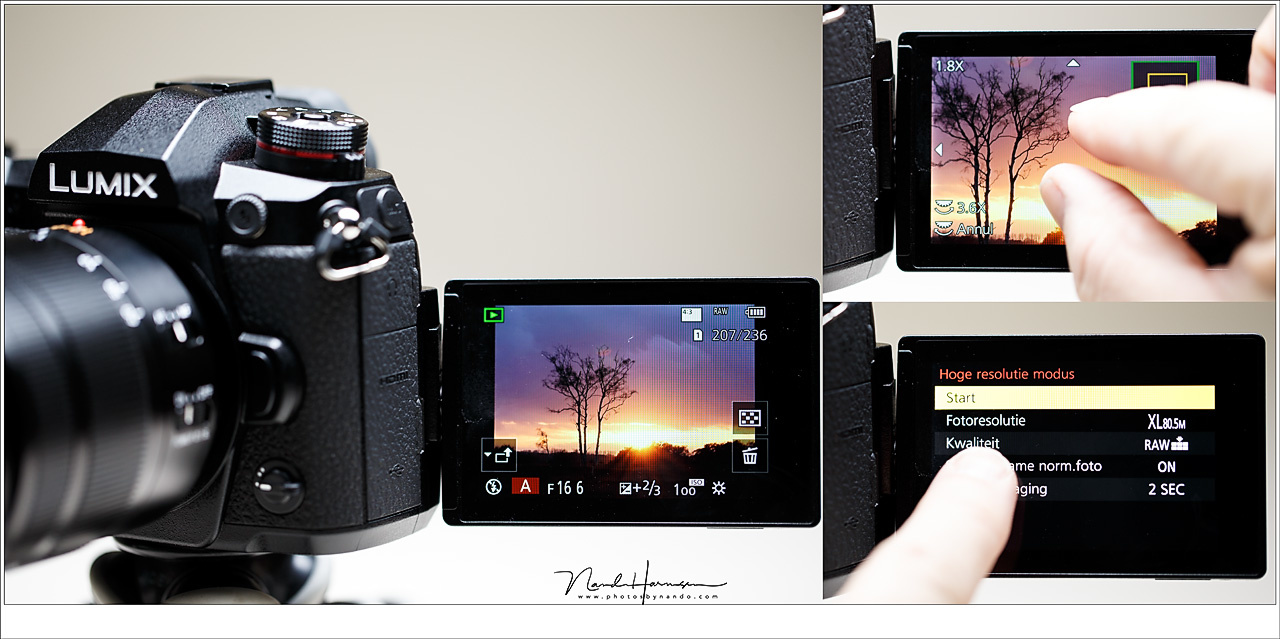
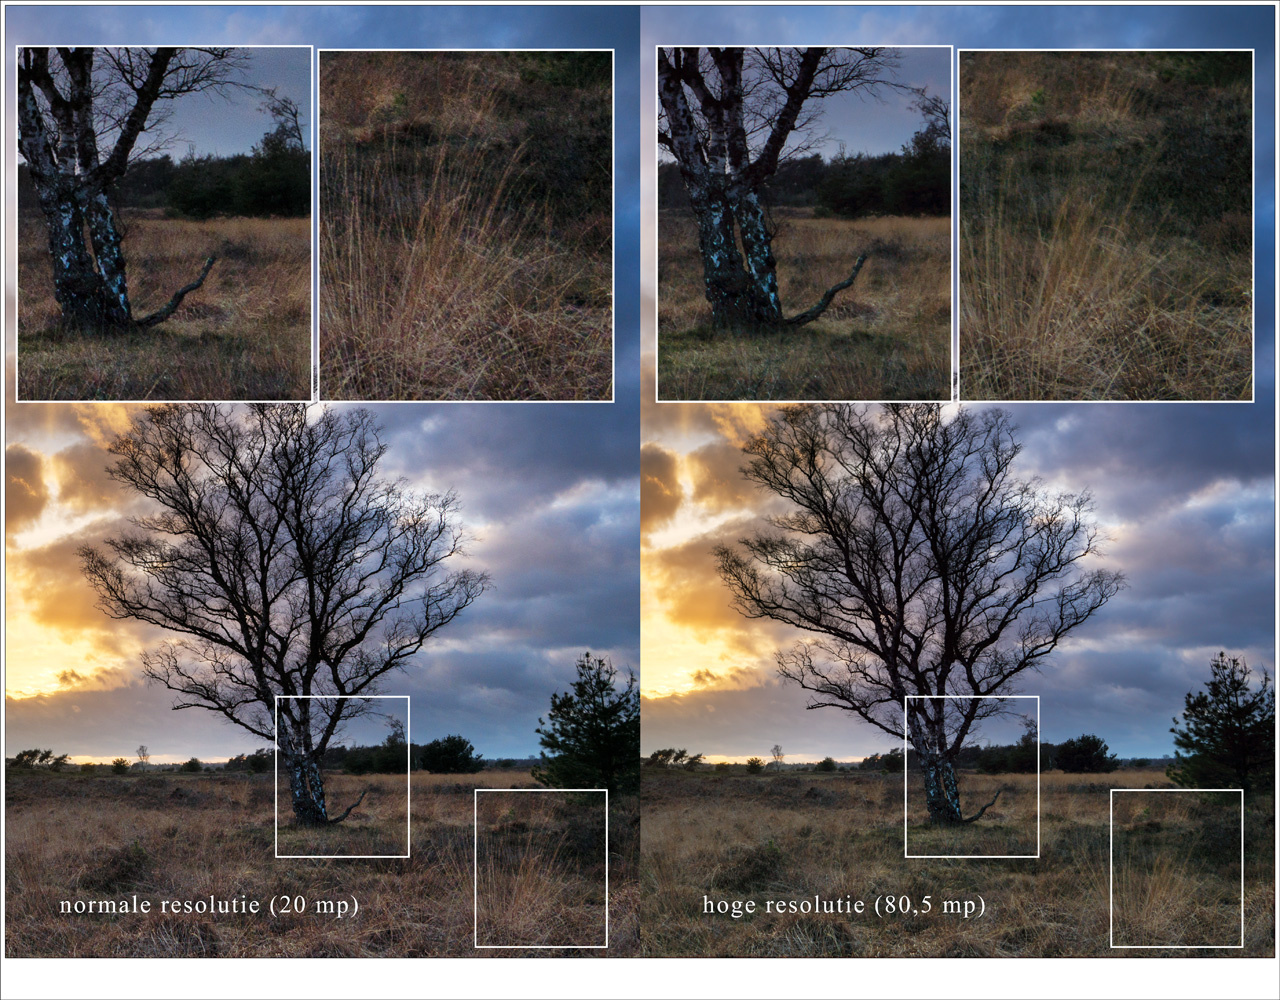
The Panasonic Lumix DC-G9 has the opportunity to shoot with super resolution. You end up with an 80,5 megapixel photo.
There is a way to achieve this with any camera, regardless if the technique is incorporated or not. It makes use in the same technique I previously explained in my article about making long exposures without the use of neutral density filters. You just have to take a series of images of a location. There are a few things to consider, but I will address those at the end of this article. For this technique, you need Photoshop or any other program that has the ability to use layers and smart objects.
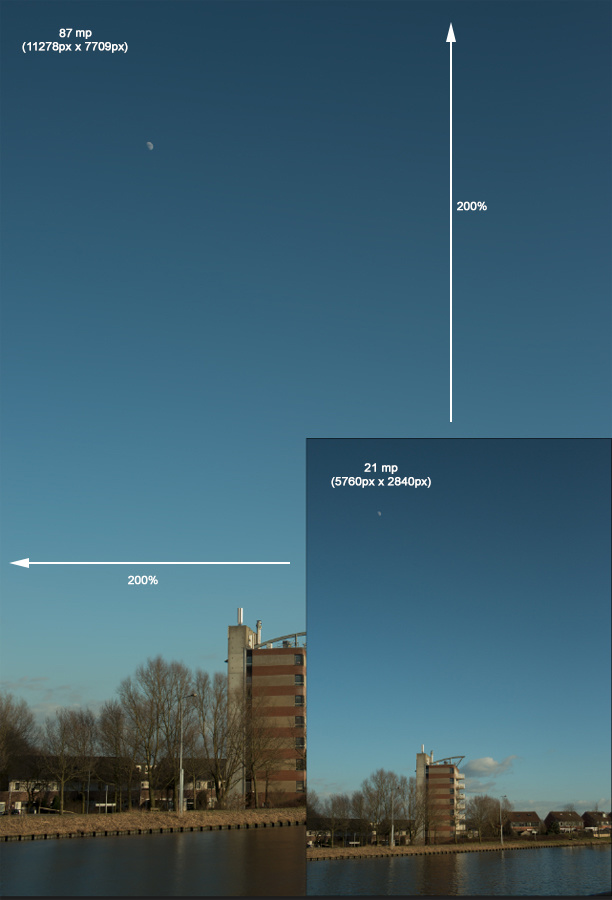
This is what you can achieve with super resolution; a 21 megapixel sensor can produce a 87 megapixel image without loss in detail.
Shooting the Images
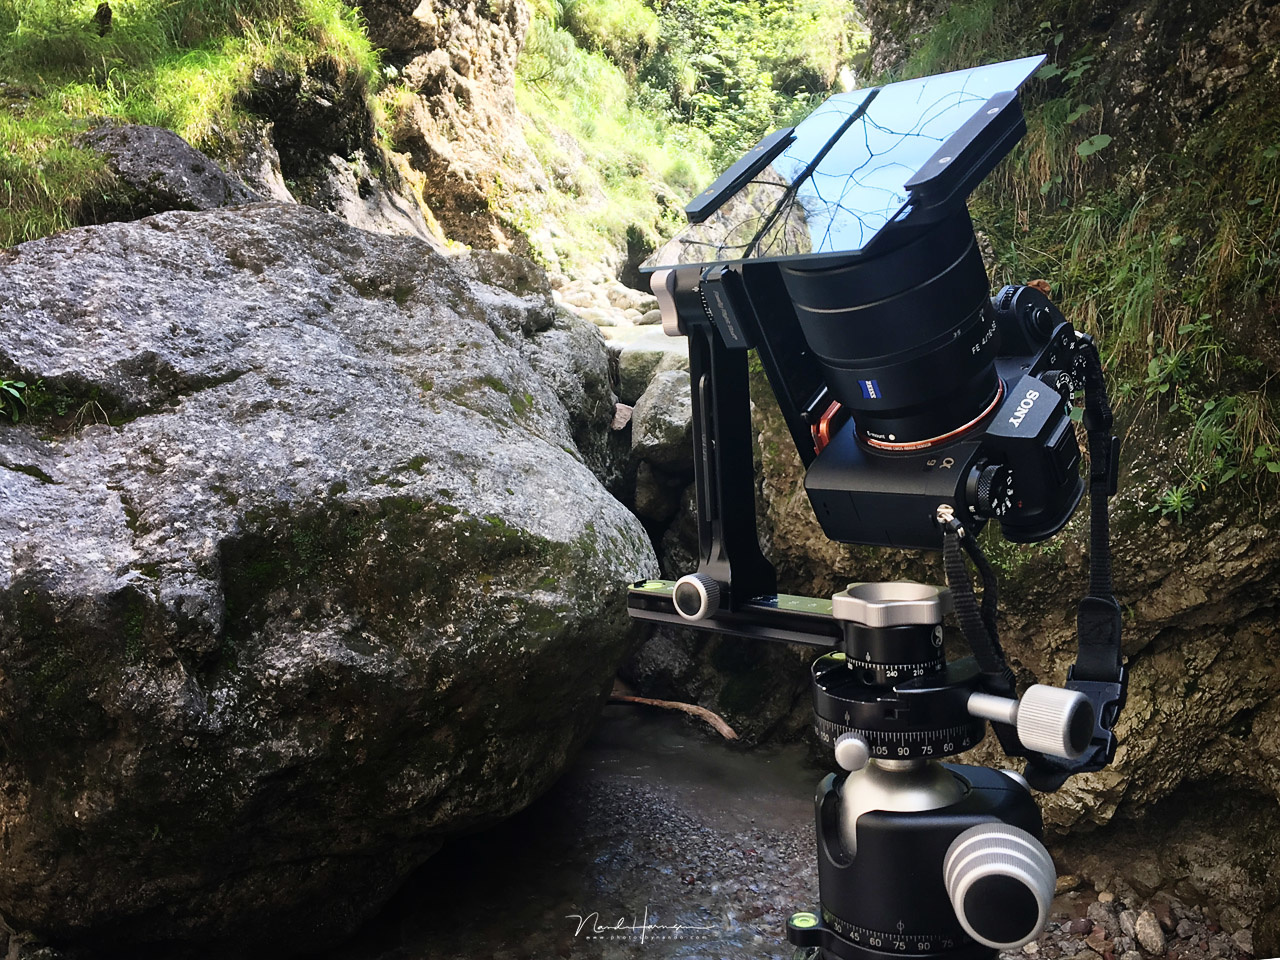
For this technique you can use basically every camera available, but I want to advise a camera that can shoot series. There is one thing you have to keep in mind; don’t use a tripod. You need to shoot by hand because the technique is based on the shift between the series of images. But you can use image stabilization of course.
When shooting a scene, it is advised to keep the ISO level as low as possible, and use an aperture between f/5,6 and f/11. A raw file format gives the best result, but you could also use jpeg if you like. Make sure the shutter speed allows for images without motion blur, because you need to shoot without a tripod. Set your camera on continues shooting and make about 20 shots of a scenery. The more, the better. But don’t exaggerate. Twenty shots should do the trick.
Post Processing the Images
When you have imported these similar shots into your software program, you need to perform exactly the same post processing on these twenty images. Just do your thing on the first one, and copy the setting onto the other nineteen. I use Lightroom for this.
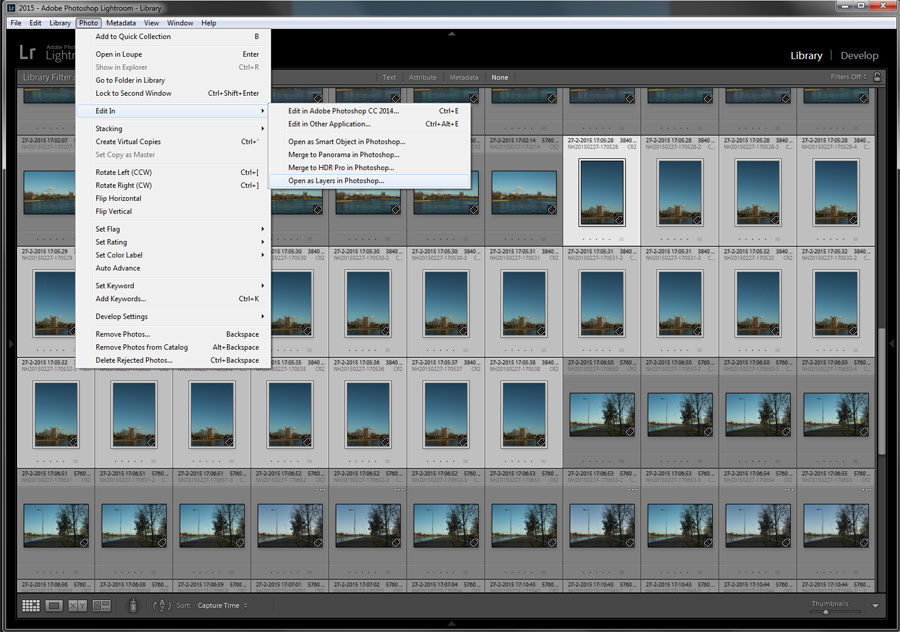
Make sure all images get the same post processing before loading all images as layers in Photoshop. With Lightroom the steps are easy but you can do it manually also.
After you are done, open all images as layers in Photoshop. Using Lightroom for this is the most easy way; just select the images in Lightroom, right click with the mouse button and choose “edit – open as layers in Photoshop”.
After the images are imported as layers, you need to increase the resolution of your image. Choose “Image – Image size” and set the width and height to 200%. This way your image will become four times the original size. Make sure the method of increasing is “nearest neighbor (hard edges)”.
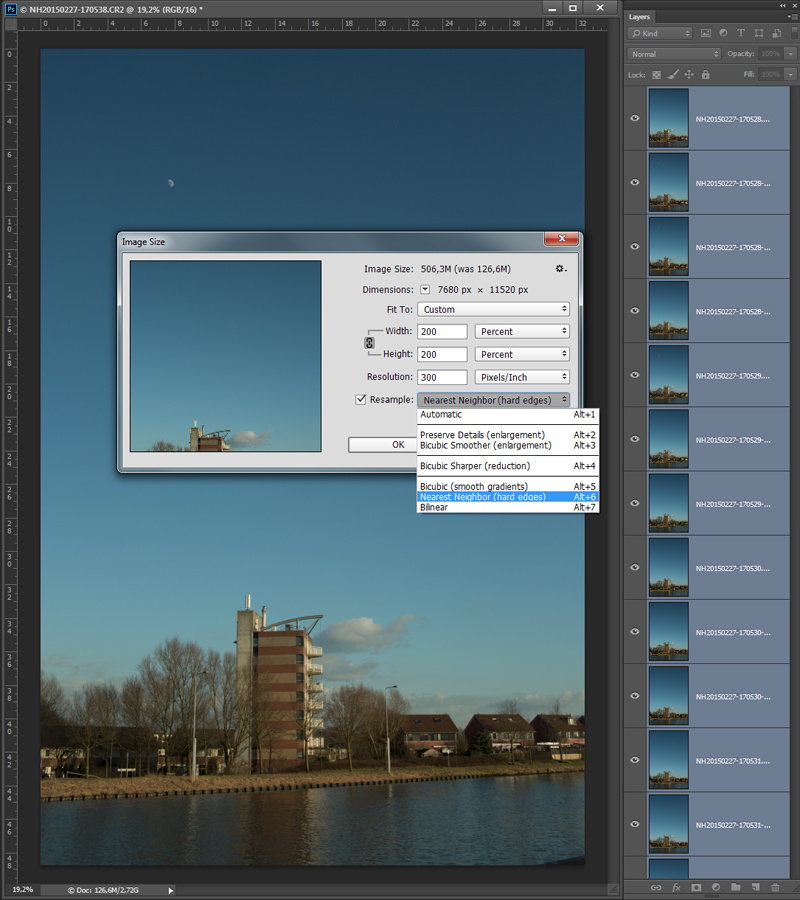
Something you normally wouldn't do: increasing size to end up with an image that has four times the size as the original. Make sure the settings are correct
After that, you need to make sure all layers are perfectly aligned. This can be done by selecting all layers and choose the option “edit – align layers”. Don’t let Photoshop correct any vignetting or geometric distortion. You need to turn this off.
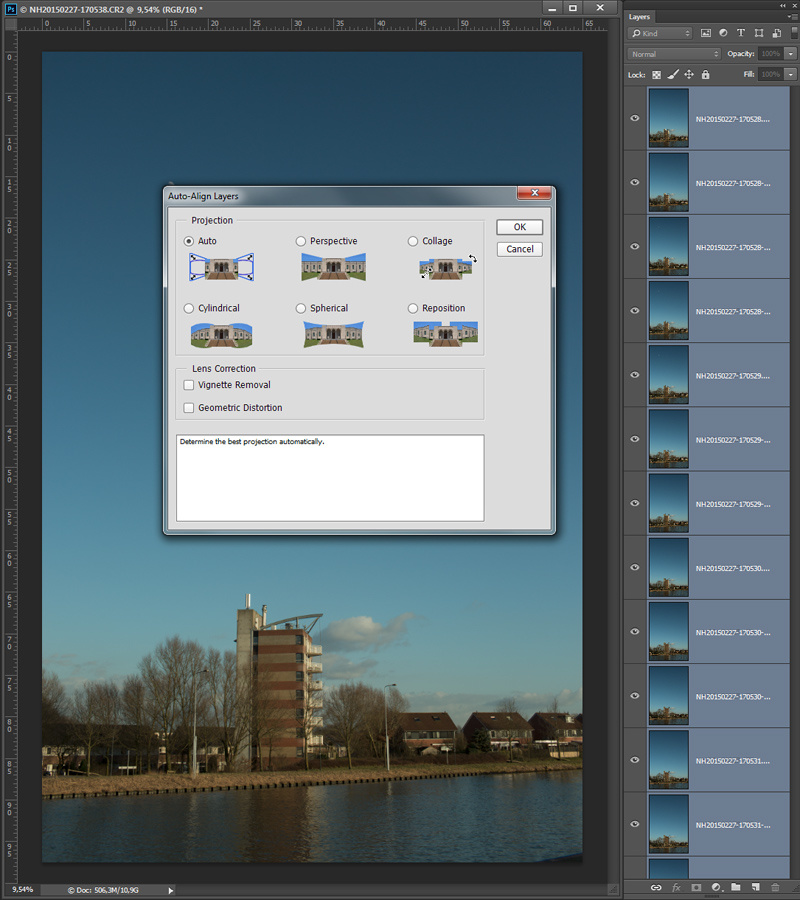
It is important to align all layers. The result depends on the details in the image. Sometimes it isn't possible.
Check if all layers are perfectly aligned by turning off every layer for a second. Throw away any layer that is not aligned perfectly. If the layers are not aligned, you need to try aligning again. If it still doesn’t work, consider using another photo.
After you’re done, you can start merging the layers. The most easy way is to make a smart object from all the layers, and stack the smart object the the median method. The option can be found in the layers menu, under “smart object – stack mode”. It may take a while to finish, but when it is the image is ready.

Make a smart object of all the layers if the alignment is correct. When that is done, you can stack the smart object with the median method. This can take some time to finish.
To prevent a very large file size, I would suggest to rasterize the image, thus making it one normal layer, and use the crop tool to get rid of any unwanted borders. If necessary you can level the image also. The last step I can recommend is sharpening and you have an image that is roughly four times larger than the resolution of your camera. With the Canon EOS 5D mark III (20 megapixels) I ended up with an image that was about 87 megapixels.
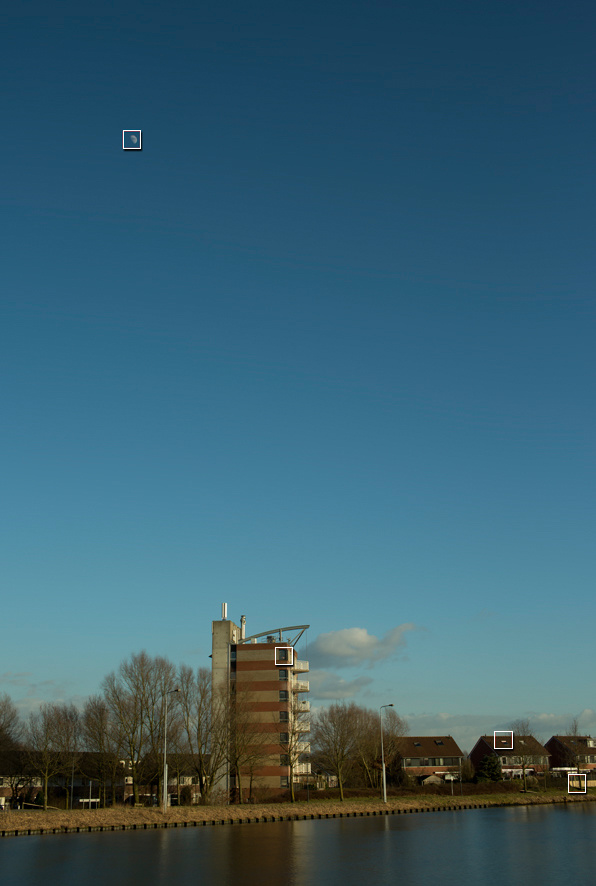
The end result of a super resolution shot. This cannot be seen in this size, but I have enhanced the fout squares to see the difference with a normal resolution
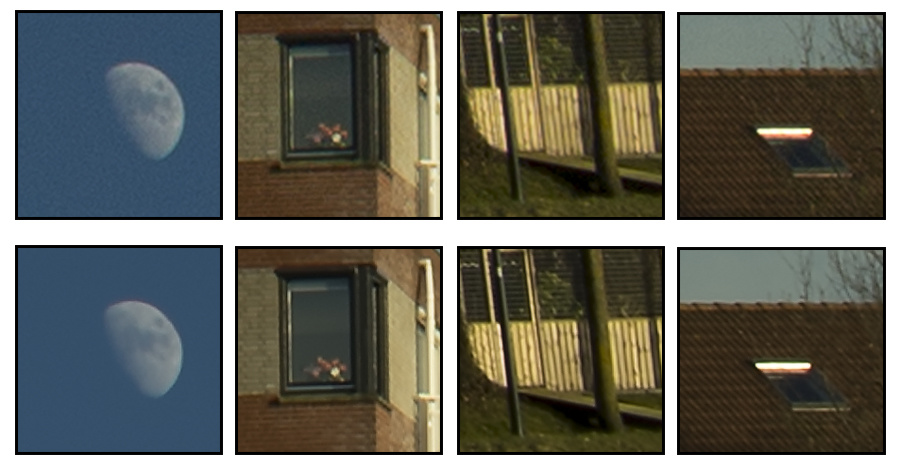
A comparison of a normal resolution and super resolution. The top images are from the normal resolution, the bottom from the super resolution.
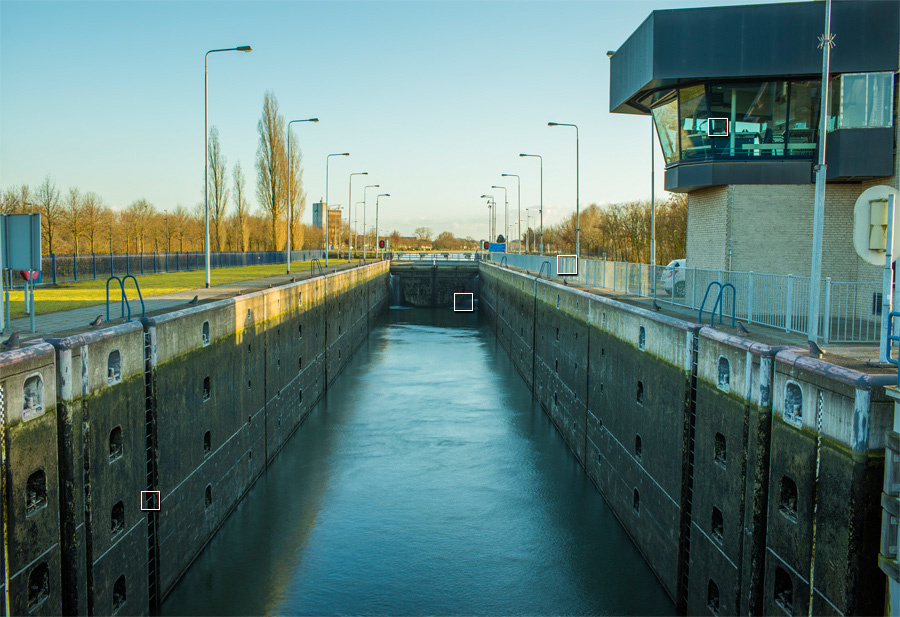
Another example of a super resolution image. Again, the four squares are enhanced in the next image to see the difference.
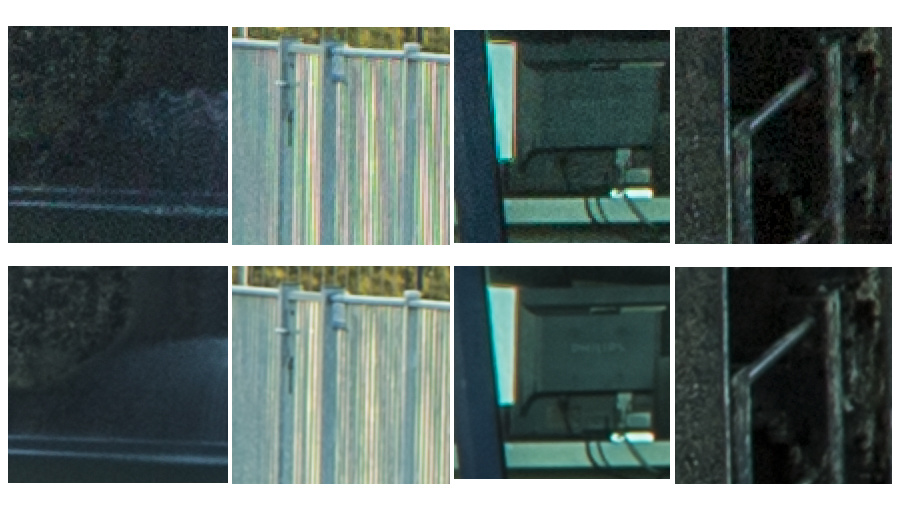
The top images are the normal resolution, the bottom images the super resolution. You can see a increase in resolution as well as a reduction in noise levels.
There is a nice benefit from this method. The stacking of many images will reduce the amount of noise significantly, making the image really clean without the loss of detail you get from a normal noise reduction.
If your software doesn’t have the ability to use smart objects, but it has layers, you can also do the merging manually. You can reduce opacity of the layer stack in the following method: bottom layer, 100%; next layer, 50%; next layer, 33%, next layer, 25%; and so on. The percentage can be calculated by dividing 100% by the number of the layer. So 100/1; 100/2; 100/3; 100/4; 100/5, and so on. After you’re done, merge the layer stack and you have the same result.
A Real Panorama
Of course you can also make use of a panorama to end up with a higher pixel count. But often you need a nodal slide to get rid of any parallax, and it takes more time to shoot. But you can do that also by determine the composition you want, and shoot that scene with a focal length that is at least 4 times longer. Or more if you want. This way you can do crazy things like making a gigapixel photo, something that cannot be done with the super resolution method I showed.
Shooting a panorama can increase the resolution of the end result enormously. Some people can produce a gigapixel image by shooting a panorama with a large telelens. This is a simple setup for a 360° by 180° panorama
When Your Camera Has Super Resolution
As I mentioned, some cameras have the ability to shoot super resolution. In that case the camera does all the post processing for you. I had the opportunity to test this function with the Panasonic Lumix G9, that offers a super resolution of 80,5 megapixels. And the beauty of it, Panasonic also produces a raw file. The image shows a lot of details, and the noise levels are also reduced due to the stacking. But the method has its down sides.
The Panasonic Lumix DC-G9 has the ability of shooting in super resolution. But you have to be careful with movement in the frame. That will produce a local blur as can be seen in this example.
Downsides of Shooting Super Resolution
The main downside of this method are movements in the scene you are shooting. Any object that is moving will result in a blur. Even clouds, water, and branches or twigs will result in a blur. But for steady object you can get amazing results. The only question that remains is; do you really need that amount of resolution for your images?
Have you ever used super resolution and if so, what do you think of it. Would you try this method, or do you think it is useless? I would love to read your thoughts in the comments below.


Fractal Interpolation. Nothing new, it's been around since the 70's when NASA got back digital images from the Voyager I & II probes, and Russia with the Venera probe back in the 60's. I just wish manufacturers would stop pretending like it's a new thing that they discovered. Hell, even Windows 95 used Bilinear interpolation in it's photo viewer. Anyway, unless you want billboard sized blow-ups, this war of resolution is rather pointless; how many photographers have hardware capable of tapping the full potential of over the top high resolution, let alone the software to render such images? There is a thing as too much of a good thing. Maybe it'll be relevant in a few years.
And only when prices and the wow factor decrease.
Nothing new, for those who are aware of this fact. But most (modern) photographers do not know this is possible.
Well, I agree it is unnecessary to bumb up the resolution even more. But for those that want to, it is a nice possibility, wouldn't you agree?
The stacking method mostly just reduces noise and moire, at least in my testing. I was able to see a little improvement in sharpness when using low megapixel cameras and high resolution lenses. The sensor shifting tech (like PIxelShift) really does improve detail and eliminates moire - but it's REALLY hard to make it work properly. I've never gotten it to work outdoors. Even indoors, it's hard to pull off unless you're in a basement with a concrete floor and a heavy tripod and nobody is walking anywhere nearby.
It's all a lot of work for not much improvement. Panoramas still work great and are pretty easy (even handheld), and do a better job of handling movement. They don't do anything for noise, though.
Totally agree. :)
[deletethis]
Olympus, Sony, Panasonic, Pentax, Hasselblad Multishot this is not. These images are not actually 80MP of detail, they're just 80MP in an interpolated file size.
The mentioned brands above give a noticeable, and often significant increase in resolving power when using their multi shot modes. This obviously does not.
Are you saying the Olympus, Sony, Pentax, Hasselblad do not use multi shot but just interpollation?
Not at all. They use it in conjunction with interpolation. For example, the Sony A7R3 just shifts pixels, but the output file remains 47MP in pixel dimensions. The Hasselblad H6D-200MS, along with the Panasonics and Olympus's will do the same, then interpolate that file up to whatever stated resolution.
Meaning... If you compare an "50MP Olympus Hi-Res" file, and one out of an actual 50MP like a Canon 5DS, the Canon will still resolve more detail, because it's not a supersampled 20MP file that's been blown up in camera.
I own and professionally shoot mainly Oly and Nikon bodies, and I love Oly's HR/Multishot modes in the M1X, but you can't expect the world out of it, and my D800E still outresolves it (but barely)
A lot of work for little gain.
True
Since the Pixel started it, many phones are stacking their images for better IQ. I'm still on a 7 Plus which doesn't natively stack, so I use the Hydra app and the results are terrific. But...1) it can only use the Wide lens; and 2) it doesn't remove ghosts. On the other hand, the Cortex Cam app does accommodate both of those things, but with a slightly smaller image that needs a minor sharpening goose.
As I understand it, this is what astronomy photographers do all the time, since they are forced into high ISOs due to short shutter speeds to prevent rotational blur.
80 MPixels and then print postcards…
Noooo, of course not. 80mp and more, and then to reduce size for Facebook
lol