
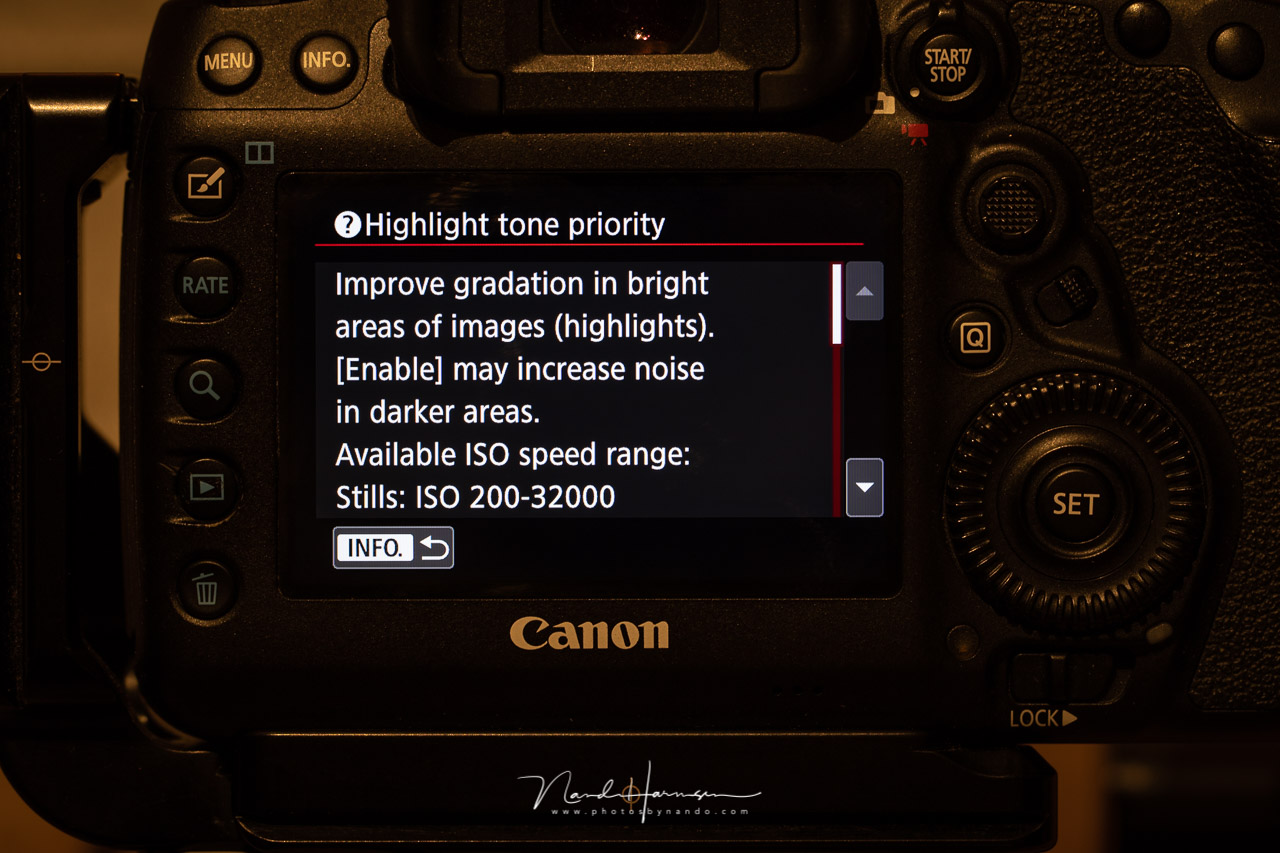
Most modern cameras have the option of highlight tone priority available. It will improve gradation in bright areas of the image. But does that function has any use when you are shooting raw images? Let’s find out.
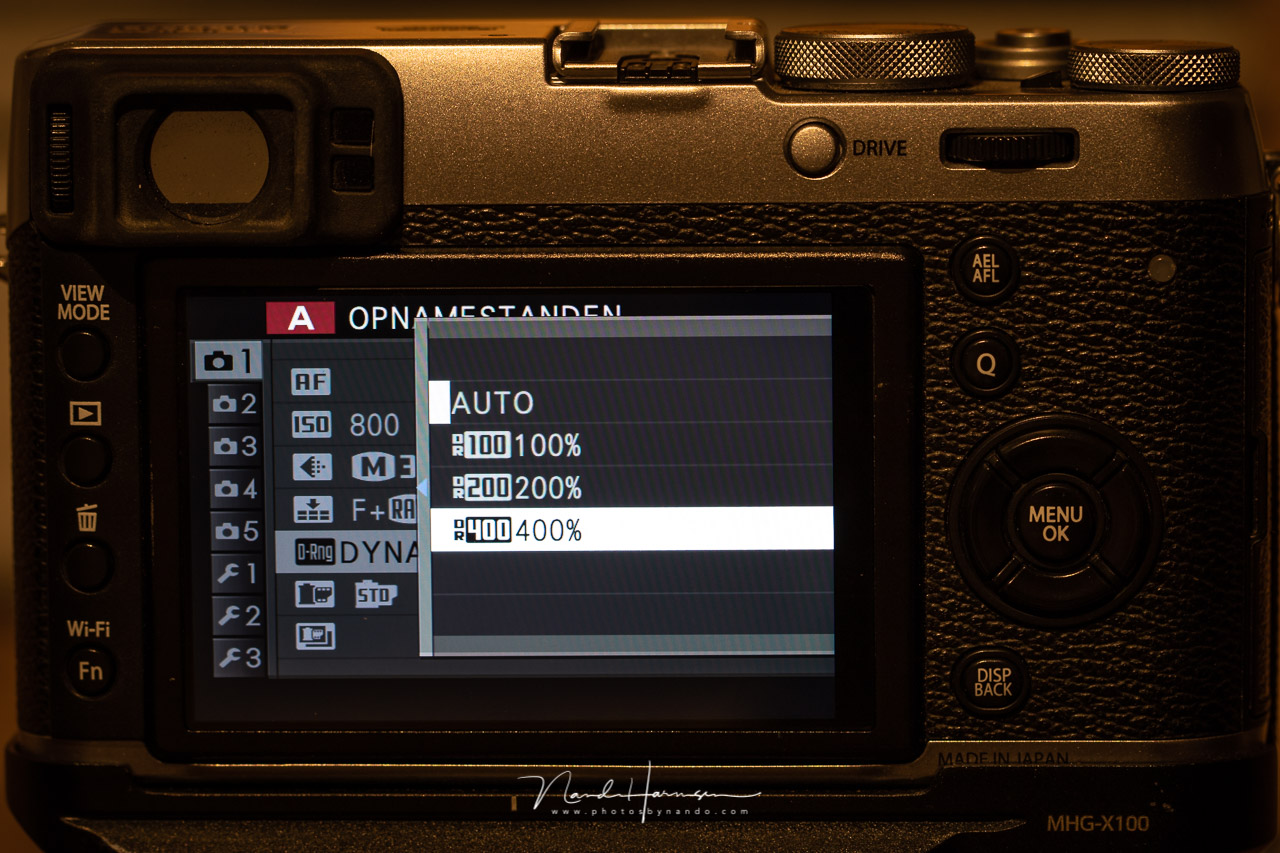
Every camera brand has its own name for improving the gradation in highlights. Nikon uses the term Active D Lighting, for Canon users it is called Highlight Tone Priority, and Fujifilm prefers to call it Dynamic Range. Other brands may have different names. No matter what it is called, it will preserve the highlights, if possible.
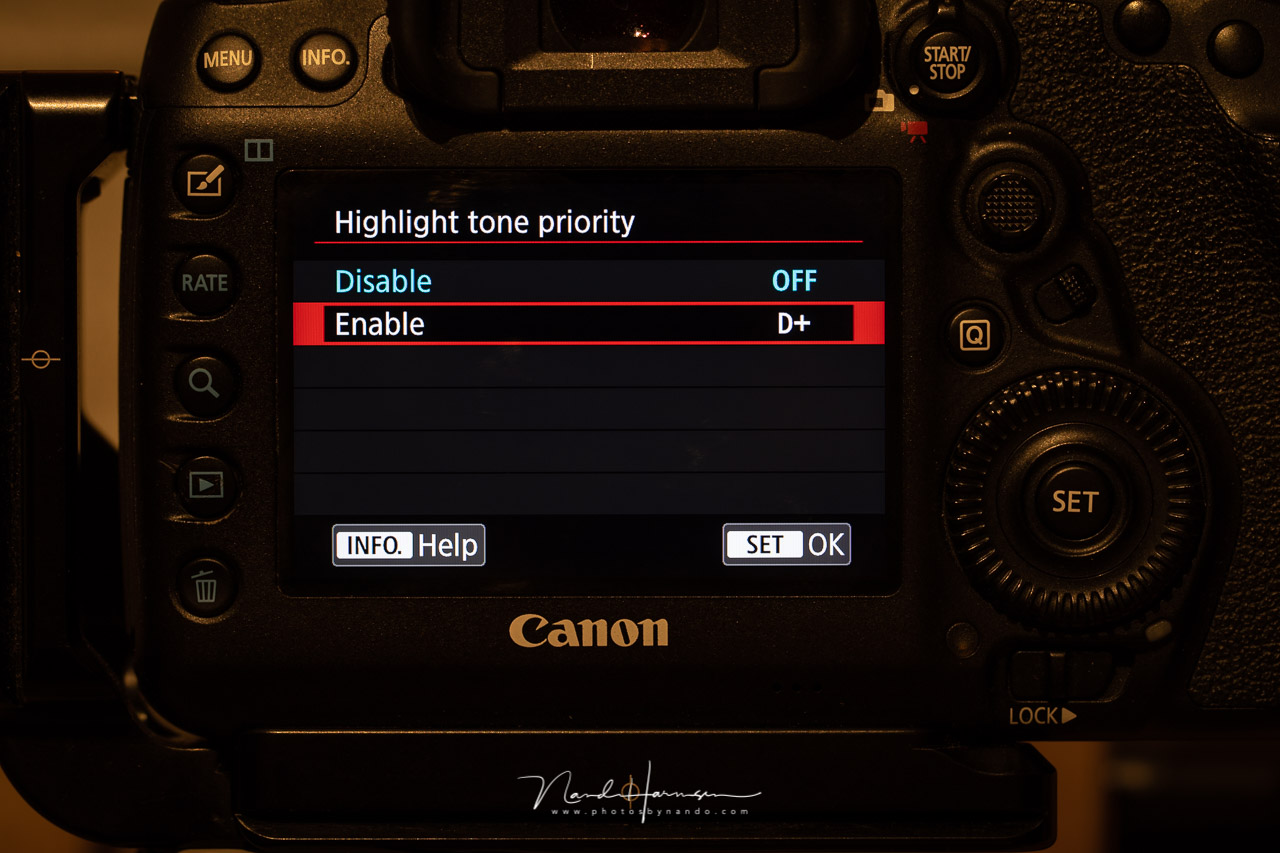
Not every camera will have the same options available. For Canon, it is just on or off. Some Nikons have different gradations to choose from. Fujifilm also has different options available. But no matter what brand you have, activating the option will have an effect on the lower ISO setting. With Canon, you will lose the option of choosing ISO 100. With Fujifilm, it will depend on the strength. The minimum setting, D200, will use ISO 400 as the lowest setting. D400 means you need to use ISO 800 as the lowest setting.
Canon warns what will happen when you turn on the highlight tone priority. The lowest ISO level is raised, and it tells you about the risk of an increase in noise in the darkest parts, of course. This might not come as a surprise, since it uses a higher ISO level, especially when you use the D400 option in Fujifilm, forcing you to use at least ISO 800.
An increase in dynamic range is nice, and it will help you to keep the brightest parts of your image within the dynamic range. But does it also work when you are shooting in raw? After all, when you use raw images, you use the unedited sensor data. At least, that is what we all think, that by using raw sensor data, the highlight tone priority would have no effect. Instead of believing this without any doubt, I decided to do a test.
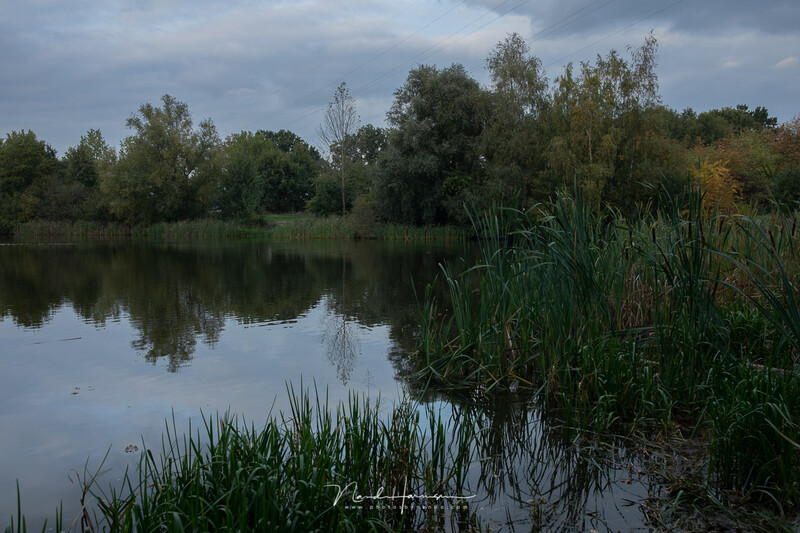
For this test, I used a Canon EOS 5D Mark IV and a Fujifilm X100T. I went out and shot a series of images of situations with fairly large dynamic range. I shot both in raw and JPEG, first in the normal mode and second in the increased dynamic range mode, as mentioned above, the Highlight Tone Priority (D+) with the Canon, and the Dynamic Range (D400) with the Fujifilm. I needed to use ISO 200 for the Canon and ISO 800 for the Fujifilm.
Shooting JPEG With and Without the Enlarged Dynamic Range Option Activated
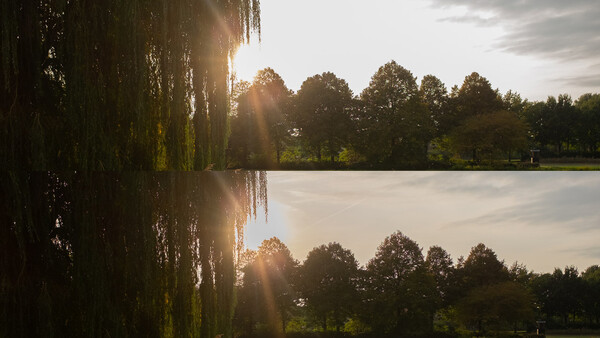
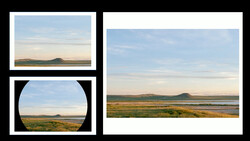
Below, you can find the unedited jpg files, only made smaller to fit the internet. On the left is the normal version, on the right is the increased dynamic range. I have mentioned all necessary information below every before/after image.
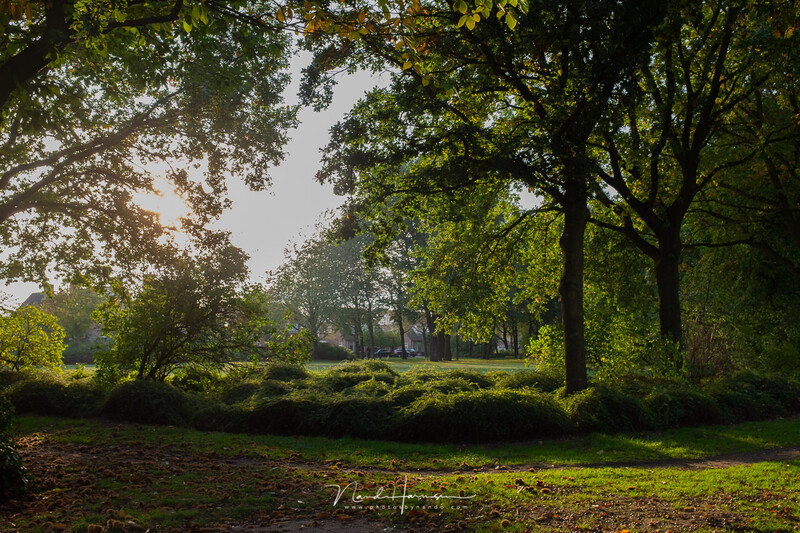
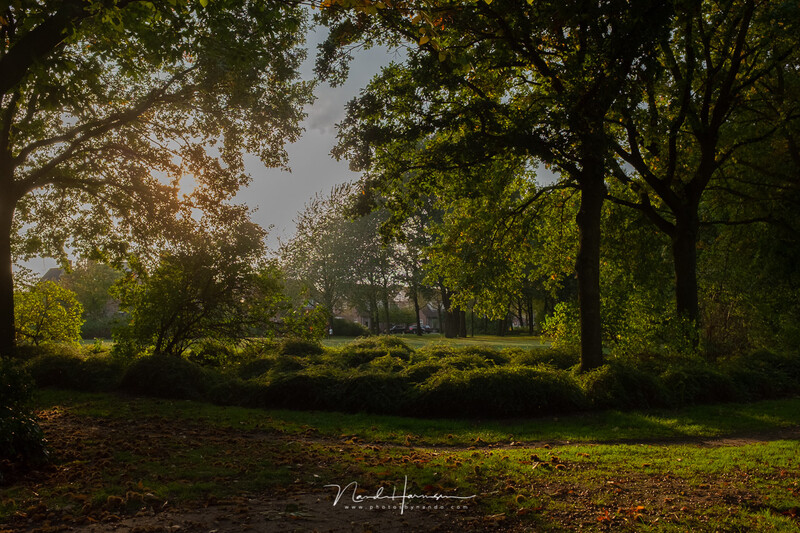
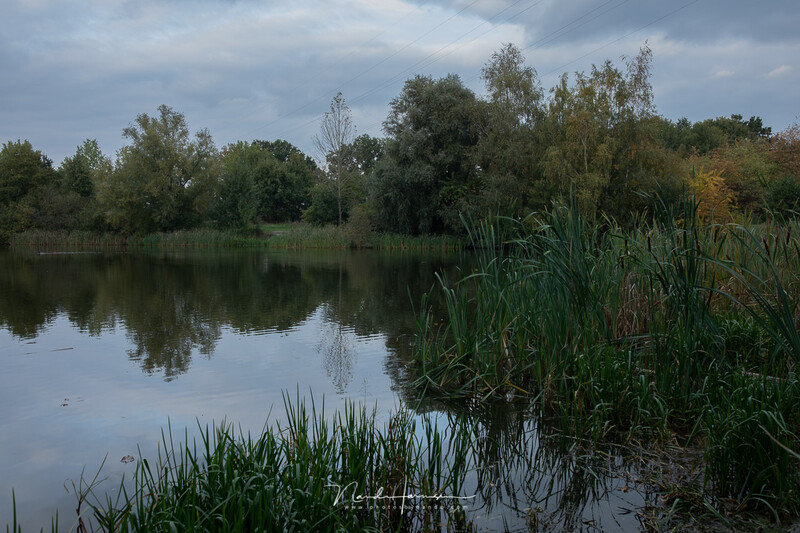
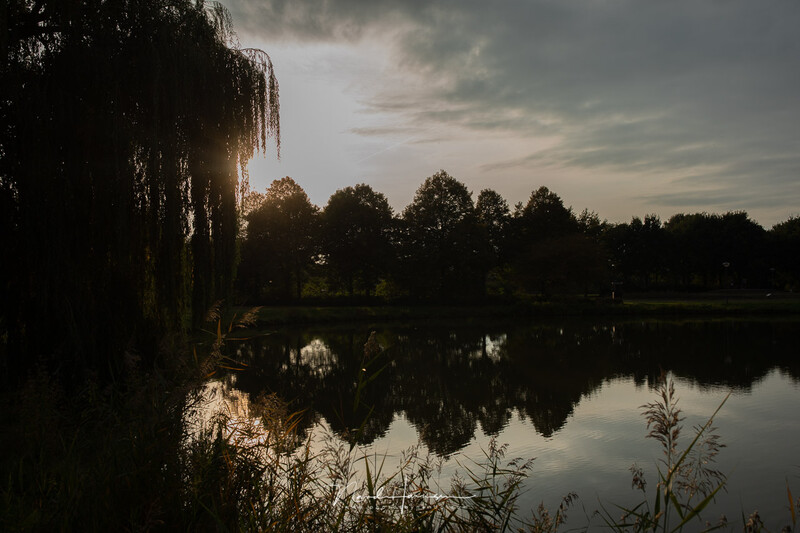
Left side is the D100 setting on the Fujifilm X100T, right side is the D400 setting. Both images are JPEG files. I used a manual setting of ISO 800, f/8, and 1/125 for both.

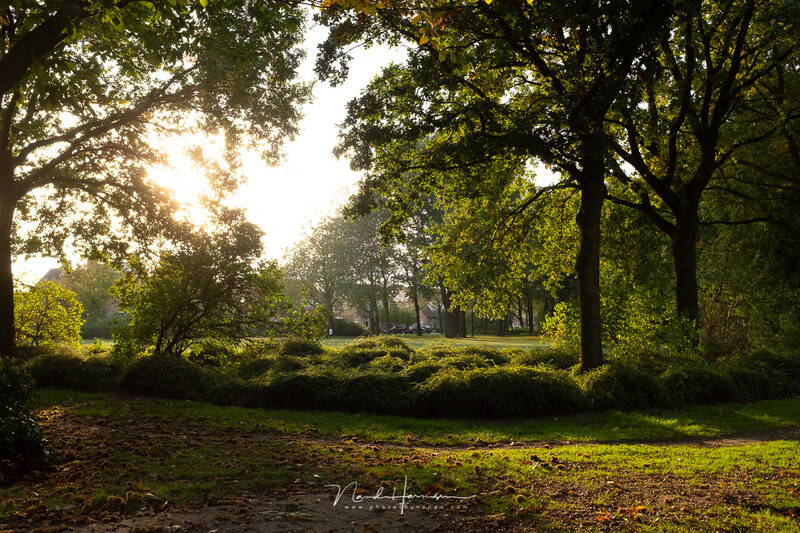
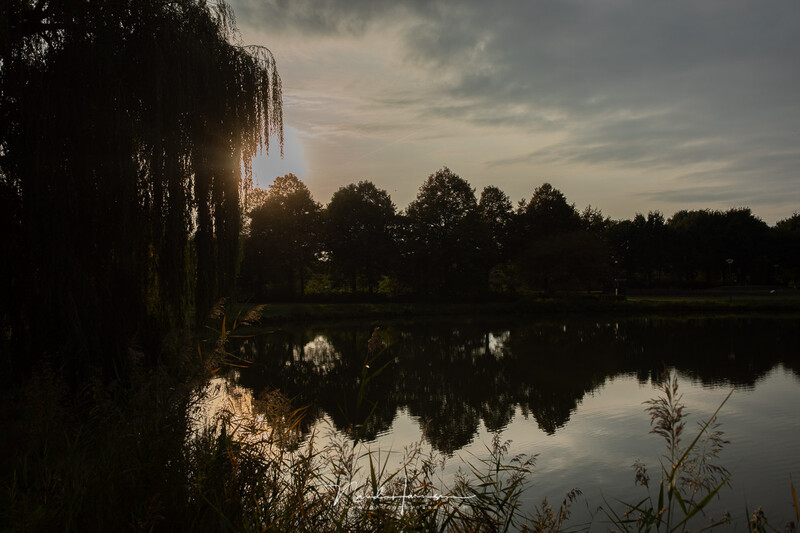
Left side is the D100 setting on the Fujifilm X100T, right side is the D400 setting. Both images are JPEG files. I used a manual setting of ISO 800, f/8. and 1/125 for both.
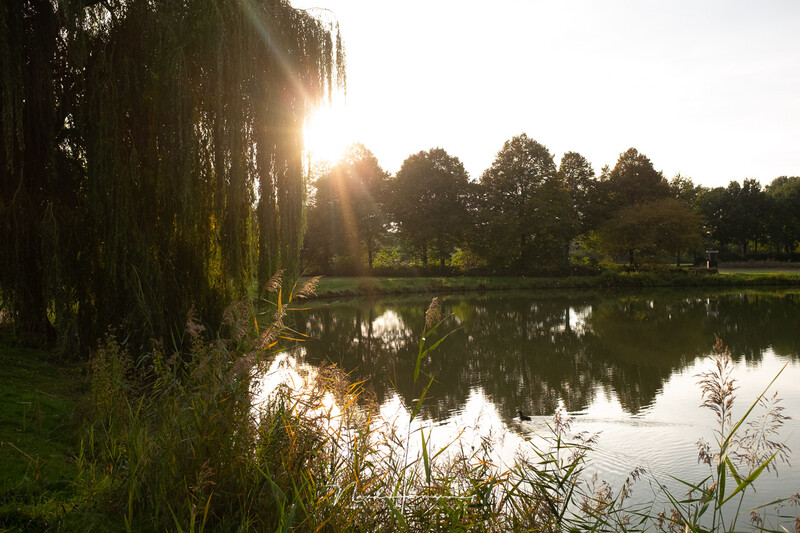
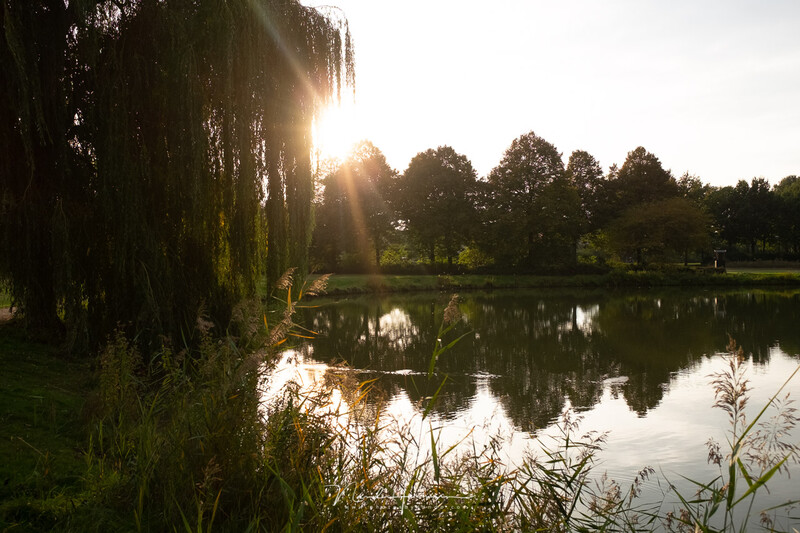
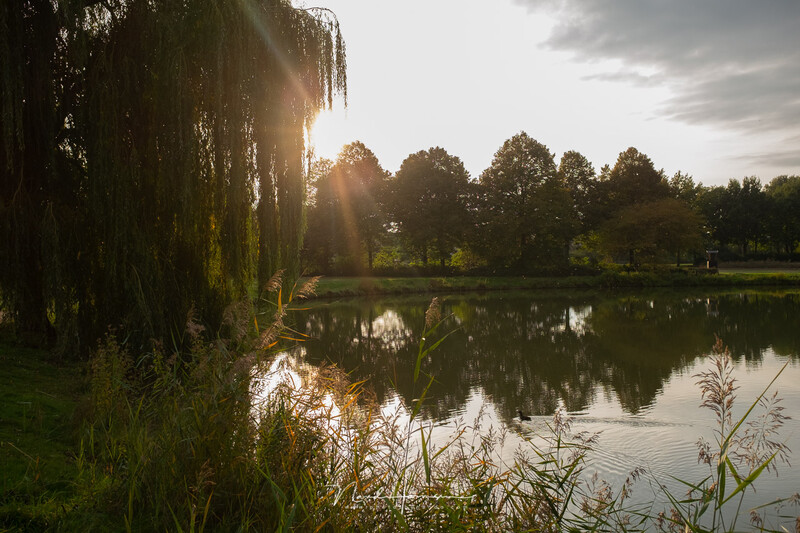
Left side is the D100 setting on the Fujifilm X100T, right side is the D400 setting. Both images are JPEG files. I used aperture priority with ISO 800, f/5 for both. The left one used 1/950 sec, the right side 1/1,250 sec.
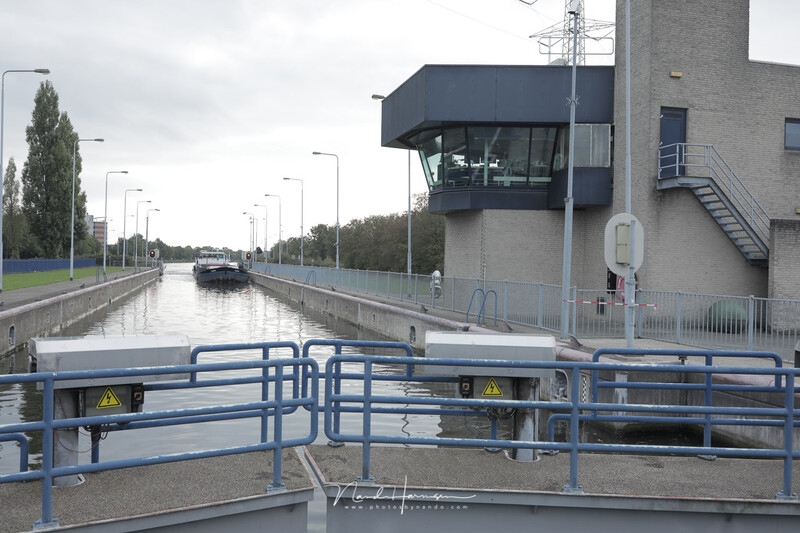
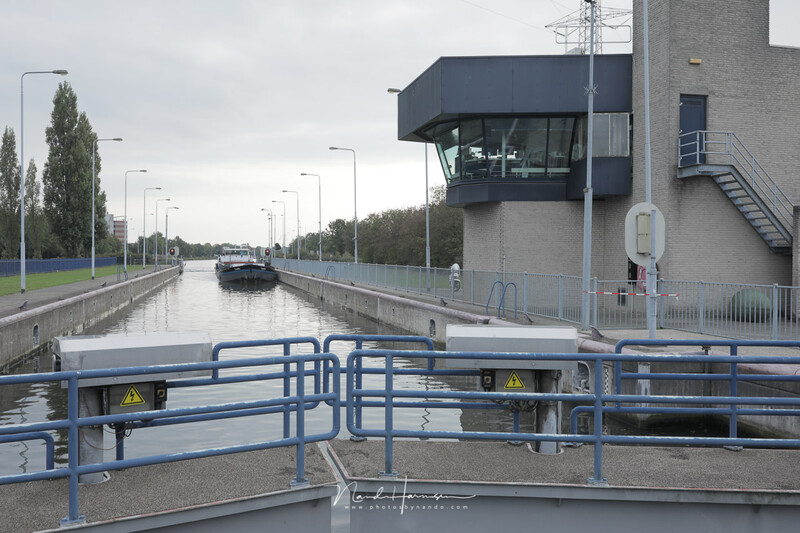
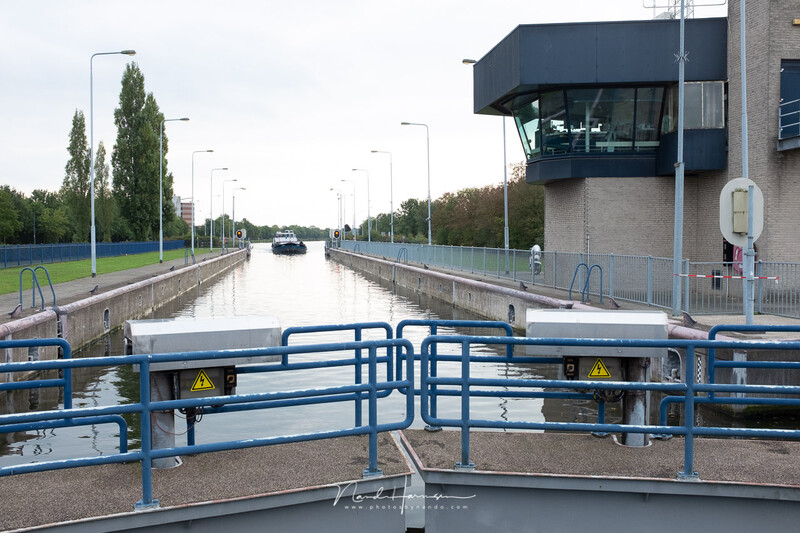
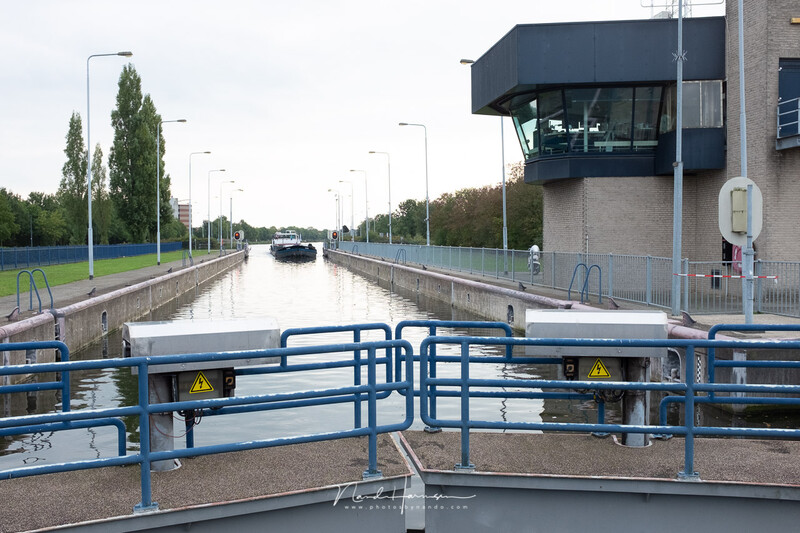
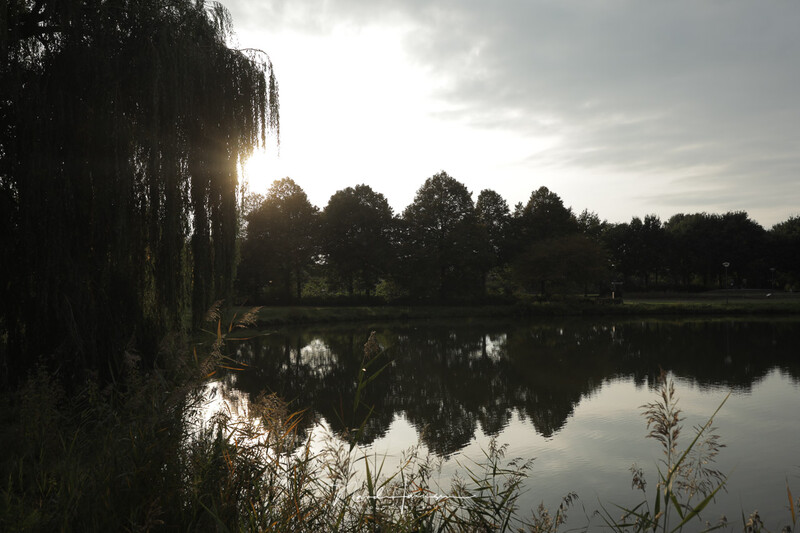
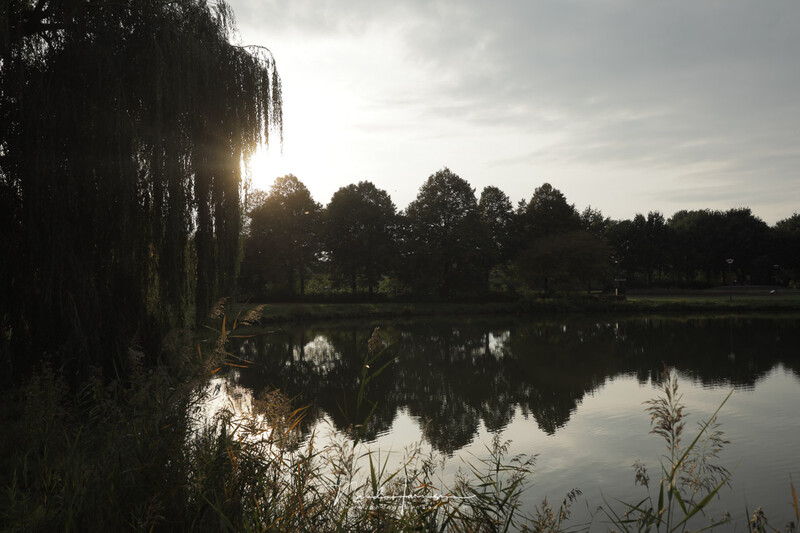
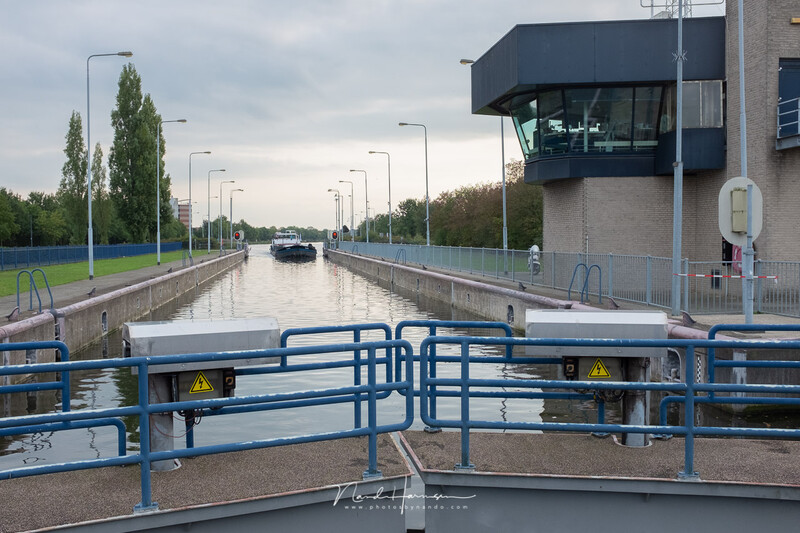
Left side is shot with the normal settings on a Canon EOS 5D Mark IV and the right side with the highlight tone priority (D+) turned on. Both images are unedited JPEG images, shot with manual setting, ISO 400, f/8, and 1/80 sec.
Left side is shot with the normal settings on a Canon EOS 5D Mark IV and the right side with the highlight tone priority (D+) turned on. Both images are unedited JPEG images, shot with manual setting, ISO 400, f/8, and 1/80 sec.
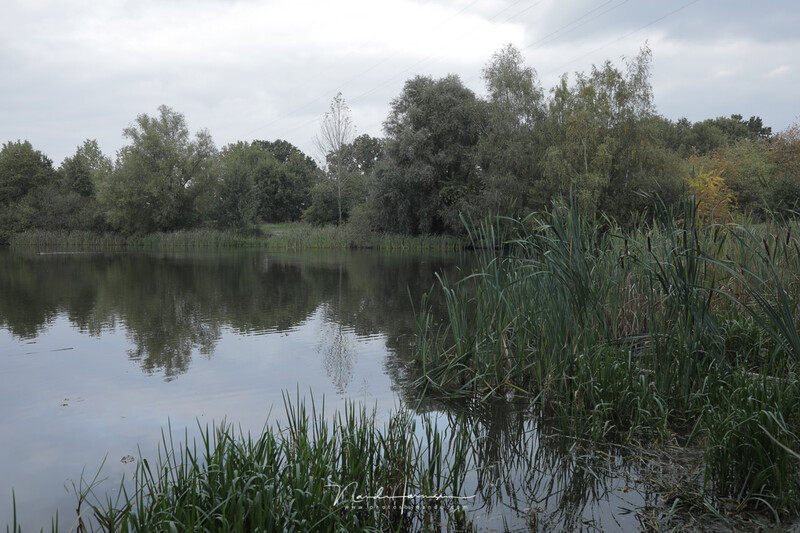
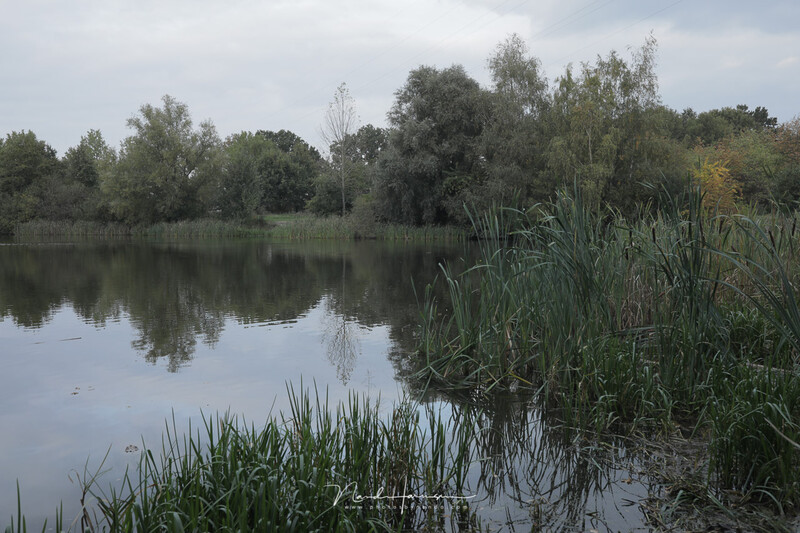
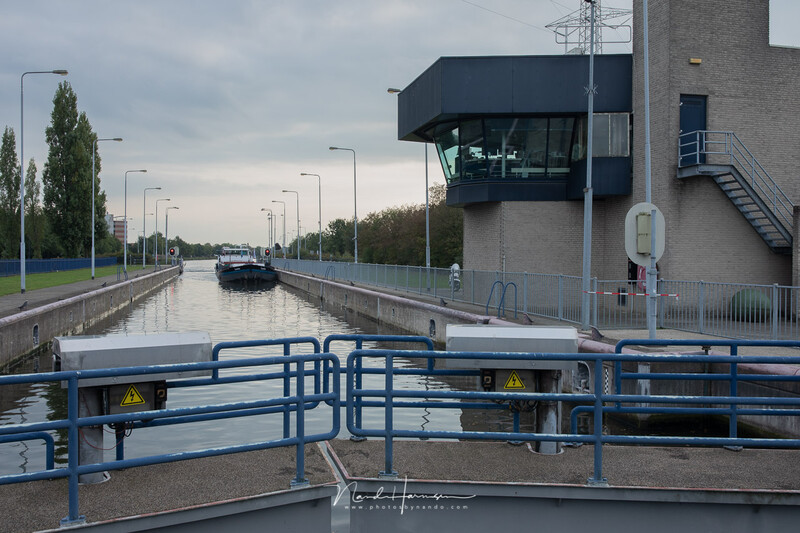
Left side is shot with the normal settings on a Canon EOS 5D Mark IV and the right side with the highlight tone priority (D+) turned on. Both images are unedited JPEG images, shot with manual setting, ISO 200, f/8, and 1/320 sec.
As you can see, increasing the dynamic range in the camera will have a positive effect on the highlights in the image. I have ignored any possible noise in the darkest parts of the image. That is not my intent. This comparison is just to see if the increase in dynamic range works and how well it works. Remember, it is a real-life situation, not a controlled laboratory environment. In other words, this is what you might expect when you would use this function.
Shooting Raw With and Without the Enlarged Dynamic Range Option Activated
Now, it is time to look at the raw images. I would expect these to be exactly the same, assuming the increased dynamic range would be something that is obtained when rendering a JPEG file from the raw sensor data.
For this test, I decided to do some post-processing in order to make the differences visible, if there were any. I used Lightroom to decrease the highlights and turn down the white point setting. This way, washed-out highlights would become easily visible. This is what I found with both Canon and Fujifilm.
The left side is the D100 setting on the Fujifilm X100T, the right side is the D400 setting. Both images are the edited raw files. I used a manual setting of ISO 800, f/8, and 1/125 for both and decreased the highlights and white point settings in Lightroom.
The left side is the D100 setting on the Fujifilm X100T, right side is the D400 setting. Both images are the raw files. I used a manual setting of ISO 800, f/8, and 1/125 for both and decreased the highlights and white point settings in Lightroom.
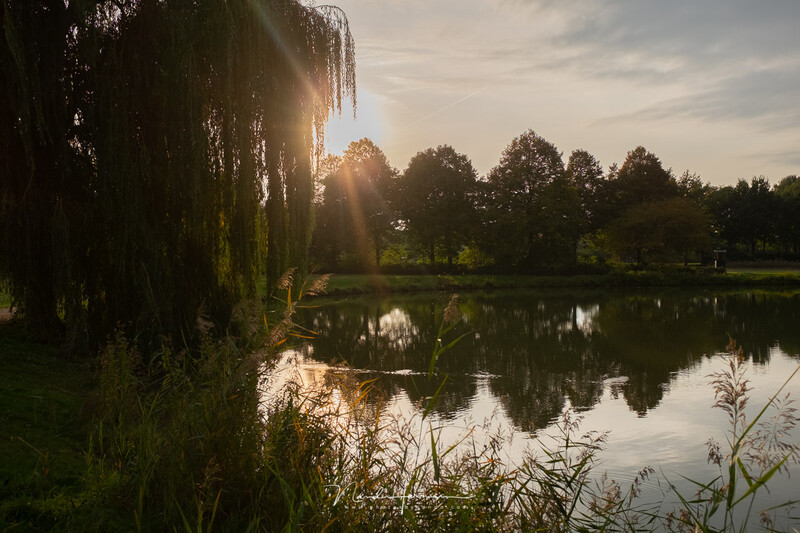
The left side is the D100 setting on the Fujifilm X100T, right side is the D400 setting. Both images are the raw files. I used aperture priority with ISO 800, f/5 for both. The left one used 1/950 sec, the right side 1/1,250 sec. I decreased the highlights and white point settings in Lightroom.
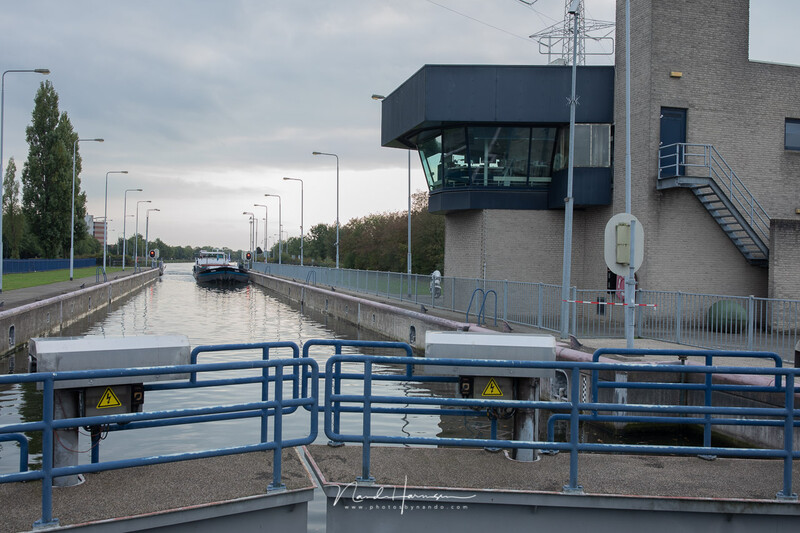
The left side is shot with the normal settings on a Canon EOS 5D Mark IV and the right side with the highlight tone priority (D+) turned on. Both images are raw images, shot with manual setting, ISO 400, f/8, and 1/80 sec. I decreased highlights and white point settings in Lightroom.
The left side is shot with the normal settings on a Canon EOS 5D Mark IV and the right side with the highlight tone priority (D+) turned on. Both images are raw images, shot with manual setting, ISO 400, f/8, and 1/80 sec. I decreased highlights and white point settings in Lightroom.
The left side is shot with the normal settings on a Canon EOS 5D Mark IV and the right side with the highlight tone priority (D+) turned on. Both images are raw images, shot with manual setting, ISO 200, f/8, and 1/320 sec. I decreased highlights and white point settings in Lightroom.
The Conclusion Surprised Me
As you can see, the highlight tone priority in Canon and increased dynamic range in Fujifilm also have an effect on raw images. This is something I had never expected. I had to check the files a second and third time to be sure I didn’t make any mistake.
I never used the Highlight Tone Priority with my Canon, believing it to be for JPEG shooters. I also believed it was just a way of how an in-camera jpeg is made from raw sensor data. Now I have found out it also affects the raw sensor data. When enabled, it will help you rescue highlights more easily.
You will be forced to set the ISO one, two, or perhaps three stops higher in order to use this function. Perhaps it will increase noise levels in the darker parts of the image, but with the amazing ISO performances of modern cameras, that won’t be a problem.
Do you use highlight tone priority for your photography, or did you believe it wasn’t of any effect when shooting raw? Please share your thoughts in the comment below. I am looking forward to reading about your experience with this.
If you're passionate about taking your photography to the next level but aren't sure where to dive in, check out the Well-Rounded Photographer tutorial where you can learn eight different genres of photography in one place. If you purchase it now, or any of our other tutorials, you can save a 15% by using "ARTICLE" at checkout.
Join the Fstoppers community for free
-
Post comments and join in the discussions
-
Browse the site ad-free
-
Share your work and get featured in the community
-
Compete in the photo contests for fun and prizes
28 Comments
Actually, at least in the case of Fuji's version (no idea about Canon), it does NOT affect the RAW file.
RAW data is RAW data. The DR mode is underexposing by X number of stops and artificially brightened - the underexposure protects extreme highlights, the brightening introduces noise in the shadows. Basic stuff.
The reason it appears to affect RAW files is because this DR mode is embedded in the metadata and most (I think?) editing programs append that metadata automatically when you open the RAW file. You can tell your software to not do this, usually.
I thought it was Canon basically combining a dual ISO image, using the lower ISO to protect 10% of the highlight range. I vaguely remember this discussion when it was introduced on the 5D III.
For the record, it does work but it's not a miracle worker with moderately high contrast scene but if the sky's going to go it'll go.
I have no idea how Canon's works. I know very little about their sensor tech compared to Sony sensors and have the least experience with their cameras compared to Fuji, Nikon, Sony, etc.
So you could well be absolutely correct on that note.
I am sure you're right, but I found out Fujifilm does add settings to a raw file that cannot be changed with Lightroom, and a lot of other software too ((at least they did with the GFX-50s). You often have to rely on open source software to get rid of those settings.
But tell me... if it doesn't affect the data, how come I cannot get the same result with the raw file without the DR setting? If the data isn't changed, I presume I would could recover the highlights just like the file with the DR activated
It comes down to clipping, once you lose data with digital it's gone. If you look at the levels you have less data to capture the nearer you get to highlights (RGB 255,255,255) which is why they clip faster. If you can save some of the data from there then you avoid the hideous jagged edges when rendering out the the RAW.
RAW has changed a lot, it's no longer a straight data dump from the sensor a lot of companies massage the data both from the camera processor and the actual RAW file. You can edit RAW files, as most of them are modified forms of TIFF with compression by using command editors as I've done with is Canon RAW files. So there's a lot of tricks now available with the increased power of the processors to present the 'best' RAW file. This has been most evident with Sony's files when they have changed the RAW files between firmware updates.
From Canon from when it first was introduced a decade ago:
Highlight Tone Priority (HTP) All cameras have a fixed dynamic range, from shadow to highlight, that they can capture. HTP shifts some of the available dynamic range from the mid-tones to the highlights to produce smoother tones, with more detail in bright areas. This helps prevent JPEG images with overexposed highlights that can’t be recovered. HTP is also useful to RAW shooters who process their images with Canon’s DPP software. Most third-party RAW processing software will not recognize Highlight Tone Priority. When the camera is set to HTP, the lowest available ISO will be 200. The HTP setting will be indicated by a D+ symbol in the LCD display. Avoid using HTP in low light or when shooting subjects with heavy shadows because it may cause more noise to appear in those areas.
The noise issue isn't so evident now, so either they have a better denoising routine or they are actually using a true dual ISO readout.
I understand this about clipping.
But I have the same exposure, with the same light situation. One with highlight tone priority enabled, and the other one not. It this setting is not of influence on the raw file, then how can you explain the clipping in the normal raw file, and no clipping in the raw file with highlight tone priority enabled.
This also applies for the Fujifilm images.
I did not know that about Lightroom (I don't use it, and for the record I don't even turn that setting off myself - you're right that it's usually 3rd party software).
To compare them and get the same result, the DR100 mode should have been shot at ISO 200 (-2 exposure compensation).
The DR400 mode is essentially doing that, but in camera - it's underexposing two stops to protect highlights, then artificially increasing the brightness (bumping it to ISO 800, basically, which is why noise creeps into the shadows in this mode). To mimic this feature, your RAW file should be underexposed two stops and then exposure raised two stops in post.
I think if you tried that, you'd find much more similar results (but they'd still probably vary somewhat because of how different software interprets metadata and how Fuji applies some of this stuff to the raw data and all that complicated stuff that's beyond my brain's understanding).
This explaination sounds good. I would have to try this comparisson. That would explain the difference between the two
I would definitely be interested to see this comparison. It's highly possible that there will still be differences, but in *theory* there should not be.
I kind of view that feature as an automatic exposure compensation for high dynamic range scenes. Instead of dialing in the exposure comp yourself, it's just automatic.
Some metering modes are similar, in a way, like Nikon's highlight priority, except they don't mess with the ISO.
Its how the Raw converters READ the metadata if it will read it or not..
Fuji shooter here. I know I'm way late to the party but you are incorrect, Matt. As you may know, any ISO higher than the base ISO involves amplification after the data comes off the sensor. (The data coming off the sensor is the same regardless of ISO setting.) The DR setting on Fuji cameras alters the way this amplification works. Instead of amplifying all the data by a constant factor, the X-Processor tone maps the data, amplifying brighter areas less to prevent clipping. All this happens before the RAW data is written to the file.
If you think about it, this makes sense. The system doesn't work at base ISO because there is no amplification to reduce for brighter areas. And the amount of DR recovery increases at higher ISOs because there is a greater difference between the amplified and unamplified signals. When you open up two images in your favorite RAW processor, one shot at DR 100 and one shot at DR400, the differences may not be immediately obvious until you start to edit the files and notice the increased latitude in the DR400 file.
I tried shooting with it some time beginning of last month, in a night shoot. When looking back at the photos however, I don't think that I really saw a lot of difference in either the RAW or the JPEG photos.
Unfortunately I didn't make notes of which photo was shot with or without and I don't think it's recorded in the EXIF data.
I didn't shoot with "Highlight tone priority" since then.
If you're a Canon user then you can their software to pull the settings from the metadata, I think it's DPP that has that ability but I rarely touch the Canon software unless I need to set up tethering or change IPTC data.
OK I'll have a look at that, I. barely look at DPP!
Well, it was night but there were also some bright lights. That's why I thought to give it a try.
Next I'll try it for some daytime photos. Thanks.
That's very interesting, thank you Nando for your time doing these experiments.
I'm wondering how well it will work for the R5 which is featuring Canon's first dual gain sensor (ISO 400 PDR = ISO 160 PDR, source: Photons to Photos PDR chart). So even if you enable highlight priority and go ISO 400 - you'll "theoretically" get less noise compared to ISO 200, AND preserve a bunch of highlights. I wish I had time to do some experiments myself!
I have the Canon R6 for a review now. I can try this also, see how it works
The R6 is slightly different. For some reason it has 2 bumps - one @ ISO 200 and another one @ ISO 400. I'm not sure if it is a triple gain sensor or just some kind of dark magic.
The ISO 400 bump is smaller compared to the R5:
https://www.photonstophotos.net/Charts/PDR.htm#Canon%20EOS%20R5,Canon%2…
Edit: you'll likely get outstanding results @ ISO 200. Just avoid the electronic shutter mode - the DR drops significantly (almost 2 stops!).
Are you serious? Two stops DR difference with electronic shutter?
That's the price you have to pay to get 20fps I guess :)
I doubt it has anything to do with 20fps, but the chart does show a decrease in DR. It would be nice to test this also (the list of tests is growing fast - hahaha)
It needs to read the entire sensor fast to keep up with 20fps, so it's likely switching to the 12 or 11 bit mode, but you're right - it's probably something else too...
I just checked the Canon website, and indeed; you're right. With full mechanical shutter it switches over to 12 bit. So does the R5.
Thanks for pointing it out to me
As you can see in my comparisson, you cannot get the same result with editing a normal image
I believe for Fuji’s case, regardless of JPEG or RAW, when DR100/200/400 modes are used, the extra highlight headroom is achieved by under-exposing the sensor during the exposure stage and in the amplification stage, the sensitivity/gain level of the sensor is amplified by 1/2/3-fold respectively. The penalty is increased noise in the shadow. So to achieve a better result, one should switch off DR modes, shoot at the lowest ISO and meter for the highlight and during post-processing, raise the shadow. At the lowest ISO, the ACTUAL dynamic range is the widest.
This is not so say the DR modes are gimmicks or a cheat. The Auto DR option in Fuji is actually quite convenient, when one is shooting in a rapid varying lighting condition, and feel uncomfortable to use the exposure compensation for each shot. In this mode, the camera decides to use the least aggressive DR modes when the scene allows. At the end, only a portion of the shots are using aggressive DR modes. So it’s a convenient tool. After all, noise in the shadow is less noticeable than clipped highlights.
Thanks for your comment. It would be nice to try this