
Spring has arrived, which means the time for gorgeous golden hour shoots in wonderful weather is nearly upon us. Sunset (and sunrise) are indisputably the most consistent crafters of amazing natural light for portraiture. The warm soft glow of the sun as it falls towards the horizon not only creates fantastic atmosphere but also some of the most flattering light that can be found. For portrait photographers the golden hour as the sun rises or sets is the perfect time to shoot.
Know Your Window
During a sunset shoot light can fade fast, so not only do you need to be prepared to adjust to rapidly changing lighting conditions, you also need to plan to complete the shoot before the sun is gone. Having a broad guess about when golden hour actually is will undoubtedly lead to feeling rushed. Always know your window. I like to use this fantastic website, which allows for me to search for my location and find out the exactly start and end of twilight which is effectively my shooting window. Be on location and ready to shoot as sunset starts.
Know Where the Sun Will Be
In the most primitive sense the sun sets in the west and rises in the east, but those are two massive horizons. In order to plan the perfect frame you should be well aware of exactly where along that horizon the sun will be arcing to touch down. This way you can compose your scene in order to maximize the impact of the sun in your photo. For this I use a great app called the Photographer Ephemeris which allows me to map the trajectory the sun will take as it falls towards the horizon.
Sometimes a Fake Sun Is Better Than the Real Thing
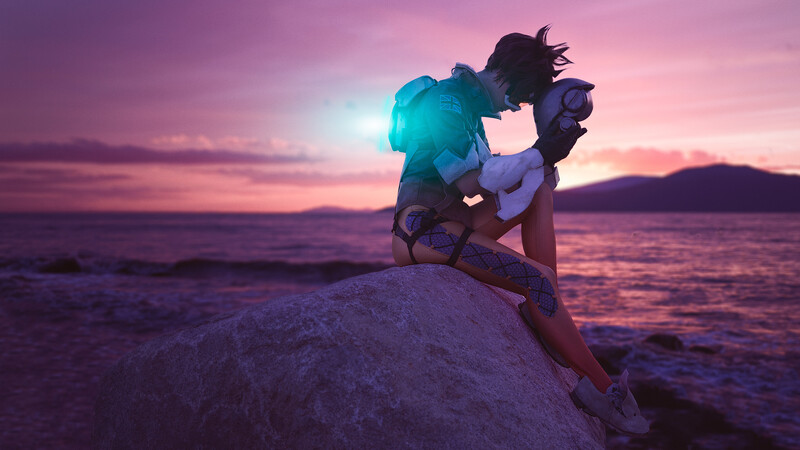
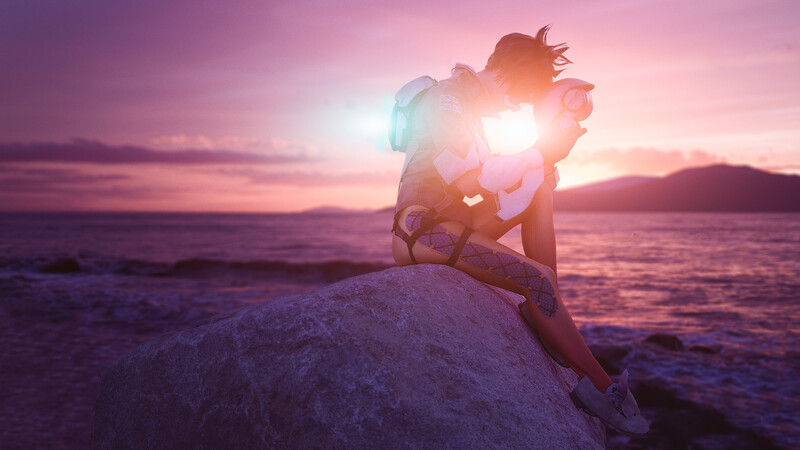
I will probably take some heat for this, but one of the tricks I like to employ is to wait until the sun falls just below the horizon (by wait I mean shooting the whole time but just not stopping once the sun has set). The reason for this is that the sky tends to turn the most vivid colors for a few moments after the sun finally touches down. The only problem is that in a situation like this there is no sun in your frame which has a nasty tendency to diminish the impact of the sunset. Thus, from time to time, I have taken to artificially adding a sun in post using Red Giant's Knoll Light Factory. Shh... don't tell anyone!
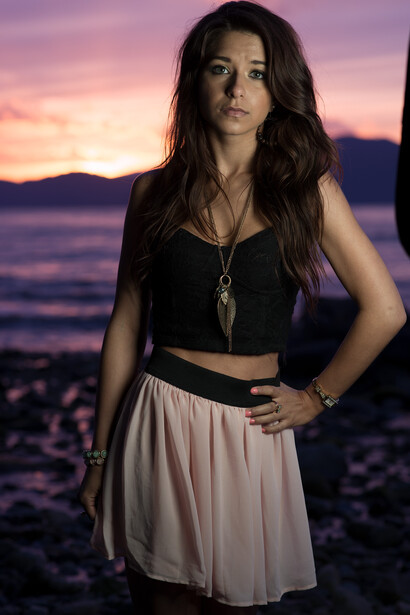
Make the Sky More Vibrant by Gelling Your Lights
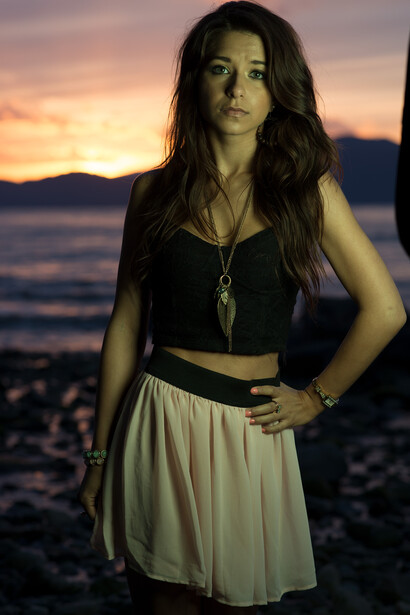
So what you are going to want to do is get a strobe the size of a house, connect it to the main power grid, and blast so much light that you can light the whole horizon with whatever colored light you choose. No? That doesn't sound feasible? OK, fine. Instead let's use a white balance trick. In virtually every raw processor I have ever worked with you are gifted with two amazing sliders that make this particular technique super easy. They are temperature and tint. In order to shift the horizon's color all you need to do is light your subject with the opposite color that you want the sky to be. Then, when you adjust for that color in post to bring your model's white balance back to neutral the sky that isn't being lit with that light falls into the opposite color. For example, in the shot below a green corrective gel was added to the key light which, when corrected for, caused the sky to become magenta. The shot is straight out of camera with the only edit being a tweak to tint. Be weary of this technique, however, as it can make the photos in camera look quite unflattering. No model wants green skin, so if you plan to use this technique make sure to explain to the model exactly what you are doing. And on a side note, camera makers, I would forever by your friend if you updated your camera software to include tint as something that can be adjusted in camera, just like temperature.
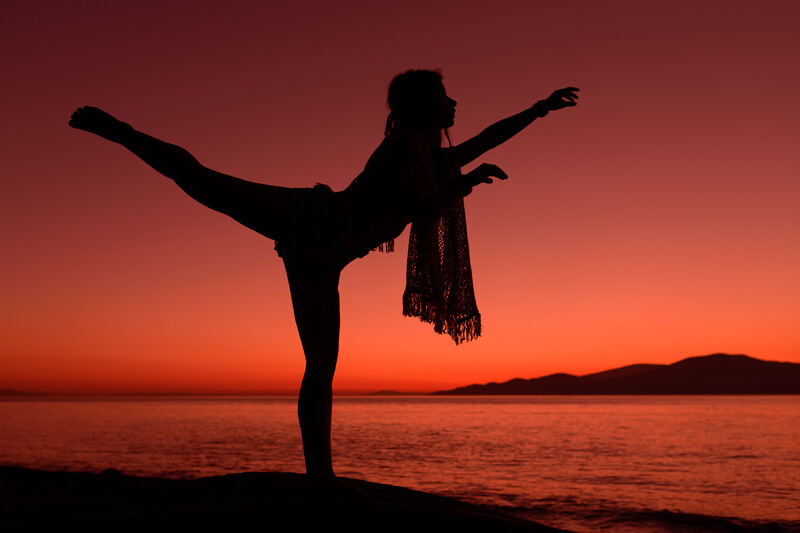
Have Some Fun With Silhouettes
A sunset is a great time to experimenting with silhouettes in an amazing setting. Given that the sky is so much brighter than your subject it can often be easy to capture a perfectly black silhouette against a spectacular sunset. Make sure to get your model up high though. One of the biggest mistakes that I often see with silhouettes is that when the model is standing on the ground their bottom half is all but invisible as the ground is as dark as they are. Have the model stand on a picnic table or tree stump and get your camera low, you want to silhouette their entire figure against the amazing backdrop.
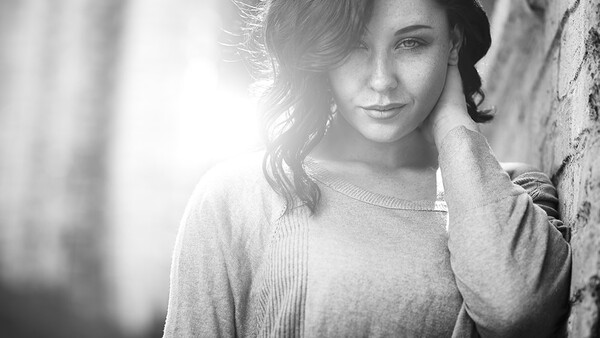
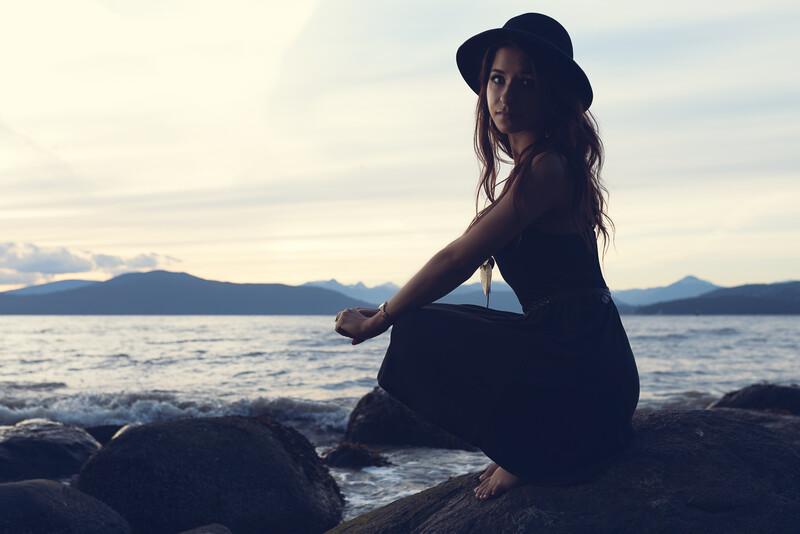
Shadows Are Your Friend
A quote from the first lighting workshop with Joe McNally that I ever took has always stuck with me. The quote was something along the lines of: "A photograph is made interesting by what you choose not to light." This has been advice that has driven so many of my shoots over the years. As photographers we are always obsessively chasing great light but often well placed shadows are what make or break an image. When shooting at sunset the easy route is almost always to shoot an extremely bright frame that is filled with light, flare, and pizzazz. Instead, next time you are shooting, take a moment to think about how you can add subtle shadows into the photo to increase the interest of the shot.
Conclusion
The golden hour is a wonderful tool in the arsenal of a great portrait photographer. By leveraging strong technique and a creative flare, a photographer can create truly unforgettable portraits that their clients will love. As with anything, practice is key. Due to the constantly changing and rapidly dwindling light of a sunset shoot a photographer has to be constantly on their toes adapting their camera and lighting so that the exposure remains consistent even if the sky is not.


Join the Fstoppers community for free
-
Post comments and join in the discussions
-
Browse the site ad-free
-
Share your work and get featured in the community
-
Compete in the photo contests for fun and prizes
9 Comments
All great points and well worth repeating. Often, I'll read an article like this and think, "What a great idea," only to forget about it when the opportunity to employ it arrives. Eventually, I'll remember. Sometimes. I think. I don't really remember. ;-)
Very true to the old mantra: "Use it or lose it." I, personally, always make a point of specifically doing a shoot with a given technique that is quite interesting to me as I find the act of actually "doing" it cements the concept in my mind so I don't forgot it.
Great article, on the Canon cameras you can do whitebalance shifts towards magenta and green if you want. I always like to take a shot with a color checker as well to balance out my WB with gels.
"And on a side note, camera makers, I would forever by your friend if you updated your camera software to include tint as something that can be adjusted in camera, just like temperature."
No need to forever be my friend, but to my knowledge, you can do this on both Canon and Nikon cameras now. Select white balance under the shooting menu (instead of using the quick control button), and then hit right on the mode dial and it brings up a grid menu. Yes, it is only a minor adjustment, but if you start with the white balance preset close to what you want, you can easily tweak it this way. A-B (amber/blue) horizontal, G-M (green/magenta) vertical
Picture attached from my D800 menu, but I know my 2nd shooter's Canon 80d has a similar setting.
This is true, to a degree, however, the range of this adjustment is very narrow. It is only designed to offset very slight color shifts. The G-M range isn't anywhere near extreme enough to use in the technique above. I had completely forgotten about this or I would have mentioned it. On mine, even with say M set to the maximum it wouldn't be enough to even remotely offset a green gelled flash.
Yes, it is a small adjustment, however, if you started with one of the like 8 different flourescent white balance settings built into the camera, which already have a bunch of magenta in them (with varying levels of orange/blue), you're already mainly there, then you can tweak a little more. They should be more than enough to counteract your gel if they can balance out flourescent lighting (which is what the green gel is "officially" used to match).
Proper flourescent white balance setting, use green gel on flash, and you can get those results in camera. It may require a tiny bit of tweaking the white balance settings in the above way to get your exact look, but it would get you a lot closer than using either a custom color temp or daylight white balance -- and would let the model see the something very close to the final result instantly.
It really only works for minimal green gels and is a huge pain to match up. (maybe a half cut at most) Personally I'd much prefer a full range slider just like temperature that lets me layer on far more magenta than the above would ever even come close to. Its not really a crazy thing to ask for either, technologically its pretty trivial, not sure why camera makers haven't bothered doing it.
Great article and great shots. Thanks
Here's another website that provides natural light information and more: the Photographer's Ephemeris. It comes in Android and IOS apps too. http://app.photoephemeris.com