

Recently, I visited the stunning Argentinian Patagonia. I want to share some simple photo editing techniques that photographers of every skill level can appreciate.
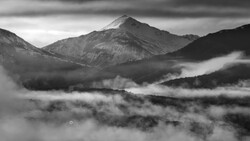
The photo used in this tutorial was taken in Argentina near the small mountain village of El Chalten. The mountain you see is Monte Fitz Roy and is considered by many to be the most beautiful mountain in the world. On the other side of this mountain is the Patagonian ice field, the second largest continental ice field in the world, which lies on the border of Argentina and Chile. This photo was taken without a tripod on an autumn morning (in April) with the Nikon D800 and Nikon 14-24mm lens. I'll be editing it in Luminar 4.
I’ll start by working in the Essentials tab.
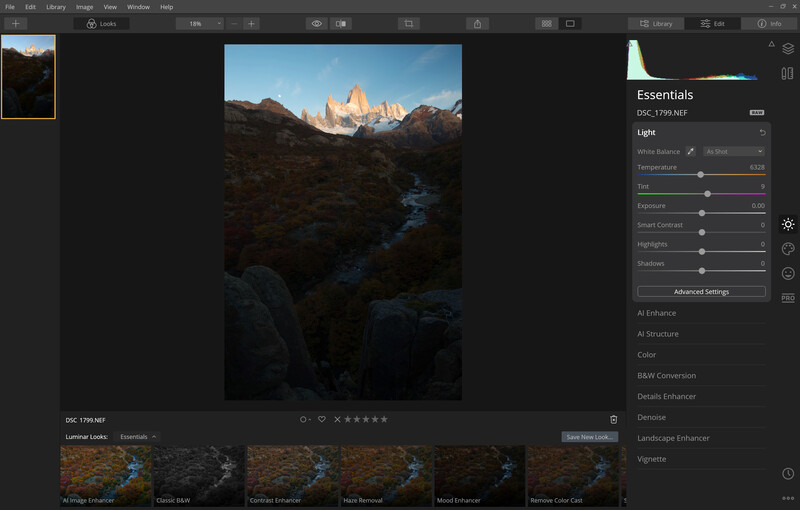
I’ll begin with changing the exposure settings. The shadows and highlights are the most important. You want to have plenty of shadow details in the darker parts and highlight details in the brighter parts. Changing these settings is not the same as changing the overall exposure. Changing the exposure will affect the shadows, midtones, and highlights together.
For this image, I’ll make these adjustments:
- Decrease the highlights by 100
- Increase the shadows by 42
I’ll leave the contrast as is and return to this menu later. It’s better to adjust the contrast as one of the last steps, because the other changes I’m going to make will also affect it.

Now, moving to AI Enhance. This menu includes the Accent AI and AI Sky Enhancer tools. Accent AI is a feature I don’t use with my workflow, because I make all the individual adjustments myself. It’s still a great feature, however, if you want to get results quickly. I do use AI Sky Enhancer, which recognizes the sky and makes it look better by making it darker and adding more contrast. In this image, I’ll set AI Sky Enhancer to 100. The blues are now oversaturated, but I will decrease the saturation later.

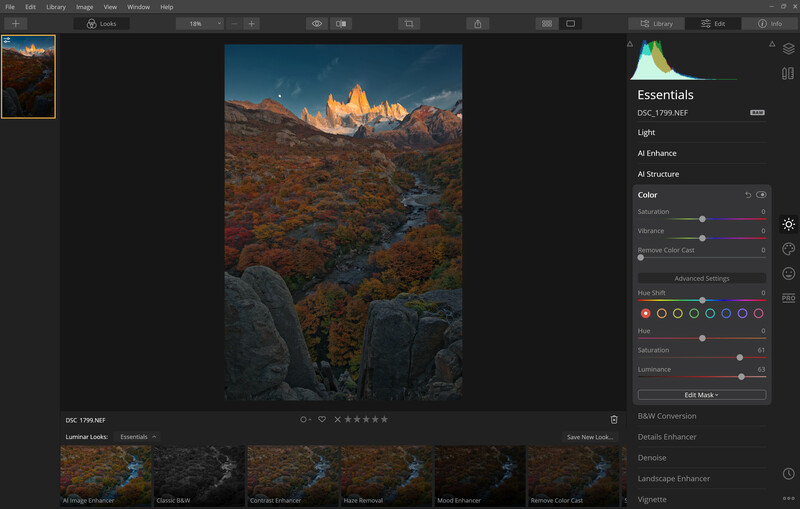
The next step will be adjusting the colors in the color menu. I’ll go to the Advanced menu, which replaces the old HSL menu. Here, we can change the tone, saturation, and brightness of each color. My goal is to increase the saturation and brightness of the warmer colors to enhance the fall foliage. Make sure to darken and decrease the saturation of the blues to give more separation to the bright mountain and make the blue tones look more natural.
Red
- Hue: 0
- Saturation: +61
- Luminance: +63
Orange
- Hue: -9
- Saturation: +31
- Luminance: +46
Yellow
- Hue: -40
- Saturation: +8
- Luminance: +30
Green
- Hue: 0
- Saturation: 0
- Luminance: +79
Aqua
- Hue: 0
- Saturation: -40
- Luminance: +66
Blue
- Hue: 0
- Saturation: -26
- Luminance: -33
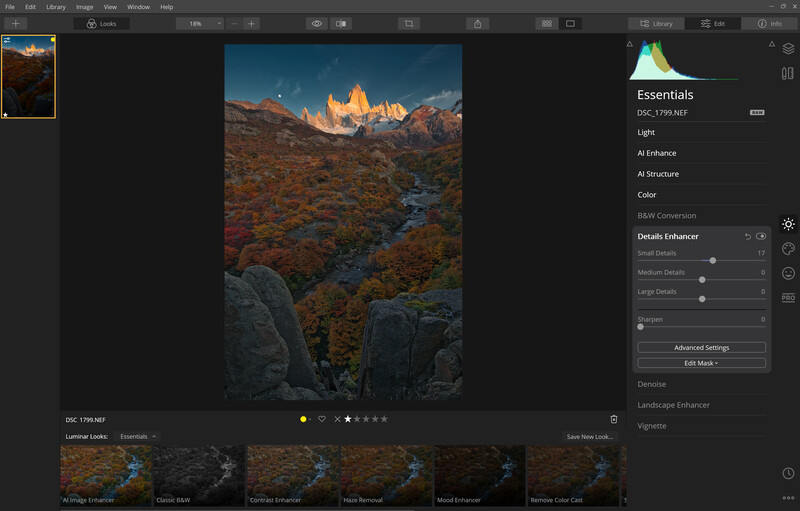
Now, getting to the Details Enhancer. With the Details Enhancer, we can adjust the sharpness of the image by sharpening the details at different levels. You can choose if sharpening will affect small, medium, or large details. I prefer to adjust the small details, because it makes the image look sharper without changing the overall contrast. The key to success is to make small adjustments. The best way to judge this tool is to zoom in 100% or more. For this image, I’ll increase the small details by 17.
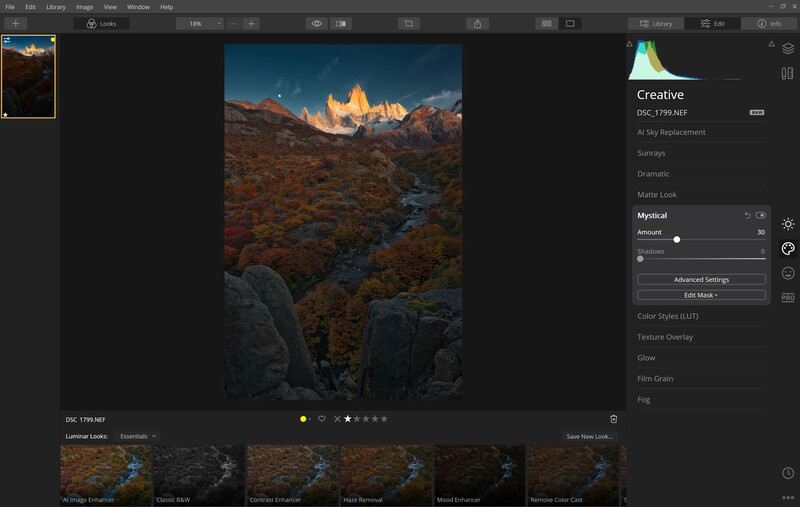
Now, I’m going to make adjustments in the Creative tab. I’ll begin with Mystical, increasing the amount to 30 and leaving the shadows at 0. This will make the image look dreamy by increasing the contrast and adding a soft look. It will also increase the saturation, but I’m already planning to adjust that in one of the last steps.
- Set the Mystical amount to 30.
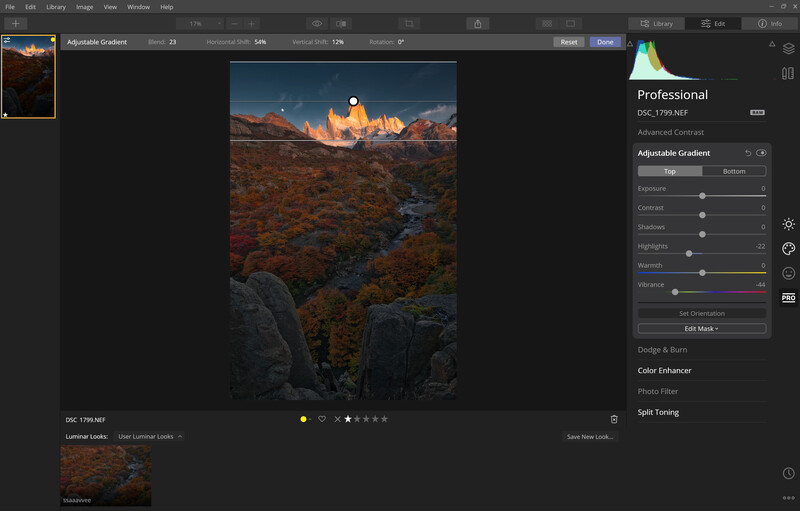
Now, I’ll continue in the Professional tab with the Adjustable gradient. You can put a gradient filter at the top and/or bottom. I’ll put one at the top to decrease the saturation of the blues and make the sky even darker.
- Do this by going to “set orientation.”
- Move the gradient to the top.
- Now, make the gradient smaller, so the middle is around the top of the mountain.
- Finally, decrease the highlights by 22 and the vibrance by 44.
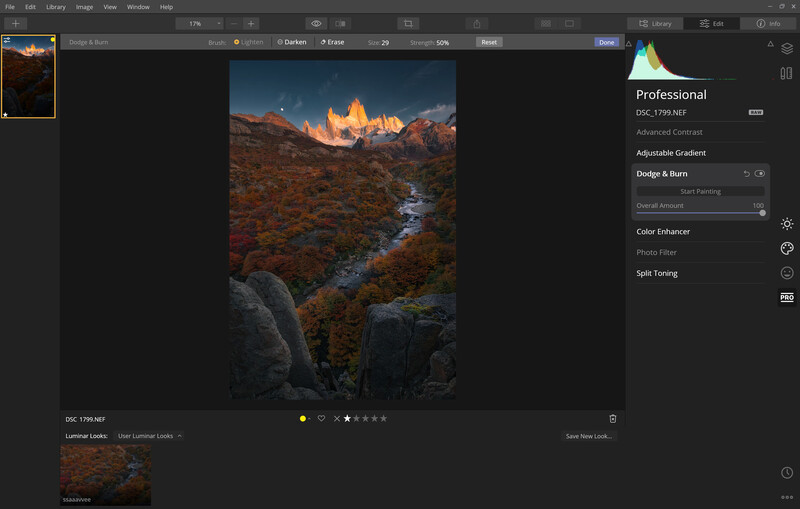
Next are the dodge and burn tools. The default size for dodge/lighten is 100. I recommend changing the diameter to get the most precise results. In this photo, I used different sizes on the river with a 50% strength. By making the river brighter, you’ll get more separation from the surrounding forest, so the river will work better as a leading line. I also applied some dodging to the rocks in the foreground. I only chose to make the already bright parts brighter to increase the existing contrast.
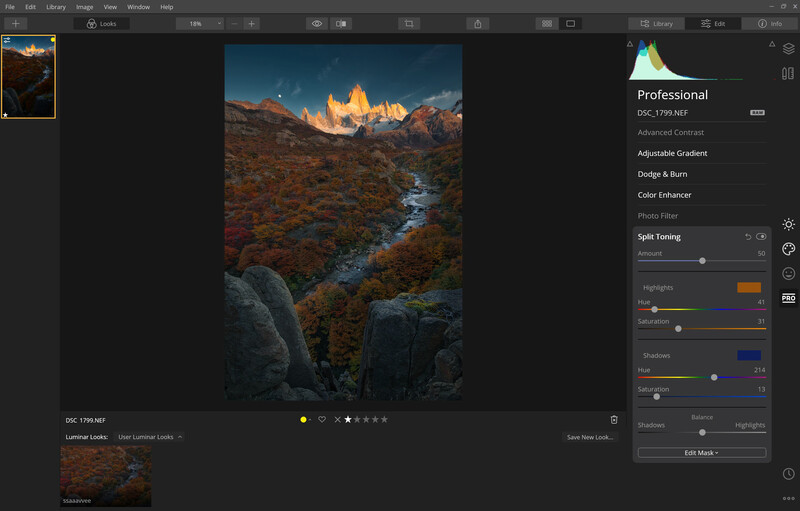
Now, I’ll go to the split toning menu, which allows you to set a certain tone for the highlights and shadows. When the image already has warm tones or allows for warm tones — such as this image does — I’ll further enhance the warmth. It’s important to stay within a certain color range compared to the original image, however. For example, in this image, making the highlights purple or magenta would not look nice. Instead, I can go for anything reddish or yellowish. The easiest way to pick the best tone is to increase the saturation by a lot — say, to 80 — in order to see if you like the color. After you’re happy with your selection, slide the saturation back to a normal amount — something like 31.
For the shadows, I always go for bluish tones. I use the same technique, increasing the saturation by a lot and decreasing it afterwards. I went for 13 in this image.
Now that I’m finished with all the adjustments, I’ll go back to step four to fine-tune the color saturation. Adjustments:
- Orange: 24
- Blue: -42
Now, I’m satisfied with all the adjustments, so I’ll export the image as a JPEG with the sRGB color profile.

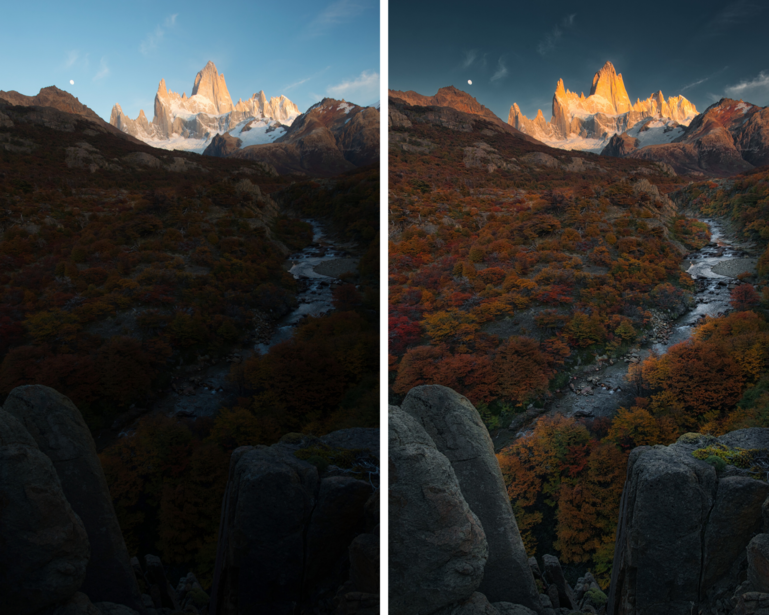
In these 10 easy steps we've achieved great results, so let's take another look at the Before and After.


Join the Fstoppers community for free
-
Post comments and join in the discussions
-
Browse the site ad-free
-
Share your work and get featured in the community
-
Compete in the photo contests for fun and prizes
19 Comments
THANK YOU! for not making another unnecessary video for a tutorial that clearly looks better in text/illustrations.
Totally agree. this much more useful than 10 minute video. BTW what software is this? I can't find any mention of it.
Says Luminar 4 in last line before beginning his description of the edit.
It would be nice to have the RAW file to see if this can be done in Capture One
what? "thank you for not giving me free content"? ass
I believe it was a legitimate "thank you", being a tutorial that you don't need to sit through 15 minutes of video for and instead you can just follow along at your own pace via the article.
This. ^
Yikes! That escalated quickly.
HA! I scrolled down to make the same comment. I sometimes watch the videos and was prepared for that here but really enjoyed an overview and some insight in to Luminar.
It really doesnt feel level to me. Regardless if the camera was actually level or not, it doesnt feel level. It feel like it slopes to the left, like there is nothing keeping the river in the river, it should be spilling out to the left.
So to have it look "professional" you need to make it HDR?
It is not HDR by definition. It is a single shot, i.e. normal dynamic range. I'm guessing you are confused and don't know the difference between what HDR is vs Tone Mapping. He also didn't use tone mapping in this. All of the luminosity changes he use could have been done with curves. He used sliders instead.
I much prefer this kind of tutorial to video where the guy blathers on and on and then makes a change. Good job.
One aspect that stands out to me though, I think you lifted the shadows too much. It makes the photo look unnatural. I think the "HDR?" question poster is seeing the same thing. Personally, I would have lifted the shadows a fair amount less. But other than that, it's good edit.
If you look at Max's work, he has a clear, defining style. His images are definitely on the ethereal, mystical side, with dark scenes, the foreground is as important is the background, and he likes to have a person in his image to provide a sense of scale. His statement "How to Make a Landscape Photo Look Professional" is valid. He has a definite workflow style and how he wants his images to look. He doesn't just hit a few 'auto' buttons on a standard raw image to dress it up; he has as style and works at accomplishing it. It also appears that most of his post-processing work is done in Luminar 4. From what I've read, he also leans towards shooting with point-and-shoot cameras.
So does his work look professional? I'd say yes, and in a very stylized way. One commenter asked: "So to have it look "professional" you need to make it HDR?" to which I'd answer No. However, to reiterate, you can't just hit some 'auto' buttons and expect it to look professional. He's paying attention to selective dodging and burning, selecting sharpening and liberal use of his specific style and color. It's similar to the old adage, I'm not a painter, but I know the difference between an amateur and Vincent van Gogh
The mountains are too bright and too saturated imho.
The contrast between dark and bright is too big. The shadows are pulled too high so that they look flat.
Maybe add more dynamic contrast to make it pop, without clipping anything.
Max, you should be transparent as say that you are an ambassador of Luminar
Sorry, but this photo does not seems pro. The composition is poor and the final retouchs are strange. The first plan is flat and there is no balance between the background and the terrain. The sky looks artificial and does not match with the sun light.
They're both pretty bad. Some pictures just cannot be rescued.
Thank you Max for taking the time and trouble to write this article. I know from past experience, there is a fair amount of effort putting a tutorial like this together.
I agree with Christian that this post with photos and software settings is easier to peruse at a leisurely pace, than following a video. And for those who have not used it, this is a good post to demo what Luminar can do with your images. I personally do not use it, as I am quite satisfied for the moment with Lightroom and Photoshop, with the various plugins I use.
All that said, having travelled to Patagonia and spent three days hiking around the base of both Mt Fitzroy and Cerro Tore, I agree with a couple of my fellow posters here, that in this photo, it definitely is pitched or tilted to the left. A professional would have used a tripod and would done a better job verifying the scene was level.
Here's my photo of Mt Fitzroy as proof, though taken at night from a distance.
https://www.instagram.com/p/BnsWGP2lAFx/
Cheers from Montreal.