
When photographing on location, be it a campaign for a clothing company, lifestyle images for a client, or just making portraits of someone outdoors, I always go through four steps before I actually take a photo.
I did not learn this from anyone, and I did not even realize I do it until someone asked me about my process and made me think about it. I guess I just picked it up from experiences over the years, and it works for me. I am sure others probably do something very similar, if not exactly the same.
If a photoshoot is for a client, we almost always have an idea of exactly what we want to accomplish in advance. But there are times that doesn't happen or a client isn't really sure. They usually hire me because they just trust me to produce images on par with what they have seen and liked in my portfolio and give me complete creative freedom. I personally arrange shoots with a basic idea in my mind, but nothing is ever completely thought out, and I just let what will happen unfold. Photographers are known as problem-solvers. So no matter the location or the natural light going on outside that day, we are expected to figure it out and produce high quality images no matter what.
First: The Background
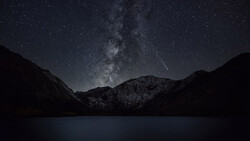
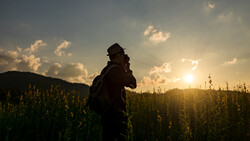
If the client has not scouted locations or given me specific spot to shoot (which is usually the case for me for some reason), I first look for the background to put the model in front of. I search for colors and textures that grab my attention and that I think would look good in the image, while also keeping an eye on the natural light that is present, be it sunny, shade, or backlight — always something interesting, and not to take away any attention from the model, but to complement them. Even if I find a wall I love, but the model's outfit clashes with it because of colors, I just move on, but keep that wall in the back of mind for later perhaps.

Second: Composition
After the background is chosen, I try to figure out the composition. Just like the background, I want the composition to not distract from the model, but to draw you into them. Sometimes, I pick a background because of the light: the light was so interesting that I have to shoot in it. But now there is something in the shot I don't want there and is a distraction, but the light is so nice; it doesn't matter. I can usually hide it by my lens choice. Part of figuring out the composition is the focal length you decide to use. You obviously can't compose an image, if you haven't decided what lens to shoot with yet. And I can use this decision to either hide the distraction or maybe blur it out with bokeh if needed. This is all a personal choice obviously. Everyone shoots with different focal lengths. I know photographers that shoot amazing portraits with 24mm lenses. I personally can't do that. The widest I go for lifestyle photos is 35mm, and I still don't even use that very often. I would say about 75% of the time, I am using a 50mm or 70-200mm lens when photographing people. It is just what I personally like and feel comfortable with.
Third: Exposure
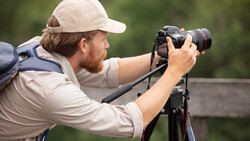
The third thing I do after I figure out the background and composition that I am going to use is dial in my exposure, both for the natural light that is present and for my strobes, if they are going to be used. The exposure will always vary, as every situation is completely different, depending on what I am trying to accomplish, make the final image look like, and of course ambient light conditions. That is why i never understand people asking me what my camera settings were on a specific image. Telling someone what my ISO or shutter speed was on a photo does not help them in any way to produce a similar shot. Anyway, so now I put the model in if he or she is ready or grab an assistant to stand in, and I get my ISO, f-stop, and shutter speed set to where I want them to be. If I am using strobes, I also get them dialed in here. I do everything in manual. There's nothing wrong with TTL, but I like complete control of what the camera and lights do.
Fourth: Posing
So now, the last step, posing the model, and then I can fire away without thinking about anything else. As a photographer, posing is by far my worst skill, so being able to focus solely on this and not worry about anything else is a huge thing for me. It is something I always struggle with. Fortunately, I have been very lucky to work with some great models over the years who know what they are doing in front of a camera and make my job so much easier. It is when I work with models that are less experienced that my own faults show. I recognize this weakness of mine, and I am constantly working to improve it. I know it will come to me one day and be more second nature as everything else has. It just takes time and practice. It is a skill, a very important one. But like I said, with my first three steps taken care of, I can just focus on the model; I do not need to chimp or look at the back of my camera at all. I will take a quick glance here and there just to make sure there are no problems, but the model gets my 100% attention at this point.
Conclusion
That's it; those are the four things I go through before I take a photograph of someone. Select a background, figure out my composition, get my exposure dialed in, and pose the model. Then, the model will change into a new outfit, and we repeat the process all over again.
What is your process when shooting on location? Is there something you do that I don't do or something that I do that you don't? There is no wrong or right way as long as you and your client are both happy with the finished product!


Join the Fstoppers community for free
-
Post comments and join in the discussions
-
Browse the site ad-free
-
Share your work and get featured in the community
-
Compete in the photo contests for fun and prizes
9 Comments
My process is about the same.
But when shooting in a location I'm not familiar with I do my best to scout it sometime before. When I scout I bring my camera for sample pictures to show the client which spots I like, I also take readings with my light meter, and see where the sun's position will be when we're planning on shooting with my Sun Seeker app on my phone.
By getting as much technical things out of the way before the shoot, speeds up my efficiency (determine if I need lights and how many, and flags/diffusion) and focus more on the photos. Instead of figuring it all out the day of.
But that's just me
That is great! I 100% recommend scouting a location beforehand too, if possible. Thanks for adding that. For some reason, that almost never seems possible for me with my current clients. A lot of last minute planning I guess. Knowing what the sun will do in advance, another great plus......In 2 weeks I am doing a photoshoot at a resort 5 hours away, so obviously I can't go before hand just to scout it, so I already looked it up online, and found some photos of the area to give me an idea before hand. Anything that can help.
True, but with technology these days it is amazing how much you can prep. I love the PhotoPills app (bit of a learning curve but they’ve got great tutorials) because I can get a good overview of how natural light will look at a given location. If I know the location, or if I can only visit it at a different time of day, then I can get very specific about what I want to shoot when.
That's awesome! It is amazing what we can do today with technology. Things people couldn't even dream of 20 years ago. I never heard or used that specific app before, but I will check it out online in a bit, thanks!
Great insight into the world of photography. And thanks for the comment Chris Kennedy
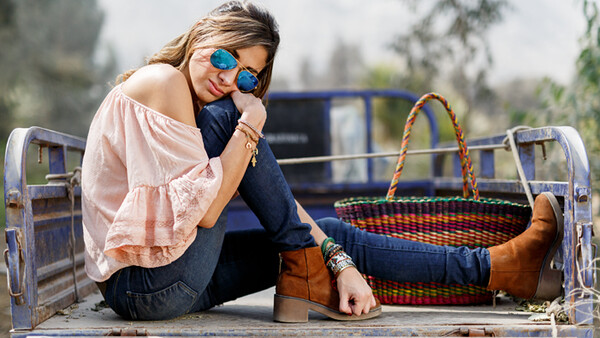
Hi Dustin. Great photos! I assume your 50mm at f/2 shot is used with a ND filter in order to sync flash with sun? Thanks.
Thank you Ken! While you can get similar results using a ND filter, that shot was actually made using High Speed Sync. I prefer HSS over ND filters so much more! I just find it so much easier to work with perdsonally. It is just one less piece of gear to play around with, and also I do not have to deal with potential color casts in post from the filter. But they both can work, and everyone prefers something different. That image above was shot using 2x Canon 600ex-rt flashes inside a Wescott Apollo Orb on a tri-flash bracket.
Great basic overview. A lot of this I either knew or do but it is confirming to know I’m not missing something vital ;-) I tend to overthink shoots if I’m not careful.
Yes it was a very basic overview of what goes on in my head, without getting into too many details. I still overthink a lot, less than I used to, but us photographers are always thinking and over analyzing everything,