Photoshop's Camera Raw keeps getting features that Lightroom users have been waiting years for, and the gap between the two is worth watching. If you organize in one program and edit in another, the question of whether you should mix them has a clear answer.
Matt Kloskowski walks through the latest additions to Adobe Camera Raw and answers a question he gets constantly: can you run a hybrid workflow, using Lightroom to organize and Camera Raw to edit? His response is blunt. Don't do it. He calls it clunky and says you won't get what you want out of it. Kloskowski frames the current Camera Raw updates as incremental rather than monumental, arguing there aren't yet enough of them to justify switching your process around.
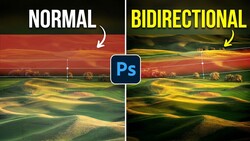
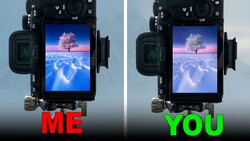
The features themselves are still worth knowing if you already live in Photoshop, Bridge, or Camera Raw. One that surprised even Kloskowski is the ability to see your focus points, something that only ever existed in Lightroom through a third-party plug-in and never natively. You right click on your photo, drop down to the pop-up menu near the bottom, and choose show focus point. From there you can confirm the camera locked focus exactly where you intended, then turn the display back off. He also covers the new bidirectional linear gradient, a masking tool people have requested for years, and points out the two small triangles that now let you control the feather on the top and bottom edges independently.
Kloskowski's own priorities say a lot about where editing tools are heading. He's clear that nobody is begging for more generative features inside Lightroom, and that the masking tools are the real staple for people working on their photos. The industry has poured enormous energy into generative fill and expand, and Adobe now meters those features with monthly credits tied to the little starred icon that signals extra charges. Kloskowski openly pushes back on that credit reset, arguing you paid for a subscription and shouldn't lose unused credits just because you had a slow month. Meanwhile, the tools that actually change how you shape light and tone in a photo, the masks and gradients, are where the day-to-day work happens. Learning to build a mask 10 different ways, as he puts it, keeps you productive no matter which program eventually gets the newest button.
The generative expand improvements get their own walkthrough. Inside the crop tool, you enable expand, turn off the little lock icon, and add space wherever the frame feels cramped. Choosing Firefly fill and expand spends one of your generative credits, and after you hit generate the program returns a few variations to scroll through. You can keep the result, cancel, or regenerate for more options. Kloskowski also touches on a presentation mode that lets you cycle through images, change the background color, and pull up an info overlay.
His bottom line for Lightroom users is patience. If the day ever comes when he can't get a mask done the way he wants inside Lightroom, he'll look at Camera Raw more seriously. Until then, his workflow stays put. See exactly how each of these Camera Raw features works by watching Kloskowski's full walkthrough above.

Join the Fstoppers community for free
-
Post comments and join in the discussions
-
Browse the site ad-free
-
Share your work and get featured in the community
-
Compete in the photo contests for fun and prizes
1 Comment
I have been using Adobe Camera Raw through Adobe Bridge for years. I can edit in ACR and open in Photoshop if I need to. I get the new ACR features usually months before Lightroom gets them and I really don't need a lot of the features in Lightroom (like syncing, versioning, DRM, auto-culling).
I believe the Photography Plan is no longer available, which gave you both Photoshop and Lightroom, so you need to pick a Lightroom or Photoshop subscription, or go for the higher tier which gives you everything (I'm in Australia). (If I'm wrong, I hope someone will correct me, I don't mean to spread misinformation.) Anyway, I believe many Lightroom subscribers would be better off with Photoshop and Bridge, which is free, and use the "Open in Camera Raw" option within Bridge. It's as robust, for editing, as Lightroom, and you have Photoshop for the heavy lifting.
I'm sure some of us need Lightroom's high-end features, but I can't believe the ratio is that high...do people not know about Bridge and ACR??