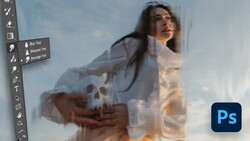
The Liquify Tool is one of the most powerful features of Photoshop, with abilities that can subtly or vastly alter the structure of features in your image (and not just those on humans). Just like any powerful tool, though, it takes a bit of finesse and know-how to get the best results, and this helpful video will give you that knowledge.
The Liquify Tool has become especially worth knowing since the introduction of Face-Aware Liquify, which automatically detects facial features and allows one to adjust their positions, size, and more, vastly simplifying the process in a lot of situations. Nonetheless, its usefulness extends well beyond faces (I even use it in landscape photos occasionally). This tutorial from Nathaniel Dodson of tutvid will show you the ropes. As he mentions, be sure to convert the layer you're working on to a smart object so you can edit non-destructively and turn off or adjust the results at any time. Also, remember that one brush size rarely (almost never) fits all, so make sure you constantly pay attention to it and adjust as needed, even as you're working on the same features. Lastly, subtlety is generally the key with such adjustments; less is more.


No comments yet