A technically fine portrait sits on your screen. Nothing wrong with it, nothing exciting about it either, and that flat middle ground is exactly where most people stop editing.
This tutorial from Gareth Evans of Park Cameras walks through the full process on a real portrait shot a couple of years back. The edit starts with a crop to center the subject, then a radial gradient across the face to lift exposure and pull the dehaze down a touch. From there it moves into Lightroom's people-detection masks, which scan the frame and offer up individual features to isolate. Facial skin, eye sclera, iris and pupil, lips, hair, and body skin each become their own separate mask rather than one lumped-together selection. Keeping them apart means every feature gets treated on its own terms.
The skin work comes first, with reduced clarity and texture on both facial and body skin to smooth out small imperfections without going plastic. The eye sclera gets a small exposure and whites boost, plus a slight saturation drop to keep the whites clean rather than tinted. The iris moves the other way, with a bump in exposure and saturation to make a blue eye color read stronger. Lips take a little exposure and contrast, and the hair gets exposure plus added clarity and texture to bring out strands. None of these moves are large. The restraint is the point, and it keeps the retouching from tipping into obvious territory.
The lighting section is where the portrait actually changes character. A linear gradient comes in from the left to mimic window light, with raised exposure and negative dehaze to give the sense of light spilling into the frame. A second linear gradient enters from the right, then gets intersected with a background selection so the darkening only lands behind the subject and never on their face. That intersect trick, right-clicking a mask and combining it with a "select background" mask, is the kind of control that used to demand careful brush work. A third gradient adds a hint of shadow falling across the subject to blend the two sides together, and radial gradients finish the job by drawing attention toward the lit side and darkening the outer edges. Global adjustments stay minimal throughout, with only small tweaks to exposure, shadows, and saturation.
Masking has quietly become the center of gravity in Lightroom Classic, and this edit is a clean example of why. Adobe rebuilt the masking engine in October 2021 and has kept expanding the AI selections since, adding people, subject, sky, background, and object detection that read the image and hand back a usable selection in seconds. The principle worth taking from this is that a strong portrait edit is usually a stack of small, targeted local adjustments rather than one heavy global push. When you separate the whites of the eyes from the iris, and the facial skin from the hair, each element responds to settings tuned for it alone. That separation is what makes the difference between an image that looks edited and one that just looks better. If you shoot people at all, learning to build masks in layers like this scales from a single headshot to an entire session, and it works the same way whether your light was flat window light or a controlled setup.
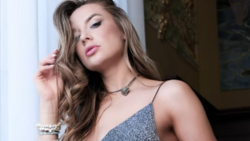
The before-and-after tells the story better than any slider readout. The starting frame is even and lifeless, the finished frame has direction, contrast between the lit and shadowed sides, cleaner skin, and eyes that hold your attention. Almost all of it came from masks, with the original file doing the heavy lifting underneath. That's a reasonable target to keep in mind for your own work, since it means the raw capture matters as much as anything you do in post. See the full mask-by-mask breakdown in the video above.




Join the Fstoppers community for free
-
Post comments and join in the discussions
-
Browse the site ad-free
-
Share your work and get featured in the community
-
Compete in the photo contests for fun and prizes
No comments yet