
Zen photography comes naturally with an empty mind. It’s both waiting for a moment where light, shape, and dynamics fall into place, and being devoid of planning in advance. Instead of checking the weather online before a shoot, you just venture out and essentially wing it. It’s all about being in the moment. As a landscape photographer, I want to share the ways of this minimalist sub-genre.
While Zen photography is a mindset in its essence, the resulting images appear strikingly minimalist by design. This sub-genre is integral, meaning that every aspect of Zen photography is part of the equation. From leaving most of your gear at home (taking just one prime lens), to having the mind-set of acceptance. And from framing your image in the field, to post-processing it in your digital darkroom. Let's move on to some practical ways of incorporating Zen photography in your workflow.
1.) Negative Space
Although some might disagree, photography is much like painting. I really like the following analogy to help understand a primary difference between the two:
A painter stops adding paint strokes to an otherwise blank canvas before he decides his work is finished. A photographer instead, removes elements of an image until the canvas is essentially blank again. He decides when this process of removal is enough to produce a striking image.
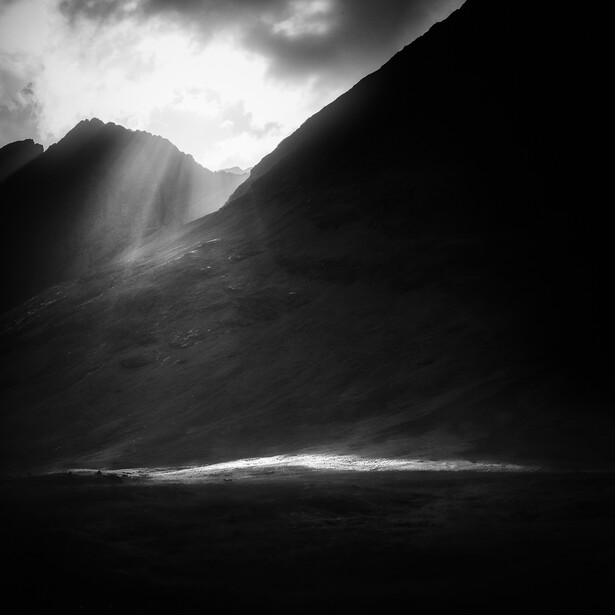
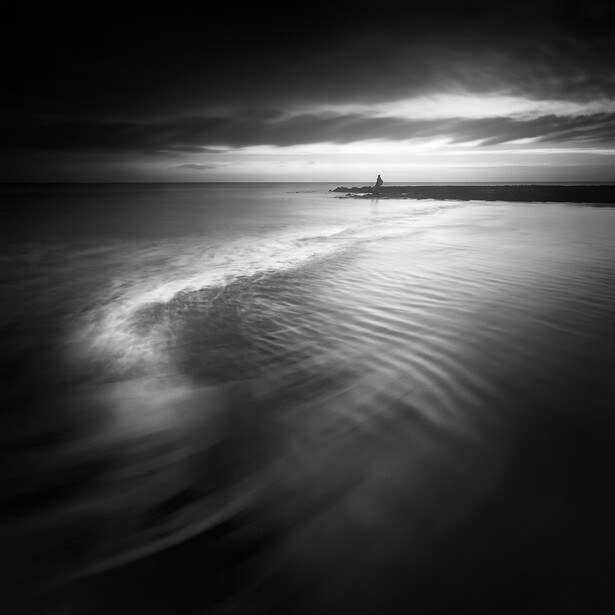
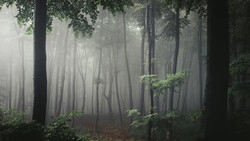
That being said, I personally admire the stillness an image can conjure up. Unlike many other genres of photography, these images do not scream for attention. Instead, Zen-inspired photographs invite you to gaze upon them again and again. Their simplicity is often misleading as the longer you look at the image, the more shapes and patterns start to appear.
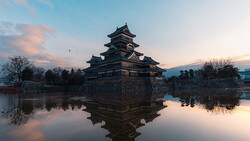
Negative space is the area that is particularly empty; without detail or subjects. It can be both really dark and extremely bright; as long as this area doesn’t ask for attention. A clear blue sky could be an excellent example of an area that’s without detail. The more negative space there is in an image, the more your subject will stand out.
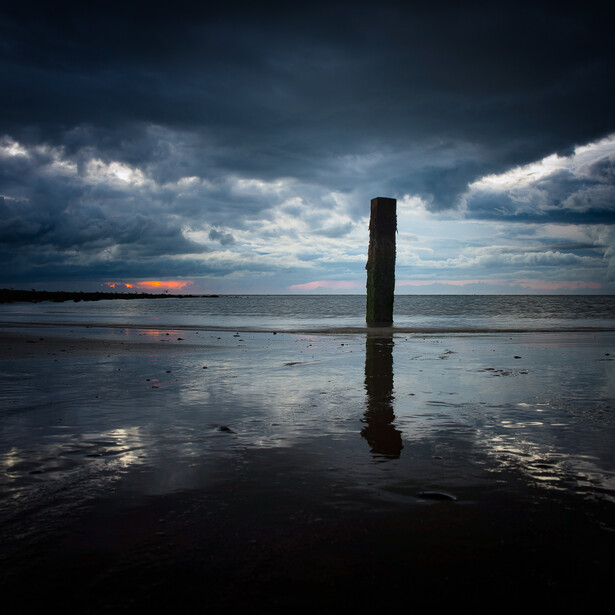
2.) Be a Square
Square compositions give an instant view of the content of the picture, even before you’d have to take in the frame first. With the width being equal to the height, the frame becomes neutral – as if it doesn’t exist at all. That makes the content of the frame more powerful.
An added benefit is the order the squares propose to an online gallery. As opposed to the soft and curved subjects in the pictures itself, such a gallery is very structured, since the pictures are placed along a grid. This paradox subconsciously makes you want to click the images.
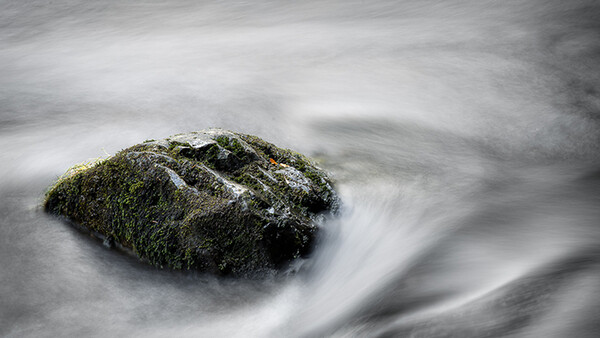
3.) Time Stretching
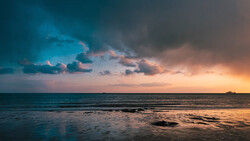
Long exposures smear clouds across the sky, reduce splashes of water to fine mist, and create a gentle background that makes a stark subject come out of the picture. Neutral Density (ND) filters help to reduce light, so you can expose an image even longer. A polarizer helps to reduce light up to three stops too, but you can always wait until dusk to increase the shutter speed naturally.
A bright sky can easily be toned down using a graduated neutral density (GND) filter, or bracketing multiple exposures. Don’t have a grad filter? Slide a matte black card or cloth in front of the lens while you’re exposing. Move it up and down the brightest part of the image about half the time it takes for your camera to capture the image. This technique, known as the black card (or cloth) technique, is nearly as old as photography itself, and is a good alternative to bracketing multiple frames or spending money on graduated filters. It works by reducing even more light in the brightest part of the image if the dynamic range of the scene (shadows to highlights) is too much for the camera to correctly expose for. And it’s a fun way to keep yourself busy during an exposure that lasts several minutes!
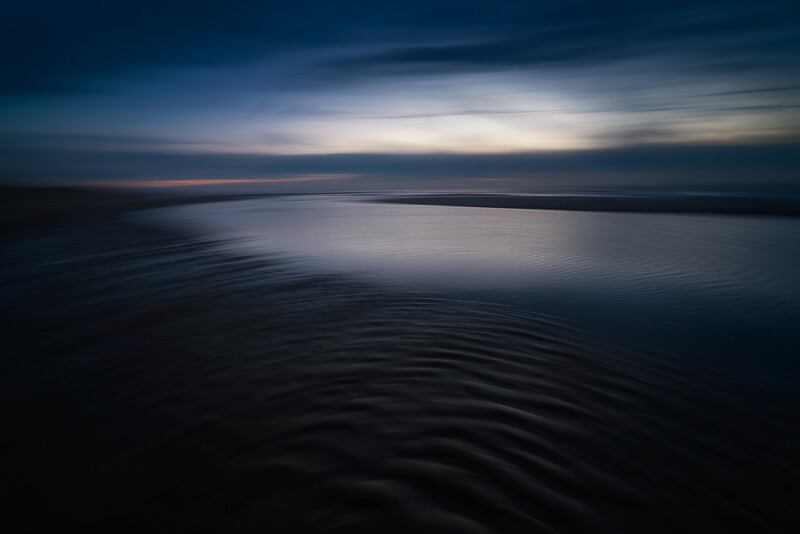
4.) Intentional Camera Movement
When there are no solid objects in the image, there is no need for sharpness. Sometimes images (especially seascapes in which only liquid and gaseous substances are captured) benefit from the added softness by panning the camera while exposing the image. When used correctly, this panning of the camera creates new textures and patterns, because you pan along with the flow of the water or clouds in the sky. This technique creates painterly images that are both unique and look alike at the same time. Use sparingly.
5.) Monochrome
Black and white images are often times less blatant than their counterparts in colour. Monochromes invite your to explore the image in another way. It’s physical as well. You must have heard somewhere (in biology class maybe) that the retinas in our eyes are made from different optical receptors; rods and cones. When the colour sensitive cones do not receive colour input, it comes down to the light sensitive rods.
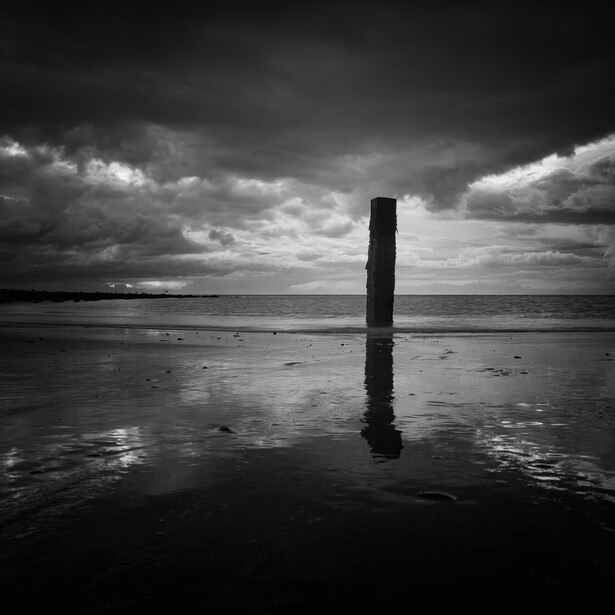
It’s a more primitive, even primeval way of observing the world around us, as rods go further back down the evolutionary path than cones do.
With digital black and white photography comes the task of converting your colour images to monochrome. While I prefer Nik Silver Efex Pro for that task, Topaz B&W Effects is also often used to give photographers full control over how each colour is converted to greyscale.
6.) The Longer the Lens...
…the less is in the image. Again, it boils down to “Less is more.” Using a lens with a greater focal length from the same spot, yields a tighter crop that helps you to ask yourself what you want to show: What’s the most significant area of what the wide angle would capture?
7.) Starting with Zen photography
Are you not entirely sure how to start? Or maybe you’re bothered with the thought of ‘an empty mind.’ You can start by introducing Zen photography after you’ve shot your regular photography. Once you have captured what you came for, it’s much easier to let go and capture something as empty as your mind.
Furthermore, it's better to have just one or two subjects/locations in mind to capture. This also helps to clear the mind and allowing you to focus. Stick to your format or technique, and learn to learn again. Much like a child who first picked up a camera.
Joyful things happen to those who are patient, so never rush the process. Landscape photography is about allowing plenty of time to pass and wait for that fleeting light. Stick to a location as well and make sure there isn’t anything that diverts your concentration or causes you to rush off. Arrive early at a location and wait for conditions to become perfect, or as you envisioned. Don't fret if that doesn’t happen though! In most cases, you can return to the scene. Sometimes even years after the original intent, but the result should be worth the effort.
I hope you've picked up some advice to start out in a new sub-genre of landscape photography. Some inspiration of Zen-like imagery is available on my website. Thank you for reading!
Join the Fstoppers community for free
-
Post comments and join in the discussions
-
Browse the site ad-free
-
Share your work and get featured in the community
-
Compete in the photo contests for fun and prizes
9 Comments
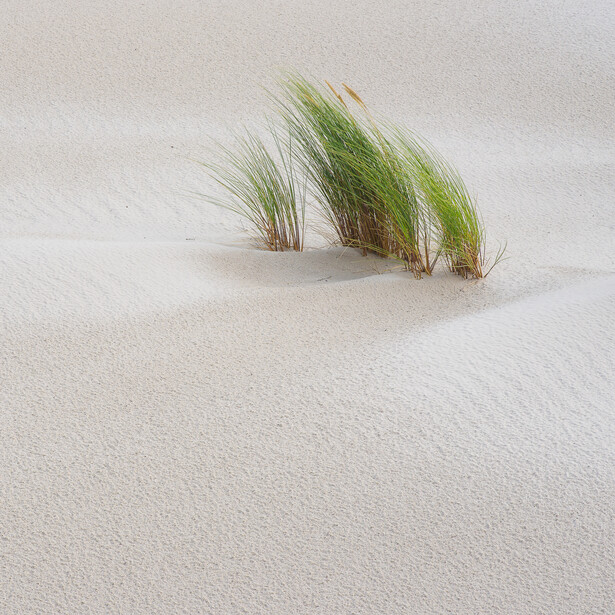
Minimal and abstract photography are my personal favorites. It's great to see a new interpretation on these categories. Really nice job with the grass in the sand image! Awesome texture ;-)
Thanks for the comment! It's exactly how you describe it; an interpretation of photography.
Cheers!
-Daniel
One of the best articles I've seen in a while! One of my favorite photo themes is #minimalmonday on Google+ - I try to be a weekly contributor.
Thanks for the kind words, Michael! Appreciate it. I'll make sure to check out #minimalmonday! :)
-Daniel
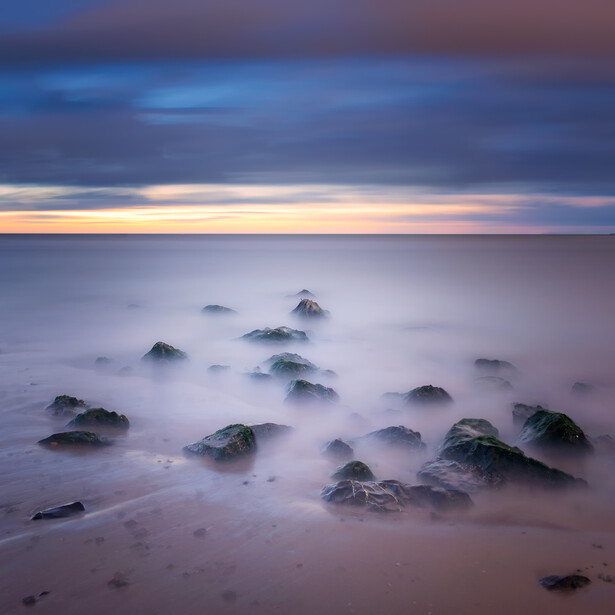
See, I have to slightly disagree with you on one thing: You wrote Monochrome as black and white... Monochrome is one dominating color (and usually cold), not just black and white! Although I agree that some landscapes are INCREDIBLE as B&W, I find the example you used a far better image as a color monochrome. It's far more telling. Then again, this is a personal preference! Y'all have every right to shaft me for saying that :)
Hi Andrej! You are completely correct about monochrome images not only being black and whites. Images with varying tonalities of just one colour are considered monochrome, and that includes greyscale.
The thing with the before and after conversion is, that it's almost a direct conversion to black and white - now that's something I personally do not like doing.
The best recommendation that I can give any aspiring Zen or otherwise monochrome photographer is to decide beforehand if the image is going to be a mono or colour image; before you press the shutter. The example given was to show you that the same image gets an entirely different feel if you do decide to convert it to black and white. I also agree that that particular shot looks better in colour, but to be frank: I initially meant for it to be a black and white image! So the other way around... During processing I decided to blend (luminosity mode) a converted black and white layer in with a colour one. Now the sunset and its reflection stand out much more.
Thanks for getting back to me, Andrej!
-Daniel
Thank you for the article. I find my better photo shoots are ones that I take a zen like approach. I don't try to plan too much and use what's available at the time. Being in the moment with a client, and connecting with the surroundings is crucial to my enjoyment, and the success of a shoot.
You're welcome, Bobby! :) Appreciate your comment. It's great that you have the ability to zone in like that! Thanks for reading!
-Daniel
Thanks for these tips regarding photography. We hired a professional Port Macquarie Photographer for my pre wedding shoot. He really did great job. You can see his details at http://www.jrphoto.com.au/ .Will recommend him to everyone.