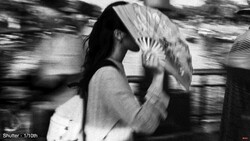
Along with aperture and ISO, shutter speed is one of the three fundamental exposure parameters of photography that not only determine a technically correct exposure, but allow you to take creative control of the image-making process. As such, having it mastered is crucial to growing as a photographer. If you are new to the craft and ready to learn about shutter speed, check out this fantastic video tutorial that offers 10 tips on how to choose the right setting for an image.
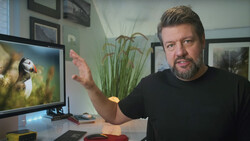
Coming to you from Nate Torres Photography, this excellent video tutorial discusses 10 tips for choosing the proper shutter speed for a photo. If I had to give advice to a beginner on this topic, it would be to not be afraid to crank that shutter speed faster. A common mistake is to use too slow of a shutter speed for the subject motion or focal length in an attempt to use a lower ISO and increase image quality. While that image quality is desirable, it is important to remember that once a photo is blurry, there is normally not much that can be done to save it. On the other hand, modern cameras and post-processing software can work small miracles on noisy images. This is why a sharp but noisy photo is always the better option. Check out the video above for the full rundown from Torres.

Join the Fstoppers community for free
-
Post comments and join in the discussions
-
Browse the site ad-free
-
Share your work and get featured in the community
-
Compete in the photo contests for fun and prizes
1 Comment
Great info for some a review! Just info add. To get a sharp lit moon, it moves but is a bright white light in the sky. SS/ISO = 125 Aperture = f/8 for sharpness adjust between f/11. Also to get a sharp in focus moon as well as a well lit foreground, say of a lit city it requires bracketing, but the moon moves. Again same SS/ISO = 125 Aperture = f/8 for sharpness adjust between f/11 but select 5 @ +/- 3EV and make the center start .5s.. You get the first image as 125s and the last as 30s. If movement like clouds just increase center shot it will get a faster first image and a faster last but still have all in between images. A note: no matter the lens whiter 12mm or a 50mm the moon will never be the size you see with your eyes. When you look up at the moon and focus on it it will be about the size of your thumb out stretched but your peripheral also catches the unfocused foreground. This is why even in the film days they cut and placed a moon the size believed seen in a photo the way today we blend a moon is post software. Yes you can get a larger moon with a telephoto but you are further from the foreground. The first part should help to get a sharp moon during a lunar eclipse but use bracketing of 3 at +/- 2EV when it gets darker before full eclipse this was you have a good center but also a brighter dark area to get the detail of both dark and lit parts in HDR post processing, as it gets darker yes higher ISO and slower SS. A lunar eclipse can last 5 to 8 hours depending on time of year and your location that is a busy time adjusting camera mount to follow so a tracker that will hold your lens will help, but remember high noon is straight up the same for high midnight for the moon. Some more info is to not use that 600mm + 2x teleconverter in APS-C (+ 1.5x) mode getting a closeup 1800mm shot, stay at 600mm and you also get stars and less blur of edges of the moon. There is a device called Promote Control you can use on cameras with limited like 3 at +/- 2ev and mirrored that lets you do as many at a may selected EV's and the best to this day for post Photomatix Pro. Lastly the moon wobbles and turns all night so images of an eclipse combined row of shots will never be the same.