Auto ISO sits quietly in your camera, but it can decide whether a fast moving scene comes out clean or a blurry mess. If you deal with city rush hour, changing light indoors, or fast events, understanding how it actually behaves gives you control you cannot get by spinning dials on every frame.
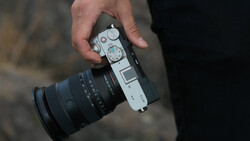
Coming to you from Jason Row Photography, this practical video follows Row through Newcastle as he fights harsh shifts in light on a bridge. He starts outside in bright daylight, then swings the camera into the darker interior of the bridge, letting auto ISO jump from 100 to around 3,200 in an instant so the exposure stays usable without touching the controls. You watch real scenes, not test charts, so you see what happens when buses, trains, and people move through mixed light while you try to keep a consistent shutter speed. Row shows how auto ISO lets you lock in motion blur or sharpness in the shutter and keep the aperture where you want it for depth of field while the camera quietly handles the exposure. The video keeps the focus on how this looks in real files, not just menu screenshots.`
Row also ties auto ISO to a point many people now feel but do not fully trust: modern AI based noise reduction has made higher ISO values a lot less scary. Instead of treating ISO 3,200 or 12,800 as emergency territory, he suggests setting a realistic upper limit that matches what your camera and editing can handle. You see how he sets a minimum ISO of 100, then a maximum in the 6,400 to 12,800 range so the camera has room to move without pushing files into territory that needs heavy cleanup. He points out that this is not just about getting any exposure, it is about balancing image quality with the risk of blur when you are moving between dark rooms, bright windows, and everything in between. The way he walks through practical examples makes you think about your own limits instead of copying someone else’s numbers.
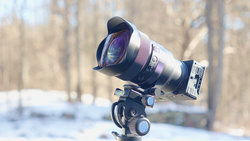
The video also gets into how auto ISO behaves in different exposure modes, which is where many people get tripped up. In shutter priority, you set the shutter to keep action sharp or motion blurred, the camera rides the aperture as far as it can, then auto ISO steps in when the lens, for example an f/2.8, is wide open and still cannot give enough light. In aperture priority, you lock in something like f/8 for the depth you want, but once the shutter drops below a speed where you know camera shake becomes a problem, auto ISO starts climbing so you keep a sharp result. Program mode adds another layer, letting the camera juggle both shutter and aperture before it touches ISO, which can be useful in quickly changing street scenes in places like that Newcastle bridge. Row even shows how on the Sony a7R V you can reach auto ISO limits straight from the ISO button, set minimum and maximum values, and define a minimum shutter speed so the camera knows when it must protect sharpness.
Row briefly touches on using auto ISO for video, which is where many people are nervous about visible jumps in brightness. He explains when a fixed ISO makes more sense, for example when matching clips in a more controlled project, and when auto ISO becomes the better option because you care more about simply nailing exposure in one pass than keeping everything perfectly consistent. There is also a useful look at how auto ISO supports you when you walk through interiors where every room is a different brightness and you do not have time to adjust settings on each doorway. The more you watch, the more you see that auto ISO is not a lazy shortcut but a way to assign jobs between you and the camera so you can focus on framing and timing. Check out the video above for the full rundown from Row.


Join the Fstoppers community for free
-
Post comments and join in the discussions
-
Browse the site ad-free
-
Share your work and get featured in the community
-
Compete in the photo contests for fun and prizes
No comments yet