Most cameras have at least one exclusive attribute, and the OM System Cameras have more than most. Its ever-expanding “Live” collection contains some of its unique computational photography features. Let’s dive into five of its tools to find out what they do and how you can use them.
Some new OM System users are at first daunted by the enormous range of features on the OM-1 cameras and their predecessors. Going back three generations to the Olympus OM-D E-M1 Mark II, the flagship camera was marketed as overengineered because of its enormous range of functions and customization. The current OM-1 Mark II has come much further.
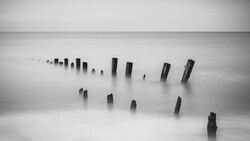
The Live features in the camera open up a world of creative possibilities. This was shot using LiveND.
I'm a fan of technology and what it can do; I come from the generation that could program the VCR and saw the first digital watches and smartphones appear. Historically, I worked in a highly technical engineering environment, so using advanced features comes relatively easily to me. Nevertheless, I also understand that a camera's functions can be intimidating for many.
Cameras are easy to use once you understand how their different functions work. So, this article explains how to use some of the OM System's most useful tools. Although primarily aimed at OM System users, this may also be interesting for those who use other camera systems and are curious about these computational photography functions.
What Is Computational Photography?
Computational photography uses the camera's processor to enhance the captured images. It improves the camera's capabilities by using features unique to digital photography. Examples of computational photography include in-camera focus stacking, HDR compilations, and creating high-resolution shots using sensor shift technology. The OM System has a raft of these features. However, the "Live" family is most useful for me.
Live Time and Live Bulb
What Do They Do?
Live Time and Live Bulb allow you to watch a long exposure gradually develop on the live view screen or viewfinder. You can also see the histogram move to the right during the shot, enabling you to judge accurately the correct exposure. This takes the guesswork out of the timing of very long exposures and makes bulb mode more accessible to photographers.
Images can be saved as raw files or JPEGs.
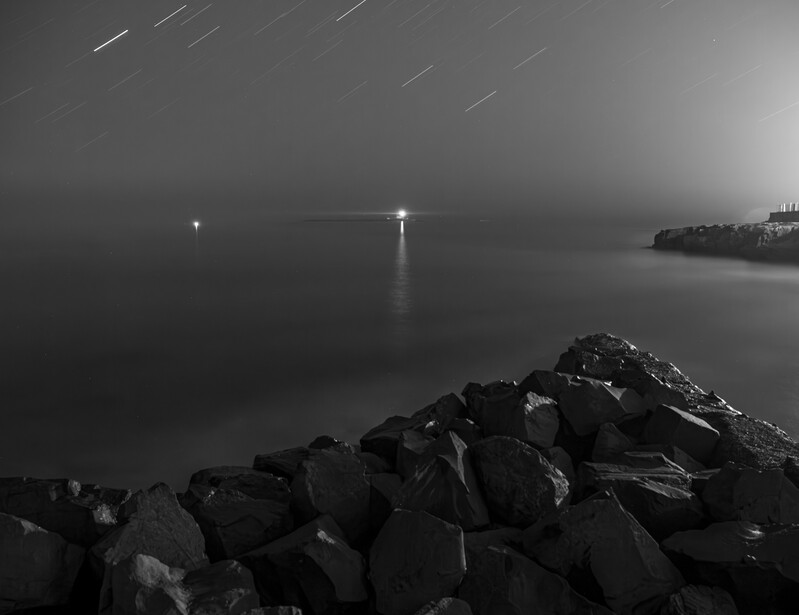
A 766-second exposure using Live Time.
Where to Find it
Live Time is found in bulb mode with the newest OM System cameras and the Olympus OM-D E-M1 Mark III. Select B on the mode dial and rotate the rear thumb dial one click clockwise, and you will switch from Live Bulb to Live Time.
On older Olympus models, Live Time was hidden away in Manual Mode beyond the 60-second shutter speed. (Unlike most cameras that are limited to 30 seconds in manual mode, you can do 60-second exposures with OM System cameras.)
How Do You Use It?
Once you have selected Live Time or Live Bulb, as shown above, you can choose how often you want the Live View screen to refresh. The number of times the camera will refresh the view depends on the ISO; the higher the ISO, the fewer times it will refresh. Press the Menu button, and you will see at ISO 80, it will refresh 24 times, and you can select refresh intervals from 0.5 to 60 seconds. So, for long exposure star trails, you would choose 60 seconds. Meanwhile, for aurora shots where you may only want an 8-second exposure, you would refresh every half a second.
With Live Time, you begin the exposure by briefly pressing the shutter release button and stop it by pressing it again. Meanwhile, for Live Bulb, you hold down the shutter button for the entire duration of the exposure; I generally use Live Time. You can operate the camera using a remote wired or wireless trigger. You can also use a smartphone or tablet and the OM Image Share app. Then you can watch the exposure developing on that device instead.
The maximum duration for Live Time and Live Bulb is 30 minutes.
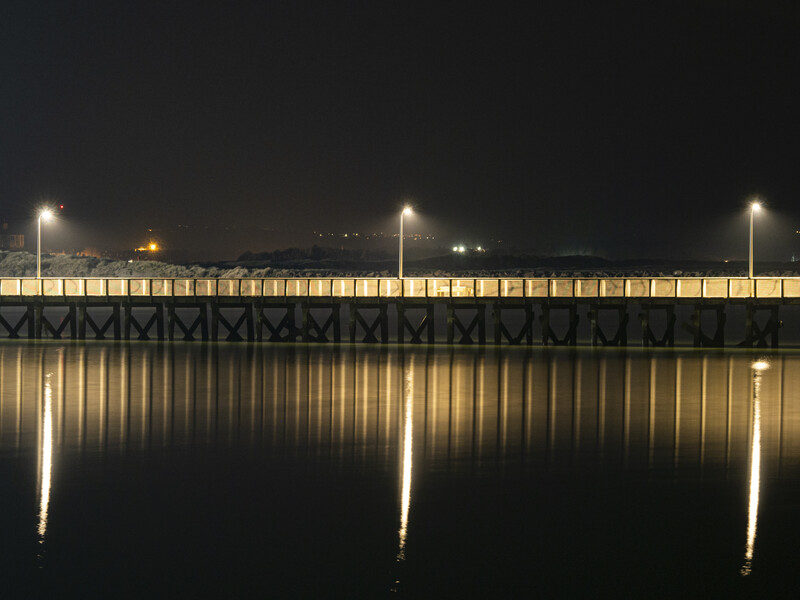
42-second exposure shot using Live Time. ISO 200, 49mm, f/4.
Other Considerations
When shooting very long exposures, you need your camera on a stable platform, and a good-quality tripod is ideal. The general advice is to switch the In-Body Image Stabilization (IBIS) off when using a tripod. However, I leave mine on auto as it switches off when the camera is still but also counteracts any slight movement caused by the wind or vibrations underfoot.
Silent mode using the electronic shutter prevents in-camera vibrations, and if you don’t have the facility to trigger the camera remotely, the self-timer works well.
Even if you misjudge the exposure time and run out of screen refreshes, you can generally estimate the correct exposure time by seeing how far along to the right the histogram has moved so far. For example, if it only moved a quarter of the way from the left in eight minutes, you know it will need another eight minutes for the histogram to move halfway.
Long exposures can cause noise artifacts on your image, so switching your Noise Reduction on is preferable. On the OM-1, this is in Camera Menu 1.3 ISO/Noise Reduction. I have this set to Auto.
Live Comp
What Does It Do?
Live Comp (Live Composite) Mode continuously takes a series of images, usually of the same scene. It only adds new, brighter light appearing in subsequent frames to the first image. The huge advantage is that you can effectively shoot a scene over an enormously long period—up to six hours—and never over-expose the original frame.
Thus, Live Comp can be used for light painting, star and car headlight trails, capturing images of lightning, and so on. The final image can be saved as a raw or JPEG.
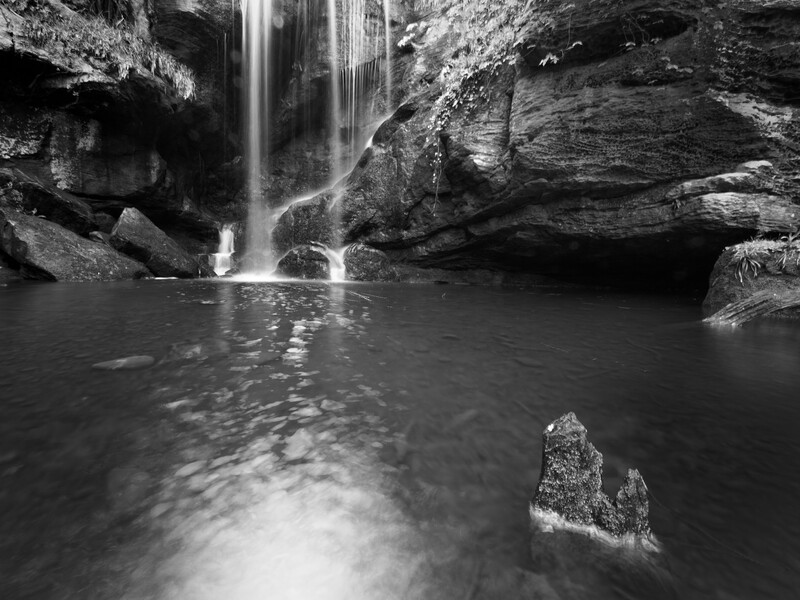
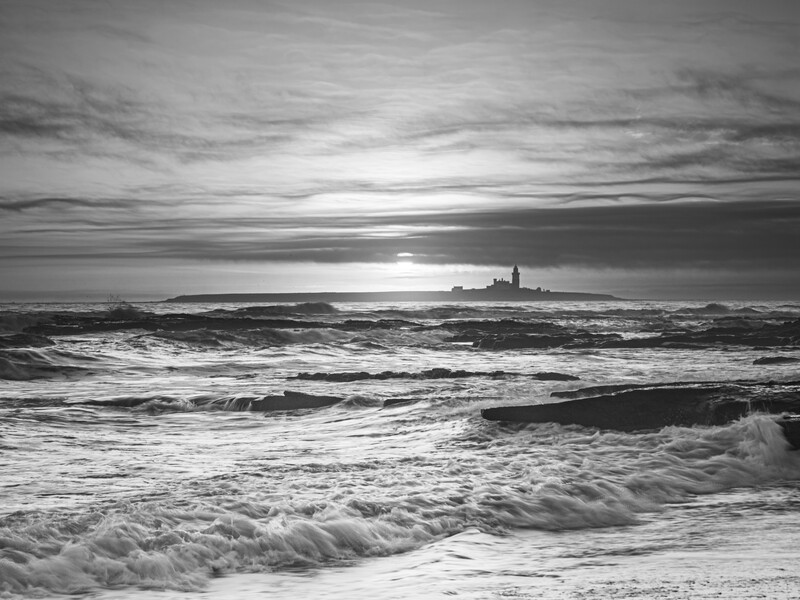
One can use Live Composite mode in situations like this, where the aerated moving water is brighter than the background. This is a composite of multiple half-second exposures.
Where to Find It
Live Comp is adjacent to the Live Time settings, so at the bottom of the M mode on older cameras, or two clicks clockwise of the thumb wheel in Bulb Mode with the newer models.
How Do You Use It?
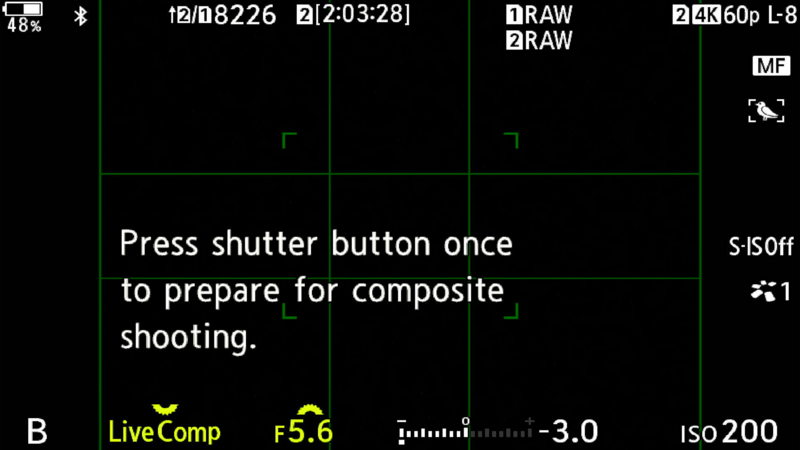
After selecting Live Comp, press the Menu button, which takes you to the Composite Settings. You can set the exposure's shutter speed between 0.5 to 60 seconds. You then can adjust the lens aperture and ISO and, if necessary, fit an ND filter for the correct exposure.
Place the camera on a tripod, and press the shutter once to prepare for composite shooting. The second press of the shutter will start the composite. Again, you can see the image form on the back screen with brighter light being added to the original scene.
Other Considerations
Like Live Time, it’s best shot using a tripod. Again, the final image can be saved as a raw or JPEG.
Because the shortest shutter speed available is 0.5 seconds, in broad daylight that would lead to over-exposure, even at ISO 80 and f/22. Consequently, using this feature to photograph lightning during the day, I fit an ND1000 filter to the lens to reduce the shutter speed.
Live ND and Live GND
What Do They Do
The Live ND filter partially does away with the need to carry physical ND filters by providing them electronically. On the original OM-1, the ND filter goes from ND2 (one stop) and up to ND64 (six stops), and up to ND128 is available on the OM-1 Mark II. The latter model also provides a graduated neutral density filter up to ND8 (three stops). Live ND darkens down the image, thus enabling longer exposures.
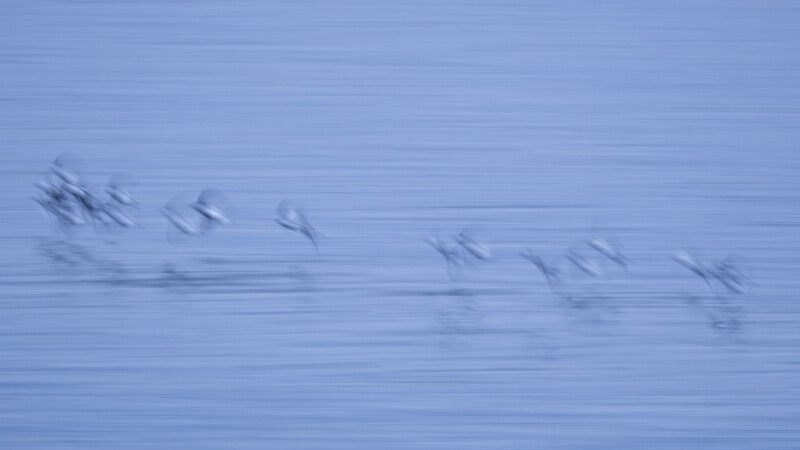
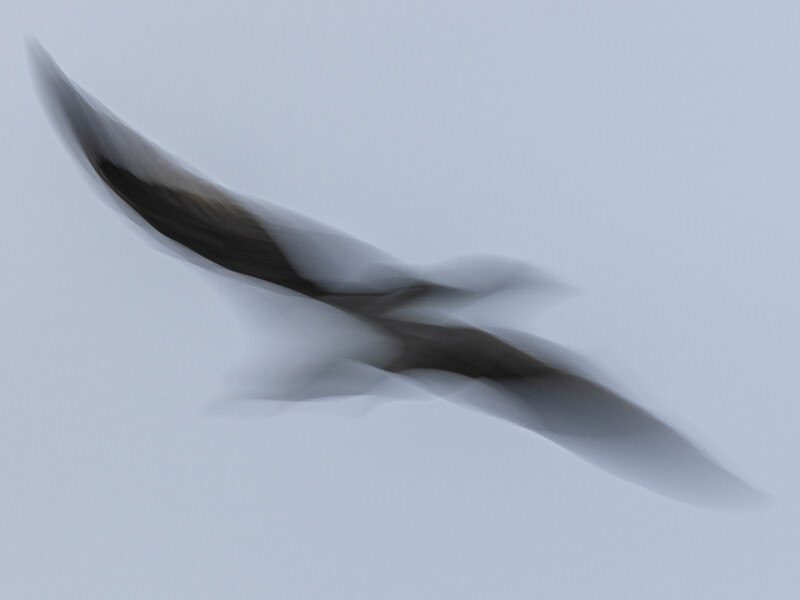
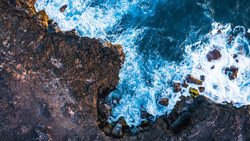
I use Live ND for abstract shots.
Live GND works similarly but affects the part of the image to which it is applied. It allows shooting a scene with a greater dynamic range because it darkens the highlighted area, usually the sky at the top of the picture.
Images can be saved as raw files or JPEGs.
Where to Find Them
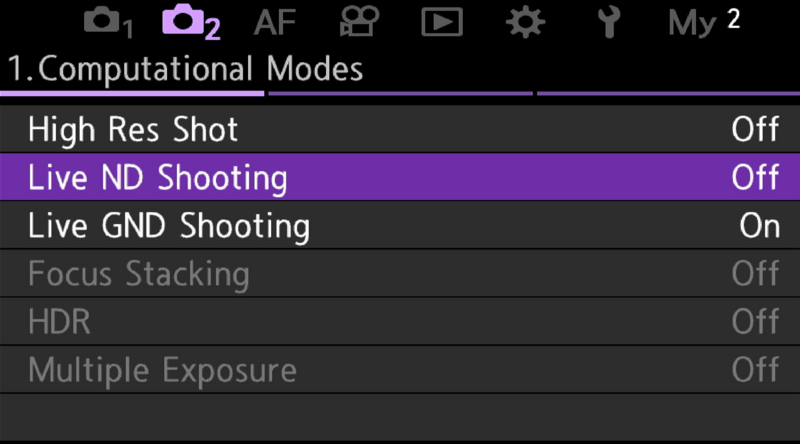
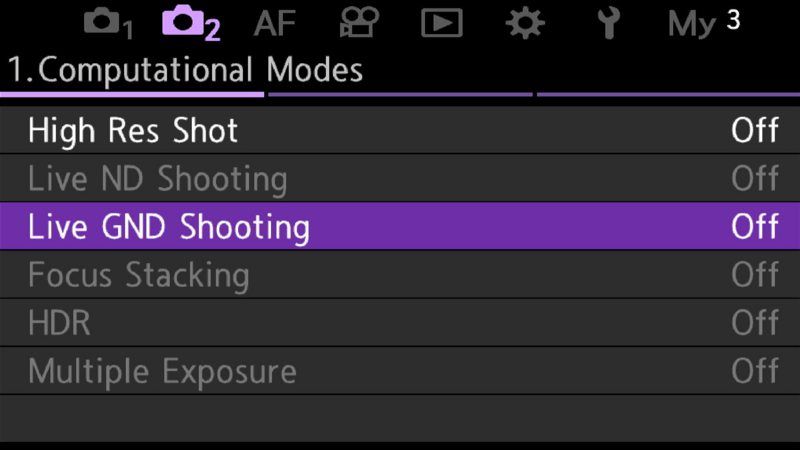
Live ND is available on the OM-1 Mark II, the OM-1, OM-5, and some earlier OM-D cameras. Live GND is currently only available on the OM-1 Mark II. In older models with the older menu system, Live ND is in Shooting Menu 2. With the newest models, Live ND and GND are found in the Shooting Menu (camera icon) 2.1 Computational Modes.
Live ND is only accessible in manual mode (M on the mode dial) or shutter priority (S on the mode dial). Meanwhile, Live GND is also available in aperture priority (A) and program (P) modes.
How Do You Use Them?
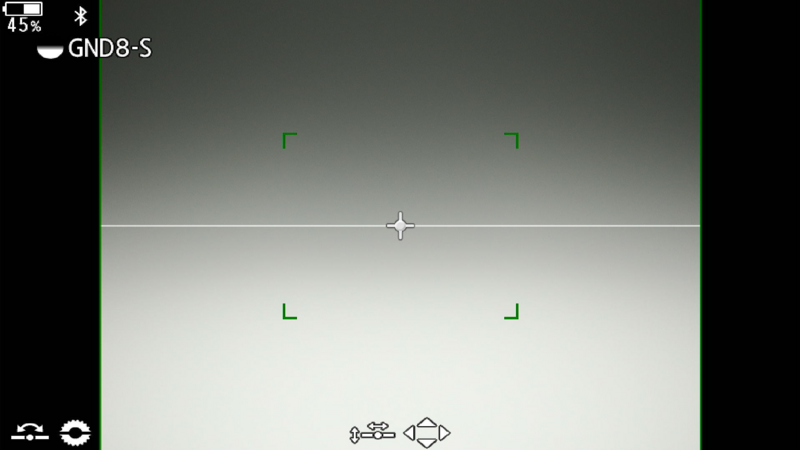
A screenshot of the GND 8 filter with a soft horizon.
The filters are both activated within the menu, as shown above. Live ND will allow longer shutter times.
Meanwhile, the Live GND can be moved up and down using the arrow button above and below the OK button. It can also be rotated using the front and rear dials, and the axis around which can be moved with the left and right arrow buttons. Within the menu, you can also choose a soft, medium, or hard boundary between the filtered and unfiltered areas.
This is a test image I shot when I first tried the Live GND filter on the OM System OM-1 Mark II. I set to darken just the sky.
Because the OM-1s offer up to 8.5 stops of image stabilization, it’s possible to use these features without a tripod. I've handheld 5-second exposures.
For this image, I fitted an ND1000 filter, set Live Comp mode to 0.5 seconds, pointed the camera at the oncoming storm, and waited for the lightning.
During bright sunlight, my screw-on ND1000 filter will only allow, at the longest, something like a one-second exposure. However, combining it with Live ND gives scope to take up to one-minute exposures even at midday.


1 Comment
Thank you .