
The mistakes you make in life, including photography, leave a tart, bitter taste in your mouth, especially when they’re your fault and entirely avoidable. The solution? Don't make them. Here are three easy steps photographers from any genre can implement to immediately improve compositions and eliminate unnecessary errors.
Nothing makes me feel worse than when I make self-induced mistakes, especially with things that I care deeply about. Be it teaching, surfing, or photography, my ego can handle getting things wrong if it’s in areas of expertise that might sit beyond my capabilities, but when I make mistakes with things that are entirely preventable, I get incredibly disappointed in myself. That includes photography.
When I was first starting out, I used to make some of the most inane errors, particularly related to composition. But I’ve learned a lot of things along the way, and here are three simple things I’d like to share with you that can really improve your compositions and the placement of elements in your final images.
1. Remove Distractions
I’ll come straight out and say it: if you have static elements in your composition such as mountains, buildings, or subjects posing for portraits, there’s absolutely no reason whatsoever to have any distracting elements inside your frame.
By distractions, I’m referring to parts of an image that are not serving to complement your subject or add any point of interest for the viewer to rest their eyes on. It might be a random person walking in the background, half a bird flying out of view to one side, or a piece of trash in the foreground.
Whatever it is, as you scan the image before you take your shot, take a few extra moments to ensure there is nothing in the frame that could possibly take your viewer’s eyes away from where you want them to go. If it’s a moving person or animal, wait until they’re out of shot, likewise if it’s some form of moving transportation. If it’s a piece of trash, move it out of the way.
If your subjects are moving, such as in-action sports or a day at the park with your kids, then it’s not so easy to eliminate distractions at the time you take your shot. In that case, you can edit them out later during the post-production phase. I’ve written a whole article on Fstoppers about eliminating distractions, which you might find of interest.
2. Move, Move, Move
It’s ever so simple, isn’t it? Just move yourself, your camera, and perhaps your tripod to a slightly different spot. The sun is always moving, the clouds are seldom still, and the light is forever changing, so why don’t we, as photographers?
How often do you see images of a particular location taken from the exact same spot? It honestly baffles me. Sure, if there’s a singular observation deck standing atop a 2,000-meter cliff that provides the only place for shooting, then that’s understandable, but how often is that the case?
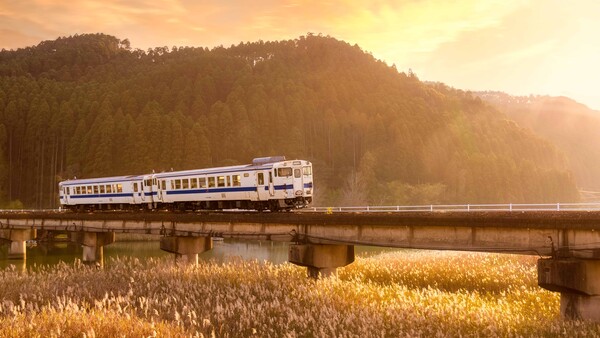
Take this image below, for example.
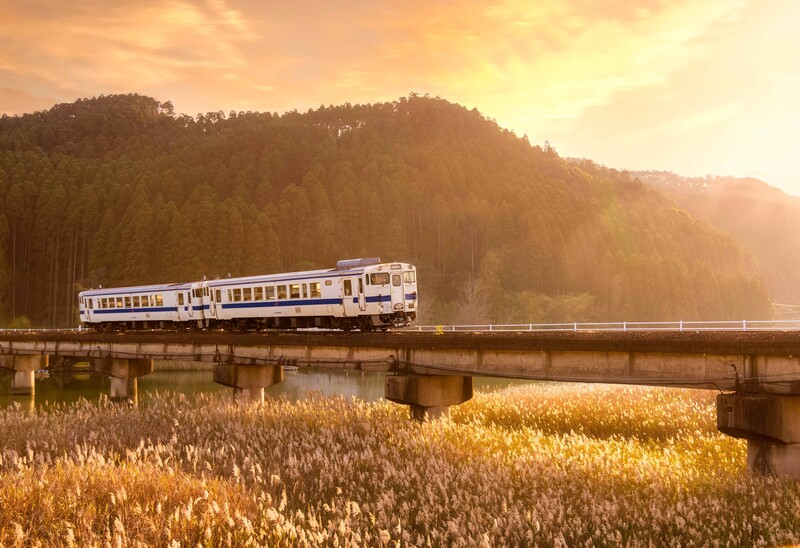
This bridge, river, train combination is very popular with photographers in this area, especially as the sun sets off the mountains to the right of the frame in the evenings. But if I had a dollar for every time I saw this identical photo pop up on my Instagram feed, I’d be able to retire right now and surf the rest of my days in an endless chase of summer.
So, what did I do? I walked down the road a few hundred yards, crossed the bridge, climbed over an embankment, gently parted some weeds and thickets, ensured no insect was harmed along the way, and set up just in front of the river looking up from a different angle.
My shot? I've never seen anyone else take it from this position.
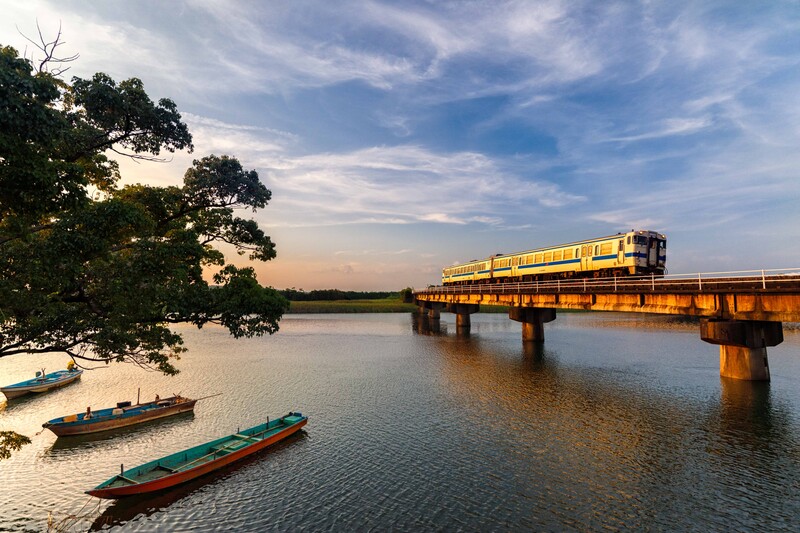
Wherever you are and whatever you’re shooting, just take some time to look around for different angles, different perspectives, and different points of interest that might provide your viewers with something more unique, creative, and original.
3. Turn Your Camera Grid On
I’m sure you know about the rule of thirds. And you might roll your eyes about another reference to it, but do you know its history and why it’s a great starting point for your images?
The rule of thirds has its roots in the 18th century, when painter John Thomas Smith coined the term. However, the concept of dividing an image into thirds can be traced back even further to the work of Renaissance artists such as Leonardo da Vinci.
Further to that, the rule of thirds is based on the idea of the golden ratio, which is a mathematical proportion that is found in many natural and man-made objects. The golden ratio is considered aesthetically pleasing and helps to create a sense of balance and harmony in images.
So, it’s not just about a bunch of vertical and horizontal lines and placing your elements on lines or intersecting points. In short, the human eye likes seeing elements placed along intersecting points, and it gives your composition some breathing space to add other elements.
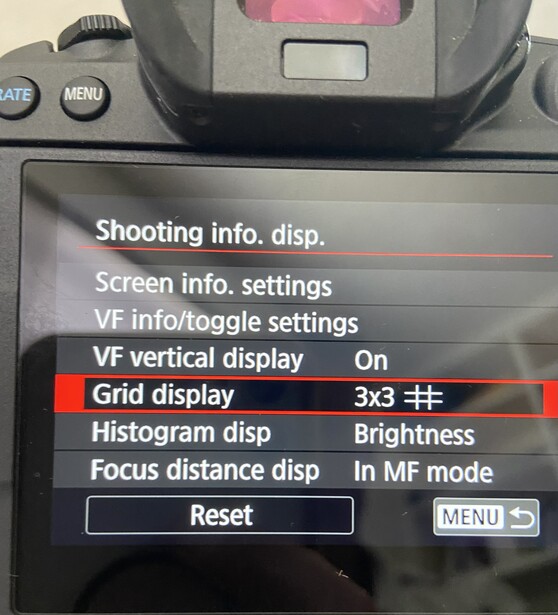
And it’s so easy to utilize. You can literally toggle a button on in your camera settings, as you can see in the image below of my Canon EOS R5. By doing so, you’re instantly able to place elements in the frame in positions that are pleasing to the human eye.
And if you want to experiment with the golden ratio or other compositional forms, that’s simple to do in Photoshop with the Crop tool or in Lightroom by clicking on the letter "O" in the Develop Module. I’ve written in depth about the value of cropping here.
Summing Up
Composition can make or break a photo. Where you place your elements can make a good photo great, or a good photo bad. Thankfully, there are simple steps you can take to ensure your compositions from this point forward are much better than they might previously have been.


Join the Fstoppers community for free
-
Post comments and join in the discussions
-
Browse the site ad-free
-
Share your work and get featured in the community
-
Compete in the photo contests for fun and prizes
7 Comments
Ha ha - when I looked at the first image, I was puzzled - didn't seem to me to "illustrate" the heading!
Couldn't agree more, with section 2! This is why we need to stop being just "trigger happy", and PLAN our photos!
The cover shot isn't a bad image, but it's been shot so many times by hundreds of photographers over the years from that very spot, especially in the afternoon. I think there are probably 4-5 better spots along that bridge/river combination you could shoot from. All it takes is 5 minutes of walking, checking, and maybe (gently) moving a few branches out of the way.
When you are new to the area, as a visitor, you take the easiest shot available, when you hear the train. There is no 5 minutes to position yourself in most cases.
I really like the cover shot. However, the 2nd one while I like the water and a different perspective, I think I would have got rid of the boats. It takes away from the main subject unless you want the boats to be the subject and then I would blur the train because my eye goes to the boats first thing.
I'm glad you educated me about the rule of thirds.
Now I'm wondering how I've managed to take photographs for the last sixty-odd years without using it.
Love these images. Especially the last one.
But if I had a dollar for every time I saw this identical train photo pop up on my Instagram feed, I'd still be a few bucks short of coffee money.