
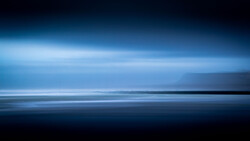
Focussed on the sharp, perfectly composed, and exposed shot? Why not try Intentional Camera Movement or multiple exposures to create something unique. You may quite like it.
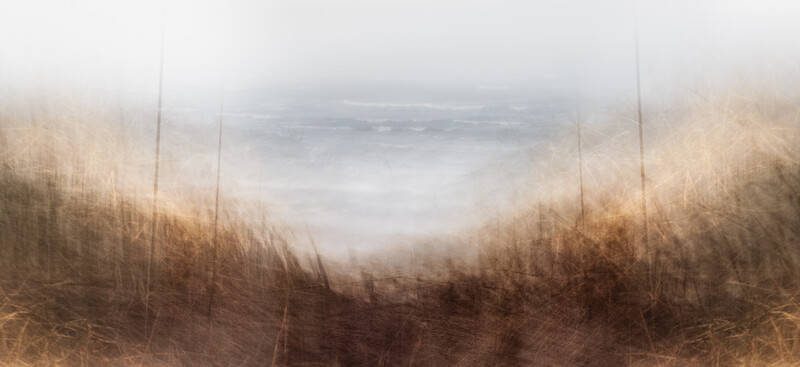
Most of us as photographers are looking for sharp, perfectly composed and exposed images. It is what we are taught or have learned and so, therefore, try to achieve. Sometimes, though, it's fun to change this up a bit. Intentional camera movement is exactly that, intentionally moving the camera when taking the shot to produce a creatively blurred image using longer shutter speeds. Multiple exposures are where you set the camera to take a series of multiple shots of the same scene or of varying scenes and elements to make up the resulting image. Your camera's menu settings should allow you to do this. But if not, there's a three-step tutorial below.
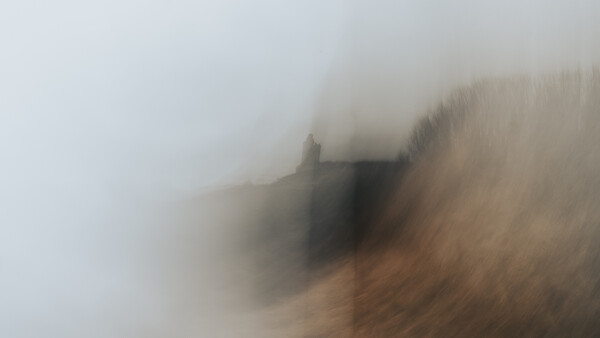
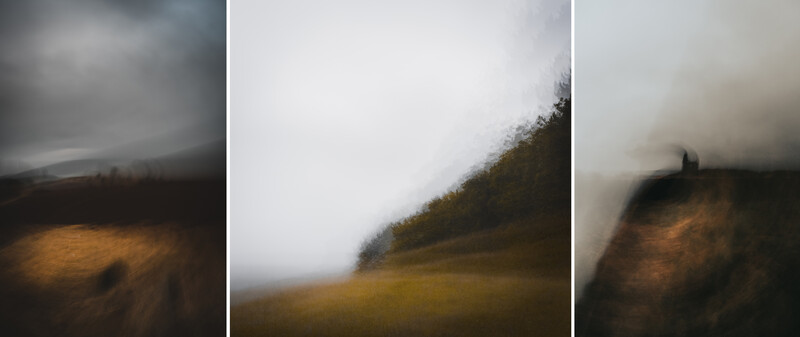
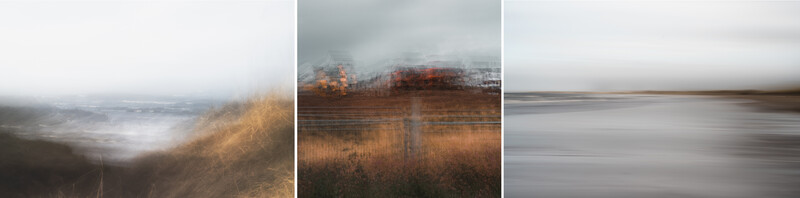
Intentional Camera Movement
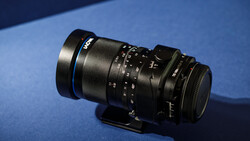
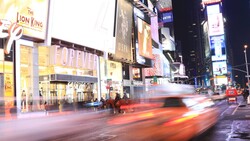
At the time of taking these images, my longest focal length for shooting was the Nikon NIKKOR Z 24-70mm f/4 S Lens, so all have been captured at 70mm. The longer the focal length, the shorter exposure required, plus the movement registers more quickly. The wider the lens, the longer the exposure and less movement recorded. You can also add an ND3 stop if conditions allow or depending on the type of effect you are seeking. Most of the exposures shown have shutter speeds of between 1/2th and 1/8th second. My choice of aperture for these was f/5.6, as I wanted slight clarity in any areas with little movement. The final effect you achieve will be up to you and will depend on the conditions when shooting. More blur, longer shutter. Another note I'd like to make is the tonality of the images shown. This is my choice to edit them with these similar tones, as I feel it complements the images and the dreary weather we get here. Plus, I'm a big fan of the artist J.M.W Turner and his works. You can opt for vibrant foliage and flowers or sunsets. It's entirely up to you.
Movement
Some photographers may tripod their shots and lock off any direction of movement that they do not wish and then take the shot. Think vertical panning of trees and horizontal panning of seascapes.
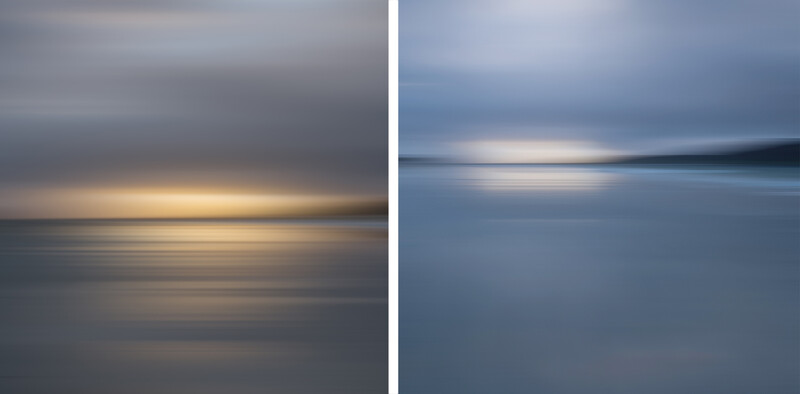
However, if you handhold the shots, there are multiple directions you can move in; just don't drop your camera! Flick your wrist, drop your wrist, spin, pan vertically or horizontally while rotating. Add a zoom blur while moving, though takes a bit of practice. All are fun to try, and all will produce varying results. Plus, there is nothing to say that during the editing process you can't combine multiple exposures to get another unique image. It's totally up to you.
You will also find a great article and techniques on shooting intentional camera movement here by photographer and Fstoppers writer Jason Parnell-Brookes
Multiple Exposures
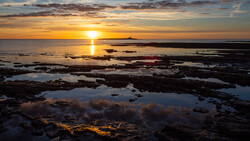
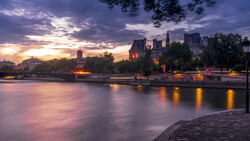
Your camera's menu should allow you to take multiple exposures of a scene, but if not, keep reading, as I have a brief tutorial on how to achieve similar results below. What I normally do when shooting these is set my camera to aperture priority, although manual works just as well, with the aperture being around the f/8 mark. My Nikon allows me to take up to 10 multiple exposures in an overlaid sequence, shown in the viewfinder, before creating the final JPEG. The in-camera blend mode is set to average. Please note if you are thinking of trying this, shooting in JPEG and not raw will save processing time in the following tutorial. I don't refocus between images.
Most of the movements I make are only quite slight, overlapping, moving up or down, and rotating slightly. When rotating, I try to imagine a fixed center point of the scene in my viewfinder. I also find that higher-contrast scenes or scenes with varying colors produce better results. These images were photographed using the Viltrox AF 85mm f/1.8 Z Lens for Nikon Z.

Smart Object Blending
If you choose to shoot these singularly instead of in-camera, try to visualize the rotation point of the previous image and don't keep checking the playback. Smaller movements will result in better images I have found. As I mentioned the Z 7 records 10 multiple images and displays/overlays them in the viewfinder when I shoot, as will most cameras nowadays. It also records them as individual files, and this is what this tutorial is based on.
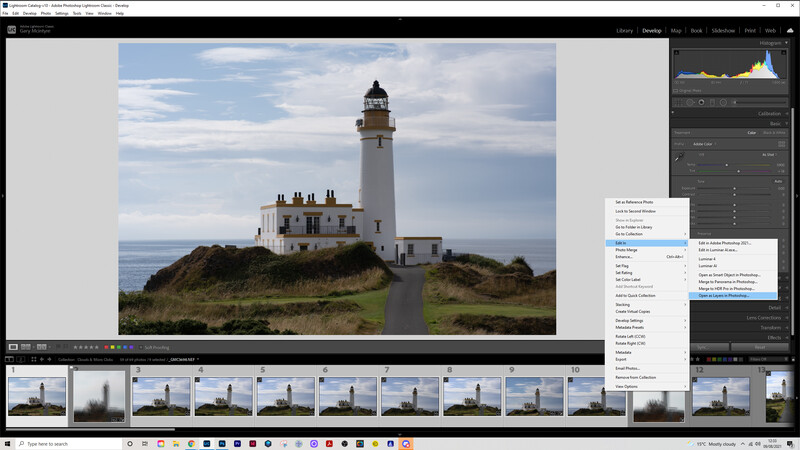
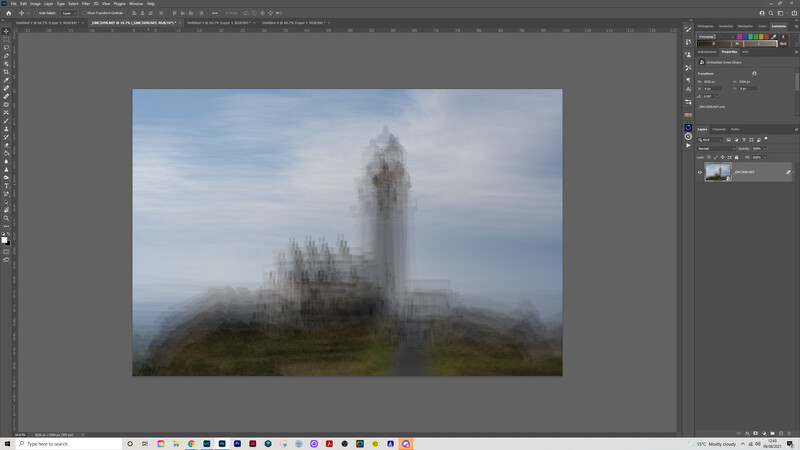
First, select all your images in Lightroom and then right-click, open in Photoshop as layers.
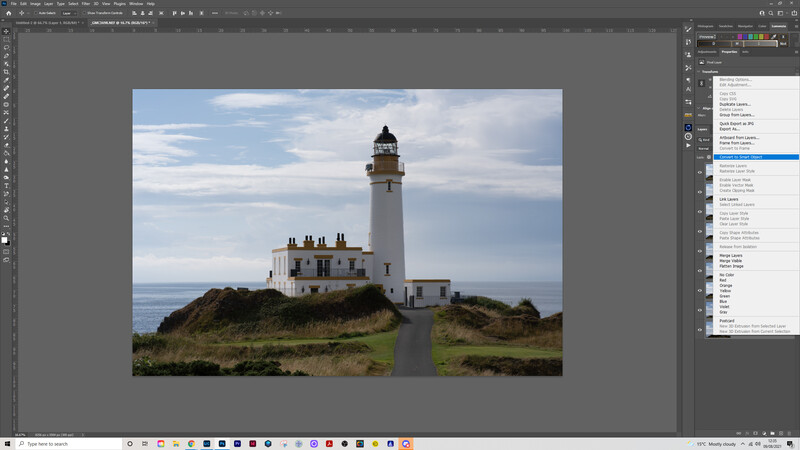
Next, in Photoshop, select all your layers and convert them to a Smart Object. Don't auto-align here, as we want them to be as you shot them.
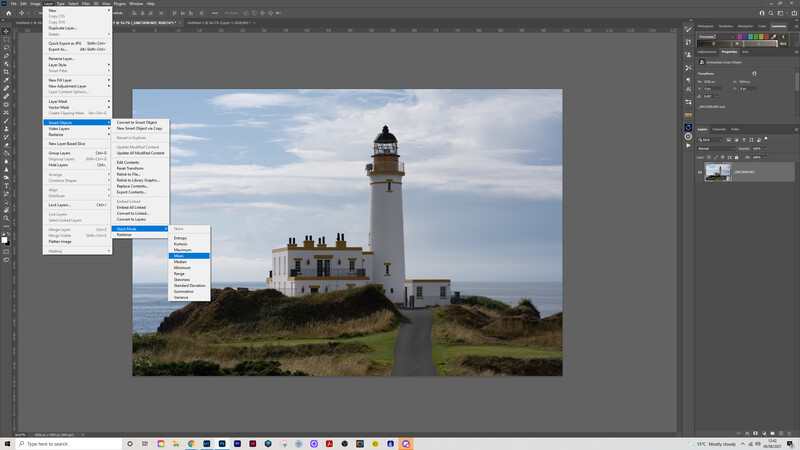
Once this has been completed, go to Layer- Smart Objects - Stack Mode - Meanm and let Photoshop do the rest. Remember if the images are raw files, this could take a minute or so. If you shoot in JPEG, the time will be much shorter.
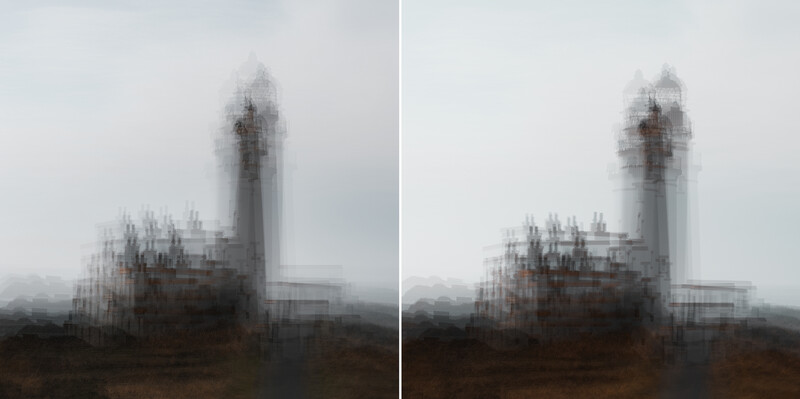
The resulting image is in Photoshop.
From here, just go on to edit your image however you want. Below are both the in-camera image and the resulting Smart Object image using the tutorial above. Yes, there are differences, but you get the idea.
Have Fun
For myself, these techniques were born out of necessity due to one of my dogs being so impatient when out with the camera. I enjoyed shooting when out walking, just recording a scene or location that I would perhaps come back to. However, one of my dogs, Inca, had other ideas and would get up to all sorts of mischief when I stopped to shoot. So, to keep an eye on her and shoot, I would keep walking and do intentional camera movement on the move. She's a lot better now, and now, I can stop for five minutes or so and do whatever I feel the scene dictates.
If you've tried intentional camera movement and multiple exposures, you'll know that they can be quite rewarding at times and produce something unique. Plus the bonus is that you're not so caught up with focusing and exposure effectiveness. I'm looking forward to trying multiple exposures with architecture when I head to the city.
If you haven't tried it, give it a go; it can be fun and breathe a new dimension into your photography.
Join the Fstoppers community for free
-
Post comments and join in the discussions
-
Browse the site ad-free
-
Share your work and get featured in the community
-
Compete in the photo contests for fun and prizes
1 Comment
Thanks for the inspiration, I'll give this a try.