
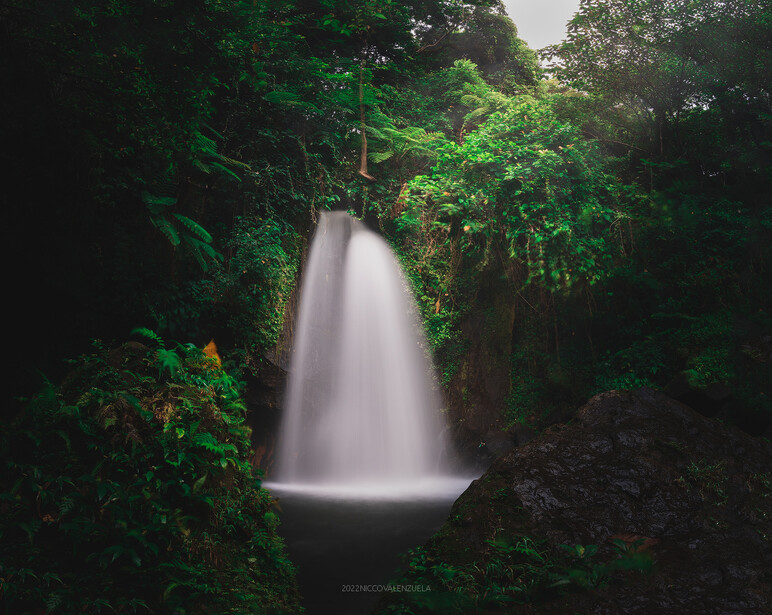
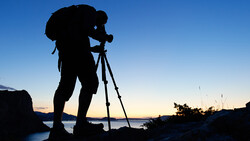
Photographing waterfalls is more tedious than it looks. In this instance, physical aspects of the gear you use heavily impact the success of each shot. Here are some important and helpful tools to have out in the field.
Shooting landscape photographs of waterfalls often requires a workflow that is very different from other kinds of landscape photography. Aside from thinking of a good composition and dealing with the ambient light, there are various environmental factors that can drastically affect your output and the success of your shot. That said, there are many physical aspects that are more beneficial when it comes to the gear and accessories being used.
Weather-Sealing and Rain Covers
The choices of cameras and lenses are pretty much the same as other kinds of landscape photography and are pretty much secondary to the fact that we prefer better image quality for our landscape photographs. However, simple attributes of the cameras and lenses are important in making sure that the gear we use can survive such environmental factors. Photographing waterfalls, specifically those with significantly heavy flow or current, requires quite a bit of resilience in terms of getting your gear wet. Unlike seascapes, where the water comes in the form of solid waves, the area surrounding the basin below the waterfalls is often filled with a spray-like mist coming from the continuously flowing and aerosolized water. When shooting waterfalls with significant height, your gear can get soaking wet from simply a few minutes of exposure to the air. For most mid- and high-end cameras, the weather-sealing on the crevices can be enough to protect from moisture. On the other hand, any other camera with no weather-sealing should be protected with a rain cover or constantly wiped.
Neutral Density Filters
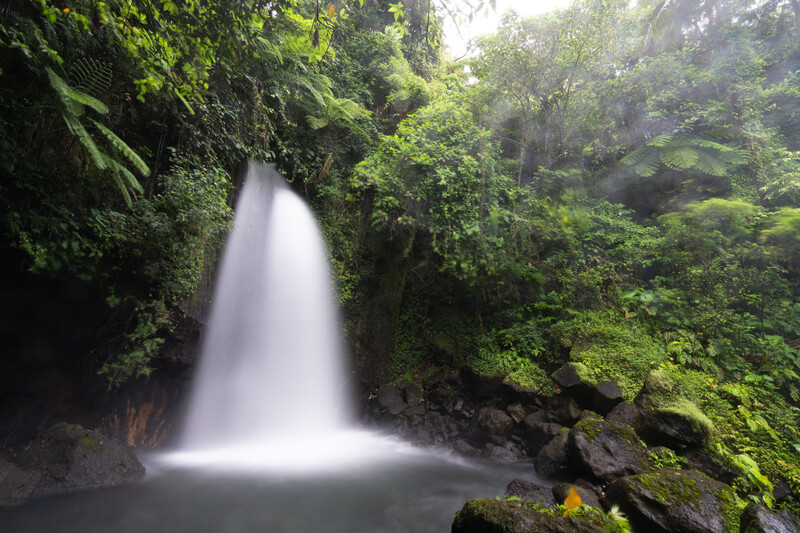
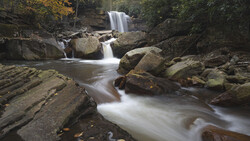
The use of neutral density filters in photographing waterfalls is not always necessary. This is especially true when the area surrounding the falls is covered by a lot of trees that provide shade. Alternatively, one just might not be into using long exposure and would rather get the frozen texture of the water. However, when you are shooting in a relatively bright situation and are after smooth and brushed textures on the surface of the water, ND filters are a must-have. Typically, a 3-stop or a 6-stop ND filter should be enough to give your exposure time significant length depending on the texture that you are after. Graduated neutral density filters can also be helpful but not always necessary, especially if the camera you use has significant dynamic range or if you prefer shooting bracketed exposures to blend later on.
Circular Polarizers
CPL filters are perhaps the most important filters when photographing waterfalls during the day. Circular polarizers are often used to enhance reflections on bodies of water to create symmetry, but the use of CPL filters in this scenario is the exact opposite. Polarizing filters redirect light coming from reflective surfaces, and this redirection can have two common results. First, a CPL can redirect the light to enhance the reflection and provide more contrast to figures reflected on the surface. Alternatively, the polarizing filter can reduce or eliminate the reflection, and this can be useful in a handful of scenarios. On the daytime sky, the filter works to reduce the glare coming from reflective particles in the atmosphere, resulting in a more intense blue in the clear sky and increased contrast against bright white clouds.

Hoods and Shields
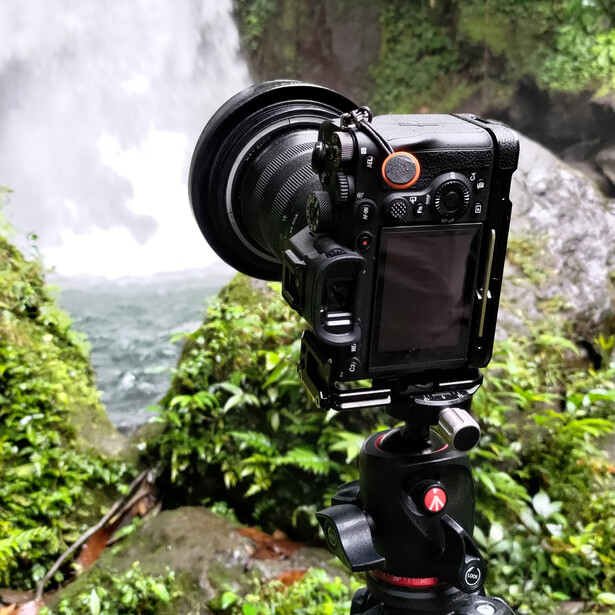
In this instance, the lens hood serves a slightly different purpose. Most of the time, lens hoods are used to shield strong harsh light coming from the sides that would result in unwanted lens flare. In photographing waterfalls, the lens hoods can partially shield the lens from the mist, not entirely eliminating getting the glass wet but at the very least reducing it. In the video above, I used a magnetic lens hood on top of the ND+CPL filter that I was using because the setup wouldn’t allow for the regular lens hood. In this case, the hood serves as a temporary shield for when I am not exposing because the distal ends of the hood would be visible in frame with an ultra-wide angle lens. However, if shooting with a standard zoom or normal prime, the hood can be kept in position to act as a shield the entire time.
Ultra-Absorbent Lens Cloths
Perhaps the most important accessory that should be in your bag whenever you are out shooting waterfalls would be an absorbent cloth. As already mentioned multiple times prior, the mist coming from the falls can really be troublesome in terms of optics. Not only does the moisture cause reduction in clarity, the small droplets can also be visible in brighter parts of the frame when using a small aperture. The result would be a blurry photograph of the waterfalls with way too many spots that would be almost impossible to remove.
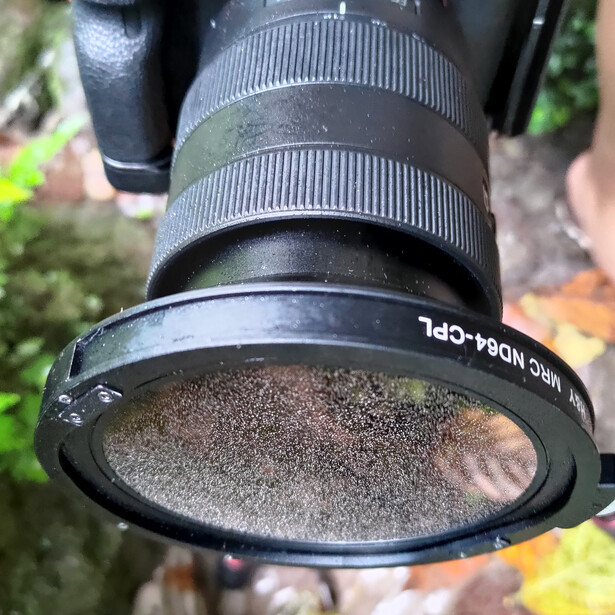
When shooting heavily flowing waterfalls, it is important to wipe down the front-most glass element (lens or filter) after every single exposure. It may also be necessary to limit the exposure time to a certain period depending on how fast the moisture builds up on the glass. The condition of the front glass layer dictates the success of each exposure and the seemingly trivial mistake of forgetting your lens cloth can ruin the shoot entirely. If shooting for long periods of time, it would be best to have multiple cloths ready in case one gets too wet.


Join the Fstoppers community for free
-
Post comments and join in the discussions
-
Browse the site ad-free
-
Share your work and get featured in the community
-
Compete in the photo contests for fun and prizes
9 Comments
Paper is far better at taking water off of a lens or a filter than any cloth IMO. Kimberly-Clark 34155 Kimwipes 1-Ply Delicate Task Wipes, 4.4" x 8.4", Tissue (Pack of 280)
Doesnt it leave any residue or dust?
Nope. For the most part you just barely touch the dust free paper to the wetness and it sops it up. There may be very slight bits left that don't smear as much if you then use a microfiber cloth.
Nice! I'll check that out. Though TBH the one that came with my H&Y has an almost paper-like feel and is more absorbent than other microfiber cloths. I dont know what they put in it. Lol
The attached photo: EOS R5, RF 24-105 L, SS 1/4s, handheld, no filters used. Ya I got lazy and didn't want to carry a tripod on our hike. And I like the look of water on the rocks giving them a wet look, which a CPL would have eliminated. To each his own.
Wow, I'm surprised my photo looks worse here than on Facebook. I guess this site compresses photos even more than FB?
Compression is about the same. However, FS reduces the size to 1000px when posting in comments. It's 2048px in FB.
To me, your image looks sharp, detailed, with no artifacts. Just curious, you wouldn't happen to be viewing on a 4k/5k monitor?
Good points and useful information. Thanks!
Thanks Carl!