
Printing a photo that's nearly 10 feet wide sounds excessive, but I wanted something that would completely transform my space. What started as a simple landscape shoot quickly turned into the largest (and most rewarding) print I've ever created.
When I set out to photograph the the Angel Oak in South Carolina, I knew I wanted to do something different. This wasn’t just about capturing another landscape photography; it was about creating something worthy of being printed at an absurd scale. I reached out to Lumaprints to see if they were interested in helping me fulfill this crazy idea, and together we were able to turn that vision into a reality. In this video and article, I wound up printing not one, but multiple large-format pieces that completely transformed my studio space, and I'm going to show you exactly how I did it.
Shooting a Massive Panorama at Angel Oak
Why Vertical Panoramas Beat Wide-Angle Shots
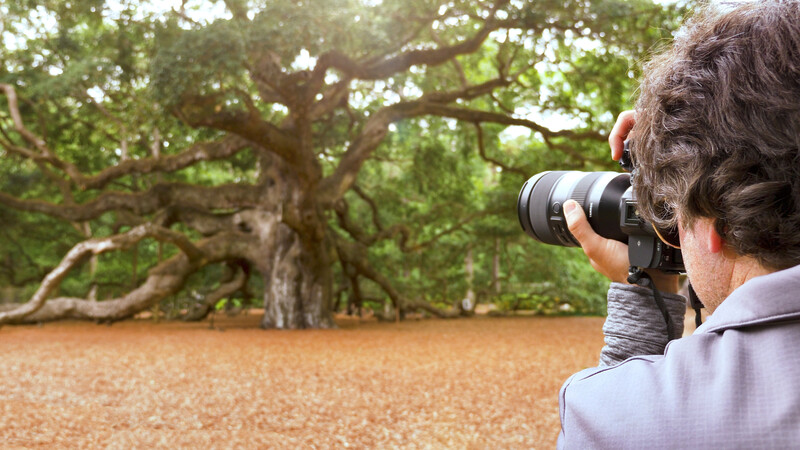
The Angel Oak on Johns Island, South Carolina is one of the largest and oldest trees in the United States. It is estimated to be around 400–500 years old and has an enormous canopy that stretches in every direction. It's the kind of subject that tempts you to slap on a wide angle lens and capture everything in one shot. But if my goal was to print this photograph with extreme detail and enlarge it up to 9 feet, capturing this massive tree with a wide angle focal length wasn't going to give me the results I wanted.
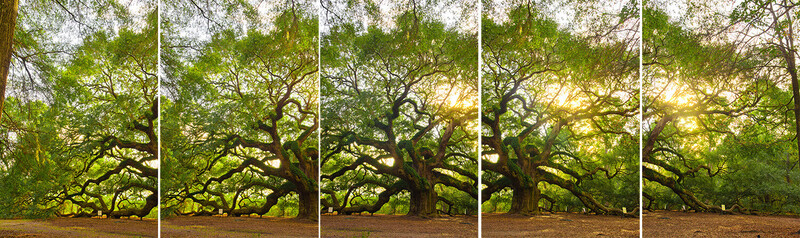
Instead, I zoomed in slightly, between 50mm and 70mm, and shot a series of vertical images that I could later stitch together into a massive panoramic file. The goal was simple: create a final image with extreme resolution that could hold up to large-format printing. This is a technique I learned by working side by side with acclaimed landscape photographer Elia Locardi. Elia and I have produced multiple Photographing the World landscape tutorials over the years, and although Elia is a much better landscape photographer than I am, this simple panoramic stitching process is just one of many photo editing techniques I have learned from him.
Shooting with vertical images allows you to create final photographs that can easily exceed 100–150 megapixels. The amount of detail you can capture is far beyond what a single frame could ever reproduce.
How to Shoot a Panorama (Even Without a Tripod)
One major challenge at Angel Oak is that tripods aren't allowed. That means everything had to be shot handheld.
The trick is to treat your body like a tripod:
- Keep the camera as stable as possible
- Pivot from your torso instead of moving your feet
- Maintain consistent framing between shots
- Overlap each image by about 30% (it never hurts to have too many images)
Here are the specific camera settings I used for this panoramic image:
- f/5.6 for sharpness
- ISO 400 for clean, noiseless files
- 1/125 sec to avoid motion blur from both hand movement and wind in the leaves
Timing was also critical. The location is usually packed with people, but on this particular day I got a lucky break when a wedding temporarily cleared the entire area. This gave me a short window to capture the scene with no distractions and minimal people (although I did still use some frames that needed retouching).
How to Stitch Panoramas in Photoshop (Step-by-Step)
If you want to create high-resolution panoramas for large prints, Adobe Photoshop makes it incredibly easy.
Here’s the workflow:
- Go to File → Automate → Photomerge
- Select your sequence of images
- Choose Auto Layout
- Enable:
- Blend Images Together
- Vignette Removal
- Geometric Distortion Correction
Click OK
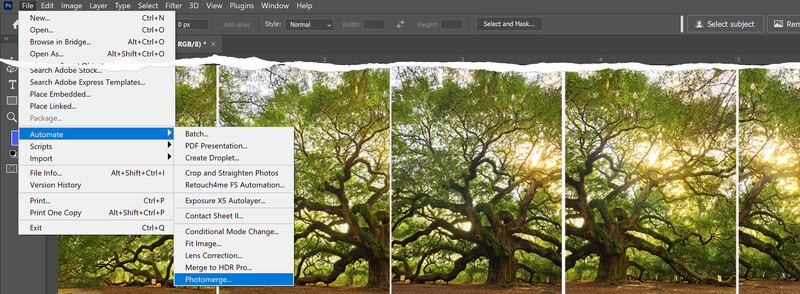
Photoshop will automatically align and blend your images into a seamless panoramic file.
From there, you can:
- Crop the composition
- Remove distractions (like people, signs, or barriers)
- Fine-tune color and contrast
In my case, I had to remove fences, signage, and anything that distracted from the natural beauty of the tree before sending the file off to print.
Printing Big With Lumaprints
Designing Multiple Large-Format Prints
Once the final image was stitched and retouched, only half of the process was complete. Now I wanted to print this file large and see just how impactful I could make this photograph when it was hung on one of our walls.
Lumaprints is an amazing online photo lab that allows photographers to print massive prints on different photo papers, metal, and canvas. They aren't just limited to processing single small orders; they can also help professional photographers save a ton of time and headaches by acting as a print portal for delivering physical prints to your clients. For this order, though, I was just using them to make a few custom prints for myself.
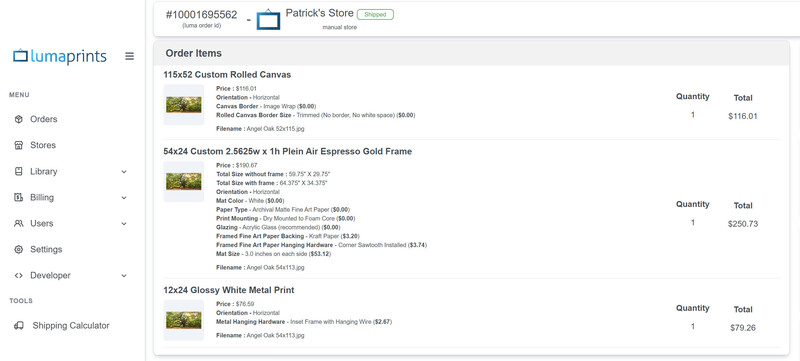
Using Lumaprints' online dashboard, I created three different versions of this single image:
- A 115-inch wide custom "rolled" canvas print
- A framed fine art print with mat board and wood frame
- A smaller glossy metal print for a modern look
Initially, I was most interested in the large rolled canvas print, but I figured I would order a few different options to see how the final print quality looked depending on the medium.
The Moment of Truth (and Mild Panic)
When the prints were delivered to my door… I had a slight panic and immediately questioned my life choices.
The framed print alone was massive, and the box was much larger than I had anticipated. Not only was I worried it was too big to fit in the location I had planned to hang it, it was also heavy enough that I genuinely thought it might require multiple people to install it onto the wall.
But once I unpacked it, everything made sense. The packaging was incredibly robust (which explains the weight), and the final product was stunning. The frame I chose, Espresso Gold, had this subtle metallic warmth that elevated the image in a way I didn't expect. As much as I was looking forward to the rolled canvas print, I think it's safe to say this framed version of the print is actually the flagship print among the three I ordered.
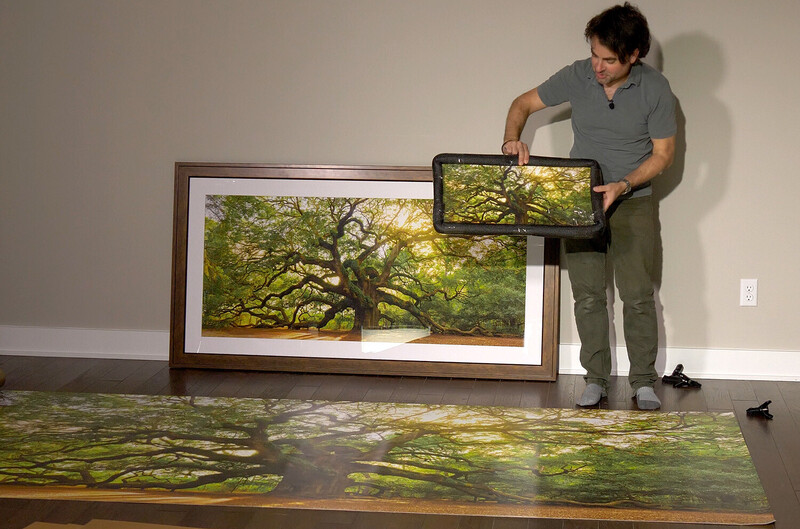
Canvas vs Metal vs Framed Prints
Each of the three materials offered something unique:
- Rolled Canvas: Perfect for large, immersive wall installations. The canvas is super durable, and at extreme sizes, it feels more like art than a photograph. And because it's rolled up, the shipping is always less than you'd expect.
- Metal Prints: Clean, modern, and incredibly sharp. These are great for smaller pieces that need to feel contemporary and ready-to-hang. I really like these for gift ideas too because they don't require frames.
- Framed Fine Art Prints: The most traditional and arguably the most "finished" presentation. The matting and frame add separation and elegance that works in almost any space. Lumaprints also has tons of mat and frame options, which makes the customizable process expansive.
What impressed me most was how well Lumaprints handled color and detail at every size. Even at nearly 10 feet wide, the image held together beautifully.
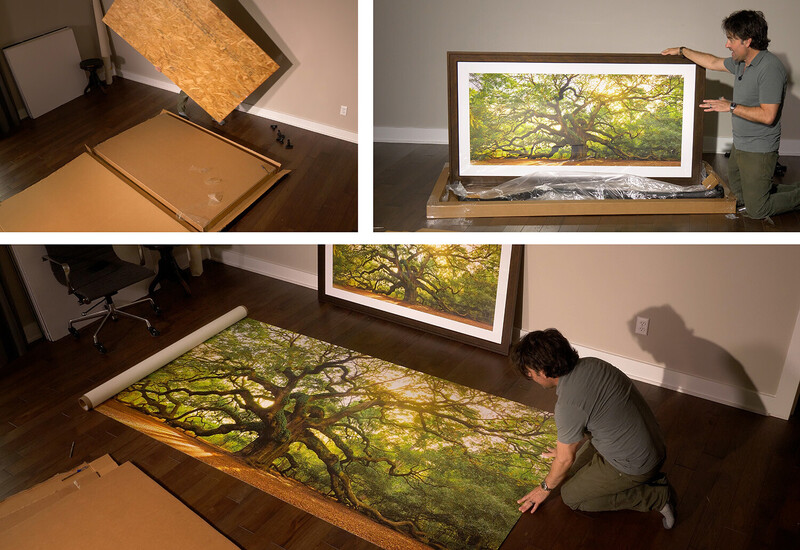
Installing a 10-Foot Print (and Making It Look Incredible)
Mounting the Framed Print Safely
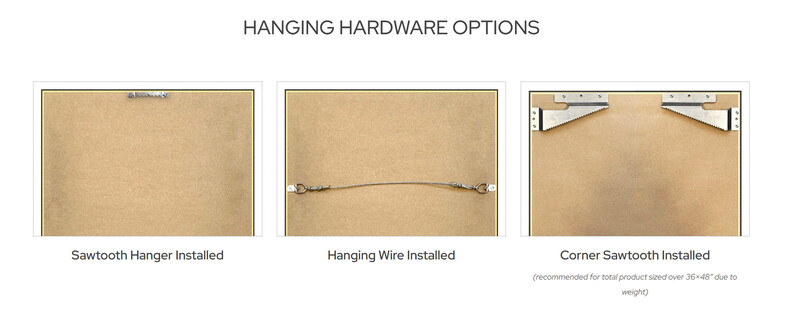
The framed print installation was straightforward, but required precision because of its weight. For something this large and heavy, you absolutely need to anchor into wall studs. I spent time measuring, locating studs, and making sure everything was perfectly level before mounting. Lumaprints offers a variety of hanging hardware options, and the corner sawtooth cleats I opted for made it incredibly easy to securely mount and level the prints all by myself.
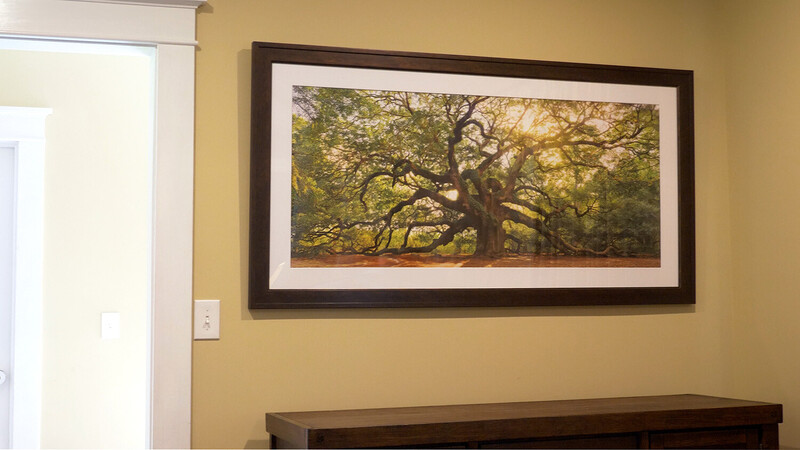
In the end, this might be my favorite print from this order, and the total presentation makes this photograph a centerpiece that instantly elevates the room.
The Minimalist Canvas Installation
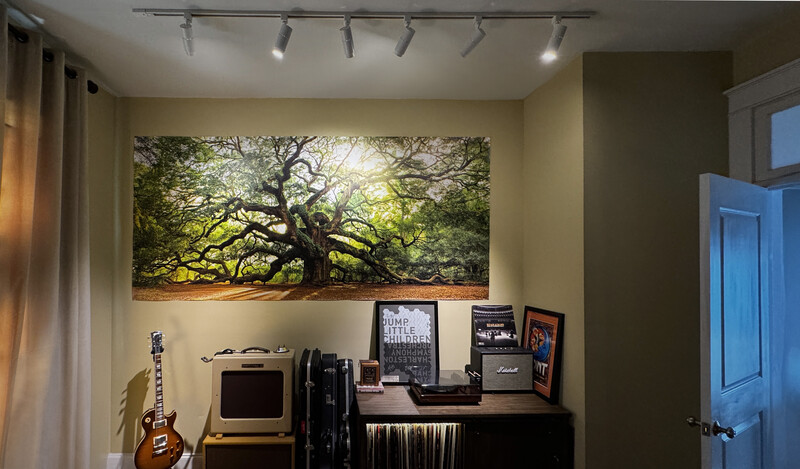
The real experiment, and the initial idea for this whole printing process, was the massive rolled canvas print. I knew framing an image this size would make it both impossible to ship and also prohibitively expensive to justify. Instead of framing it, I decided to go with a completely unconventional approach: flat push pins directly into drywall. Yes, they leave tiny little holes in your wall, but they will be incredibly easy to fill with sheetrock plaster and paint over when the time comes to redesign the room. Also, because the pins are flat and clear, they don't call attention to themselves at all.
No frame. No stretcher bars. Just a clean, minimal installation that gave it an almost poster-like, avant-garde feel.
Surprisingly, it worked incredibly well. The simplicity actually made the scale feel even more dramatic, and unlike the framed and matted print, the rolled canvas allowed the actual image to take up the entire wall without any additional material scaling down the print.
Why Lighting Matters More Than the Print
If there’s one takeaway from this entire project, it’s this: Lighting is everything.
Initially, the wall looked flat and lifeless under ambient light. It also varied heavily depending on if the natural outdoor light was skirting through the window or if the room was only lit by the single overhead ceiling light at night. I wanted this print to look amazing regardless of the time of day, so I installed a track lighting system with adjustable, zoomable spotlights. What's great about being a photographer and understanding dramatic lighting is you can easily adapt these skills and use them like a master interior designer.
The best track lights I found on Amazon were these 10w 3-color Zoomable Spotlights. They worked well for a number of reasons:
- Adjust from 60° down to 15° beam angles
- Are dimmable
- Allow precise control over color temperature (3,000K, 4,000K, 5,000K)
I also added honeycomb grid modifiers (similar to what we use in photography) to control light spill and focus illumination exactly where I wanted it.
Once everything was installed, positioned, and tweaked to my liking, the difference between no additional lighting and perfect studio lighting was night and day!
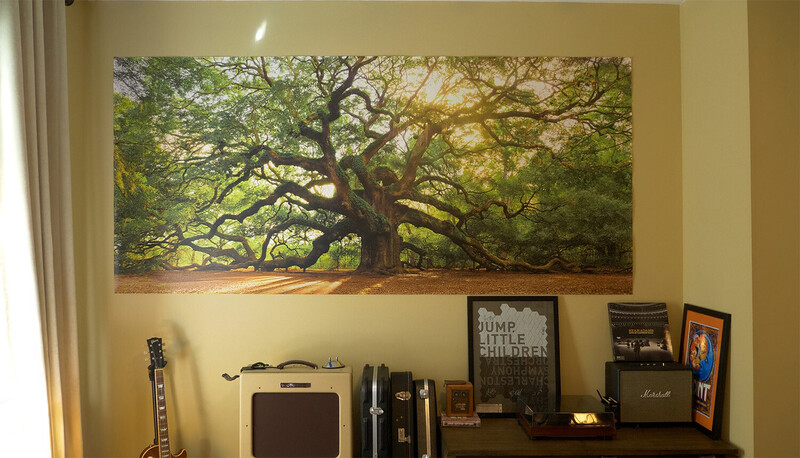
By dimming the room and spotlighting the print, the image came alive without turning the space into a harsh gallery or studio environment. Instead, it felt warm, intentional, and immersive. Below you can see what the image looks like with only natural light coming through the window. It looks great when the sun is out, but earlier and later in the day it can often be much darker.
Why You Should Be Printing Your Work Big
So many photographers never get around to printing their favorite images and hanging them on the wall, and I'm guilty of this too. There's something fundamentally different about seeing your work printed, especially at scale. On a screen, everything is temporary, disposable, and easy to scroll past. Digital images are almost a commodity and, unfortunately, often forgettable even if the image itself is amazing.
But on a wall?
It becomes part of your environment, your identity, and your space. This project reminded me that photography isn't just about capturing images; it's about experiencing them. And printing your work is one of the most powerful ways to do that.
If you've never printed your photos before, start small, but don't be afraid to think big. My sister used to be an interior designer, and it's always shocking to me how many people own unbelievable homes with massive walls to install killer artwork but then opt to either install generic art that doesn't have any personal meaning or, worse, never install anything at all.
Once you start printing and installing large images and you see your work at 5, 7, or even 10 feet wide… it's hard to go back to hanging smaller 8x10 images anywhere.
Thanks to Lumaprints for Making this Possible
Massive prints like this can easily go wrong, but Lumaprints absolutely delivered across the board. The process was easy, the medium and finishing options were outstanding, and the cost was not as outrageous as I have experienced with other print labs.
From:
- Color accuracy
- Material quality
- Packaging and protection
- Their range of printing options
Lumaprints made the entire process seamless even when printing at a scale that felt borderline ridiculous.
If you're serious about your photography, printing your work isn't optional; it's essential. And printing large forces you to see your images in a completely new way, which is always good for any creative person to experience.
Whether it's a framed fine art piece, a sleek metal print, or a wall-dominating canvas print, bringing your work into the physical world is one of the most rewarding things you can do as a photographer.
And if you’re ready to take that step, Lumaprints is a fantastic place to start.


Join the Fstoppers community for free
-
Post comments and join in the discussions
-
Browse the site ad-free
-
Share your work and get featured in the community
-
Compete in the photo contests for fun and prizes
2 Comments
Thank you... I really enjoy articles about printing. I had never heard of Lumaprints until your recent contest. Since then, I've used them a few times and been totally satisfied. One of the orders was for several framed pieces drop shipped to a client 250 miles from me. The customer claimed one of the photos was missing, I relayed the problem to Lumaprints, and they reprinted a replacement right away, no questions asked.
I really wonder how their pricing can be so low. I've been printing on wide format 44" Canon and Epson printers for 20 years and have a real good appreciation of inkjet printing costs. If I include paper, ink, waste and overhead, I doubt that I can make a print for the price they sell them for. Framed pieces are especially good prices. And for anyone accustomed to buying printing of any type, low prices are often a sign of trouble. Although that doesn't appear to be the case with Lumaprints. Their quality and service from my experience so far has been great. Their website is easy to use as well.
I have one additional suggestion to add to your review. If I'm buying a large expensive print, I'll typically order a small 5*7 or 8*10 on the final paper of my choice to serve as a proof for the client. Lumaprints can make one of them and ship it for about ten bucks.... cheap insurance for confirming color and contrast before buying a much larger framed print or canvas.
Great article. May I suggest a nodal plate to eliminate parallax error for stitching images.