

Focus stacking/bracketing consists of taking several shots of the same frame (in this case, a landscape) at different focus points within your frame to ensure sharpness throughout. Is it necessary? In most cases, no, as an aperture above f/9 will typically cover any slight variations in depth of field. However, if you are using an ultra-wide lens with subjects close to the lens and a large distance between the foreground and background elements, it is beneficial to ensure sharpness throughout.
There is plenty of excellent software out there that can take care of the whole process for you, with little to no anomalies when outputting the final image. My personal preferred method is Lightroom and Photoshop, and in this short article, I'll show you the way in which I go about it.
Focus Stacking
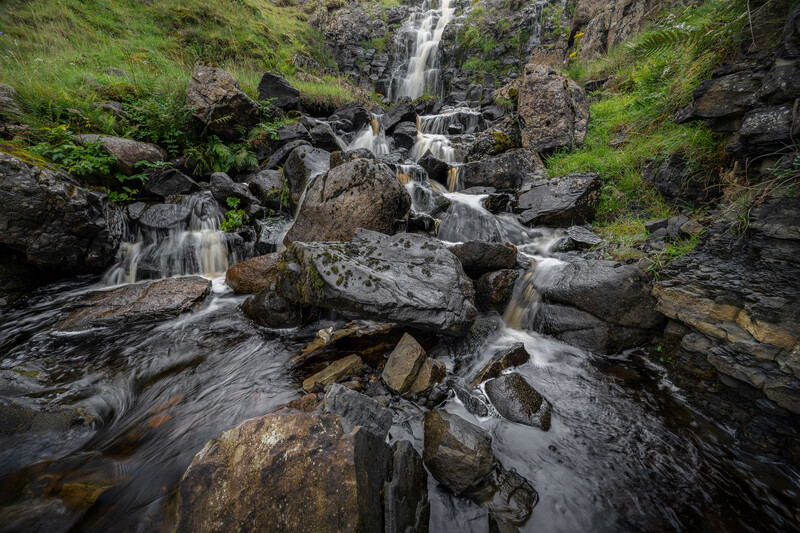
For this composition, I chose five focus points, though adding a couple more on the edges would have benefitted the shot. The extra points would help sharpen the wide-angle distortion. Cropping could also correct this, but I like the distortion effect from wide angle lenses. Neither one is entirely correct. It is simply a creative decision. Just be aware of the different options so you can be intentional.
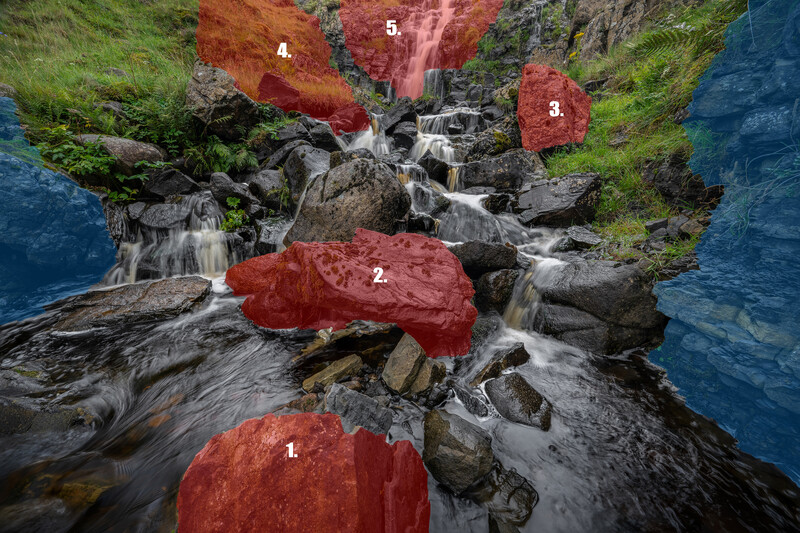
Choose more focus points than you think you need. It's better to take extra images than get home and realize you should have taken more. The number of focus points depends on the scene.

Here is one way to fix the grammar and reduce wordiness without significantly changing the meaning:
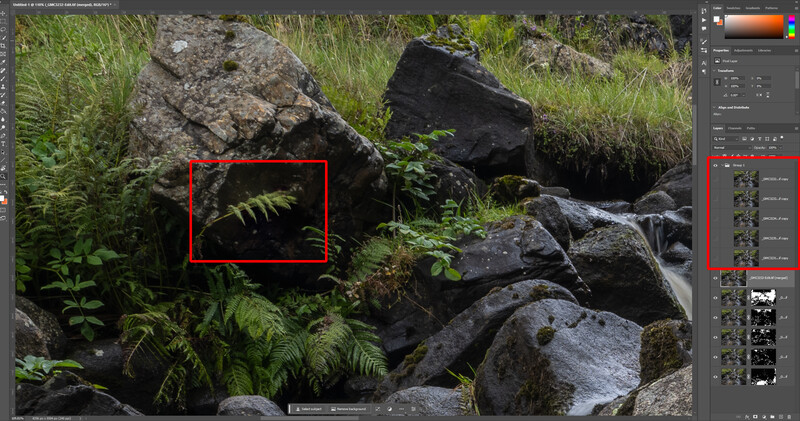
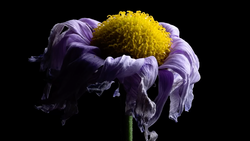
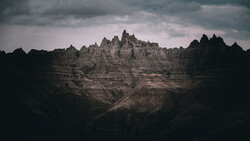
The image clearly shows the difference in focus between image one, focused on the foreground rock, and the final image, focused on the back rocks and grasses.
Lightroom and Photoshop
Once images are uploaded and selected in Lightroom, balance the adjustments. Edit one image to your preference, then synchronize the edits to the remaining images. This allows for easier blending later in Photoshop. Note any bracketed shots at this point to prep them before opening in Photoshop. Fully bracketed sequences can be HDR merged in Lightroom. Otherwise, merge individual shots like a sky.
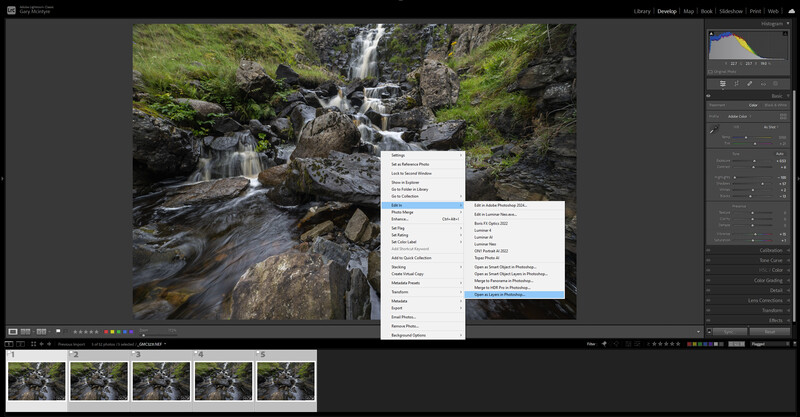
Select all your images, then choose Edit in>Open as layers in Photoshop. If not already open, this command will open Photoshop and stack your images in layers in a single document.
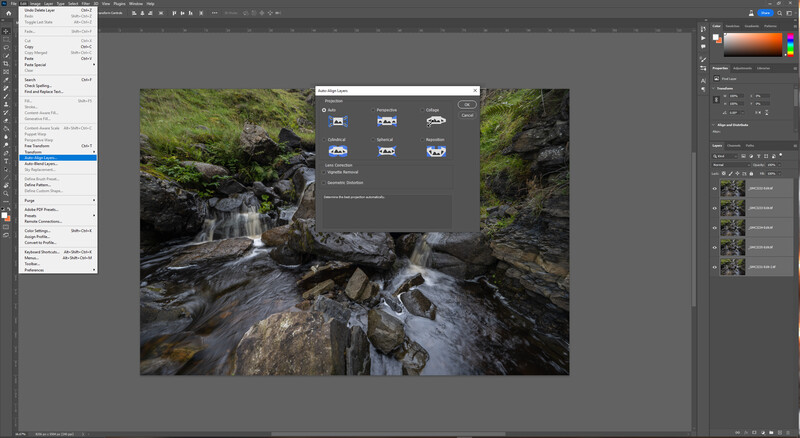
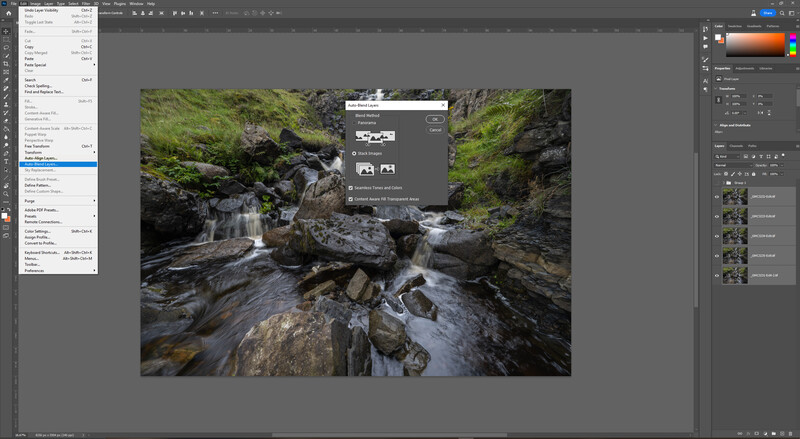
With all your layers selected, go to Edit > Auto Align. If you are relatively new to this, I would go with the default setting in the pop-up window that appears, then simply select ok and let Photoshop do its magic.
The Safety Group
Once all of your images are aligned and stacked in Photoshop, while they are still highlighted, press command+J (Mac) CTRL+J (PC). and this will make a copy of the layers. As these copied layers are now selected, click the group/folder icon at the bottom of the layers menu, and the copied layers will neatly be grouped into a folder, the safety group. Turn the layer visibility off, and you won't need them again with any luck.
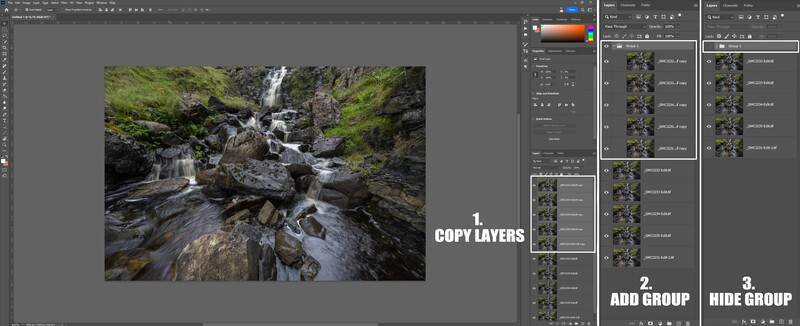
This layer group allows for tidying any anomalies between all the focused images. I've found it particularly useful with water, especially waves, as Photoshop doesn't always blend these seamlessly. The layers in the safety group also help when there is unnoticed movement in your frame.
The next step, with the original layers selected, is to go to Edit > AutoBlend Layers and select okay. Photoshop will select the best focused areas across the layers and blend them into one final layer.
Using the Safety Group
As I mentioned, Photoshop doesn't always get it right, and there can be slight variations or anomalies within the final merged layer. In this case, there was a slight wind during one of the shots, and a fern had moved. To help combat this movement, it was time to engage the help of the safety group.
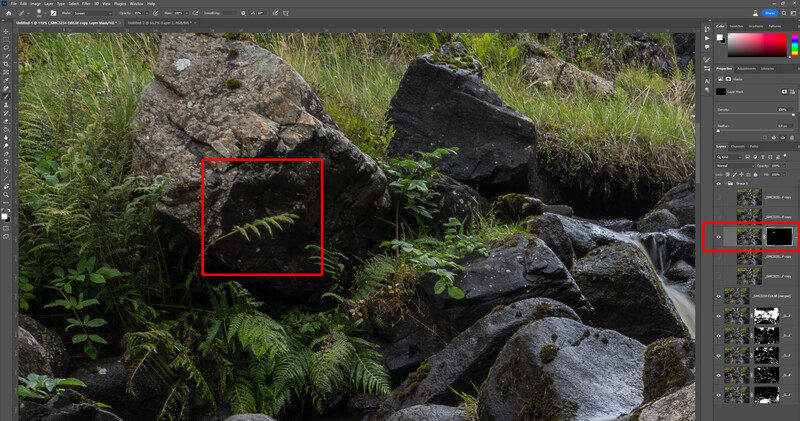
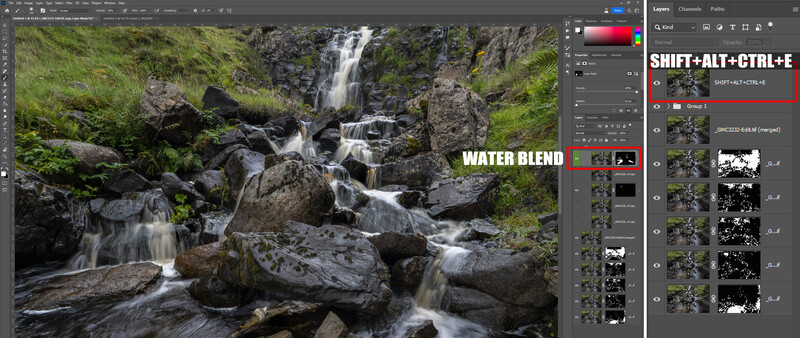
This technique can also emphasize other areas in your images. In this case, I selected one layer that I felt had a better water effect. Using a hide-all mask and white paintbrush, I painted in the areas I wanted. You may also want to include areas from other layers - a hide-all mask lets you do this.
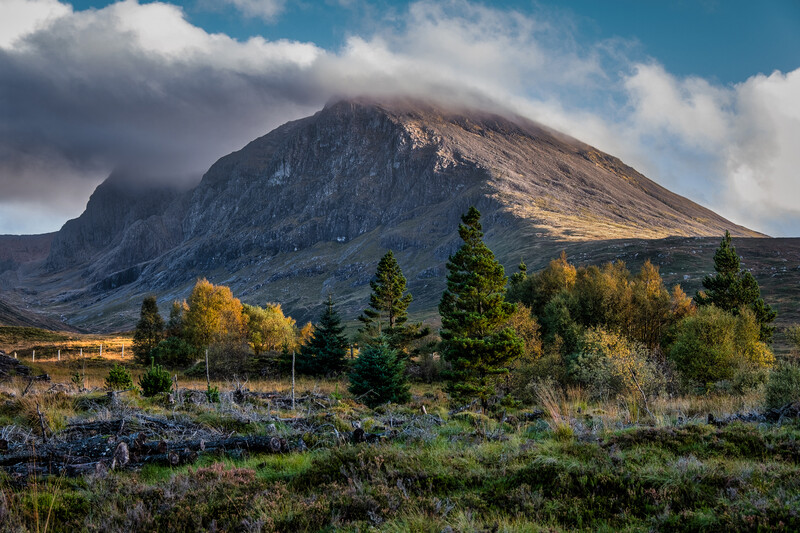
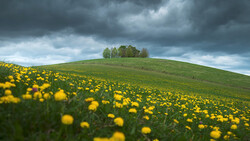
Focus stacking isn't necessary for all your photographs, but it is a great technique to have under your belt. The first image below wasn't a focus stack simply because there was nothing in my immediate foreground close to the lens.
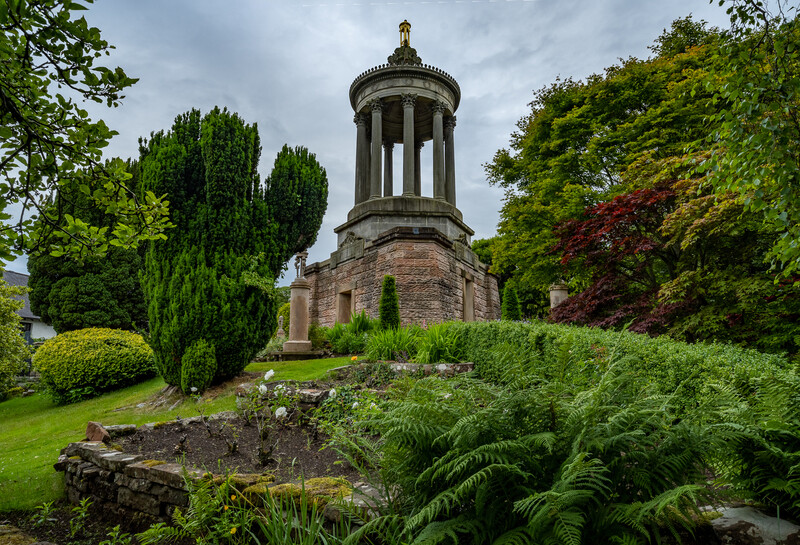
Final Thoughts
This is my preferred method of focus stacking, although there is software out there that excels in doing it. I have found this method to be the most reliable for me and my photography. I'm sure, however, that Adobe and others will be working on AI versions that take care of the entire process seamlessly, and until then, I'll keep using this technique.
If you want to learn more about photography and editing, a series of videos I can highly recommend is Photographing The World with Eli Locardi, found here on Fstoppers, now with its fifth release, Photographing The World: Japan, with over 14+ hours of tutorials you can find here.


Join the Fstoppers community for free
-
Post comments and join in the discussions
-
Browse the site ad-free
-
Share your work and get featured in the community
-
Compete in the photo contests for fun and prizes
3 Comments
That safety group approach solves one of the more frustrating challenges I've had focus stacking certain images. I'll definitely be using it next time I do this!
Thank you for nice tutorial. I have found focus stacking feature of my olympus camera working perfectly and I can use it hand held. It is important to set correct steps but then with e.g. Panasonic 8mm lens (16mm FF eq) it usually takes 3-4 shots to have in focus everything from few inches to the infinity
May be a bit irrelevant Recently cameras like Sony A7RV supports focus stacking or bracketing. It allows to set a starting point then can take as many as required to infinity.
But focus points as seen in the LCD is represented in 2D or x,y. Why dont these cameras simply allow to select user defined points than introducing 3D concepts like infinity?
Any idea why they dont allow manual selection of focus points?