
One of the most rewarding yet mysterious elements of landscape photography is seeing the results of a long exposure. A few weeks ago, I had the chance to check out a new set of filters that mount using magnets, and the resulting photo is pretty interesting.
There are a ton of interesting and new products that pass through the offices at Fstoppers. Some of them are super exciting, like new cameras and lenses, while others, such as new camera bags or tripods, aren't quite as impressive. Neutral density filters usually fall into the latter category, even though they are some of the most useful pieces of gear I keep in my camera bag.
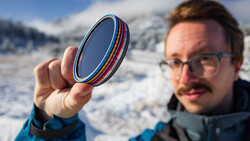
About two months ago, the company Freewell sent us a few different versions of their new magnetic neutral density filters to try out. In the box was an ND1000 (10-stop) filter that is great for capturing still images with long shutter speeds and an ND64 (6-stop) filter, which can be used both for still photography but also video work in bright situations. These filters have a super-high rating on Amazon and come with all the typical zero color cast, anti-fingerprint, true neutral density stops you would expect from a well-respected filter company.
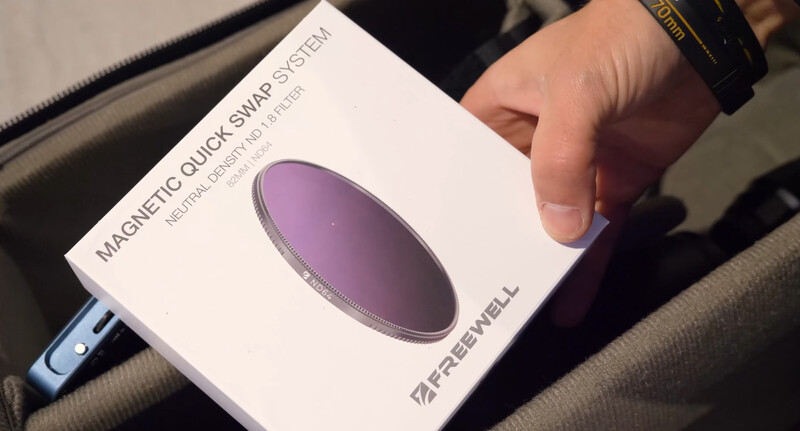
The one feature that was super exciting to me though was that these filters use magnets to snap into place instead of having to be threaded onto the lens. Each filter comes with a threaded filter that is magnetic. This can be "permanently" attached to your lens, and you can even use a Freewill lens cover that snaps into place. Then, you simply snap any of the different filters Freewell makes into this magnetized holder. This is super handy, because if you like to blend multiple exposures together ala Elia Locardi, having to perfectly add or remove a threaded neutral density filter without moving your camera can be extremely difficult. Add some frigid temperatures and extreme weather during the blue hour, and it can be outright disastrous.

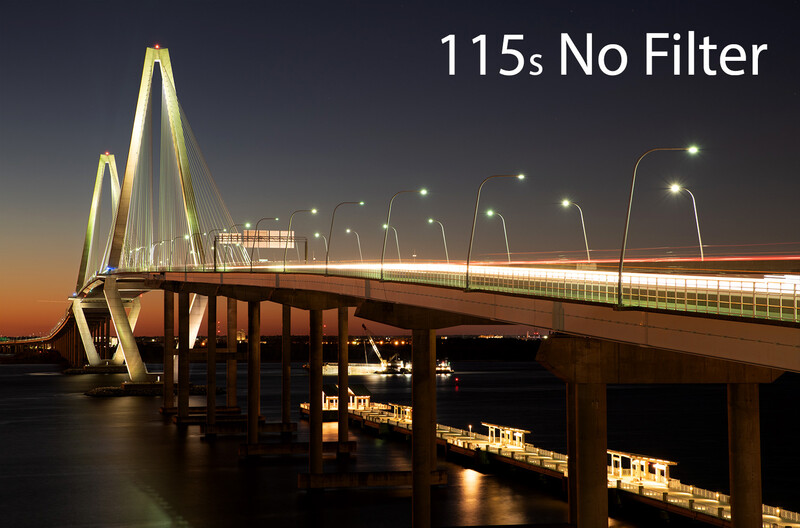
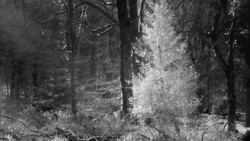
Above is an example of using a neutral density filter during the day to achieve a multi-minute exposure. As you can see, the clouds have a haunting effect and the traffic is all but completely removed. Using a 10-stop filter during the day is an easy trick for removing pedestrians while also achieving interesting results with moving clouds. However, sometimes, long exposures ranging from 10 to 120 seconds are useful closer to sunset as well.
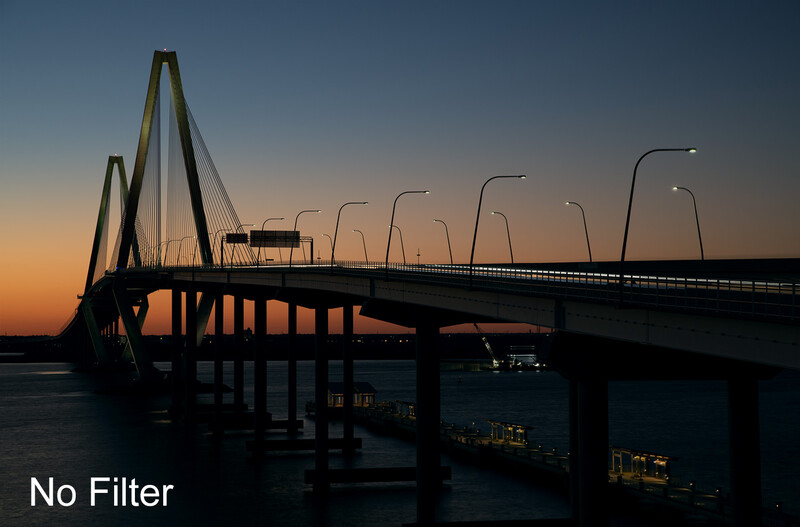
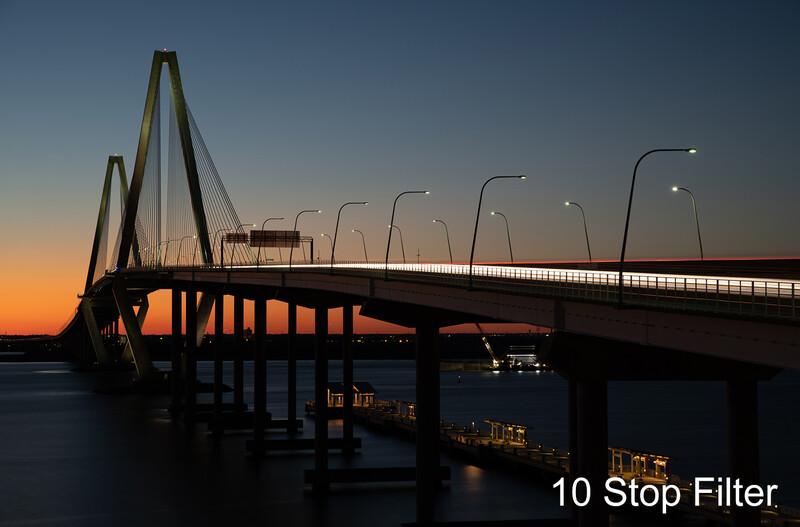
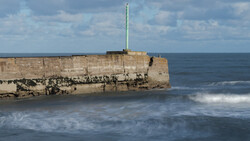
As you can see in the photos above, the 10-stop filter allows you to capture a longer length of time while the overall exposure is still pretty bright. Because the shutter speed is much longer in the 10-stop version, I had more cars travel through the frame, which resulted in brighter and more impactful car trails. The water was also smoothed out due to the lengthened shutter speed. Some of the bridge lights and pier lights are also a bit brighter, but that has more to do with the slight change in exposure caused by the shifting blue hour lighting. However, if we compare two images taken with the exact same shutter speed, one earlier in the night with the 10-stop filter and one without a filter at all, you can clearly see why having a 10-stop filter during sunset creates a much more impactful image. Even though the shutter speeds are the same, the latter image without the filter has lost much of the detail in the sky, and the ugly green sodium lights make for some muddy colors that look kind of like a putrid HDR effect has been added.
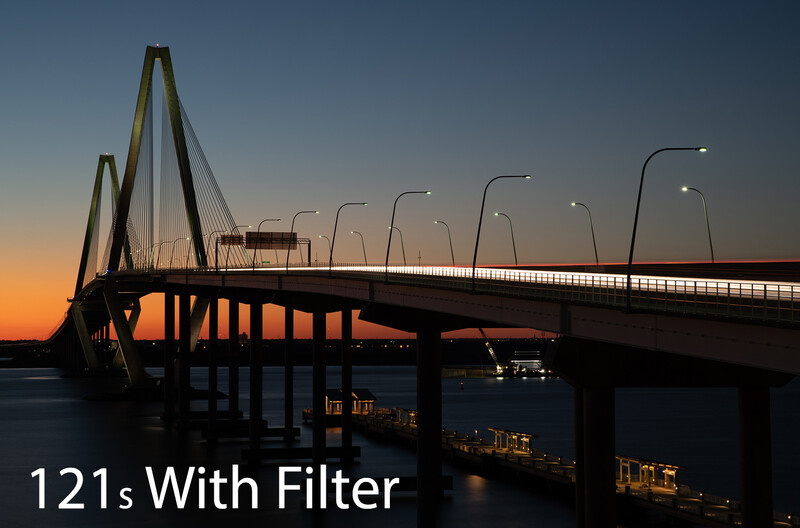
Unfortunately, I got skunked when it came to capturing an interesting sky. The skies were completely clear the two nights I attempted the above photograph, so I wasn't able to capture anything with the blurred cloud effect. That's one of the biggest challenges with landscape photography and a reason why it can be so fun making multiple attempts at the same location. If you aren't able to return to a location a second, third, or fourth time, however, you can always replace the sky with one that fits your vision. I know this is not a very popular technique for the landscape purists out there, but it's definitely a handy trick for any of you commercial, architectural, or conceptual photographers who have to deliver perfect images with impactful skies.
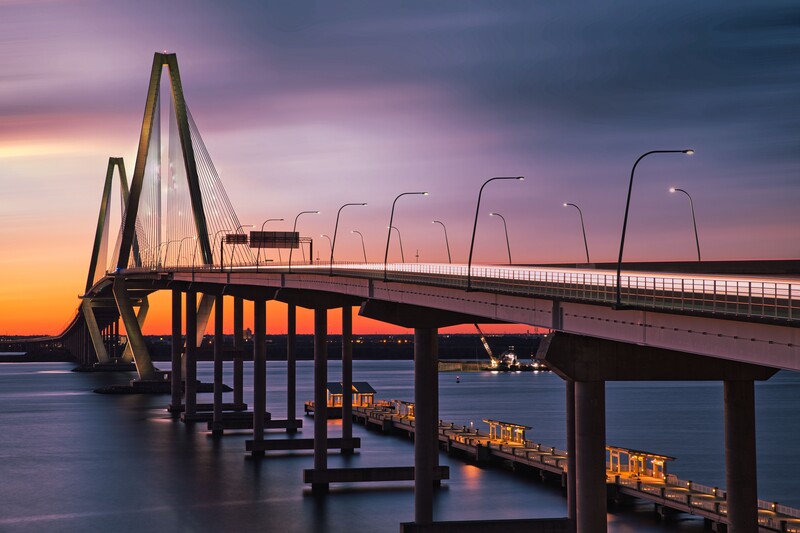
For my final image, I added a motion-blurred sky to this bridge shot that resembled the same effect I would have captured on location with the 10-stop Freewell filter. The software Luminar AI is extremely useful for these sorts of sky replacements, and for a complex image like this, replacing the sky by hand would be exceedingly difficult. Luminar AI didn't mask the sky perfectly on the first try, but with a little finessing in the advanced menu, I was able to create something that I think looks pretty cool. Obviously, it would be fun to return to this location and try to capture another shot completely "perfect" in the camera, but until then, this is a fun artistic rendition of the ideal shot in my head.


Join the Fstoppers community for free
-
Post comments and join in the discussions
-
Browse the site ad-free
-
Share your work and get featured in the community
-
Compete in the photo contests for fun and prizes
6 Comments
If you need any more convincing to try these filters out. I used them for a completely different reason than Patrick and highly recommend them for both video and photography.
https://fstoppers.com/gear/better-alternative-variable-nd-filters-fstop…
But you noticed a few issues with the cap ergonomics iirc.
Also, it'd be an issue if I wanted to use it together with other threaded filters, right? Say e.g. I already have a protective filter in harsh weather days or dusty locations, or I wanted to add a threaded IR filter on top.
Using them with other threaded filters isn't an issue. I can add them on to threaded filters OR add threaded filters on to them. Works both ways just fine.
Thanks! I had thought not being threaded from outside was the reason they offered a magnetic cap. Apparently I was wrong. Thanks for the correction.
According to a previous review on this same site, and I believe it was by Alex Armitage that posted above :-), they had a few annoyances when removing the cap, and by not it being too sturdy. If ergonomics are not that good, I fail to see how they make it "even easier".
My only issue was with the lens cap specifically if I put the lens cap and filter on at the same time. Within that scenario it can be difficult to remove the lens cap without the filter with it. That said even if that does happen it's not hard to separate them and put the filter back on. Never had any issues with ergonomics of the filters.