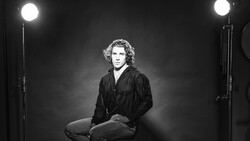
Flash photography can seem overwhelming at first. There are many concepts and techniques to learn, but understanding them is essential for capturing great portraits. Let’s explore some key aspects of flash photography that can help you improve your skills.
Coming to you from Ed Verosky, this insightful video covers five important aspects of flash photography. First up is TTL (Through The Lens) metering. TTL measures the light coming through the lens and adjusts the flash output accordingly. When you press the shutter button, the flash fires a test burst, the camera reads the light reflected off the scene, calculates the necessary flash power, and then fires the flash at the correct setting during the exposure. This process happens so quickly that you might not even notice the test flash. TTL is particularly useful for balancing ambient light in dynamic situations, making it ideal for event photography.
Another key topic is the use of flash diffusers. These attachments can soften the light and create more flattering portraits in indoor settings. However, their effectiveness is limited outdoors. Diffusers work by spreading the light so it bounces off surfaces like walls and ceilings. Outside, where reflective surfaces are scarce, the light disperses too much, reducing its impact. Understanding when and where to use diffusers can greatly improve your lighting technique.
Verosky also explains the inverse square law, a fundamental concept in lighting. This law states that light intensity decreases with the square of the distance from the source. For example, if your subject is properly exposed at 5 feet from the flash, a background 10 feet away will receive only a quarter of the light, resulting in a two-stop underexposure. This principle helps you control the exposure and mood of your photos, especially in portrait settings.
That's just the beginning, though, so check out the video above for the full rundown from Verosky.
If you would like to continue learning about how to light a portrait, be sure to check out "Illuminating The Face: Lighting for Headshots and Portraits With Peter Hurley!"


Join the Fstoppers community for free
-
Post comments and join in the discussions
-
Browse the site ad-free
-
Share your work and get featured in the community
-
Compete in the photo contests for fun and prizes
2 Comments
I have been wanting to make a video forever explaining the relationship between on flash diffusers and the inverse square law. This video comes sooo close to touching on it, but I've never seen anyone actually show why bounce cards and those little flash diffusers usually look so bad. I hate them and never recommend using them.
Basically if your ceiling is low, there is a chance the bounce flash and the diffuser equal out and produce a nice aesthetic. However, if the ceiling is too tall, which is normally the case, because of the inverse square law, all of the bounce flash is barely affecting the scene but the super bright bounce card/plastic dome is now over powering the bounce. What this does is it makes your photo look like it's lit ONLY with direct, on camera lighting.
So IMO the only time to use those plastic dome covers is when your ceiling is around 8 feet or so, they can add some fill light and a catch light in the subject's eyes. My favorite way to use them though is to actually put black tape around the dome that faces your subject so it blocks all that horrible flat, harsh light and only fires the light in the other direction.
As I type this out, I realize I gotta make a video about this.
100% you should make that video!