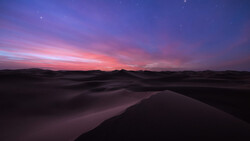
A dark subject against a bright sky creates a common problem. The scene loses depth, and important details disappear. Fixing this issue is about more than pulling up shadows; it’s about maintaining the natural look of both highlights and dark areas without sacrificing one for the other.
Coming to you from Christian Möhrle - The Phlog Photography, this detailed video breaks down how to approach such an edit inside Lightroom. Instead of jumping straight to the global exposure slider, Möhrle begins with careful adjustments in the Basic panel. He demonstrates how raising shadows and blacks little by little brings back detail in the foreground without blowing out the sky. He also shifts the color profile from Adobe Color to Adobe Landscape, adds warmth with a higher temperature, and boosts vibrance for richer tones. The balance between texture and clarity plays a role here too, creating a sharper but slightly dreamy look. Each step builds toward balance, not just brightness.
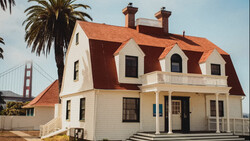
The workflow then moves to targeted edits using masks, which are essential for tricky scenes. Möhrle uses a subject mask to brighten the dark foreground without harming the already well-exposed sky. He carefully tweaks shadows, blacks, whites, and even temperature to make the subject warmer and more natural. A luminance range mask follows, pulling out detail from the tree line, and an objects mask zeroes in on house walls for selective exposure and warmth adjustments. These targeted refinements create depth by enhancing light where it should naturally fall. They also prevent distracting dark blobs or flat highlights that can ruin the overall mood.
From there, Möhrle introduces creative touches. Radial gradients add glow to the brightest parts of the sky, while linear gradients fine-tune balance at the top of the frame and across the water. Subtle negative dehaze pushes the glow further, and warm tones reinforce the golden-hour feel. The process doesn’t stop at exposure. Möhrle heads into color grading, shifting blues toward cyan, warming clouds with purples and oranges, and layering split toning for controlled contrast between warm highlights and cooler shadows. The calibration panel adds another push, and sharpening in the Details panel ensures fine structure doesn’t get lost after all the tonal and color work. Check out the video above for the full rundown from Möhrle.
And if you really want to dive into landscape photography, check out our latest tutorial, "Photographing the World: Japan II - Discovering Hidden Gems with Elia Locardi!”


Join the Fstoppers community for free
-
Post comments and join in the discussions
-
Browse the site ad-free
-
Share your work and get featured in the community
-
Compete in the photo contests for fun and prizes
No comments yet