Adobe has updated Lightroom and Lightroom Classic, adding Firefly integration, WEBP support, assisted culling improvements, and a new generative upscale tool. If you rely on Lightroom daily, these changes are worth a look.
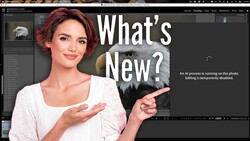
Coming to you from Anthony Morganti, this practical video walks through what actually changed and how it works in real use. The headline feature is deeper Firefly integration, now available directly from the File menu under “Generate Using Firefly.” You can send a photo to Firefly to add generative elements or even create a short video from a still image. It opens in your web browser rather than staying fully inside Lightroom Classic, so the workflow is not seamless. You still need to download the finished file and import it back into your catalog manually.
Assisted culling also received under-the-hood improvements. The panel itself looks the same, but Adobe claims better accuracy and speed when identifying blurry shots, closed eyes, or poorly framed faces. Morganti points out an important setting in Catalog Settings under the Metadata tab. By default, Lightroom can automatically analyze photos whenever the assisted culling panel is open. If you move between people-heavy shoots and landscapes, that background analysis can become annoying and slow down your workflow. Disabling automatic analysis gives you tighter control over when AI steps in.
Lightroom, the cloud-based version, mirrors many of these updates and adds a few of its own. Firefly access is available from the Share icon, again launching in a browser rather than running natively inside the app. There is now direct copying from a local folder to an album through a simple three-dot menu, removing several steps from what used to feel clumsy. Performance improvements target large masks, geometry adjustments, red eye removal, the masking brush, and the Remove tool.
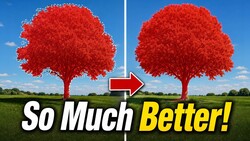
The most practical new feature in Lightroom is generative upscale powered by Topaz. Through Photo > Generative Upscale, Lightroom uses Topaz Gigapixel to enlarge an image 2x or 4x. A 2x increase costs 10 credits, and 4x costs 20 credits. The result is saved as a new DNG file while leaving the original raw untouched. Unlike the standalone Topaz Gigapixel application, you cannot choose specific enhancement models. You select the scale, spend the credits, and wait. Processing time depends heavily on your computer’s graphics performance, and older machines may struggle.
If you print large or crop aggressively, that 4x option could rescue a marginal file and make a 24 x 36 inch print realistic. Check out the video above for the full rundown from Morganti.


Join the Fstoppers community for free
-
Post comments and join in the discussions
-
Browse the site ad-free
-
Share your work and get featured in the community
-
Compete in the photo contests for fun and prizes
No comments yet