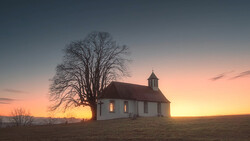
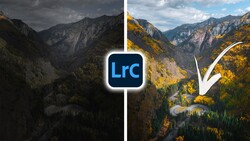
Masking is one of the most powerful tools in photo editing, especially when you're looking to bring out specific areas or elements in your images. If you’re not already using masking in Lightroom or Adobe Camera Raw, you’re missing out on some of the most precise control you can have over your edits.
Coming to you from Matt Kloskowski, this informative video covers seven key tips for using masking effectively in Lightroom. Kloskowski kicks off with a useful tip on adding color through a linear gradient. Often, adjusting temperature and tint won’t give you the exact look you want. By tapping into the lesser-known color swatch at the bottom of the panel, you can introduce a whole range of colors, giving you more control over your edits. This method is particularly useful when you want to enhance the hues of a sunset or bring out specific colors that aren't easily achieved with the basic sliders.
Kloskowski also emphasizes the flexibility of the masking tool's overlay function. While the default red overlay helps you see where the mask is applied, you can quickly toggle through different colors like green or white by using the shortcut Shift + O. This is a great way to improve visibility depending on the image you’re working with. He also mentions using the white-on-black option to see how refined your mask is, making it easier to see detailed areas like the edges of a subject.
One particularly useful tip is about handling linear gradients. Sometimes, after you create a gradient, you might lose track of where it is. Kloskowski explains how to avoid this issue by ensuring that the "Show Edit Pins" option is set to Auto, which will display the gradient handles when your cursor is near them. If you prefer shortcuts, pressing “H” will toggle the pins on or off, so you can quickly adjust the gradient whenever needed.
When working with brushes, Kloskowski introduces a helpful trick for constraining your strokes. By holding down Shift, you can force the brush to draw in perfectly straight lines, which is incredibly useful when you're working along horizons or edges. He also covers a time-saving shortcut: holding down the Option key (Alt on Windows) while using the brush switches it to subtract mode, allowing you to erase parts of the mask without constantly toggling between add and subtract. Check out the video above for the full rundown from Kloskowski.


Join the Fstoppers community for free
-
Post comments and join in the discussions
-
Browse the site ad-free
-
Share your work and get featured in the community
-
Compete in the photo contests for fun and prizes
No comments yet