
I've actually had quite a few people request that I create a tutorial for my production processes wherein I add background textures into my studio shots. I know, it has taken me forever to get around to actually putting it together, but it's here now! The tools that I will go over in this tutorial are quite handy for a variety of uses. But for this tutorial, we will specifically use them to select and mask the background in a studio portrait shot.
Introduction
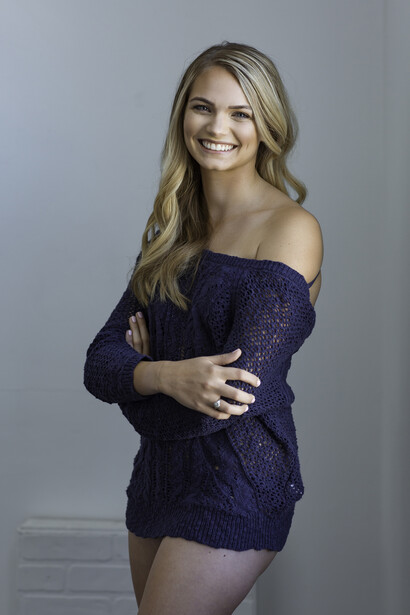
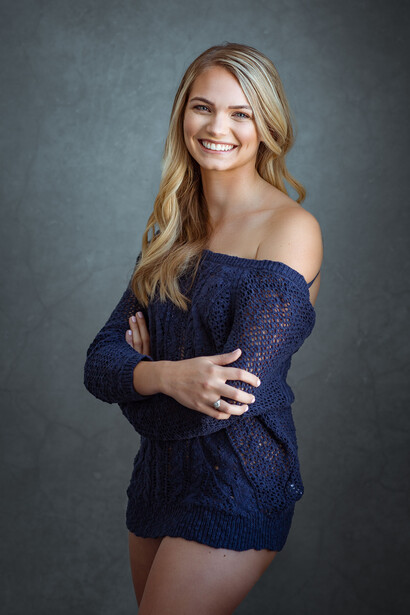
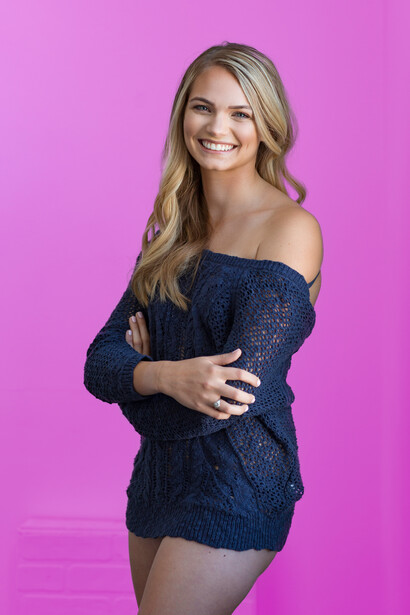
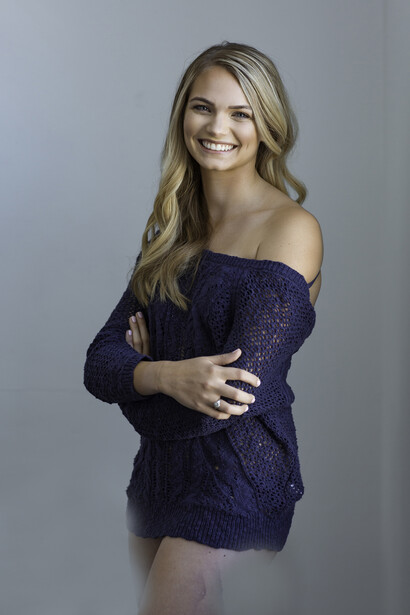
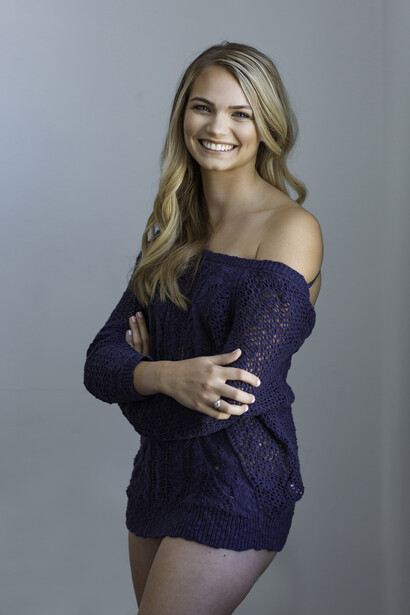
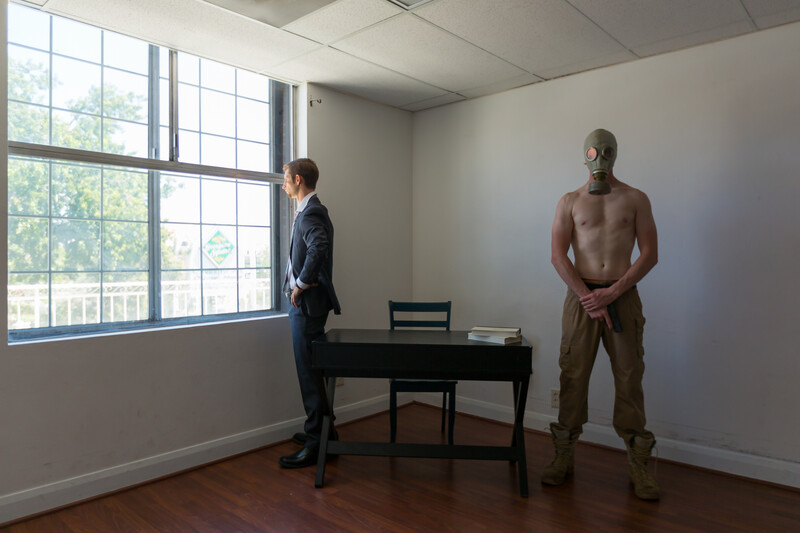
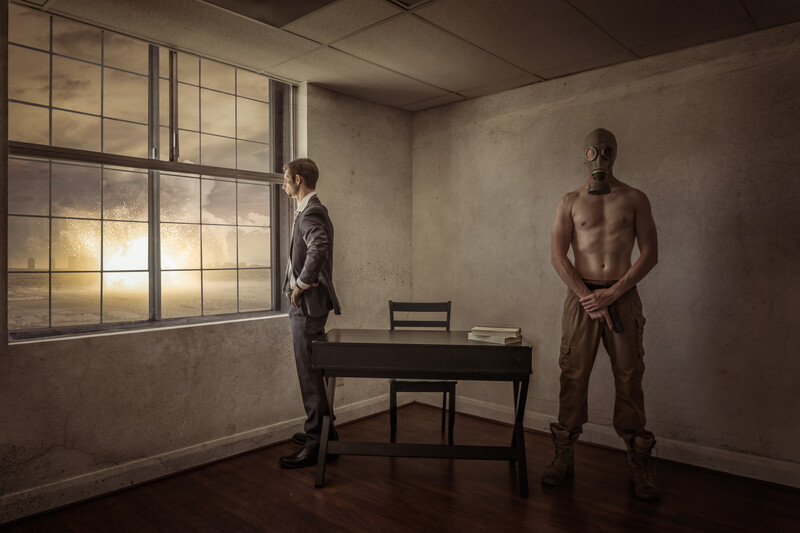
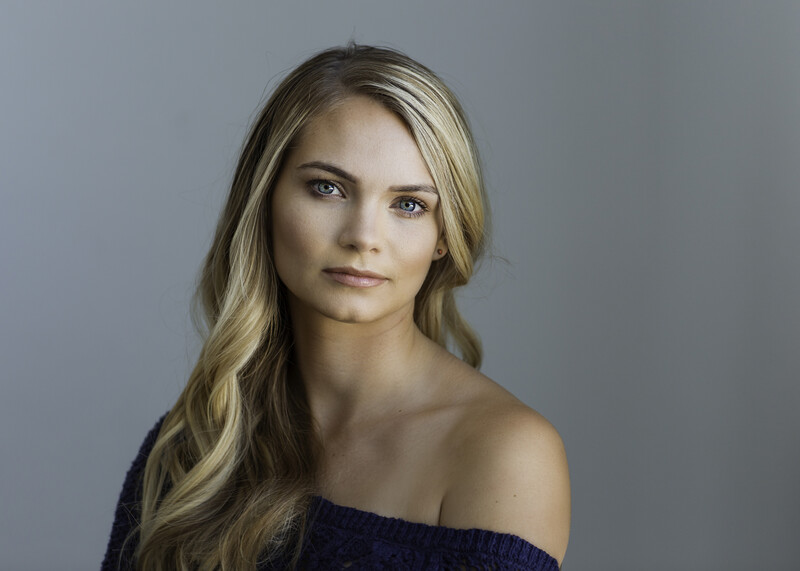
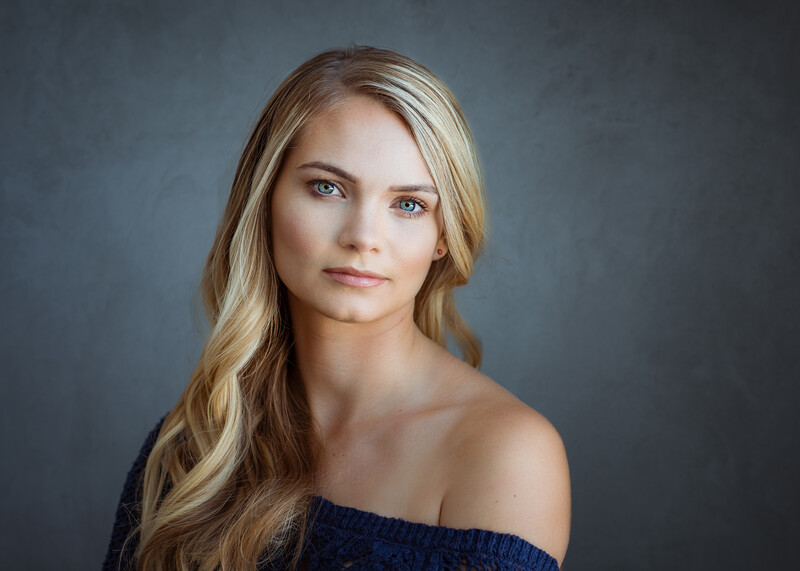
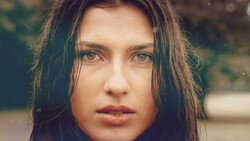
Now, before we dive straight into the tutorial, this is a before and after view of what we are going to create.
I don't spend a lot of time detailing the advanced capabilities of each tool I use in this tutorial, but at the same time, none of the tools I go through are super complex. The tool I spend the most time going over is the Select And Mask tool (formerly known as Refine Edge). To get the most out of the tutorial, you will want to be at least somewhat familiar with these other tools in Adobe Photoshop.
- Quick Selection Tool
- Quick Mask Mode
- Alpha Channels
- Layer Masks
- Grouped Layers
- Clone Stamp Tool
- Blend Modes
The Process: Getting the Base Selection
To start off, we need to make a selection of the background around our subject. We can use pretty much any selection tool available to us, but my preference is almost always the Quick Selection Tool, especially for studio shots like these where we are pretty much selecting a blank wall.
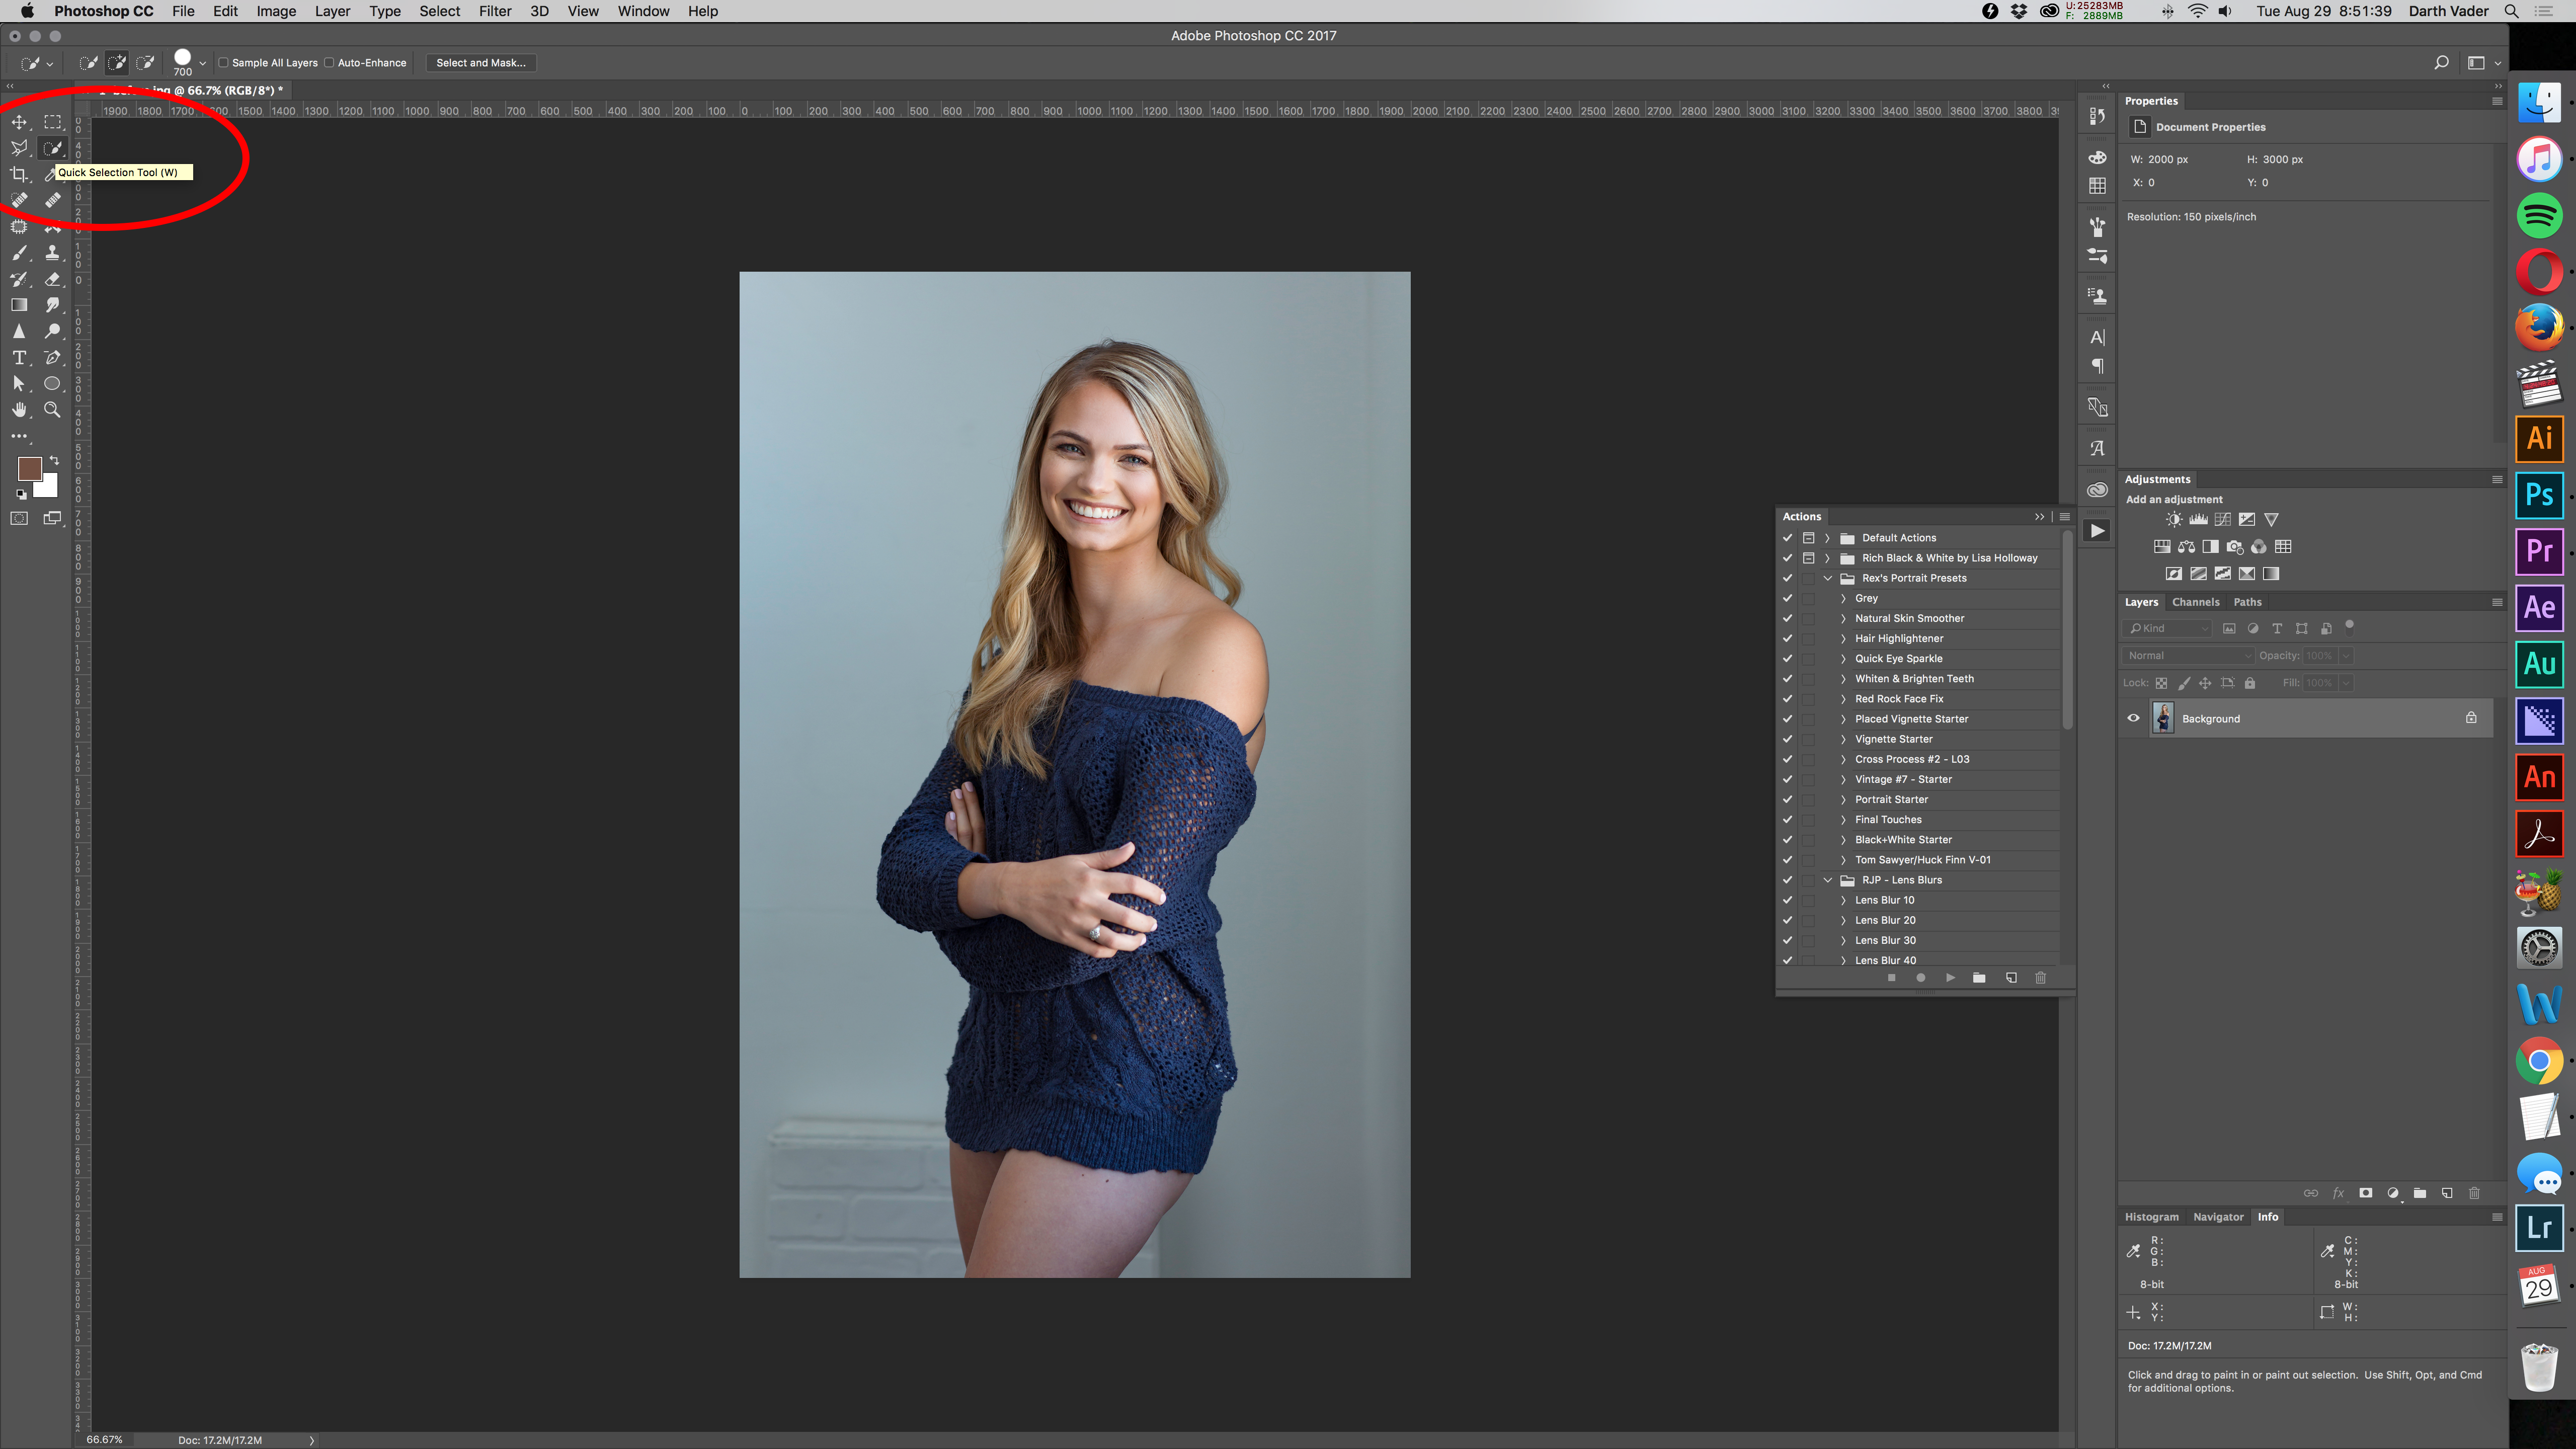
With the Quick Selection Tool, we are simply going to click/brush the area around our model, to get a good clean selection of the background. With a nice clean wall like the one in this shot, the Quick Selection Tool shouldn't have much problem doing that at all. It might pick up a few pixels of the model here and there, but not much.
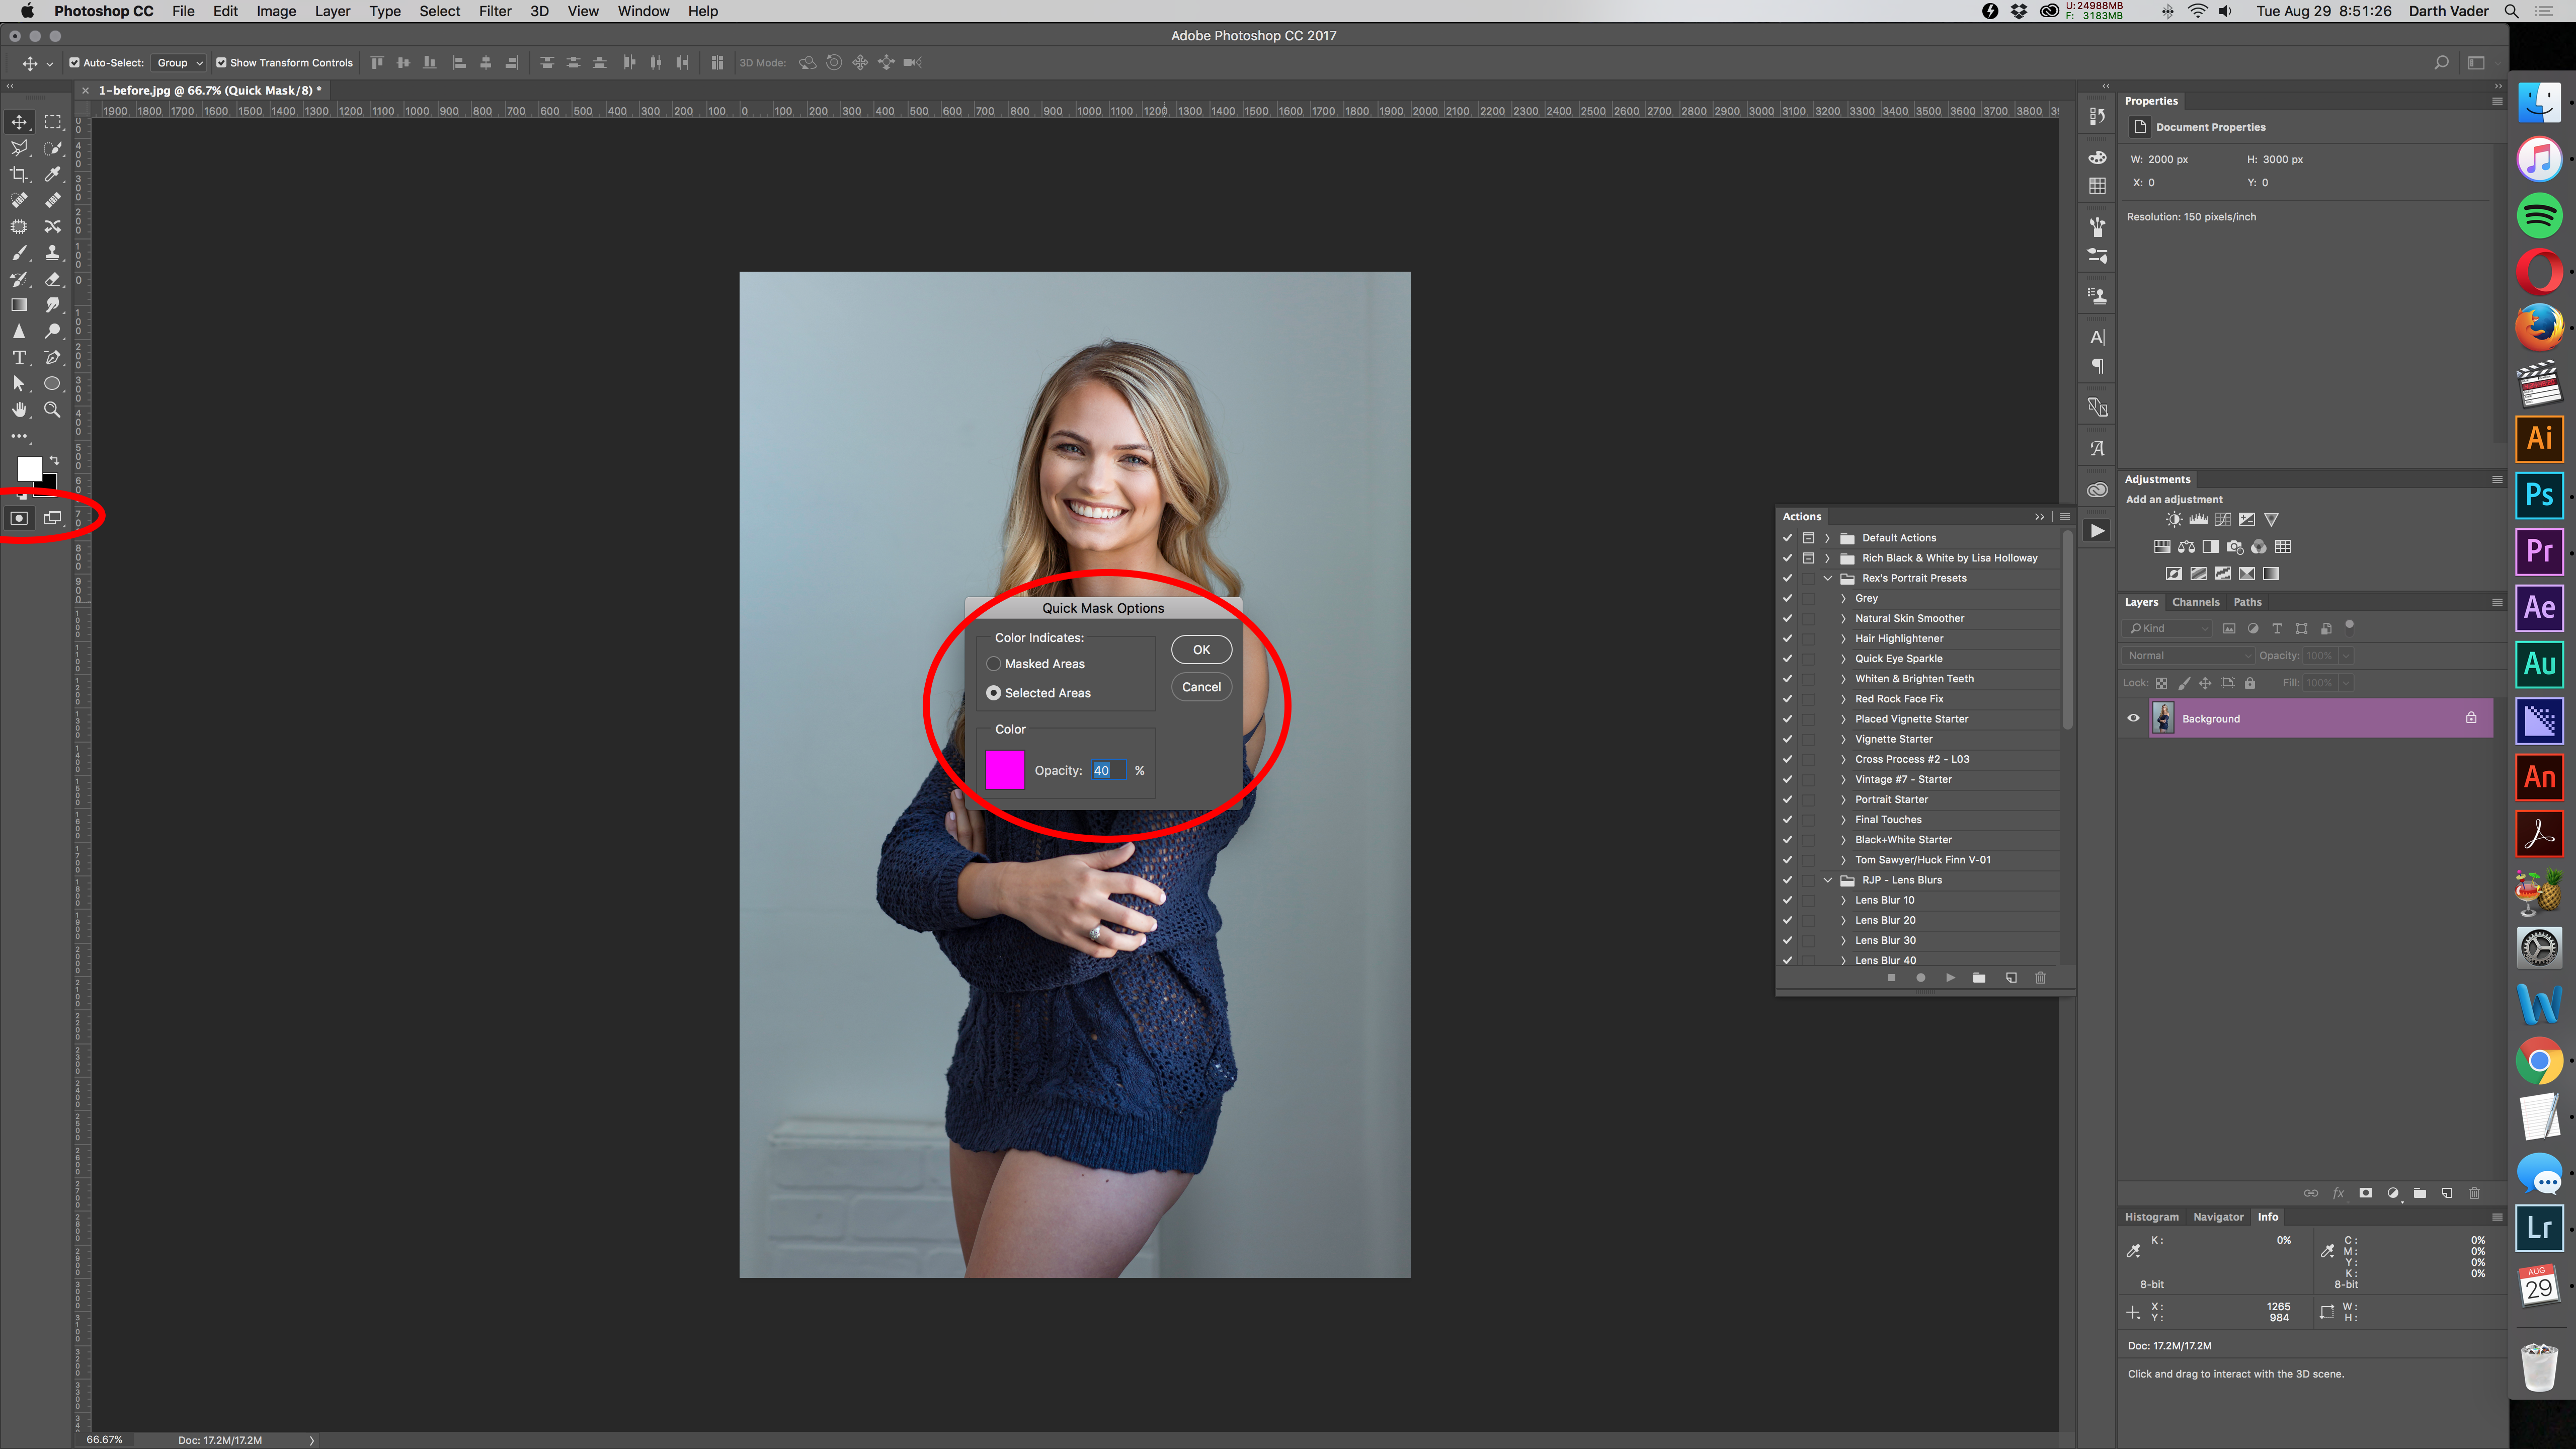
Once we have finished getting our base selection, we can preview our selection by hitting the "Q" button on the keyboard, or navigating to the toolbar and turning on Quick Mask Mode. When we do that, the selection will show up in a solid color overlay, like what is displaying in this screenshot below.
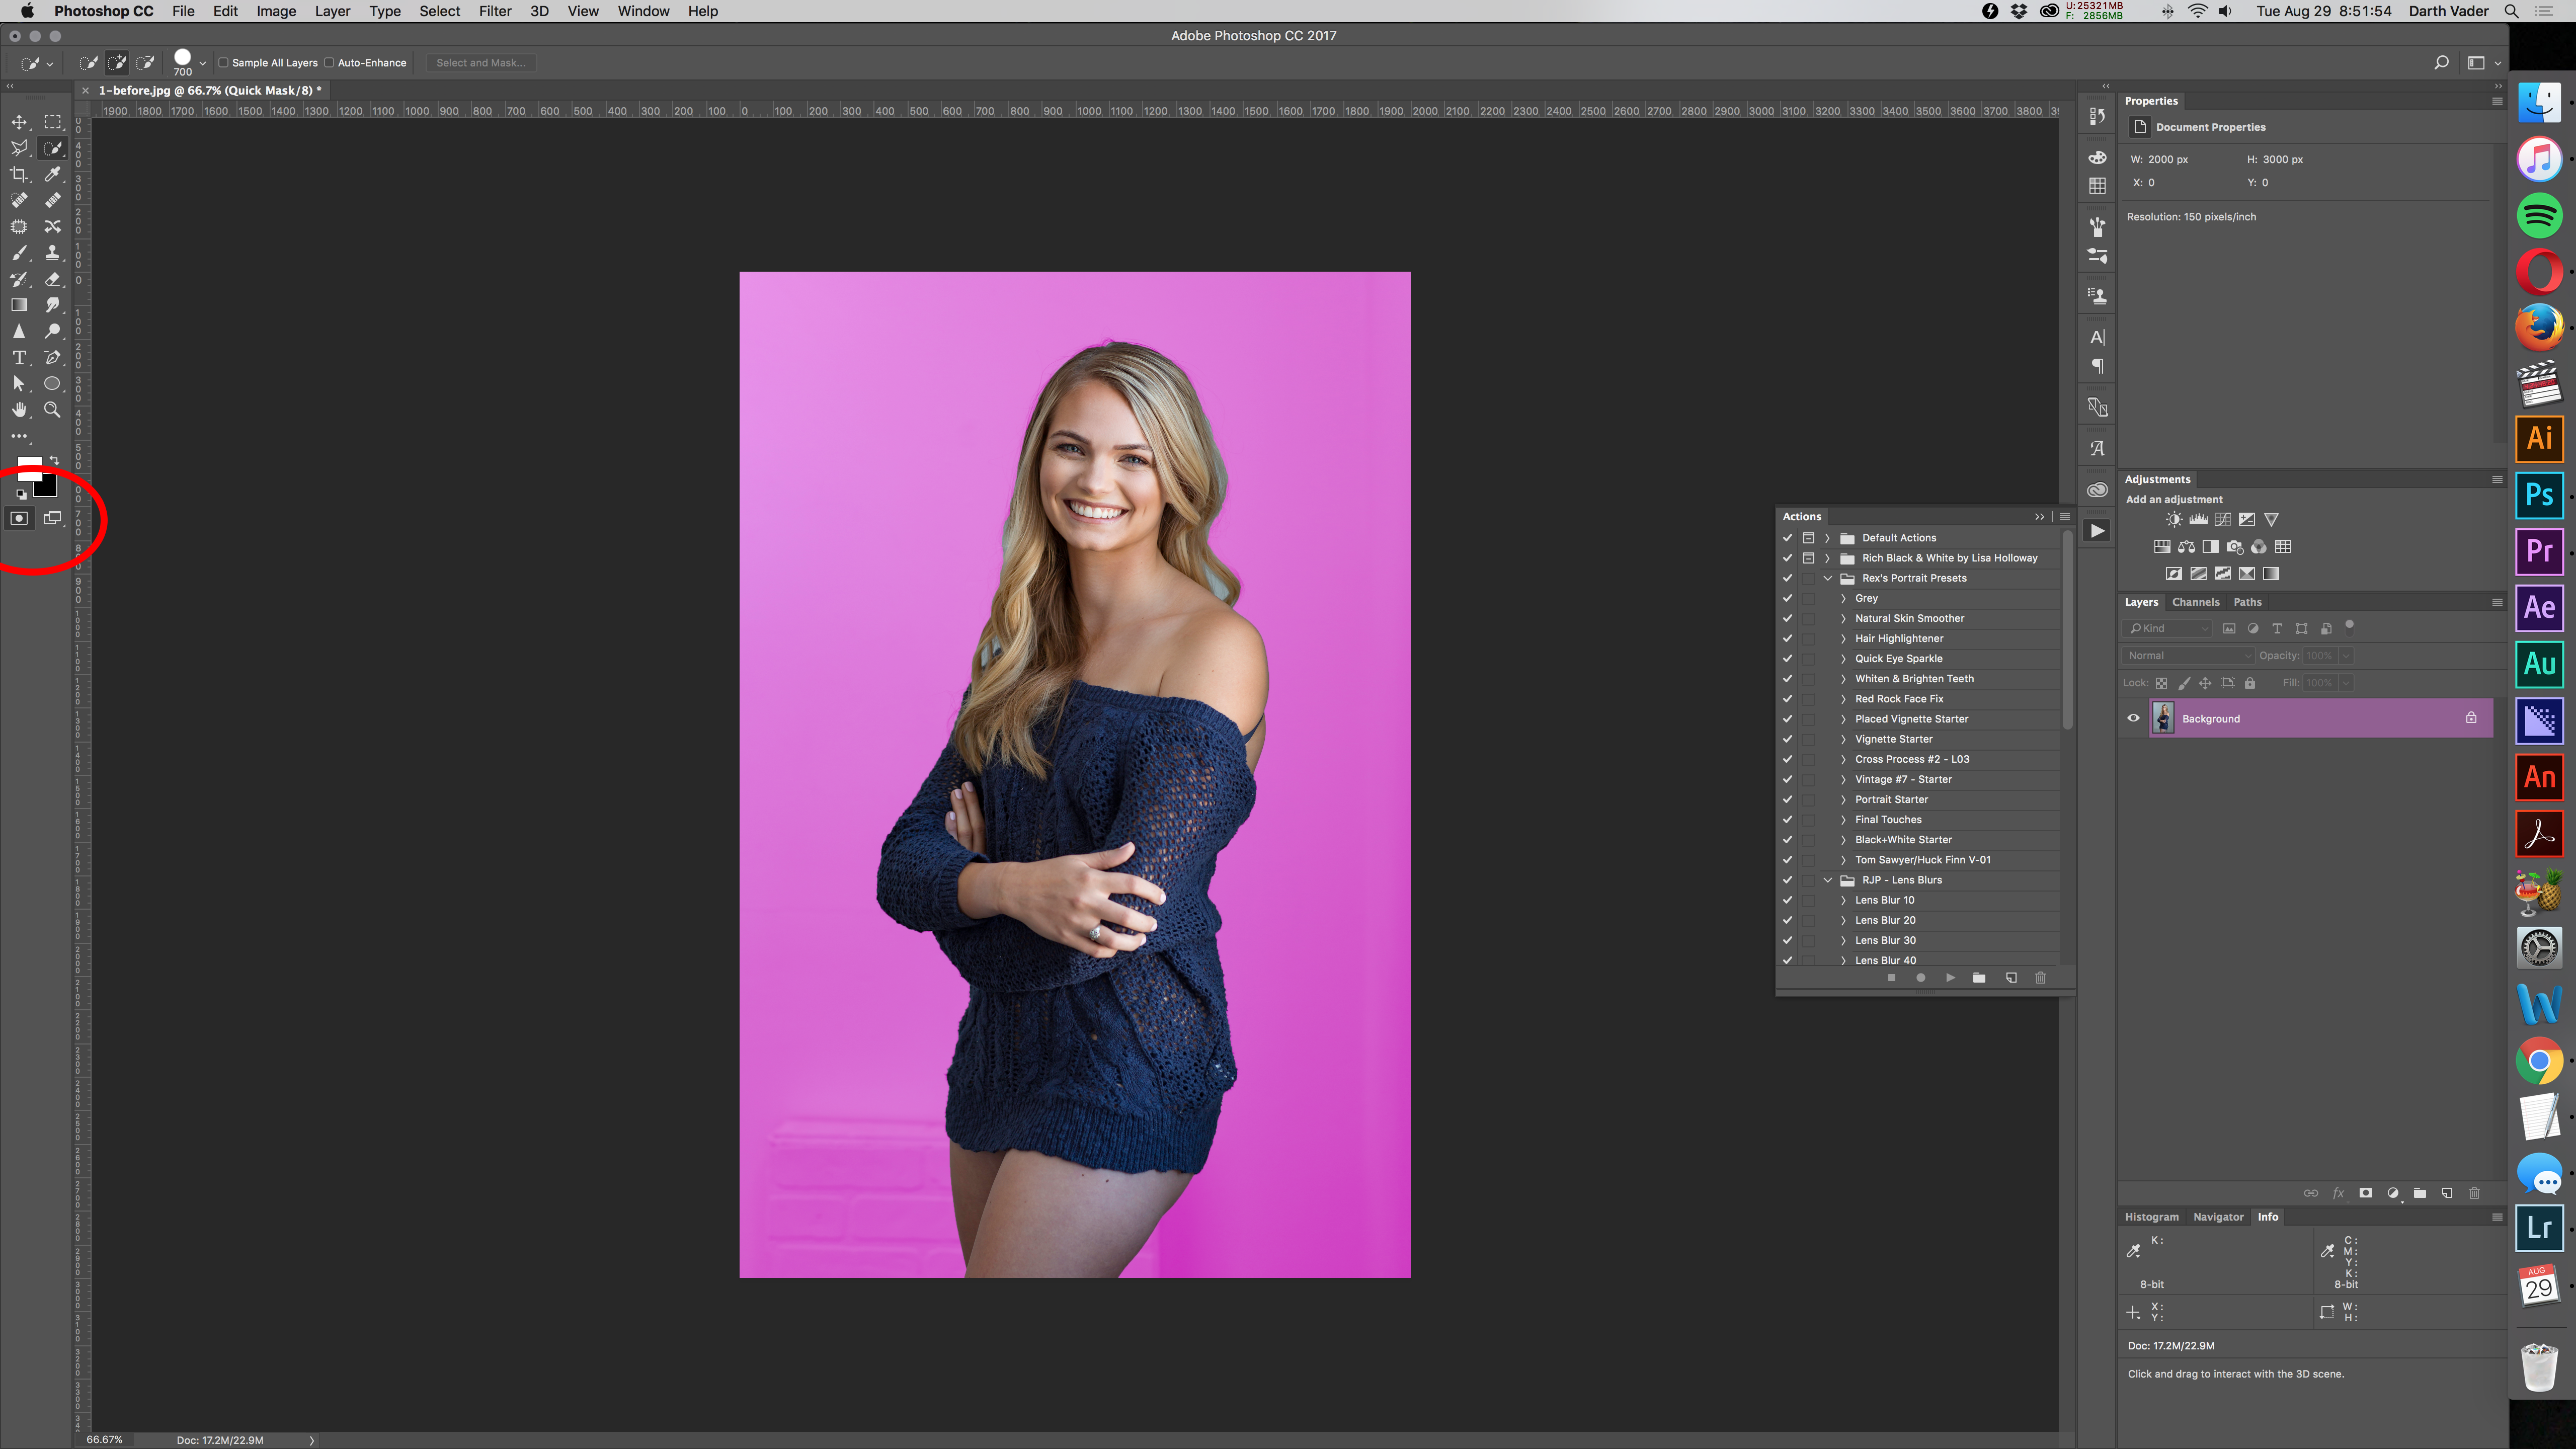
Now, if you have never used Quick Mask Mode, you might need to set up the tool so that it performs the way you want it to. I have mine set up to reveal my selection in neon pink, whenever Quick Mask Mode is turned on. The way to configure this tool is pretty simple. In the screenshot below, I have highlighted where the Quick Mask Mode button is located. To adjust the settings, double click on the button, which will open up the control panel for this tool. To set your quick mask color, selection preference, and opacity, just modify what settings you see to match what you want. The settings in this screenshot are what I use 98% of the time.
Once we've completed making our base selection, checked it using Quick Mask Mode, we are now ready to refine the selection using the Select And Mask tool (formerly known as the Refine Edge tool).
The Process: Refining the Selection
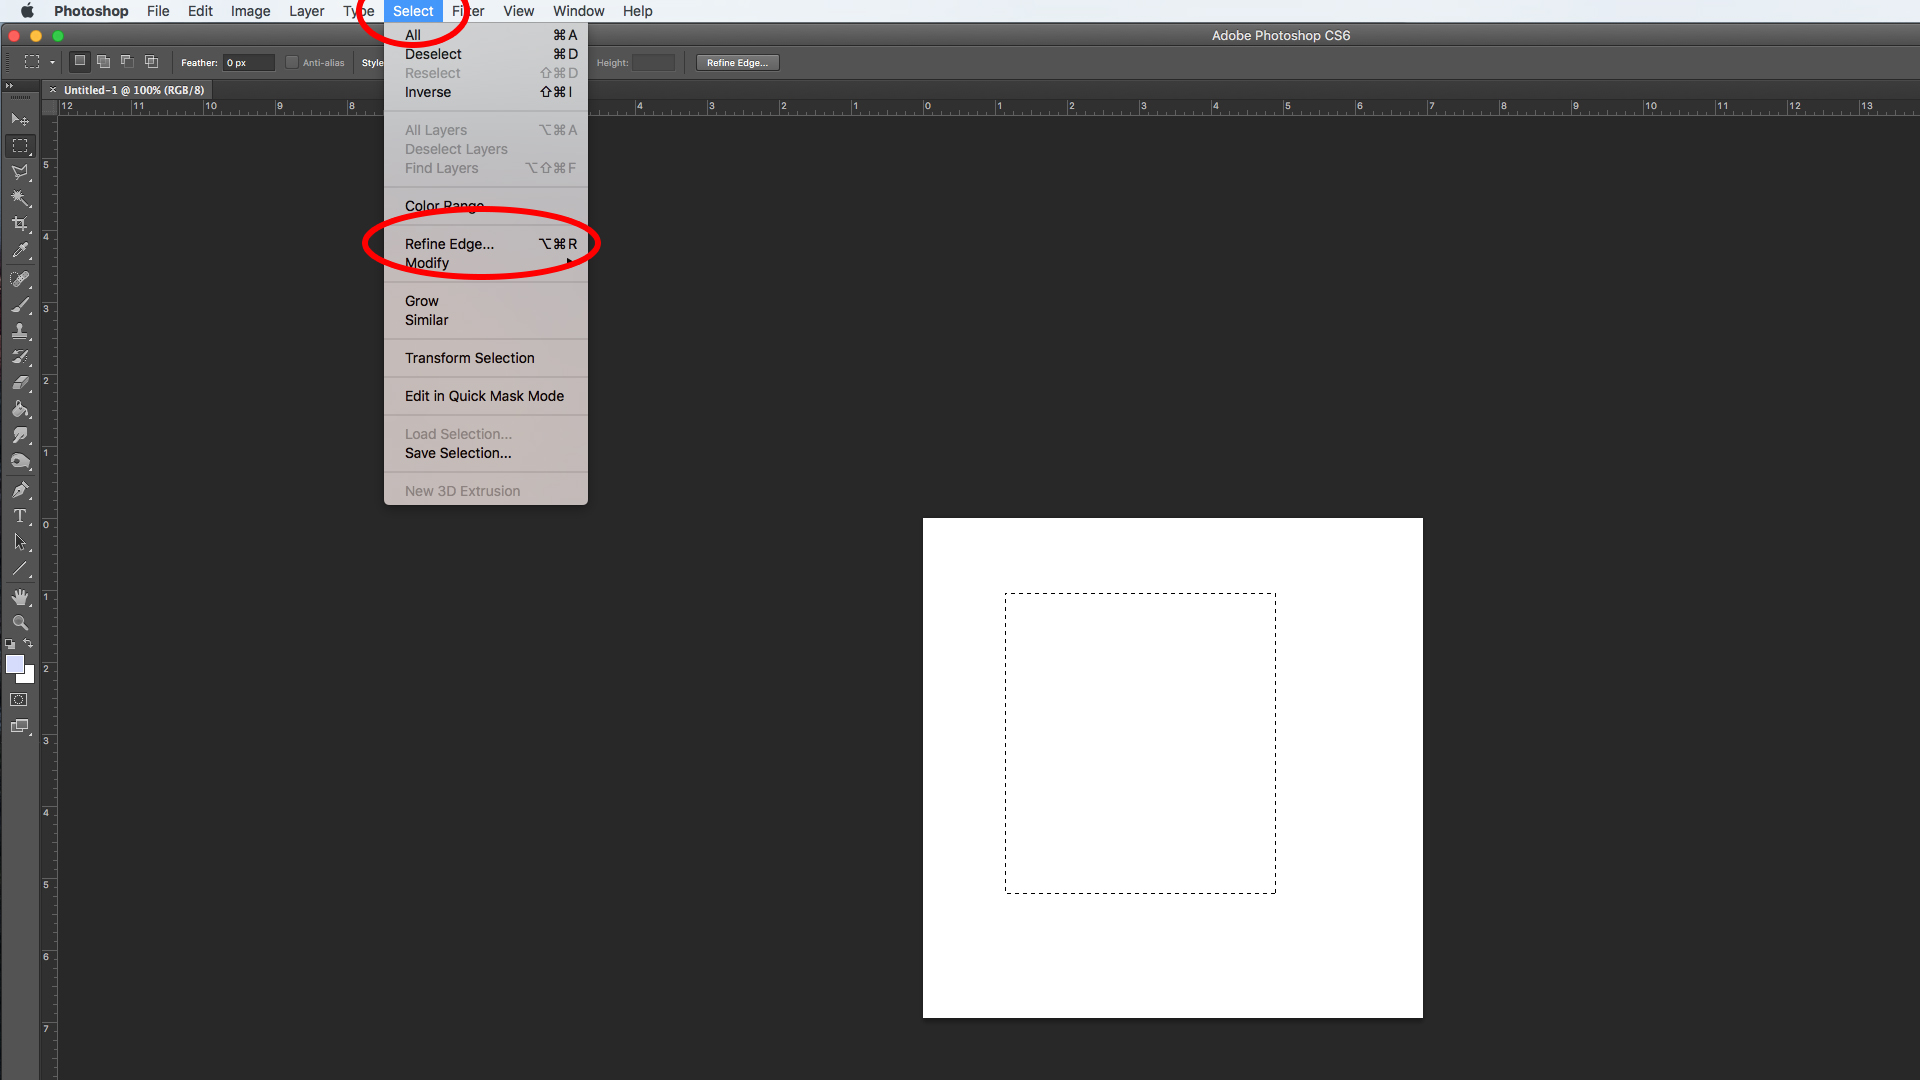
With the selection live (you should be seeing the marching ants), we are going to open up the Select And Mask (Refine Edge) tool. For those of you who are using an older version of Photoshop, the screenshot below will show you where to find the Refine Edge tool.
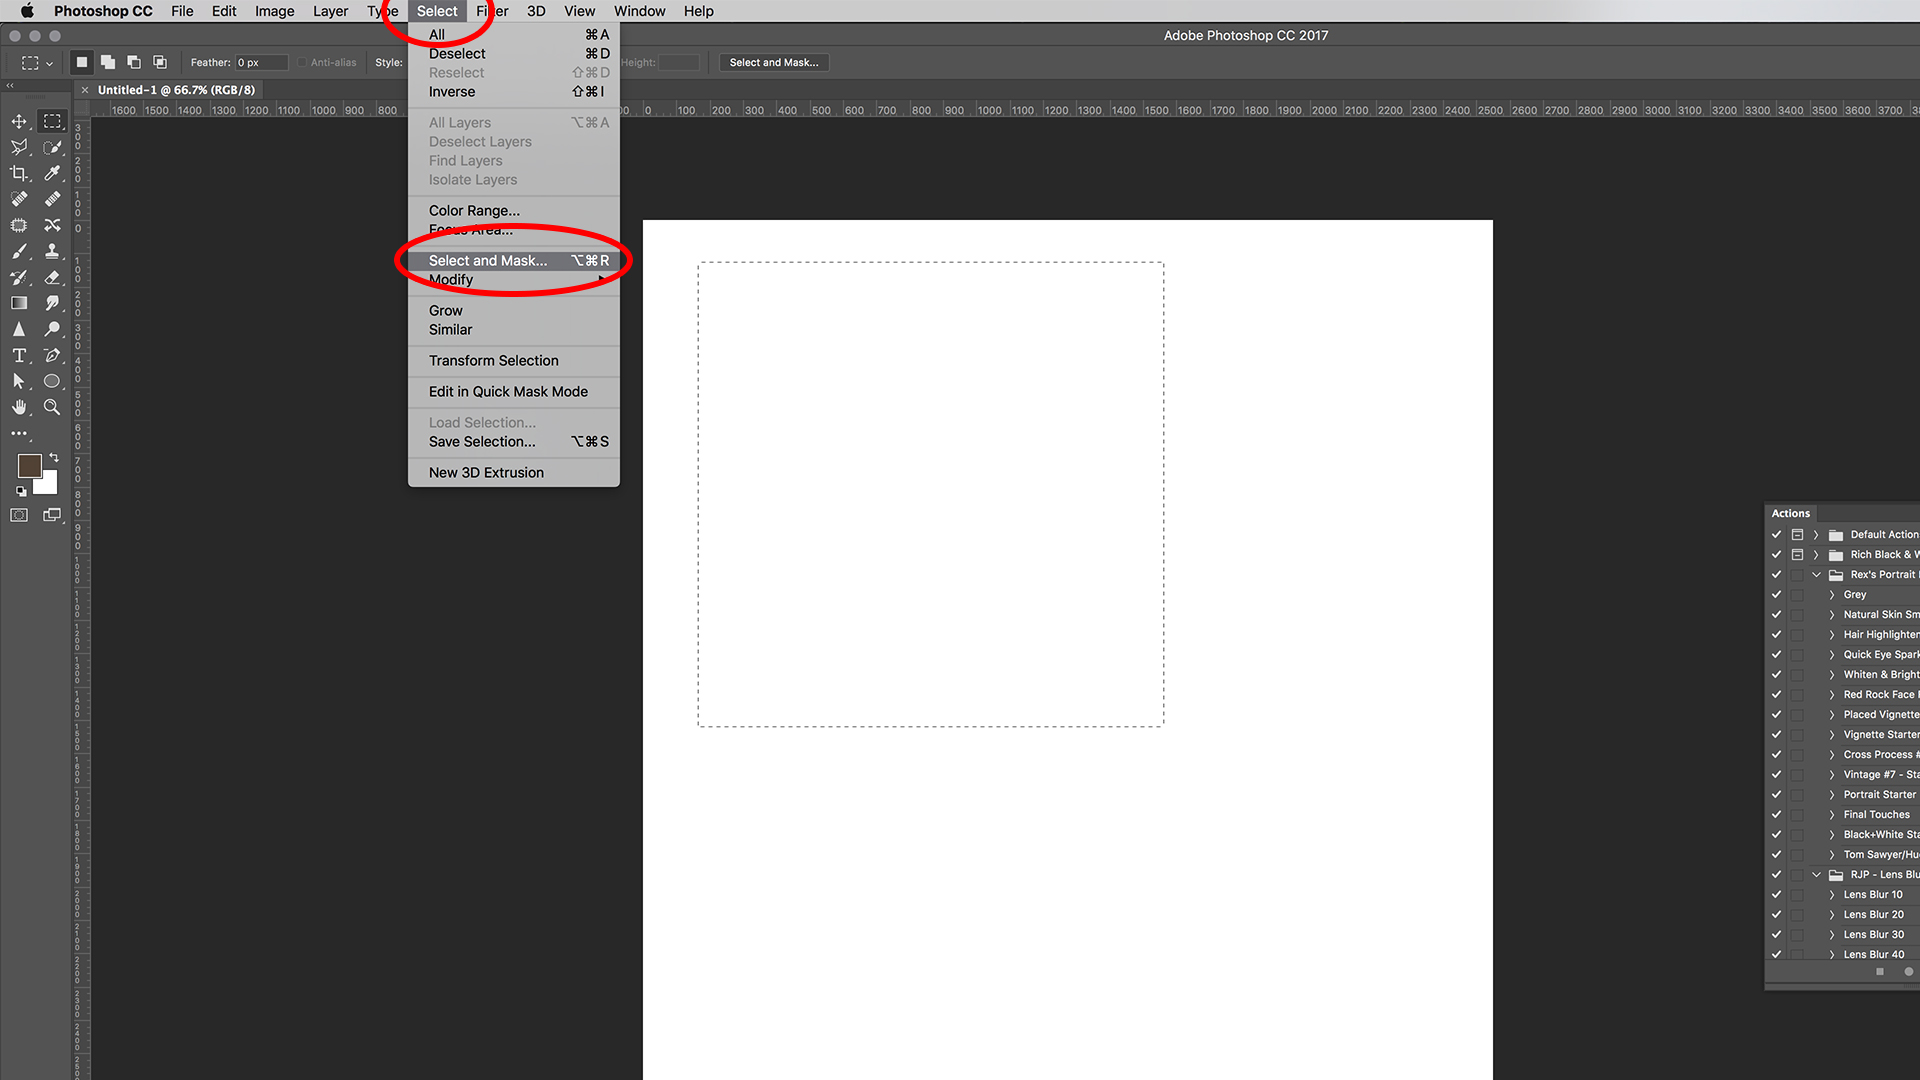
For those of you who are using a newer (CC) version of Photoshop, the tool you're looking for is the Select And Mask tool, which is outlined in the screenshot below.
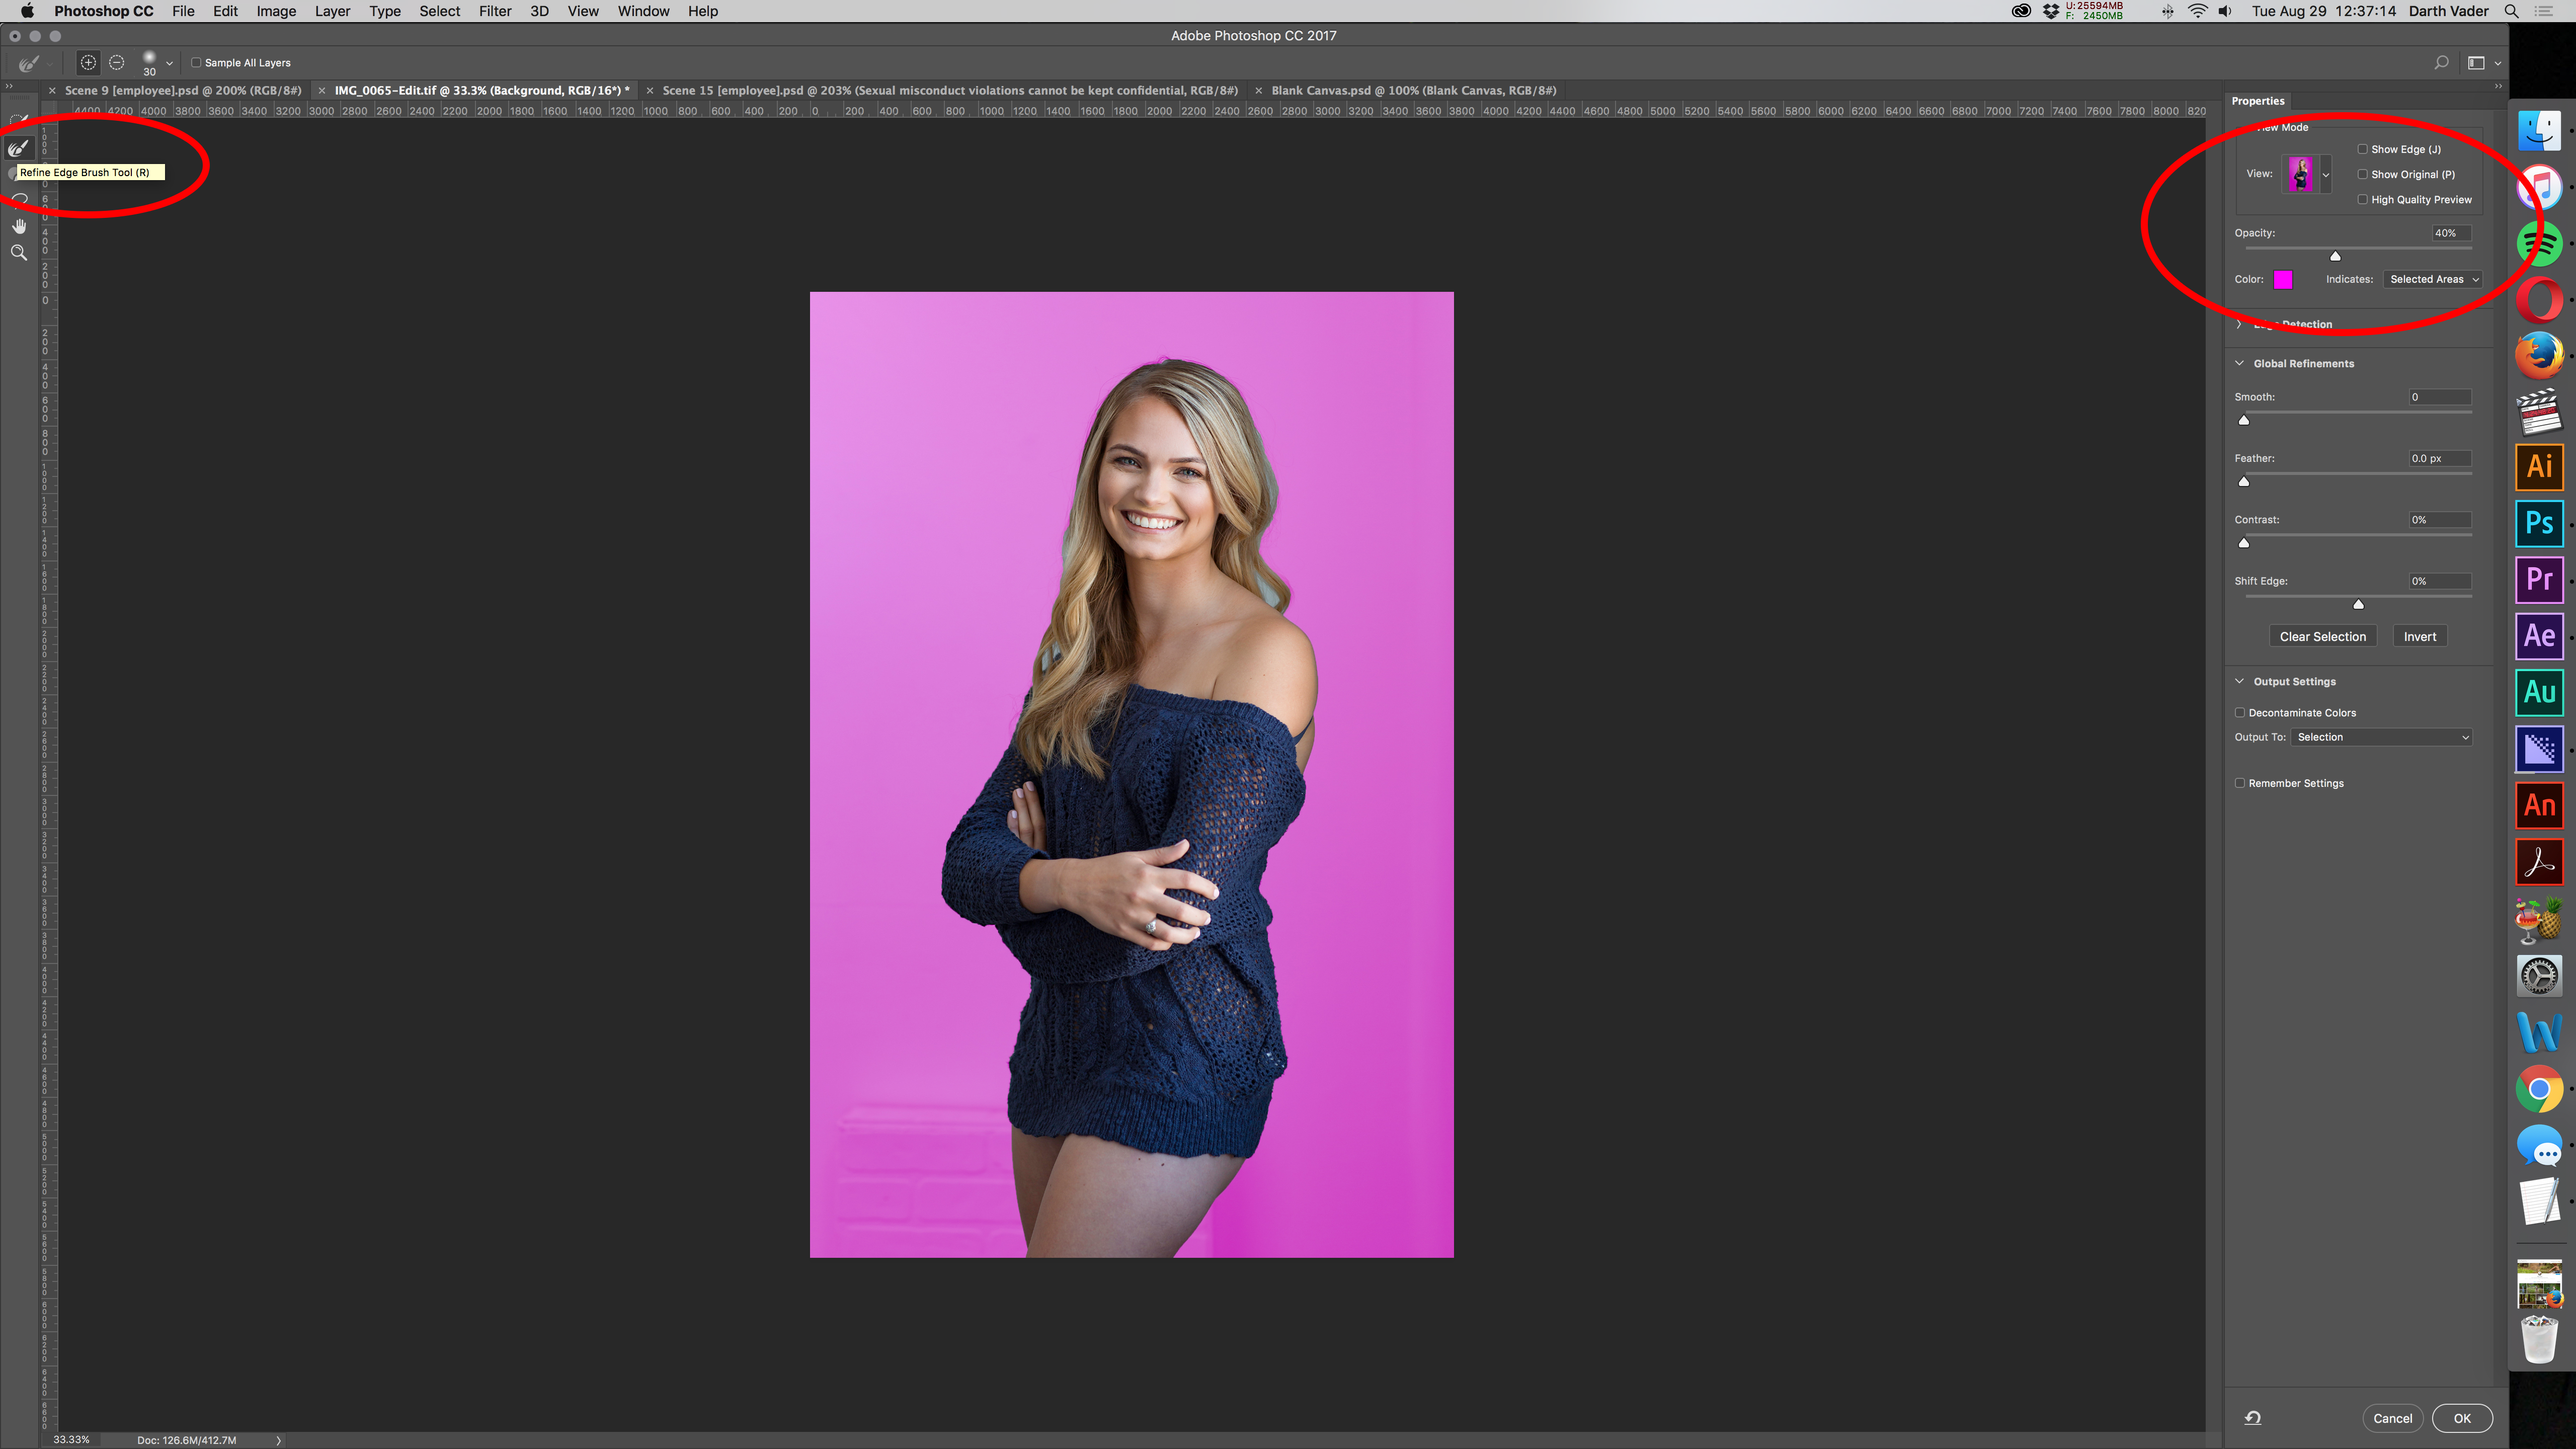
So, when we open this tool, to view the image like we did in Quick Mask Mode, we want to adjust the View Mode to Overlay. The controls for setting that are found in the upper right hand corner of the control panel (as highlighted in the screenshot below). Once we are seeing the image in Overlay mode, we can see clearly that anything highlighted in neon pink is a part of our selection. Refining the selection at this point is relatively simple. We need to select the Refine Edge Brush Tool (yes, this brush exists in older versions of Photoshop as well). The brush tool in question is highlighted in the screenshot in the upper left side of the image.
With the brush tool selected, all we have to do now is to paint along the lines of the selection. We need the brush size to be big enough to paint on both sides of the selection line. This means that we will be painting just large enough to include wall pixels on the selected side, as well as some of the pixels that make up our figure who we want de-selected. We want to make sure to paint the entire fringe of the selection, taking care not to paint too far into the wall nor too far into our model. The Refine Edge Brush Tool will automatically select similar wall pixels while de-selecting the pixels that make up our model. We want to make sure to paint all areas where we can see the wall color, even those bits between the curls of her hair. Once we have finished painting the circumference of our selection, we click OK to exit the panel and finalize our selection. Below is a before/after of what the selection started out like and how it ended up after painting the edges in the Select And Mask tool.

The Process: Finalizing the Background
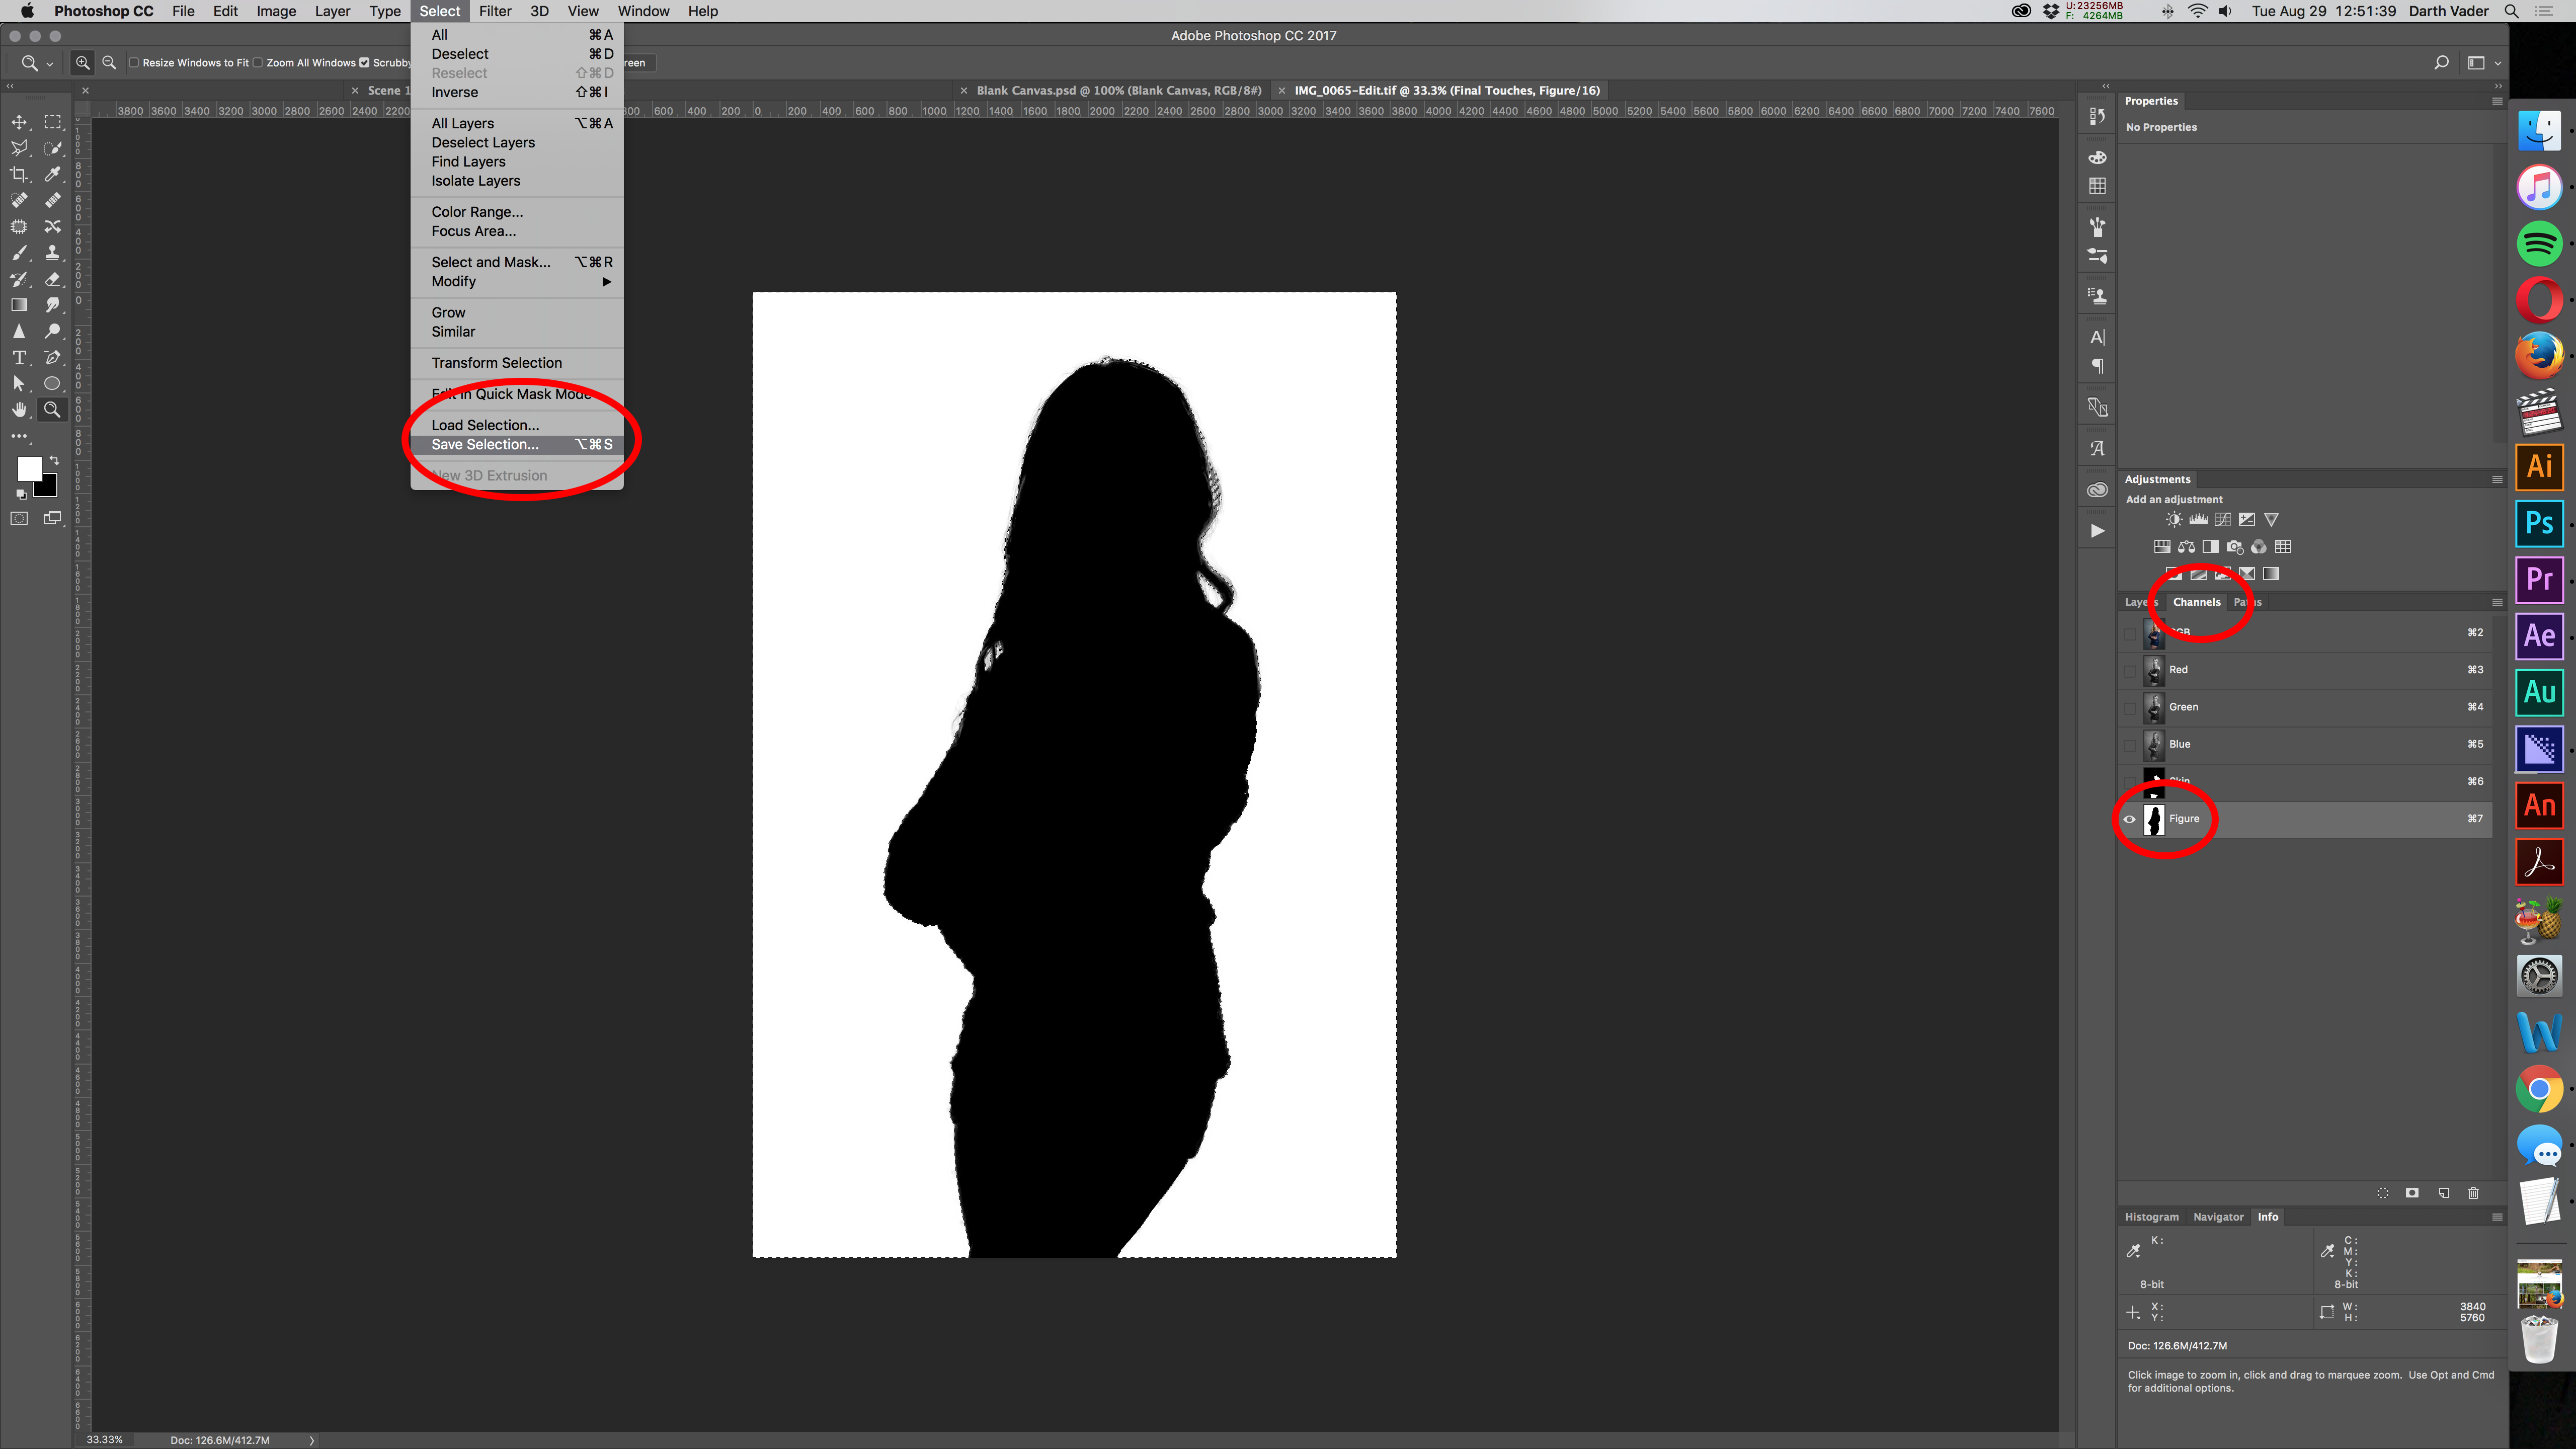
Having finalized the selection, I always like to save the selection as an Alpha Channel. We do this by navigating to the Select menu and choosing Save Selection. Upon naming our selection, you can see that it will show up in our Channels panel.
At this point, finishing off the edit is relatively simple. The first thing we'll do is duplicate the image. On our duplicate, we are simply going to use the clone tool to clone out that odd box thing behind our model. Now, to avoid bogging this tutorial down with insane amounts of screenshots, I'm just going to include a before and after of what we're doing here. So, we clone out the box on our duplicate layer. I'm really not worried at all about cloning some of the wall into our model, you'll see why.
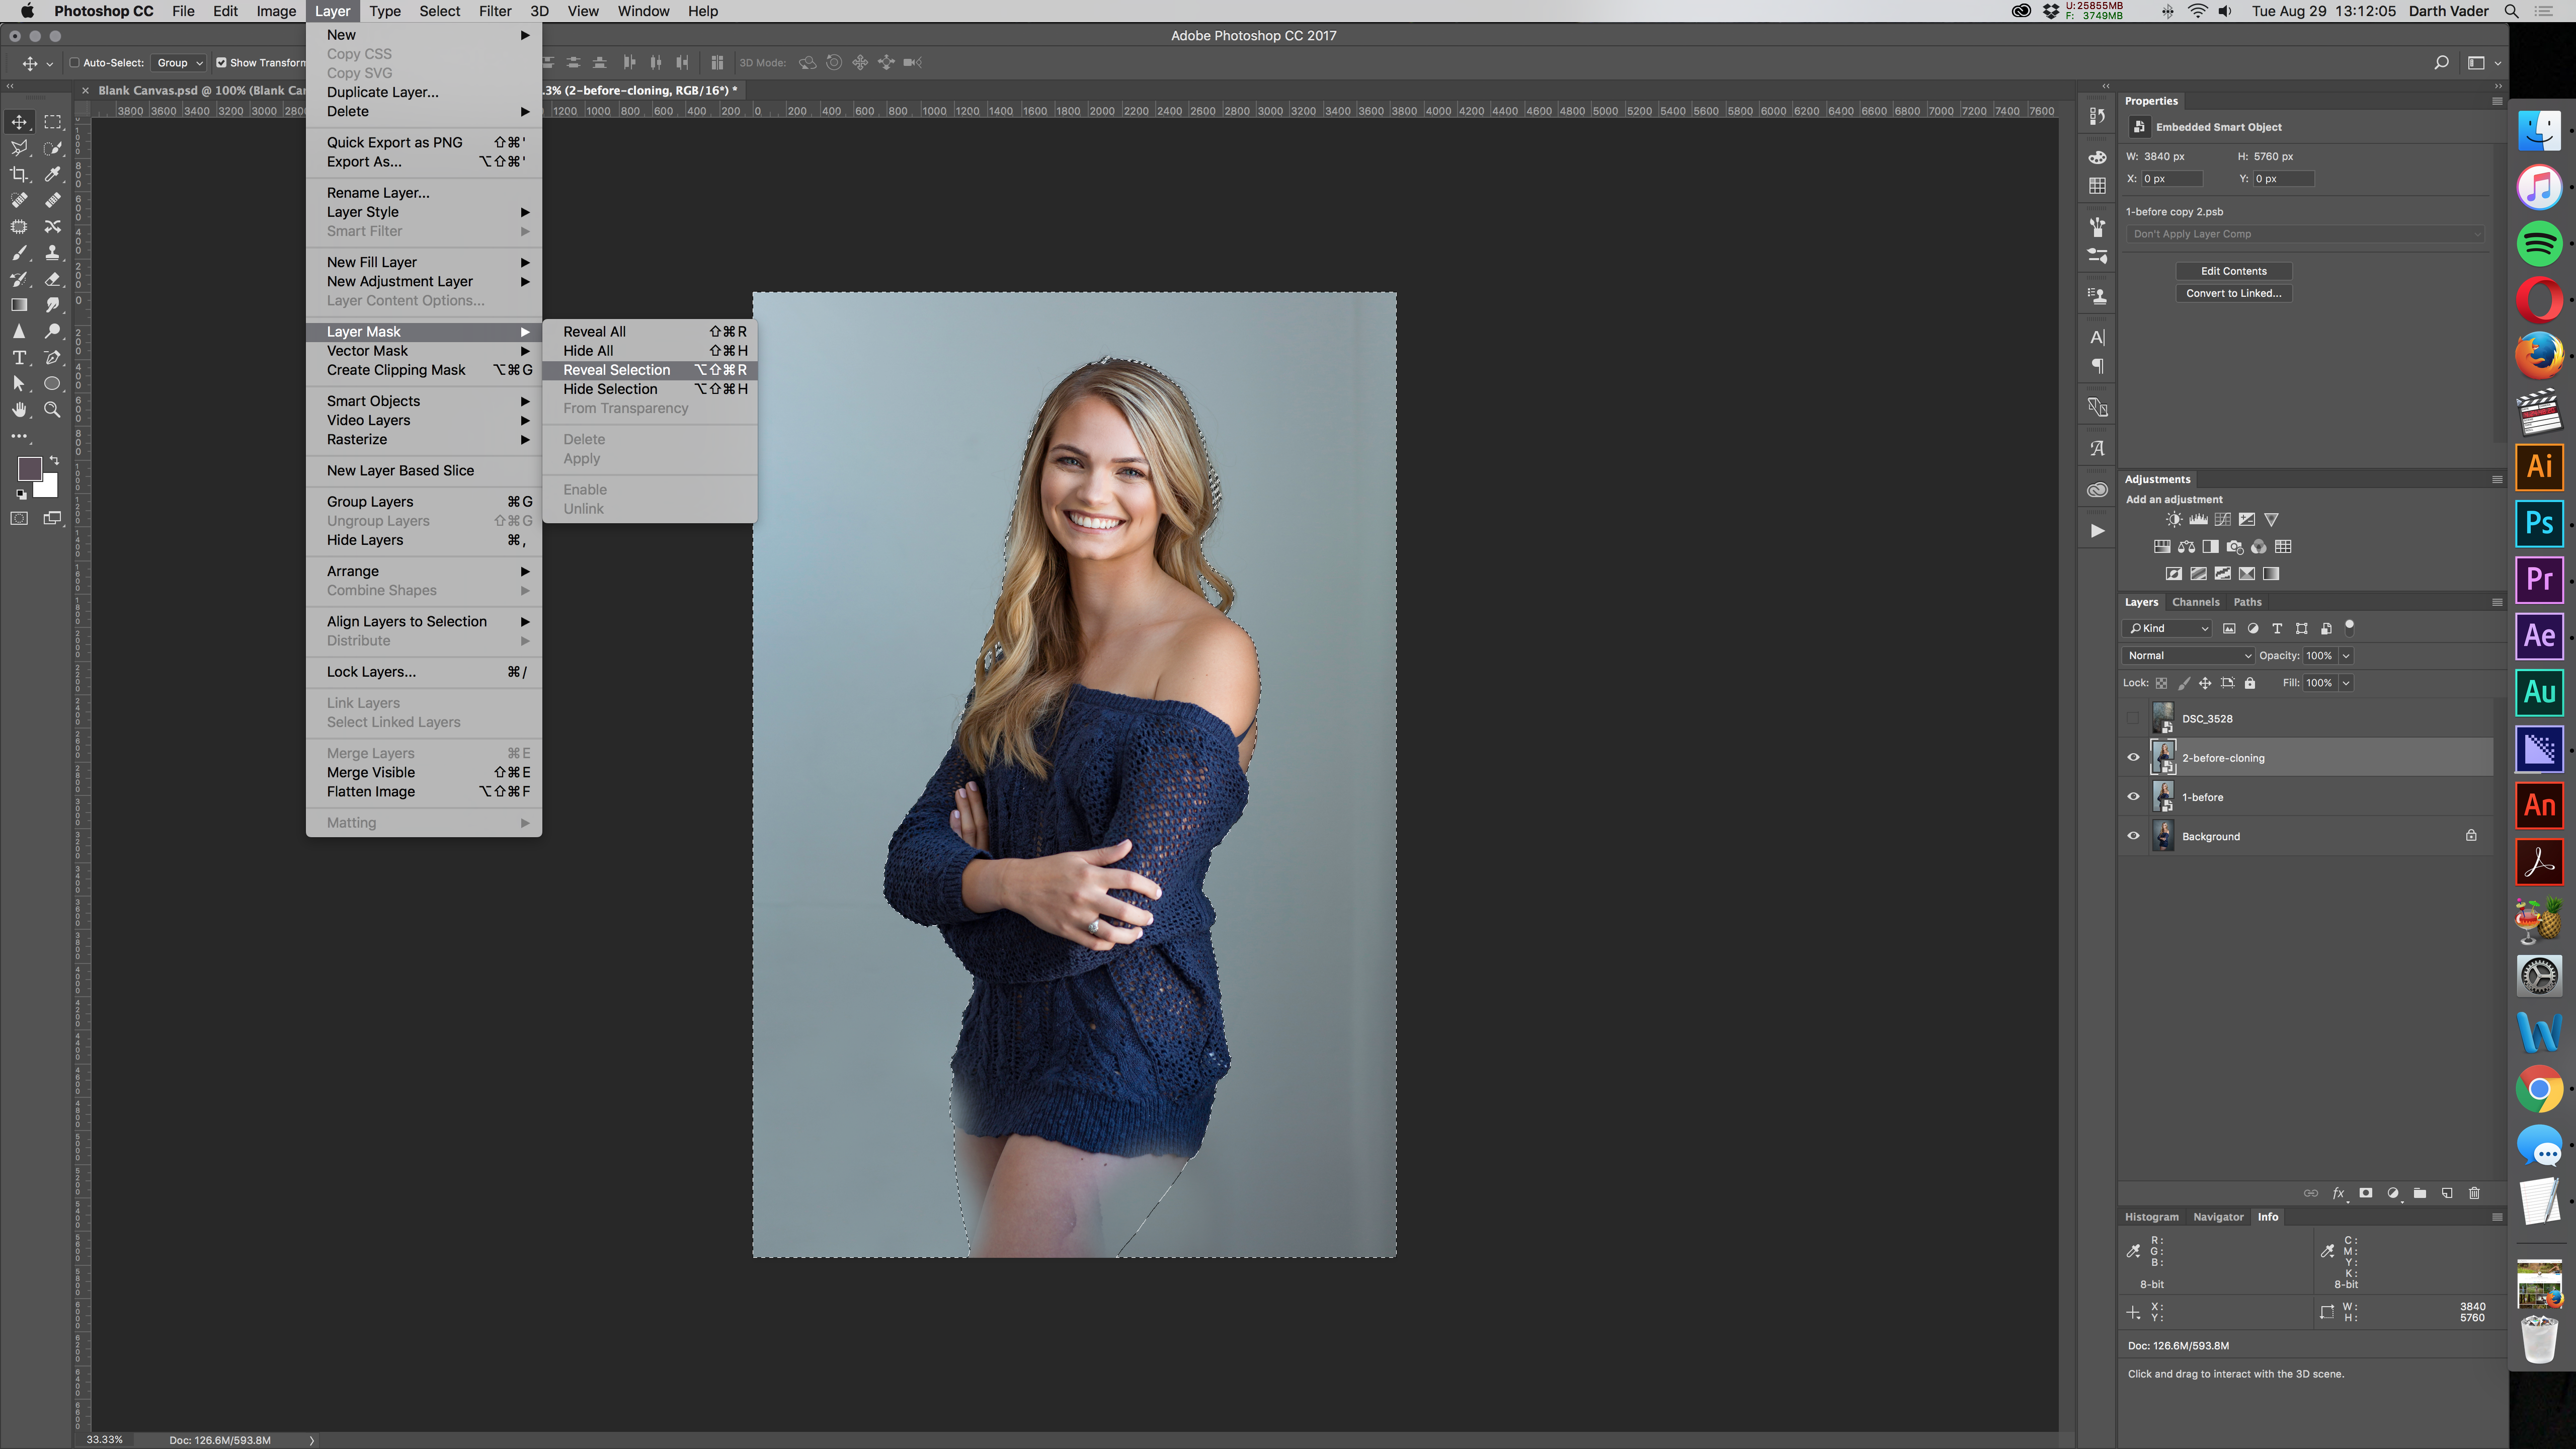
Once we finish cloning, we're simply going to navigate back to our Channels panel, we're going to Command+Click on our Figure channel which creates a selection for us. Then, on our duplicate layer, we are going to simply apply that selection as a layer mask, which can be found in the Layers menu. As seen below.
By applying the layer mask to our cloned image, it only reveals the section that we want to see, which is that cleaned up background. Here is a before/after of what that did for our image.
Adding in the background texture, at this point, is relatively easy. We will simply bring a texture into our project and make sure it fills the entire space of the image. Then, my personal preference is to duplicate the texture layer and set the bottom layer to the blend mode of Multiply and the top layer to the blend mode of Overlay. We are going to group the texture layers into a single layer group, and on that group, we are going to apply our selection again as a layer mask. This will reveal our texture fully over the background without it being on top of our model. After that, it is simply a matter of adjusting the luminosity of each texture layer to personal preference. For our bottom (Multiply) layer we set it to 30% in this example, and the top (Overlay) layer was set to 20%. In this screenshot, you can see how both layers exist in a grouping with a layer mask placed on the group itself.
Beyond this point, the rest of the edit is done to personal taste and preferences. We can use the refined selection to adjust the color of our background without changing colors on our subject. We can darken, or lighten, the background as needed. This all can be done while leaving our subject untouched.
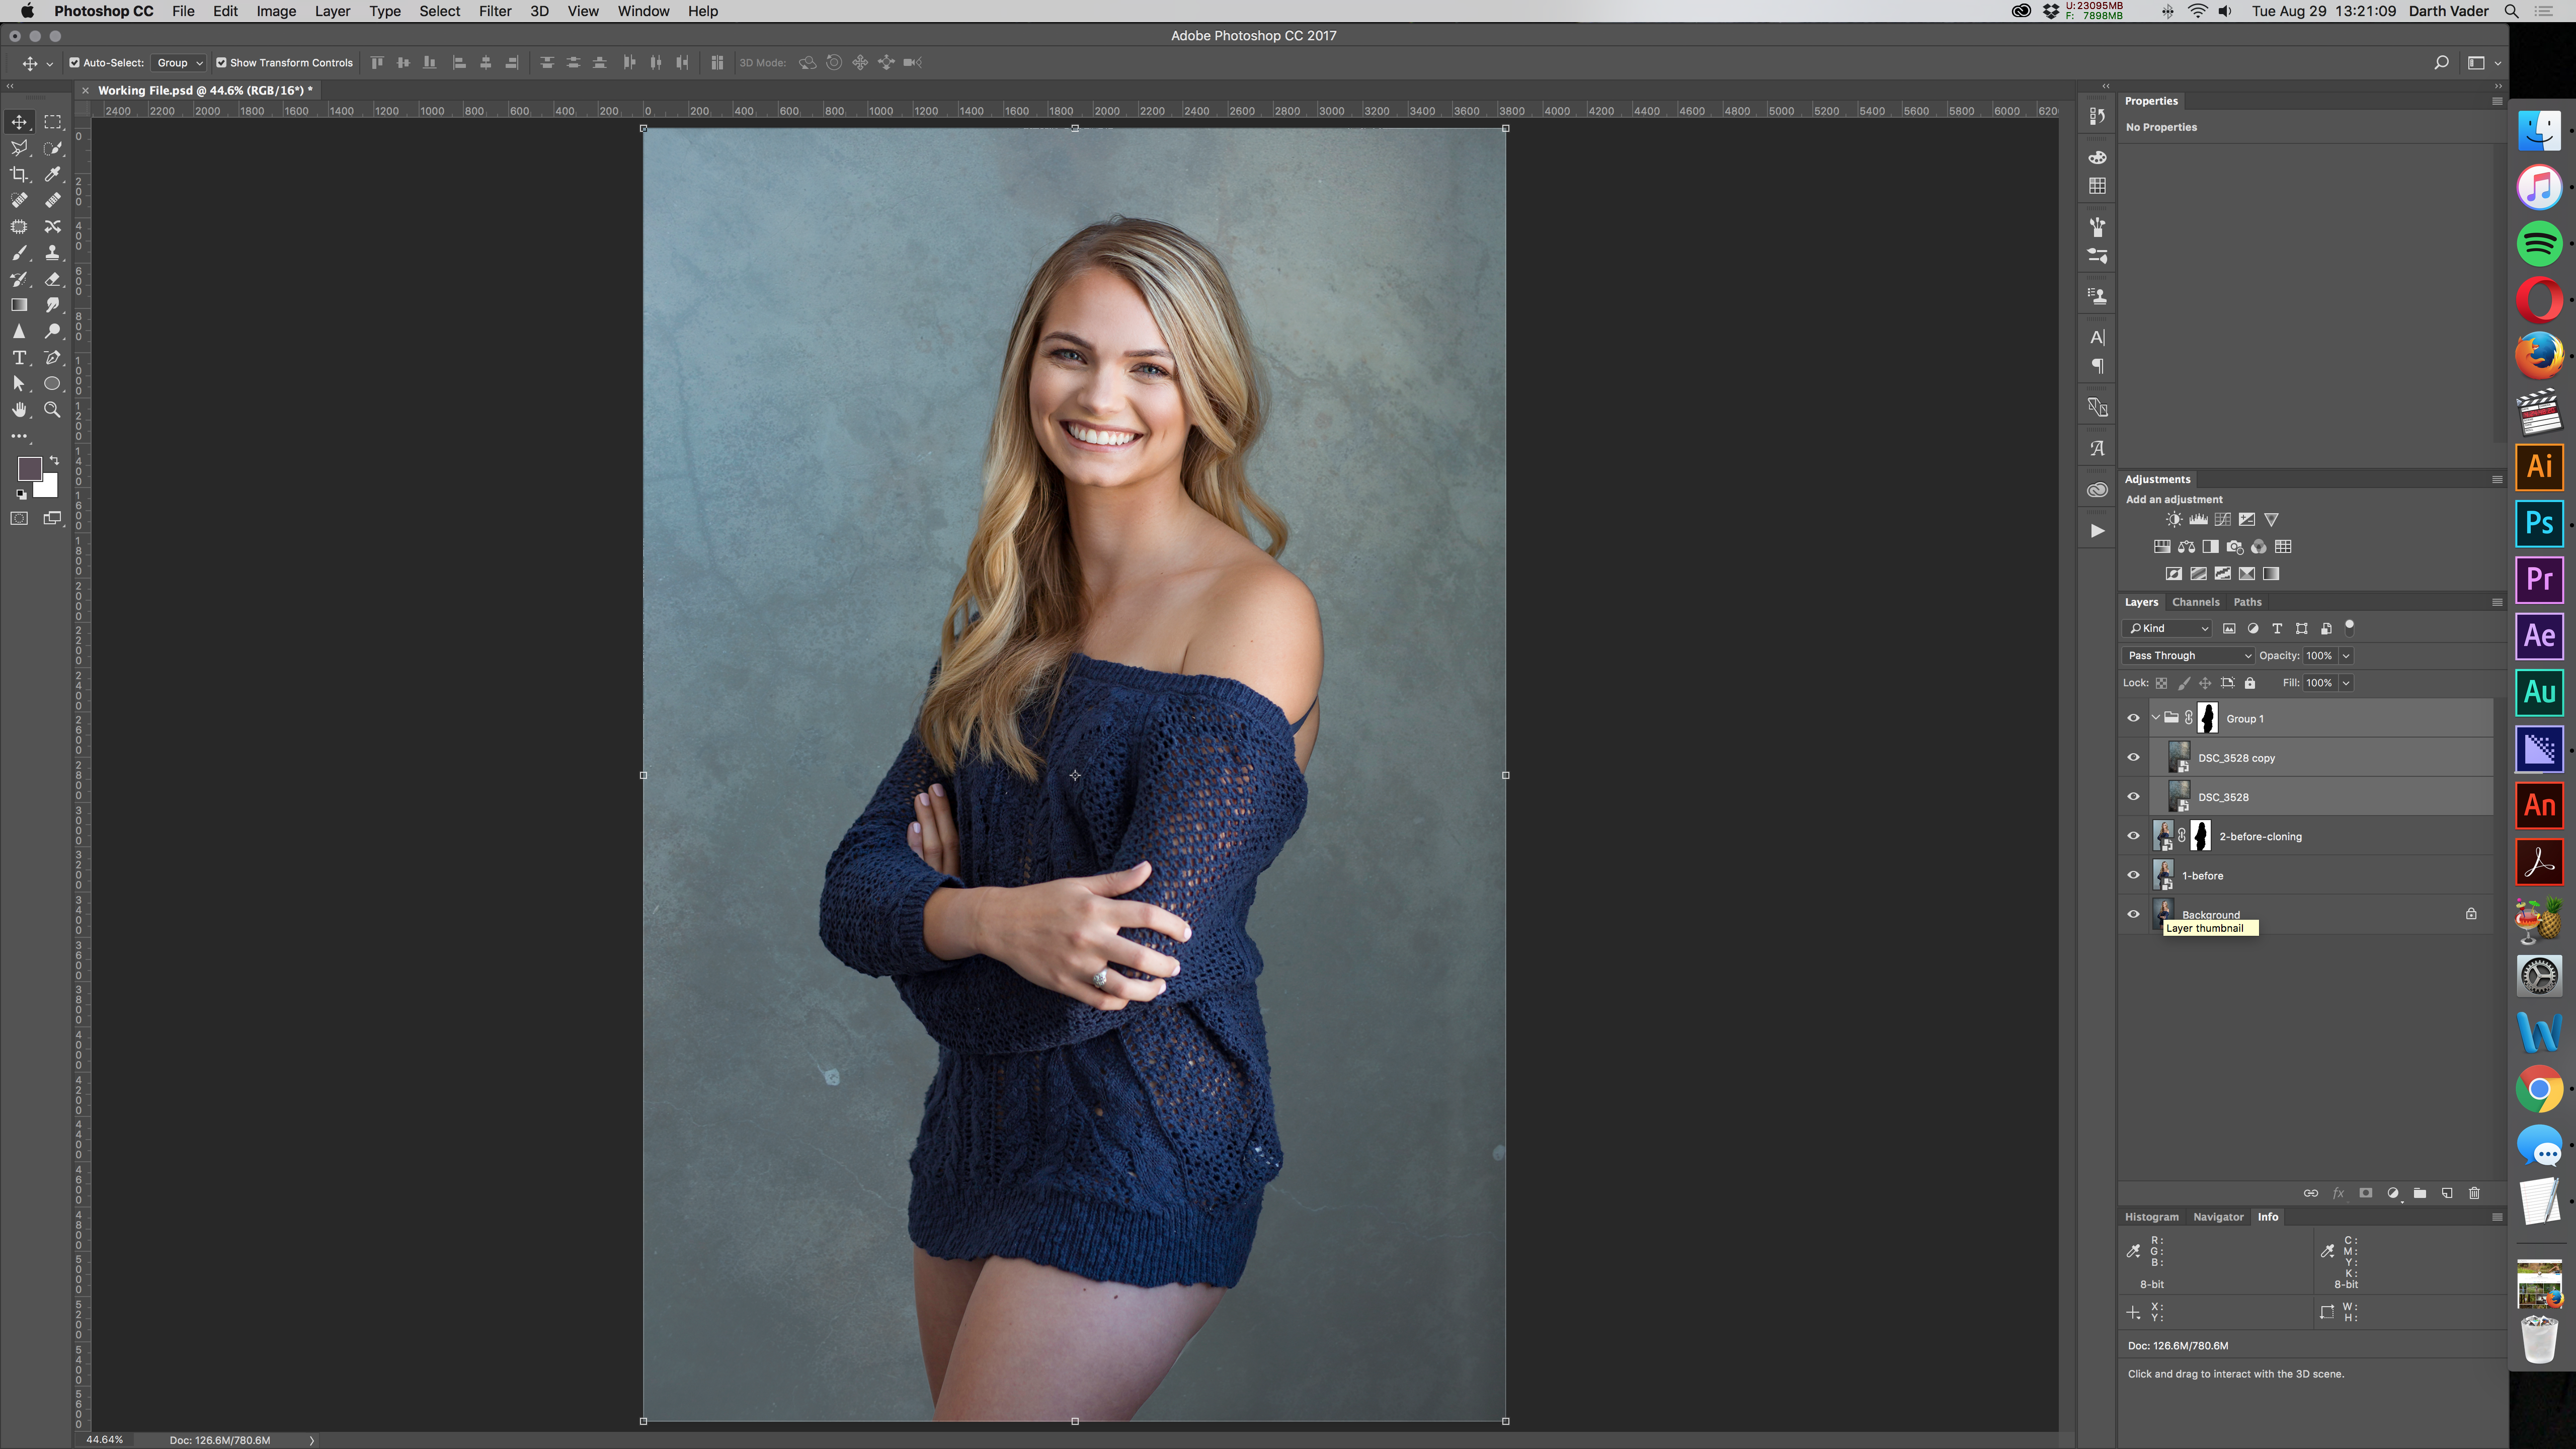
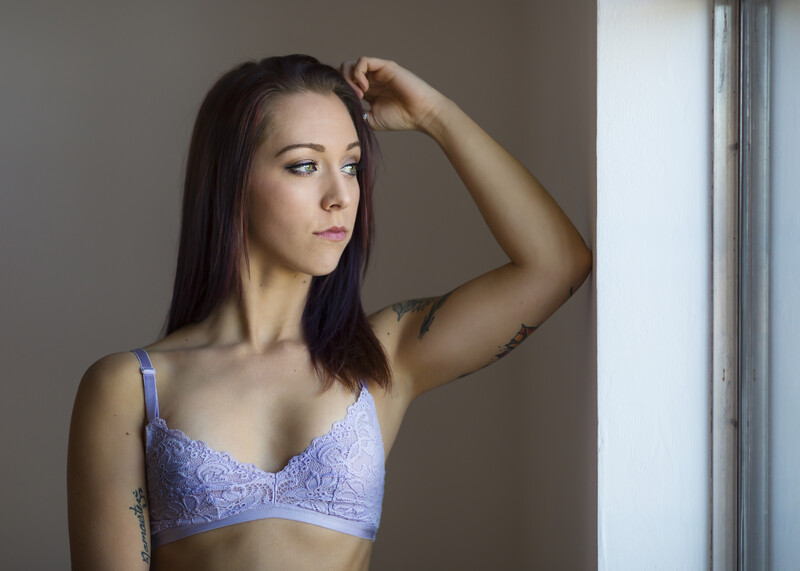
I use this technique all the time for my edits, specifically for the studio shots, but has even come in handy for some of my outdoor work as well. Here are a few more before and after sets beyond the one that we worked on in the tutorial. In some of these, the masks were a little more elaborate, others were relatively simple. But for all of these shots, I used the exact same techniques for each edit. I hope this helps! Make sure to comment if you found any of this particularly helpful in your own work, or if there is another technique you would like to see expanded into another tutorial!


Join the Fstoppers community for free
-
Post comments and join in the discussions
-
Browse the site ad-free
-
Share your work and get featured in the community
-
Compete in the photo contests for fun and prizes
8 Comments
This is all good and well. But what i really want is a method of isolating the subject from a very complex background.
Well, you're not the first person to ask me for that one. :) Happy to do so.
Some of that really comes down to individual shoot styles per photographer. I tend to try to shoot in a way that results in less complex backdrops.
Do you have a sample shot you could share with me, just so I can get an idea of what sort of imagery you'd be most interested in seeing me work on?
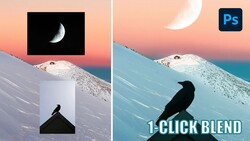
Have you tried the Re-Mask plugin from Topaz Labs? I'm sure you can do it natively in Photoshop, but I've found this plug-in makes it much easier. Here's an old image I used it on... I masked the mountain goat and the cliff separately. I wanted to darken the hillside in the background and sharpen the goat while leaving the cliff in the foreground light.
Hiya and thanks! I am going to sift to my images for a nice example. Yes I do have Topaz Re-Mask and I like using it because of the fact that I do use a Wacom tablet. But it still leave me wanting especially for complex backgrounds that has lesser contrast with hair and clothing. I'm going to post a Photo for you Rex in a while and thanks. =)
Awesome! I'll make sure to keep an eye out for when you get the chance to get that example shot! :)
Hey Josh! I'll be honest, I haven't even heard of that plugin. I'll have to check it out. And hey, if it ends up being something that I can incorporate well into my workflow, I'll make sure to do a video on it! :) Oh, and that shot of the mountain goat is rad!!
I'd be interested in learning more about the image with the man in the suit and the shirtless man wearing the gas mask... The replacement of the image outside the window seems like it would be much more complex than simply replacing a background behind a model.
You're absolutely right, that image was far more complex to process. The techniques are grounded in the same processes that I illustrate in this particular tutorial, but I did push the bounds a bit more for the shot you're talking about.
I'll have to try and find a good way to go over the process that I went through to create that image. Haha, it's a little tricky because I have noticed that I tend to be long-winded in my video tutorials as it is, and with the amount of tools that I used for that image, I'm afraid the video would be way too long! As soon as I can manage to detail the processes in a manner that doesn't bore people to death, I'll make sure to post it! :)