

Freckles. Some people remove them and some people chose to enhance them. In this quick Photoshop tutorial, learn the easiest way to bring out the freckles in your subjects and create more dynamic portraits.
After experimenting and messing around with Photoshop for years, I've finally found a versatile way to bring your photos to life by enhancing your subject's freckles. This technique works for images both in black and white and color and takes just under five minutes to do. Let's jump right in!
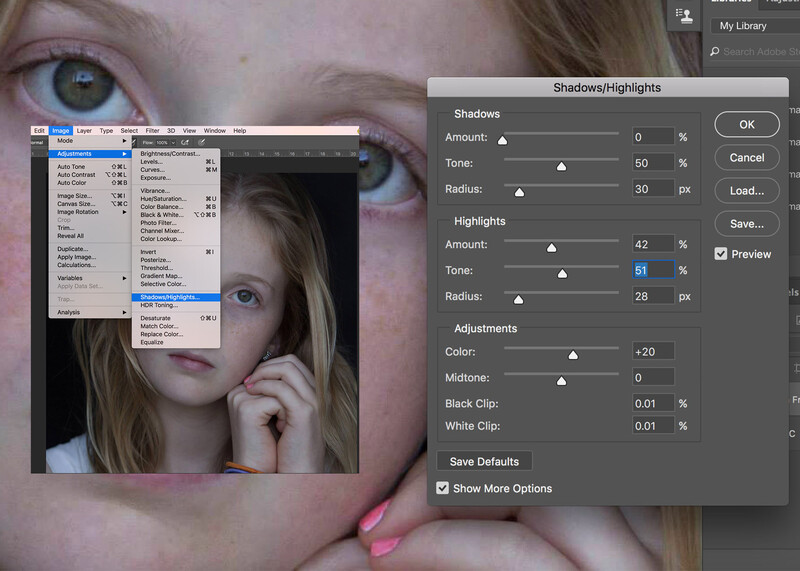
Step 1: Reduce Highlights
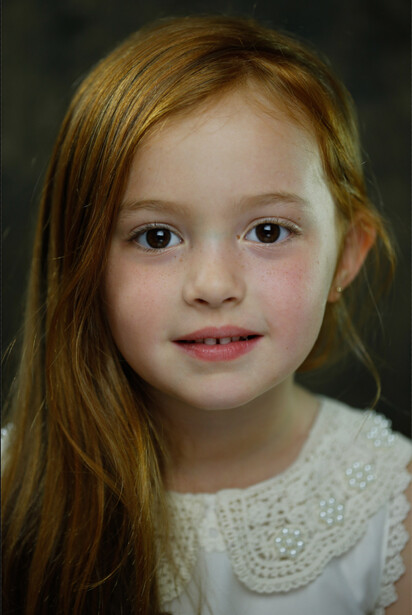
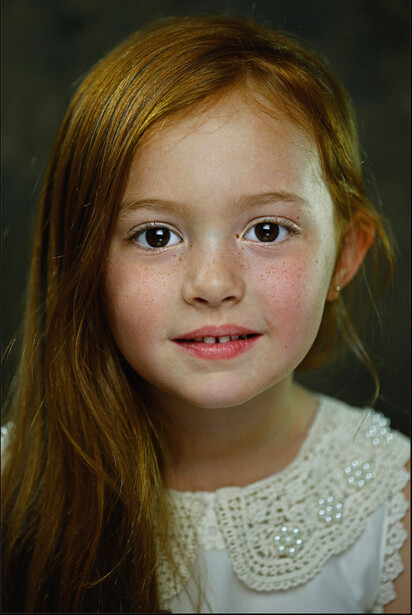
Right off the bat, when you look at the straight out of camera image, you'll notice it's flat. What we're trying to do with this simple adjustment is to dig down into the highlights and bring out the details in the skin. The raw image actually holds onto a lot more information than we think. To do this, head up to Image - Adjustments - Shadows/Highlights. Once you're in that panel, set your Shadows to 0 percent (it will be at default 35 percent). Then, scroll down to the Highlights tab and tweak the settings accordingly to your image. For my image below, I decided to set my amount at 42 percent, my tone at 51 percent, and my radius at 28 pixels. The goal in this first step is to produce more texture and details in our highlights but still maintain the natural look to the freckles.
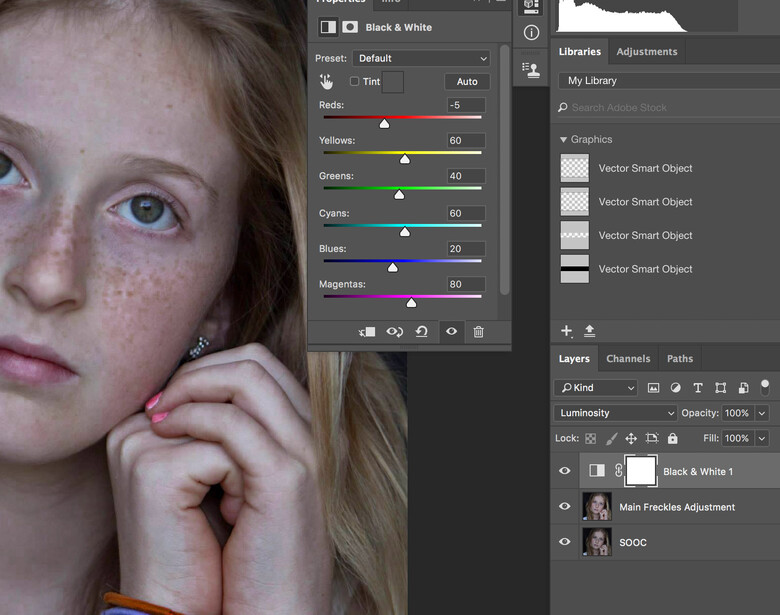
Step 2: Add a Luminosity Mask
Generally, when you shoot a well-exposed raw photo, you're trying to maintain the details in the image, but your camera can't do all the work. One way to target specific areas of your image is to use luminosity masks. To bring out freckles in an instant, we will add a black and white filter, and change it to luminosity to target the brightness and clarity of specific colors. In the case of enhancing skin, we are slightly underexposing certain colors to bring them out, and when editing portraits, we will adjust the reds, which is where the freckles fall in. To add a luminosity mask, go down to your Adjustments bar and add a black and white filter. Next, change your blending mode to luminosity. Then, you're ready to go. Adjust each image to taste.
Step 3: Sharpen The Image
Any camera in good light can take a great picture, but I like to push that one step further in Photoshop by sharpening my images. There are dozens of ways to sharpen an image, but I choose to use a method I described in my article I wrote last week.
Step 4: Convert to Black and White
This step is arbitrary and specific to the image you're working on. This technique works both for color and for black and white. If you are choosing to do a color image, simply stop at this step.
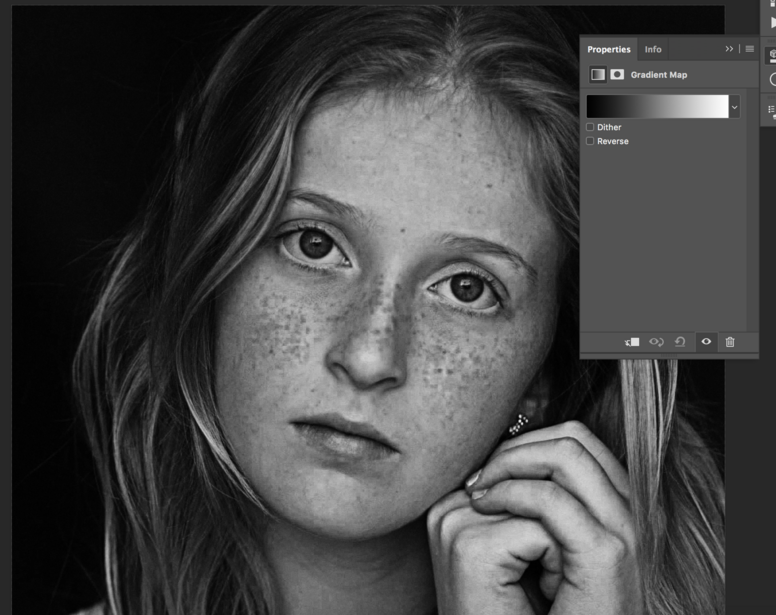
When converting your image to black and white, you want to keep in mind one thing: the tonality of your image. In a black and white image, there are three properties to it: the shadows, the midtones, and the highlights. You want to make sure there is a even gradation between all three. You want it to start dark around the edges of the photograph and gradually go lighter near the eyes. Adding a gradient map does this perfectly.
To add a gradient map to the image, head down to Adjustments and select "Gradient Map." Click on the gradient and make sure it's set to Black and White.
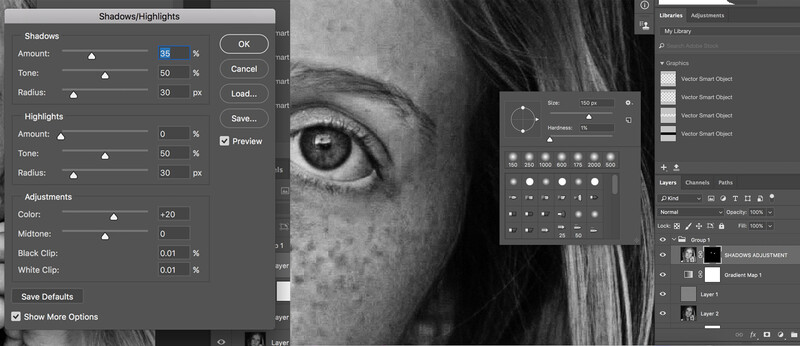
Step 5: Finishing Touches
After applying the gradient map, it may appear to be to harsh or have affected too much of the image. To counteract that, we want to go in and lift our shadows and bring in some more details in the eyes and hair to give them life. Adding this slight adjustment to the image will also give it more dynamic range and enhance our overall black and white tonal range. Once the Shadows/Highlights panel is brought up, adjust to your taste.
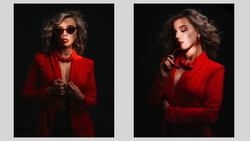
The Final Results
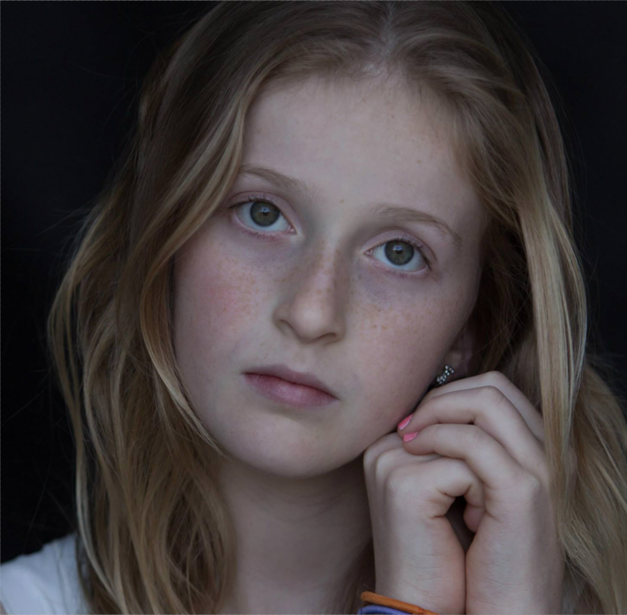
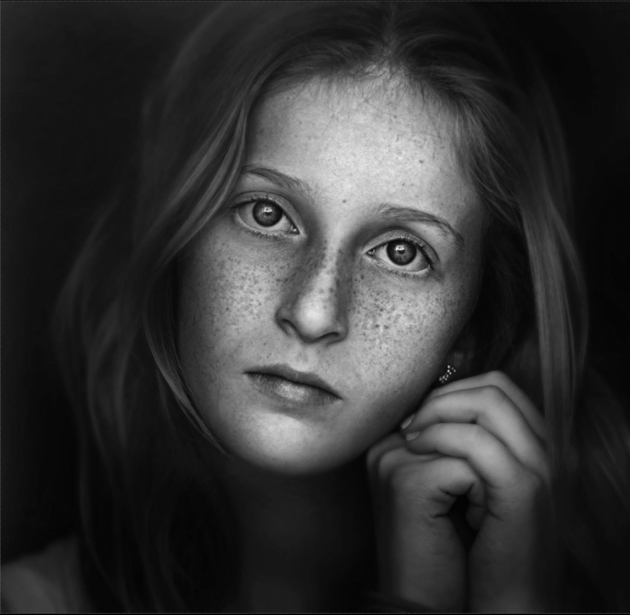
In just a few simple steps, you can enhance the freckles of your subjects to bring their natural beauty to life. This technique could be applied to your black and white or color photos. If you're hooked on black and white images, stay tuned next week for a two-part series on capturing and editing the perfect black and white image. If you have any questions, leave them down below! See you next week!


Join the Fstoppers community for free
-
Post comments and join in the discussions
-
Browse the site ad-free
-
Share your work and get featured in the community
-
Compete in the photo contests for fun and prizes
6 Comments
Makes me sad when freckles are edited out.
Got a tutorial for Capture One?
Same for me. Especially when my sister has them. Unfortunately i don't but the same principals apply there too.
I had them on my face when I was younger but not anymore. But, my wife's a mildly freckly redhead, as-is my son who's just starting to get freckles at 3 years old. My daughter is 5 and has a few, too, just like I did as a kid. It's definitely a feature I want to capture in my images of my kids and wife.
Agreed! This was the first thing I taught myself when learning photoshop and became a fundamental step in my workflow!
Yeah... me too.... I try not to edit them out if a person has them. I've not done any enhancing projects... yet... but I have one in the works I'll likely hit this summer.
Interesting technique. I think it's a bit heavy-handed on the little girl shot, but it's a good way to make selective alphas. This technique in reverse, besides used to minimize freckles, is also useful for smoothing out blotchy skin. I usually go the calculations route for stuff like this, but this may be useful for any number of processes.