

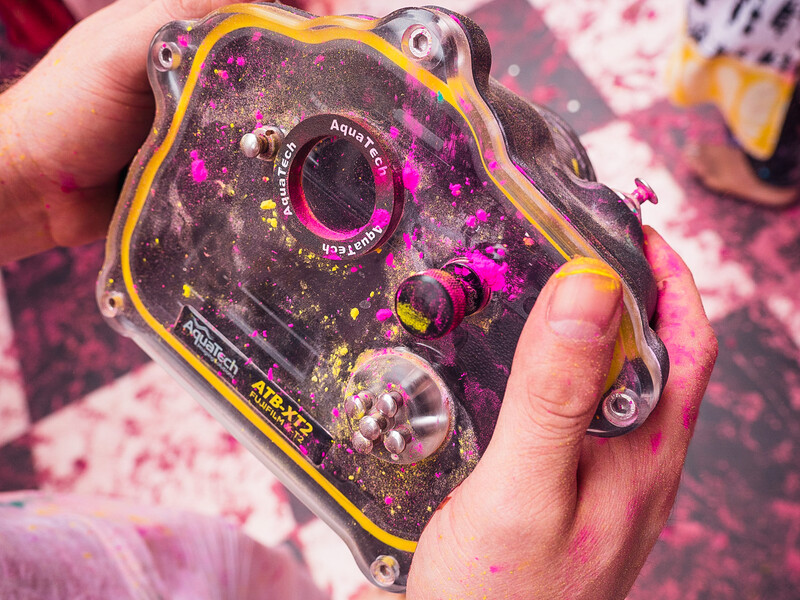
It’s easy to think of underwater housings as a one trick pony. I mean, the name “underwater housing” suggests a very specific use. But in reality, these housings are good for protecting camera gear in all sorts of extreme conditions. So when I had the chance to shoot the Holi Festival in India, I thought it would be the perfect place to test the new underwater housing from Aquatech that was designed specifically for the Fujifilm X-T2.
While I was planning my shoot for the Holi festival, I knew I was going to need some type of camera protection. Yes the Fuji X-T2 is dust and water resistant, but I’m not sure I want to push that rating to the limits if not totally necessary. For those of you that don't know, the Holi festival is a huge festival in India and they celebrate by throwing colored powder and water into the air and directly at people. The powder is similar to that used during color runs, and as we have seen in the past, that stuff can totally destroy camera gear.
When I first received the housing, I was pleasantly surprised by how small it was. Yes it’s a decent amount larger than the Fuji that its holding within, but it’s still nice and manageable in my hand. Along the left side, it has a nice handle that makes it super easy to carry around. When I first got the housing, I had wished there was a way to attach a strap of some type, but after use, the handle was more than adequate for carrying around all day. Other than the handle, the housing also comes with a nice pistol grip. This grip has two buttons that act as a focus button and a shutter button. The nice thing about the handle and the pistol grip, is that both are removable. So if you are using one, you don't have to have the added bulk of the one you are not using. There are also nice little grooves on the housing for your fingers that make holding the housing nice and comfortable.
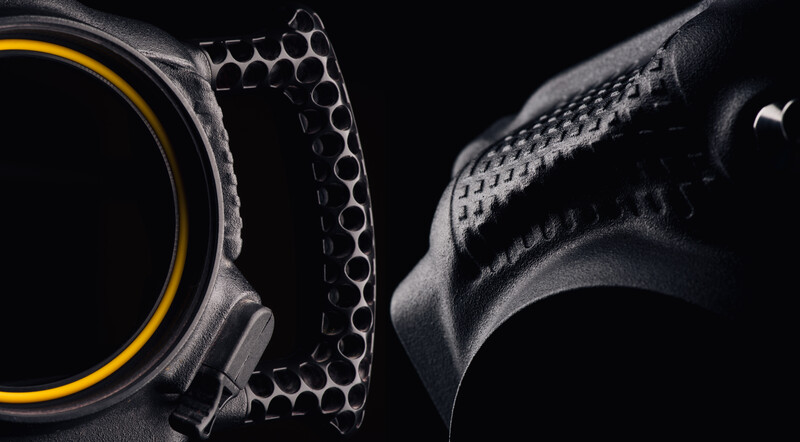
On the front of the housing there is a lens port that is interchangeable depending on the lens you are using. The nice thing about this lens port is that it's super easy to take on and off. This is important since there is no way to control the aperture while the camera is inside of the housing. So instead of having to completely remove the camera from the housing to change the aperture, all you have to do is screw off the lens port, make your change, and then screw it back on.

In order to secure the camera to the housing, you attach a supplied mounting plate to the bottom of the camera. This mounting plate then slides into some grooves that are found on the inside bottom of the housing. The problem with this mounting plate though is that it blocks the battery door, so you have to completely remove the plate to change the battery. Another issue with this plate is that it has a small lip on it that blocks the tilting LCD screen from being able to flip out. Not a huge deal, but it would be nice to not have to remove the plate every time you want to use the camera outside of the housing and still be able to use the tilting screen.
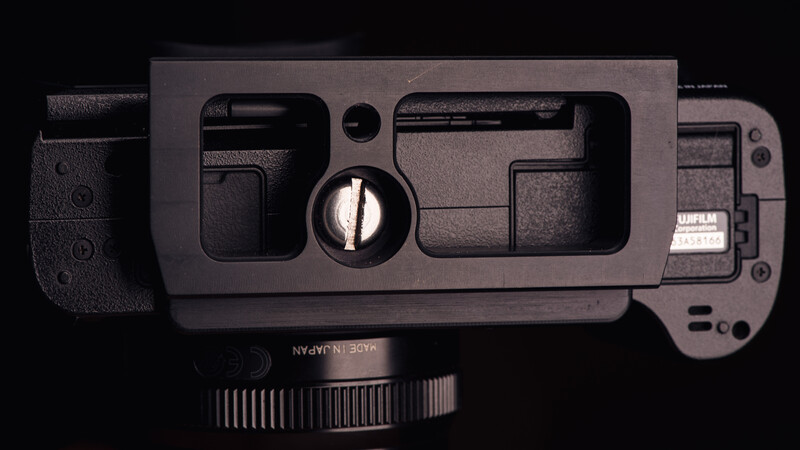
One other thing I would have liked to see with this mounting plate is some type of tab that could be used to pull the camera out. Because Aquatech did such a good job minimizing the size of this housing, it's actually pretty hard to get a grip on the camera to pull it out. Instead you have to remove the lens port and push the camera out from the front of the housing.
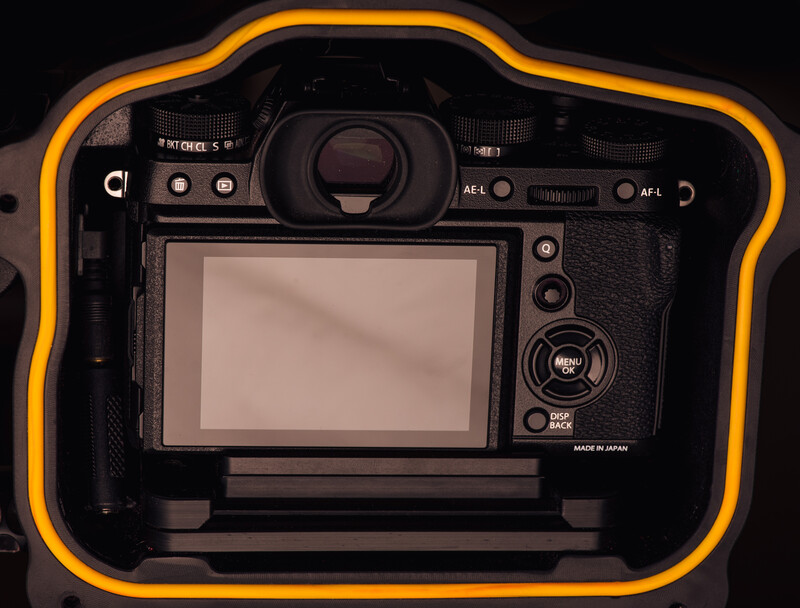
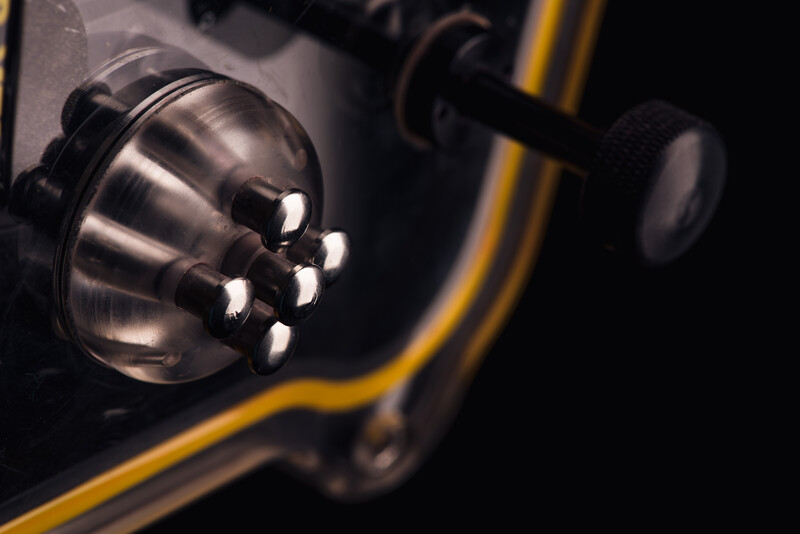
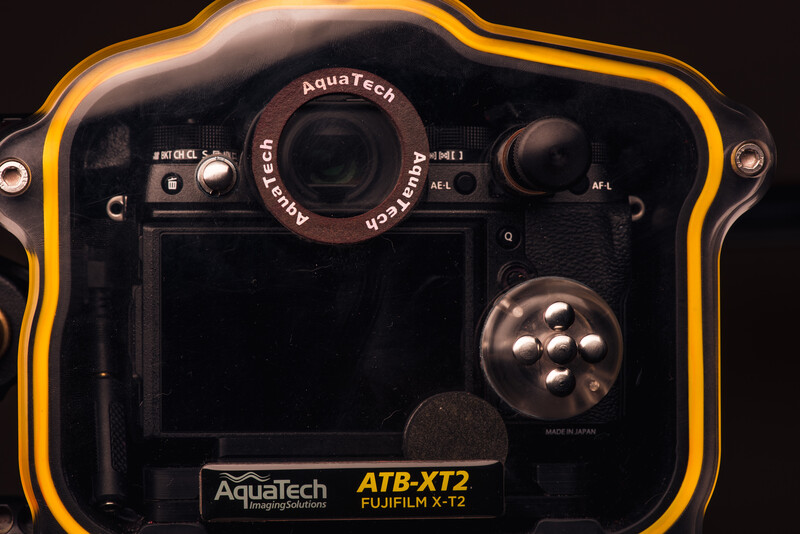
On the back of the housing you will find an assortment of buttons and dials. Like most underwater housings though, there isn’t access to every single button and dial on the camera. Instead, you only have access to the menu button, the four directional buttons, the play button, the shutter button, and then a dial that can control the rear command wheel. The buttons have a solid feel to them and are easy to locate without looking. The menu button and directional button are even at slightly different height which makes it sure easy to know what button is what. I did have to fight the dial that controls the command wheel though. This dial has the ability to move in and out so that you can set your shutter speed, then pull the dial out so you don't accidentally change your settings. The issue I had is that the control wheel on the X-T2 can actually be pressed to do a zoom in for focus testing as well as change the focus assist setting. Because of this I found myself having to constantly press, hold, and maneuver this dial in order to get thing back to normal. This is more an issue with the camera and not the housing and thankfully there is a new firmware update coming that will allow you to change the function of the command wheel press, which means you will also be able to turn it off completely.
When it comes to actually controlling the camera with the limited amount of buttons, things can get a little tricky. Because the X-T2 doesn't have the ability to control the main exposure settings from within the menu system, most things must be set prior to placing the camera inside the housing by using the top dials found on the camera. I did a lot of playing around with different options in order to find something that would actually let my control my exposure for varying conditions. I knew a single ISO setting wouldn't work, but I also couldn't leave it on auto because then anytime I changed my shutter speed, the ISO would ramp up or down to compensate, and I would be stuck with a zeroed out exposure meter. Thankfully I found a little trick. When you use the auto ISO function, you have the ability to set the minimum and maximum ISO. So if you set the minimum and maximum ISO to the same number, then in a roundabout way, you now have a way of setting the ISO without using the top dial. It's a slower process, but now when I adjust the shutter speed dial, I'm actually controlling the exposure.

Once all the settings are dialed in, it's time to seal everything up. After placing the camera inside, the back just gets attached with a set of screws and is sealed tight with a yellow rubber gasket. The great thing about the back being completely transparent is that you can actually see the yellow ring being compressed as you tighten the screws. This is a nice visual confirmation that you have a solid seal around the entire housing. The most frustrating part of the entire housing for me though is with the screws that hold the back on. These screws make taking the back off a slow and tedious process. Not only do you have to loosen each screw, but each screw is a loose piece of hardware that needs to be kept track of. I would have preferred to see some type of captive screw that was fixed to the housing back so that they couldn't be easily lost. That, or something like the quick release buckles they have on other housings they offer.
One thing I would like to point out though is that my issues with the mounting plate and screws for the back may not be a huge deal for most users. In most situations when you use this in the water and you need to change a battery, you need to get out of the water and you have a nice place by your camera bag to make the change. But when using this in a situation such as the Holi festival, you have to find a clean and safe location to make the change. A lot of the time this isn't easy. One time I just had to ask for help from people on the side of the street and one man gave me his scarf to clean things up and then stood guard as I made the change. When in this type of scenario it would be nice to be able to make the change fast and efficiently. Instead, I had to pull out my tool that I now have to carry around, take the back off while making sure I don't loose the screws (5 in total), take the lens port off so that I can push the camera out, take off the mounting plate with a different tool, change the battery, and then put everything back together. Since the X-T2 can eat through some batteries, this had to be done at least two times per day. But it's not often that you are going to be shooting in the water for 12 hours, so my circumstances were a bit unique.
The last thing I want to talk about is the price. This housing is not the cheapest option on the market, coming in at $1295, it's not the most expensive either. One thing to note is that I do believe the construction and build are in line with the price. I have used cheaper options that are on the market, and have always been left feeling slightly uncomfortable while using them. Like maybe they just wouldn't hold up and i would be left with a water logged kit. But with this housing, I never once had this worry and felt totally free to get covered in colored powder and water.
What I liked
- Rock solid protection
- Enough buttons and controls to get the job done
- Great handle, pistol grip, and ergonomics
What I didn't like
- Screws on the backplate
- Mounting plate blocks the battery door and tilting screen
Overall this housing was a true joy to use and I’m really glad I had it for this trip. There were times that I thought I would be fine not having it, and right around then is when I would get drenched with a bucket of water that was thrown off the roof by a bunch of kids. Having this housing allowed me to get close to the action, without worrying about my gear and how it was holding up. The housing definitely comes at an investment, but if you see yourself needing to shoot in the water or in messy locations, it's definitely worth the asking price.
Below are a handful of images I took while using this housing, or you can see my full blog post here. If you have any questions, sound off in the comments.


Join the Fstoppers community for free
-
Post comments and join in the discussions
-
Browse the site ad-free
-
Share your work and get featured in the community
-
Compete in the photo contests for fun and prizes
6 Comments
That's great. I tried an underwater case for my a6300 but the EVF was covered and the backscreen was near impossible to see in daylight. Color runs are the main reason I wanted one. Instead, I'm using a raincover taped to the lens hood and uv filter installed and it's worked well though no one really tosses the powder right at me.
ya the back screen is definitely hard to see in daylight on this housing, but the EVF worked perfectly and was easy to see.
That's an interesting use of underwater housings. I could see where it could be used to photograph Rainbow Runs or Burning Man, events that LensRentals says that the renter is responsible for the repair costs.
exactly!
Howdy! Awesome review. Thank you! I'm in the market and curious which port and which lenses you used? I want to be able to shoot both the XF 35mm f2 WR and the XF 16mm f1.4 WR. Thanks again!
Helo, I have a housing from Meikon, seafrogs fot the fujifilm XT-2, but I don't know why but the camera shut down each time I close the housing. I was wondering if yours did that? A trouble with the battery maybe? It looks like It was hot inside the housing... Do you know anything about housing that keep heat inside or anything else...? Thanks a lot! :)