
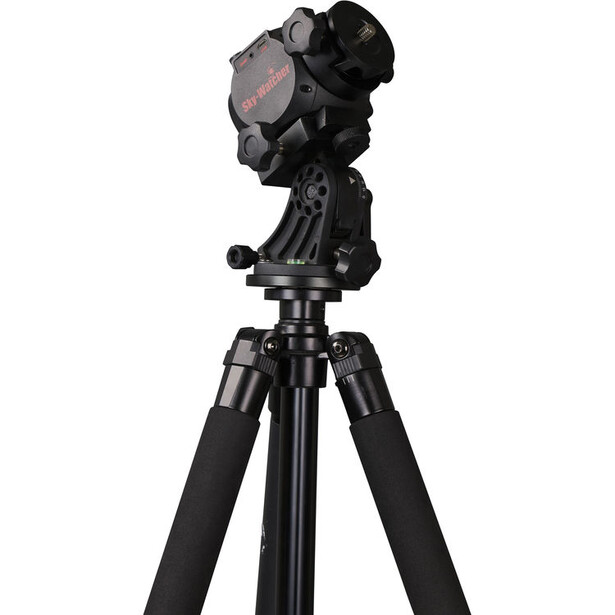
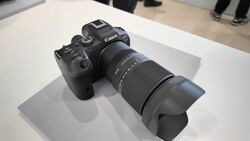
The Sky-Watcher Star Adventurer Mini (SAM) is Sky-Watcher’s newest time-lapse and astrophotography tracking platform. It’s their attempt at a compact lightweight mobile setup that's both beginner friendly and easily packed into your camera bag.
The SAM is the little sister to Sky-Watcher’s Star Adventurer, which Fstoppers previously reviewed and it shares a lot of the same features and accessories. Like its' big sister, the SAM attaches to any standard tripod, is capable of sidereal, solar, lunar tracking, and traditional time-lapse photography. The unit itself comes in at close to half the weight of the Star Adventurer while still using the same Latitude Base and Polar Alignment Scope.
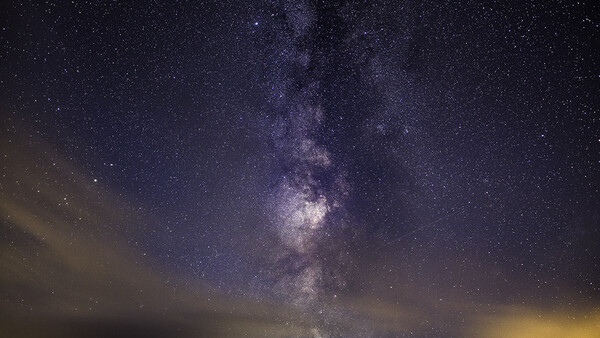
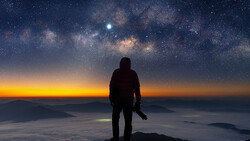
As an adventure photographer I spend a lot of time traveling to difficult to reach places and what gear I bring is well thought out in advance. Every item I pack will have to be carried on someone's back for the majority of the trip, so every pound matters. Since I find myself in the mountains staring up at the night sky, like a lot of photographers I've dabbled at taking some Milky Way shots. I've had some success but nothing that would win any awards. Previous to using the SAM I had never used a star tracker or any type of astrophotography system. So I approached this review as a novice excited to see how much I could improve my previous attempts with a little tech help.
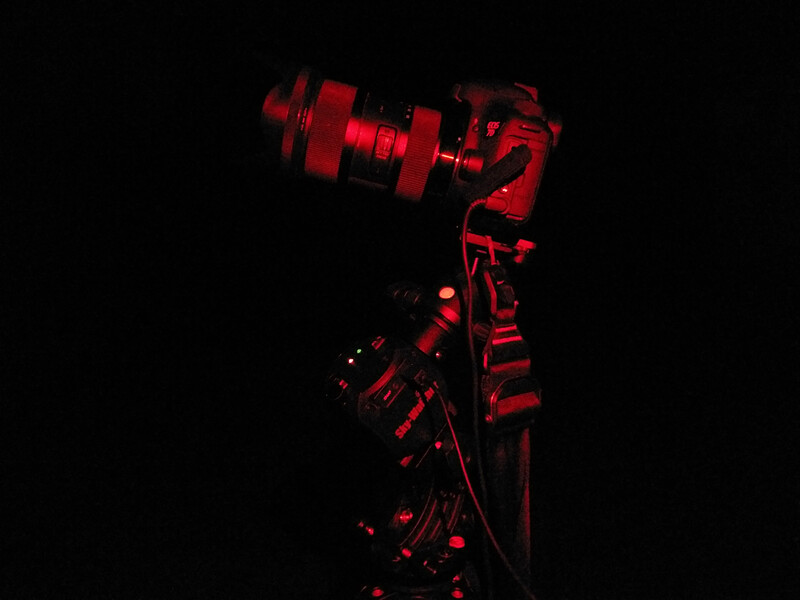
When the box arrived I had no idea what to expect. Its called Mini but as far as star trackers go what qualifies as Mini? When I opened the package I was both amazed and a little disappointed. Disappointed because the picture on the box showed it being red and the unit I got was black, but then I pulled it out and was quickly back to amazed. The main unit itself is cube shaped and roughly three inches all around. Combined with the latitude Base it sits about eight inches tall. This would easily fit into most my camera bags only adding about three pounds to the kit. Still a lot to carry for some trips but plenty light enough for hiking and most importantly to me motorcycle camping trips. Of course with this much lighter unit comes some sacrifice in how much weight the unit can have mounted to it. The SAM comes in at eight pounds down from the 10 pounds for the Star Adventurer.
You can purchase the SAM main unit for $299 with some additional optional accessories available. I received the main unit, which comes with polar scope and illuminator, and the optional Latitude Base which is $65. The Latitude Base really is a necessity for any astrophotography as it works much better than a standard tripod head. I recommend getting the base unless you already own these items from a separate kit. Additionally they offer a DEC bracket with counterweight for longer lenses and a camera specific control cable so the unit can trigger the camera itself. Both of these I did not receive for testing, just after a short time playing with the unit I can see how much help they would be.
The Set Up
Having never used something like this, setting up for the first time was a little confusing. The detailed manual was a big help even if I typically toss them away. The main unit can be mounted to a tripod in two different ways. One for standard time-lapse photography and a second for astrophotography.
Astrophotography
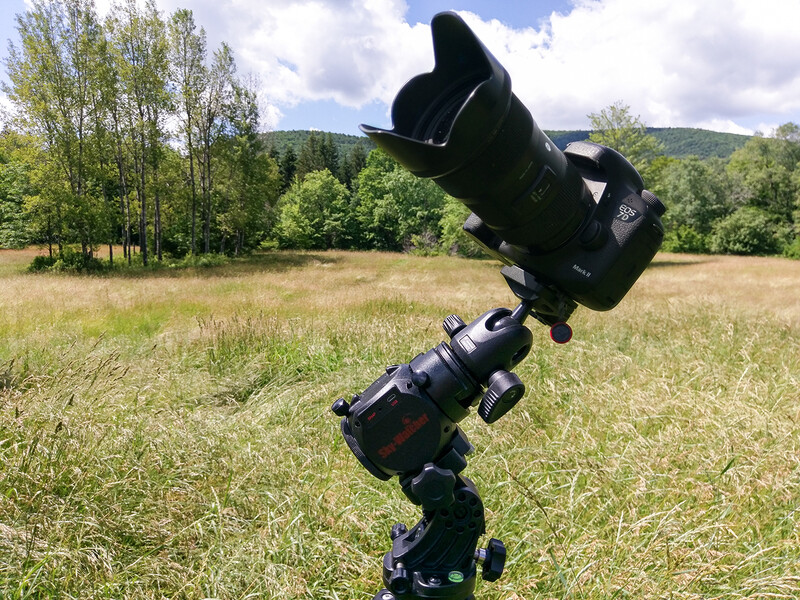
The latitude base is pretty simple it mounts to your tripod base has a geared dial for setting altitude covering a wide range of 0-90 degrees and two azimuth adjusters on either side. At the top there is locking quick release plate that you connect to the main units under side. Once the main unit is connected to the latitude base you can then connect any standard ball head to the supplied dovetail bracket that locks into the top of the main unit.
Time-lapse Photography
For any standard time-lapse functions you don't need the Latitude Base and can attach the main unit directly to your tripod. You can then attach a standard ball head exactly as mentioned above and you're all set to go.
Once I had figured out these two different methods setting up each time was easy and quick. The only issue I had being that the latitude mount didn't have any way to rotate once it was mounted to the tripod. Maybe it's just that I'm used to using a tripod head and not planning out the direction I would be shooting when setting up but this quickly became frustrating in the dark.
The main unit is powered by two AA batteries which can be replaced while everything is mounted which is nice. It can also be powered via the micro USB port and a typical power bank. This feature is great if you are planning on doing really long time-lapses, or like me just have a lot of battery banks with you at all times. I didn't test how long the unit would run on the batteries alone, however based on a night's use with a battery bank I imagine the batteries would be enough for your average user. Obviously ambient temperature plays a part in how long both last so testing in your local area and having backups is recommended.
Polar Alignment
The hardest part of any star tracker seems to be attaining Polar Alignment. With no experience using any other devices I went out into the back yard and made my first attempt. The SAM has two ways for achieving polar alignment. A basic gun sight method and a more precise Polar Scope method.
The polar scope method was a little confusing at first so I tried a wide angle lens and the simple gun sight method. Once you find Polaris (north star) you want to roughly point the unit in its direction. Then, and this is important, you need to level the tripod using the bubble level on the latitude base. It’s important to do it in this order because as I mentioned above you cannot turn the base on the tripod. If you're like me I typically level my tripod then line up my shot which meant I had to redo my level each time. Once facing Polaris and level, you can then look through the gun sight and make a rough line up with Polaris. I found looking through the gun sight for a tiny star to be very difficult but as long as you are shooting with a fairly wide angle lens it seems you don't have to be too accurate. I took two quick 30 second exposures one without the tracker and another with it, to see how well I was lined up. Using the 500 rule I new with my camera there should be a slight movement in the stars at 30 seconds.
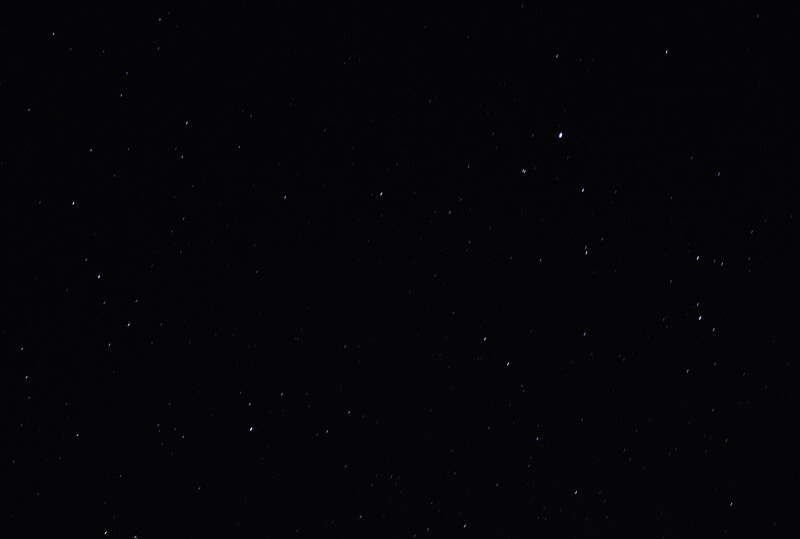
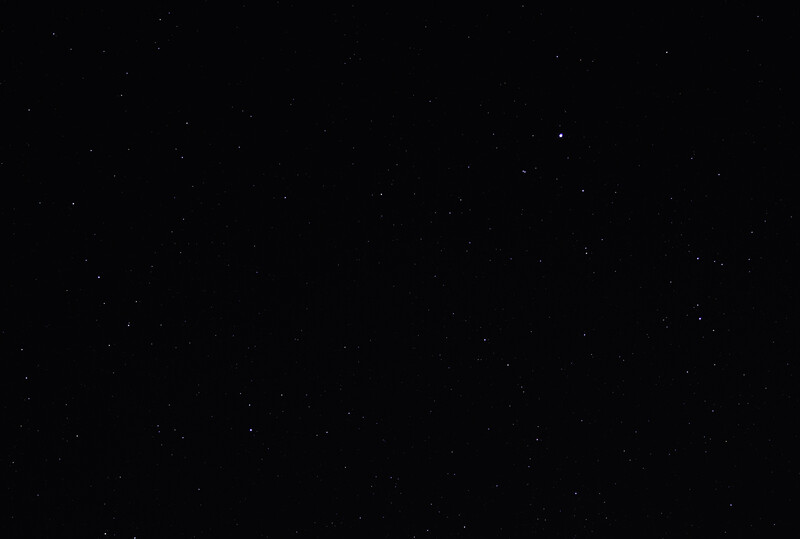
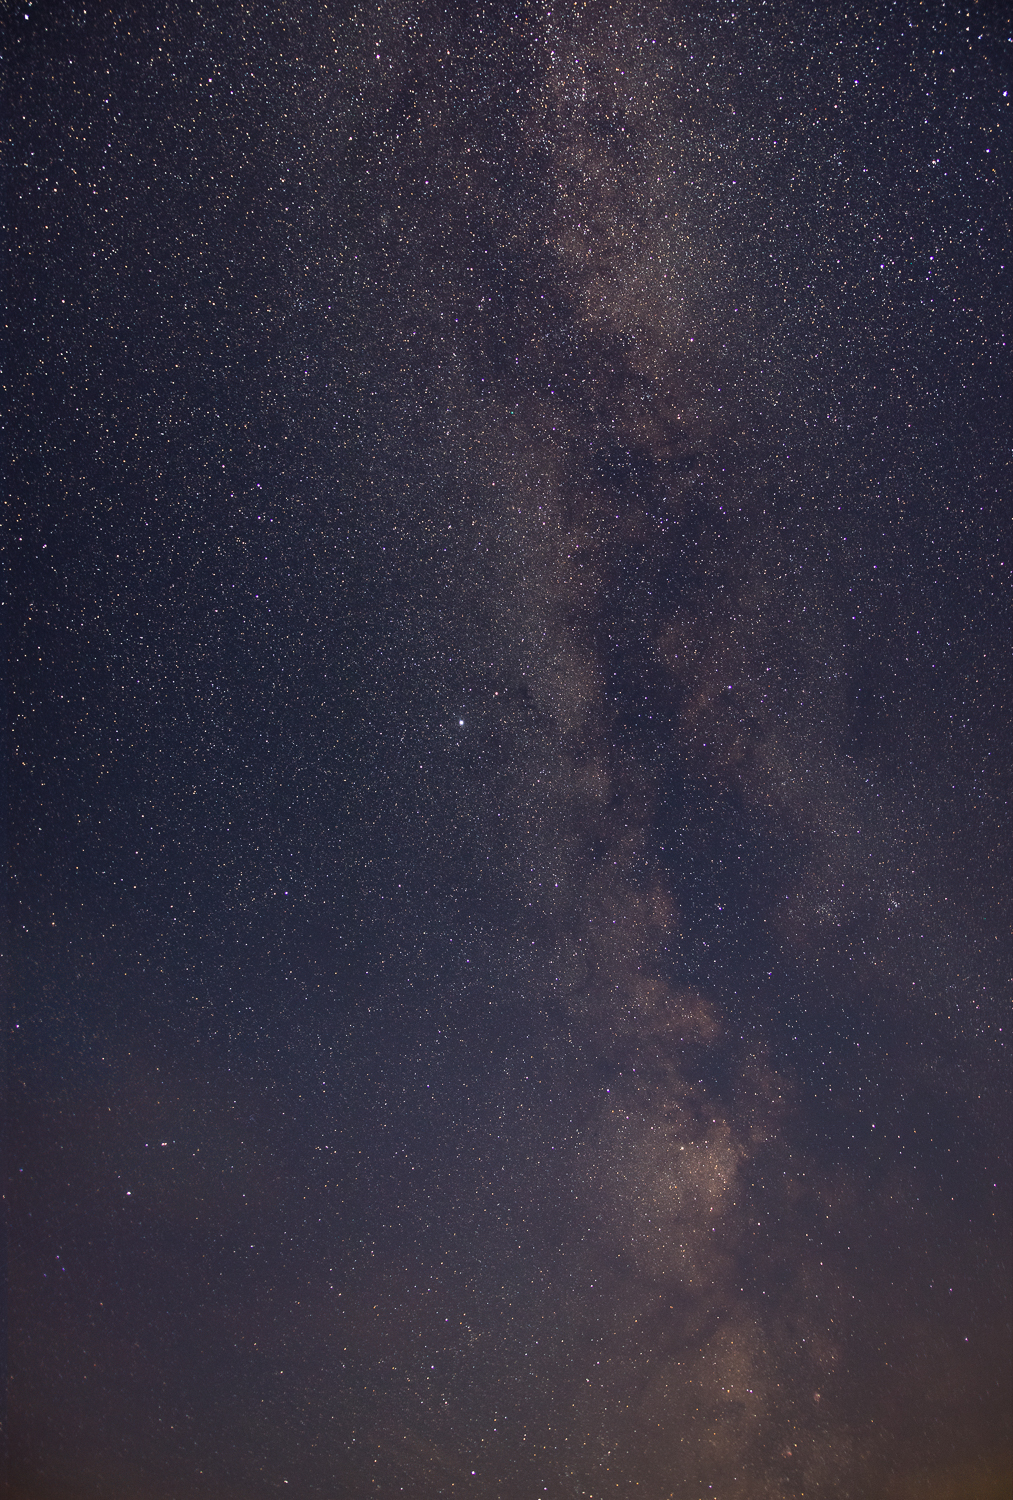
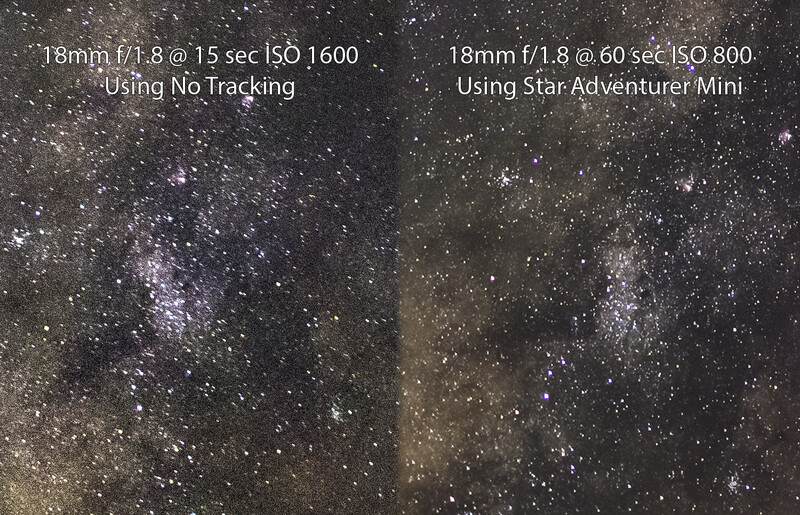
f1.8 @ 30sec Before: without SAM After: with SAM.
Having never attempted this before and setting up in the dark, I was very surprised with how sharp the second shot came out. I was convinced I didn't understand Polar alignment and got it wrong but I was able to get up to a two minute exposure on my first attempt before the light pollution made it impossible to try longer. I was very happy at this point and I can say that anyone, even with no experience before, could set this up and get great results.
On my first outing I decided to attempt Polar alignment using the provided Scope and illuminator. My first impression was correct and it was a bit difficult. The main unit has a slot through the center that you place the magnifying scope into and then attach the battery powered illuminator on top. The scope does make it easier to see Polaris but I couldn't seem to get the illuminator to function in a way that was useful and stopped using it after a few tries. This could simply be user error.
The scope has cross hairs for lining up Polaris according to a star chart and this can be a little confusing at first, but there are countless tutorials on using a Polar scope as it seems most devices use something similar for accurate Polar alignment. So with a little practice I was able to get a much better alignment. This is probably the least user friendly aspect of the SAM but a little research and practice will go a long way.
One thing to note is you have to either remove the polar scope to attach the camera or slide it partially out. In both cases you can't use the scope with the camera mounted. I didn't particularly like this aspect because if you bump your tripod in the dark or just want to check or adjust your alignment it requires you to remove the camera and ball head each time. The dovetail quick release makes this easy but still annoying. From the images the DEC bracket looks like it allows you to mount the camera and use the scope at the same time.
SAM Console App
To control the SAM you need to use the provided console app. The apps GUI is pretty basic but it does just about everything you could ask for, and even had a few features I was surprised by. It's available for both Android and iPhone and connects to the Units own WiFi network. So if you wanted to use a tablet to live view your camera via WiFi then this would complicate that.

It will automatically set your location info based on your phone's GPS which is nice. There are different menu setting tabs for Astrophotography, Astro Time-lapse, Regular and Long exposure time-lapse, as well as manual control. All are very similar in layout with each having mode specific parameters. Each mode will auto input some of the basic parameters based around various settings you input. For example in the time-lapse mode if you input the video time span it will auto fill in the number of photos to shoot. This is a very helpful feature if you're unsure of exactly what you need but have an idea on how long you want the end result to be. Or if figuring out how long you can run with the available memory space you have with you. There is also a Polar Clock Utility which I overlooked the first night out and downloaded another app to use. So having it available all in one app is great.
I had some issues with connecting to the unit via WiFi and again I’m unsure if it was just user error or not. If I turned my phone screen off to save battery sometimes when I would come back the WiFi would have disconnected. This never affected the tracking but was tedious to have to reconnect every so often. It’s possible this was an issue with my phones WiFi or the turning on and off of the screen, but it’s something that was more just annoying then problematic. There is a feature in the menu to turn “WiFi Off on Run” to conserve battery on long running times but this wasn't what was causing my issue.
Overall Performance
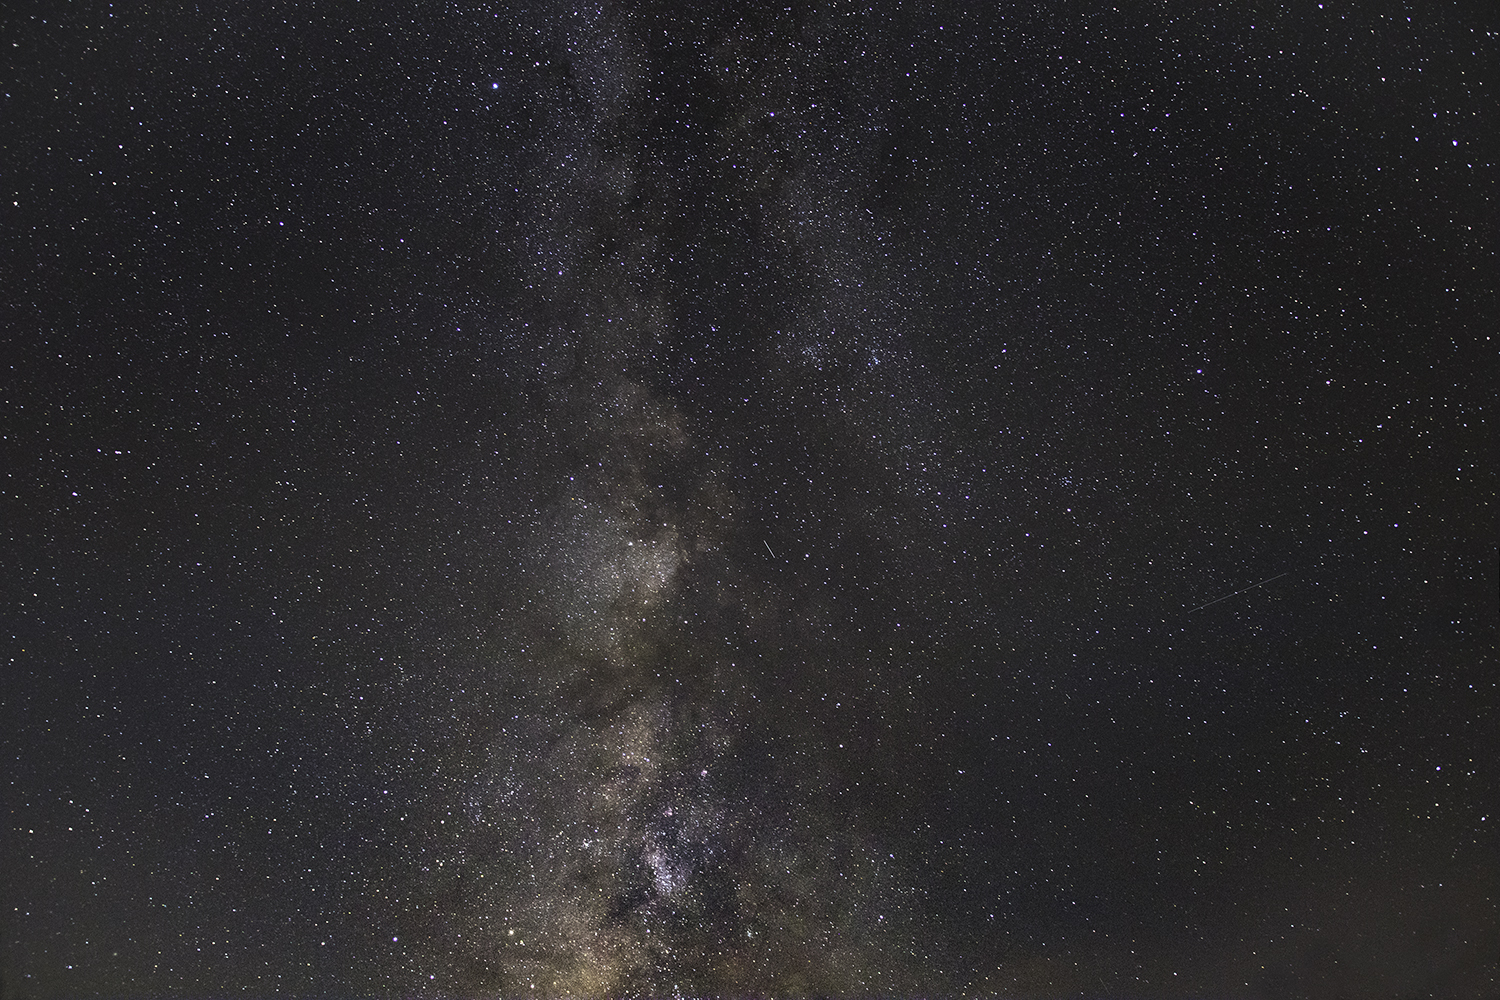
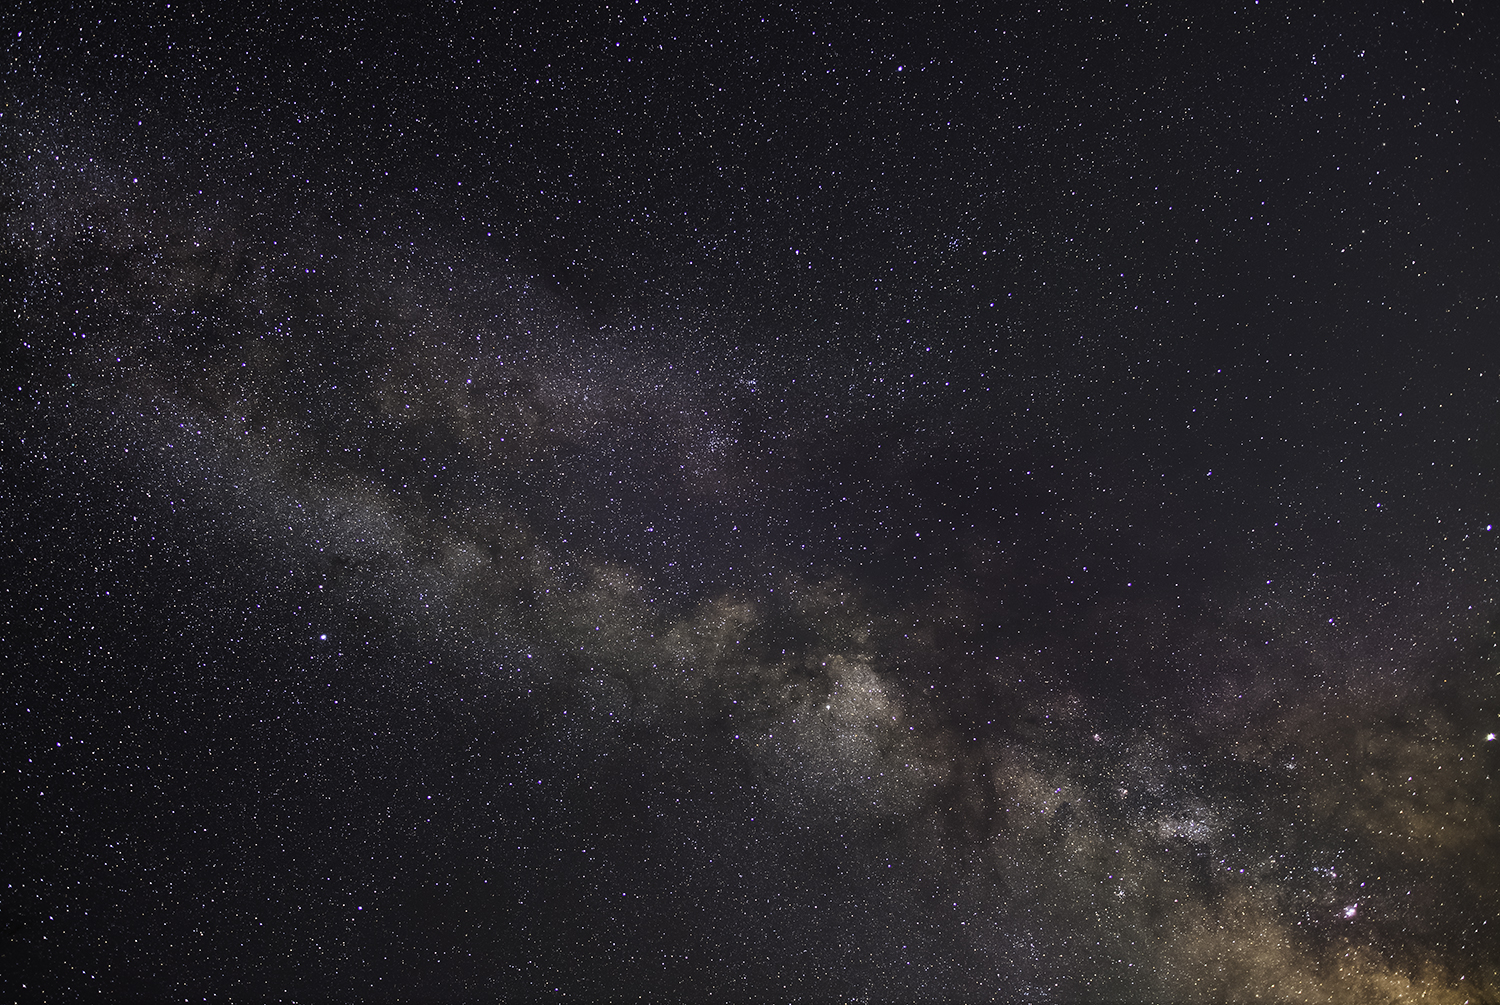
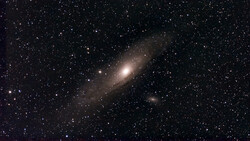
In all the shots I took I was always surprised with just how sharp I could get the stars. I always felt a little unsure about my alignments. It seems the small form factor and weight restriction of the SAM lends itself to more wide angle shots as this reduces the need for greater accuracy in the Polar alignment process. Of course this makes it great for newer users to break into astrophotography. With the Polar scope an experienced user can get a much more accurate alignment and use something like 135mm lens to capture images of specific galaxies.
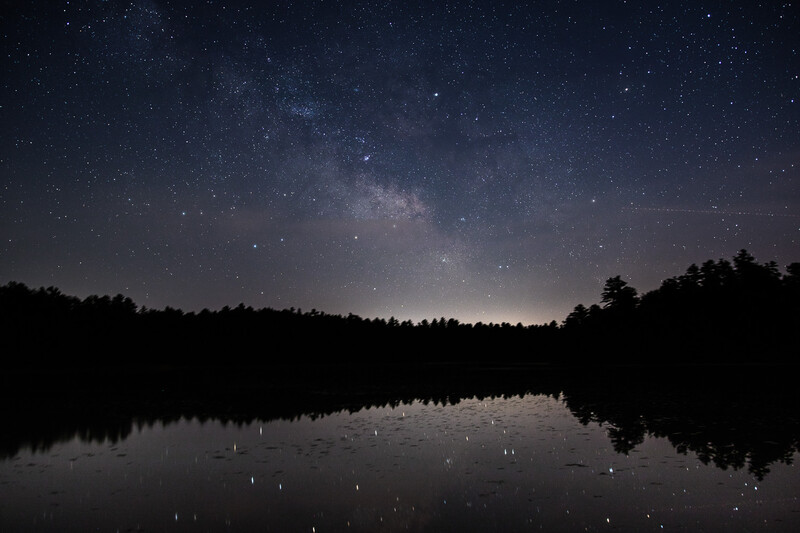
Even up in the Catskill mountains of NY I wasn't able to really push my exposure times but getting two to three minute exposures sharp up to 50mm was pretty easy. I made some attempts at 100mm and was limited to shorter exposures of 30 seconds or so before I started to see some blur. Again the amount of time and practice you put into your Polar alignment will really allow for you to step up what this device is capable of. With just the little time I used the SAM I was able to see how much it could improve my images. It allowed me to shoot lower ISOs and longer exposures. Resulting in less noise and more detail. With additional tricks like stacking multiple shots the potential for what you can achieve is really exciting for a novice in astrophotography.
If you're shooting astrophotography remember that if you compose with something in the foreground and expose for anything over 30 seconds the tracking motion will blur it. If you are doing repeat exposures for stacking purposes then it will be even worse. This can be avoided with doing some compositing in Photoshop or keeping your exposure shorter and to a single shot. I found even doing this the stars were sharper than shooting with the traditional 500 rule.
Additional Features
There were some very cool additional feature that the SAM is capable of that I didn't get around to testing but think I’m going to play with the next trip I take. For star tracking you use the Sidereal setting but there is also a setting for Lunar and Solar tracking. These seem pretty cool and I’d really like to see what can be done with them. There is an upcoming Solar eclipse in August which seems like the perfect chance to test the Solar tracking feature out. There is also an Astro time-lapse mode that confused me at first. My understanding is that the SAM takes an exposure then resets to the same starting point and takes the next exposure repeating the cycle. This allows for the foreground to remain still with a slight blur but the stars to be captured sharp and rotating around the sky.
What I Liked
- Small form factor and weight
- Easy set up with few components
- Controlled entirely through App
- Relatively novice friendly (good results first night out)
- Variety of program modes (less gear more functions for travel)
What I Didn't Like
- That it was black instead of red (I like Red)
- The Latitude Base does not rotate on its own
- The GUI could always be prettier (this is the Geek in me nitpicking)
- Gun Sight could be better
- Illuminator could be brighter
- You have to remove the Polar Scope to mount the camera
Final Thoughts
If you're a novice this is a lightweight easy and quick to set up entry into astrophotgoraphy. If you're experienced and looking for a more mobile kit for traveling or fun weekends with the family then this has tons of great features to make it the go to setup. The images I shot my first night out with the SAM were much better then any I had taken before. While testing my only goal was to get to an area that was as dark as possible and far enough from any city to not get a lot of light pollution. So I really didn't put much thought into compositions or getting creative. After a few nights of use, my mind is full of great ideas of what I could do with the SAM. Wider shots with the Milky Way arching or tighter shots of some of the closer Galaxies would be really interesting to try. Next however I'm going to try out the Lunar and Solar tracking modes in preparation for the Solar Eclipse in August.


Join the Fstoppers community for free
-
Post comments and join in the discussions
-
Browse the site ad-free
-
Share your work and get featured in the community
-
Compete in the photo contests for fun and prizes
17 Comments
Nice price, but you can't use it if you have foreground elements or they'll blur?
If you use it for astrophotography then yes because the unit moves the camera over time with the movement of the stars. So anything that is stationary relative to the tripod, like trees, will move. Iin my example the trees and water are blurry because at 60 sec exposure the camera moved panning with the stars. Its a trade off if you didn't have the SAM device then at 60sec the stars would have moved and been blurry. There are ways around this, like using Photoshop to composite your foreground in. Here is the same shot as a composite.
Right on, thanks.
Basically If you prefer getting it all in one shot then the Traditional method using the 500 rule is the way to go. If you don't mind a little Photoshop compositing then you could get some pretty insane foreground images with this device.
Yeah I'd rather just do it the other way. Than having a nightmare in PS. Cool device (great price) but I prefer night skies to have a foreground element.
There was an article a while back on lonelyspeck.com about doing this, but of course I can't find it now. Head over there anyway for lots of great info on shooting the night sky, although most of it is non tracked.
Thanks!
This tool is awesome, the down side (as far as I can see) is: As the Polaris star is only visible on north hemisphere, half of the planet and people that want to travel, cannot use this. This is a deal breaker, unfortunately. There is any alternative way to set the alignment, @Michael DeStefano?
It can most certainly be used in the southern hemisphere. There is no obvious bright stars near the southern pole to align with but with the polar alignment scope there are several dim stars that can be seen. It may be a little more difficult but the procedure is the same.
In the southern hemisphere you line up with the South Celestial Pole. While this can be done manually, with a device like this the SCP should already be in the database. One of the requirements I believe is you tripod needs to be perfectly level. Once done, you should be able to track with this device. I'm sure if you want to use this "down under" there are more specific instructions from the manufacturer on how to do it, I would simply contact them if you're interested.
Being as this essentially is an equatorial tracker, this video below will give you an overview of alignment in the southern hemisphere. I would be surprised however if the software doesn't make alignment fairly straightforward, but this will probably be good info to know regardless.
https://www.youtube.com/watch?v=35E9Lqjypz8.
awesome answer! I'm from Brazil, so this is a must. Thank you so much!
folks, it is all manual. the SAM does not have a database for locating the SCP, so you will need to read up on the "how to" details in the manual, or follow Spy's link... have used this item to do some rough time-lapse videos during daylight and must say I am very impressed. I took it outside for a bit of an astrophotography trial last night from my suburban backyard, unfortunately SCP was not possible (big tree in the way), however I do know how to find "south" using the Southern Cross (and Pointers) so I did a quick guesstimate and went from there. the attached is overlooking the neighbors house, a single 120sec exposure, f4, ISO400, @17mm... Canon 5d Mk2 and Canon 17-40 f4L combination. again, pretty impressed and I look forward to getting some clear sky and aligning with more accuracy in the near future. cheers
"It's available for both Android and iPhone and connects to the Units own WiFi network. So if you wanted to use a tablet to live view your camera via WiFi then this would complicate that."
Why would that be? Simply use your phone to control the tracker, and your tablet to control the camera.
"If I turned my phone screen off to save battery sometimes when I would come back the WiFi would have disconnected. This never affected the tracking but was tedious to have to reconnect every so often."
Perhaps purchasing a battery-backed cellphone case would supply enough power for a night's worth of shooting and leave the screen on, although the screen (and phone) can get hot being on continuously. Just a thought tho.
Overall this unit and it's bigger brother seem very cool and reasonably priced. There used to be a similarly cool iOptron SkyGuider that was equatorial, but they have since discontinued it and replaced it with an Alt-Az unit. I have to assume the relatively inexpensive earlier unit was eating into the sales of their more expensive equatorial drives.
Interesting that you do your trips on a bike. I've been toying with the same idea on my bike (a Suzuki Bandit 1200), but I'm not sure how to strap a significant tripod to it. I've only managed a smaller unit that I would imagine is inadequate for a project like this.
Michael:
ROCK STAR write up as I have been searching for something like this to mount with my new Nikon P1000. Question: Assuming since this moves with the stars, I could easily move with the moon correct? Asking as I like to record the moon close up and catch UFO's/Satellites and all kinds of weird stuff. Thanks in advance and wonderful write up here.
Yes the unit has a solar and lunar tracking mode. I played with it during the last eclipse.
Great news. Thank you
Hi Michael,
This is a great review of the product, thank you!
Did you get a chance to use the Solar tracking rate? I'm currently struggling with using it, doesn't seem to be tracking the Sun very well.
Also, do you know whether an external intervalometer can be used with the SAM? Is it necessary to use the release cable from SAM to the camera (I bought that separately because the manual mentions it.
Thanks!
Meghana.