
Implementing gels into your photography is a really simple and effective way to make sure your images really stand out from the rest of the crowd. There are a ton of different ways to use gels to create some absolutely stunning imagery, but in this post I am just going to show you a few ways that you can use them to add color to your background to produce really dynamic portraits.
In my last post, I talked about how to get three different headshot looks with just two lights and one grey background. If you haven’t already seen that, check it out here. Today I want to expand on that concept a little bit by using gels to add color to the background which will virtually give you an infinite number of backgrounds to choose from. Instead of using two studio strobes like I did in the last tutorial, for this lesson I'm going to be using three speedlights. The reason I wanted to use speedlights rather than studio strobes is because I got a handful of questions about whether or not the 3 in1 headshot could be done with more basic gear. In order to lay those concerns to rest I wanted to get back to basics and use some of the least expensive gear on the market to prove that you can get some great images with very inexpensive gear.
Here’s a list of the gear I used (excluding the camera):
Savage Grey Seamless Background - $28
Speedlights - Yongnuo YN 560IV x 3 - $69 each
Flash Trigger - Yongnuo YN 560 TX - $40
Rosco Color Effects Filter Kit - $33
MagMod MagGrip and MagGel Holder (Optional to secure gels) - $100
Westcott Apollo Orb Kit - $150
Tether Tools Orange Tether Cable (Optional but recommended) - $49
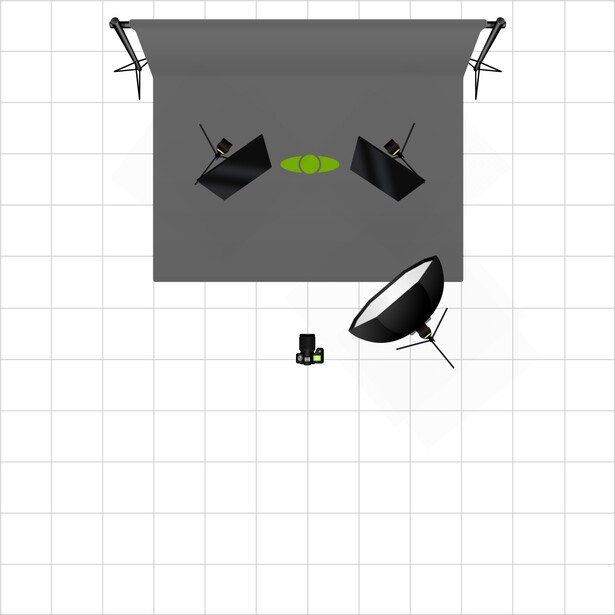
Now that I've gone over the basic gear, let’s get started. Here’s the process in a nutshell.
Setup lights… Add color to lights… Take picture…
Ok so maybe it’s not that simple, but it really isn't all that difficult either.
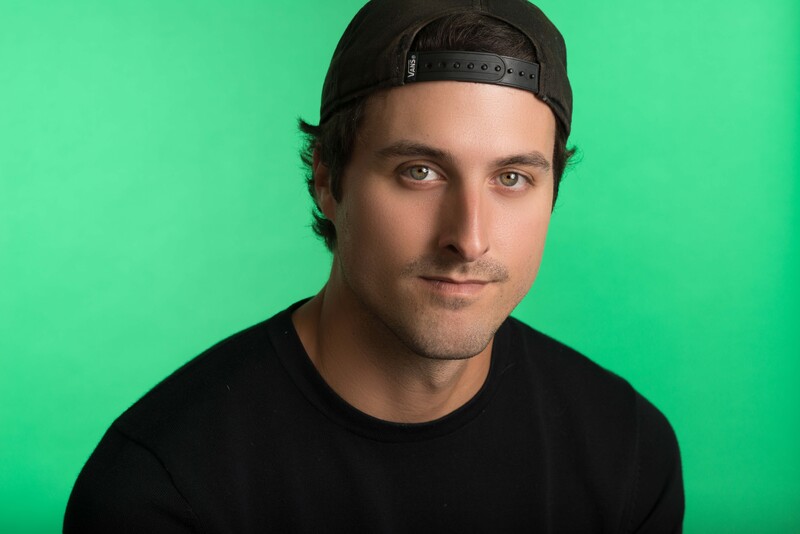
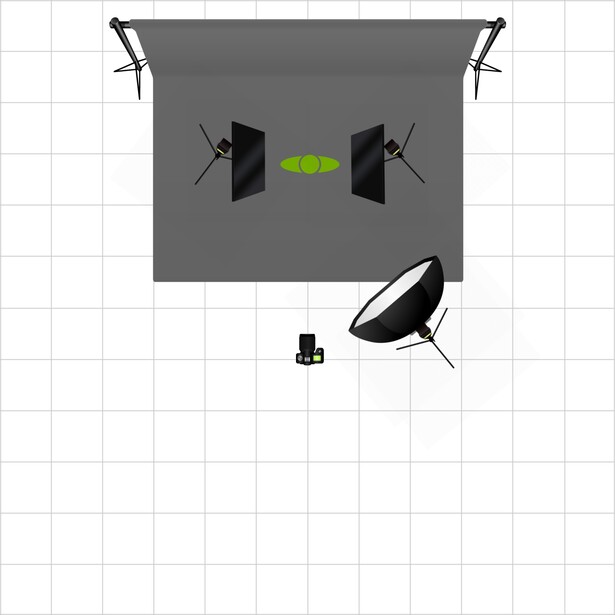
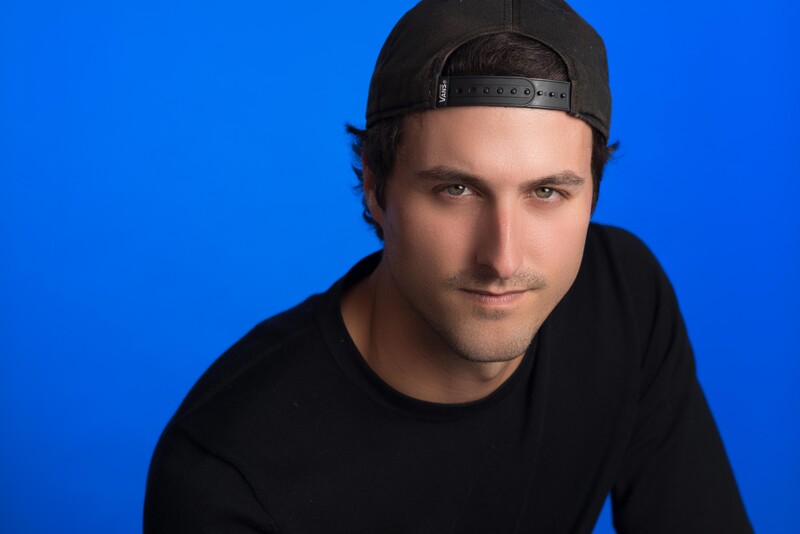
The first thing you’ll want to do is setup your background lights. It’s also important that you use a grey background (which I failed to mention in the above video) because that will translate the color from the gels better than any other background. You can probably get away with using white, but in my experience I have always had better results with grey. When I am adding color to my background I prefer to use two lights rather than just one because with two flashes I am able to control the color much better than I would be able to with just one flash. That being said, you can definitely use just one flash if that’s all you have but I have found that I get a much more consistent color across the entire frame if I have two lights angled in toward the background at about 45º.
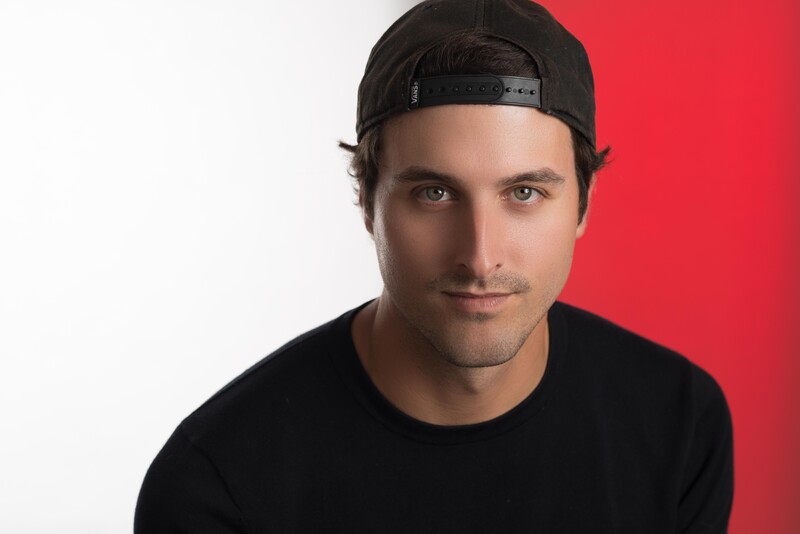
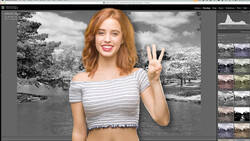
Once you have your background lights placed where you want them, go ahead and take a test shot without your key light on. Depending on where you have place your subject you might get some pretty bad color bleed onto the side of your subjects face.
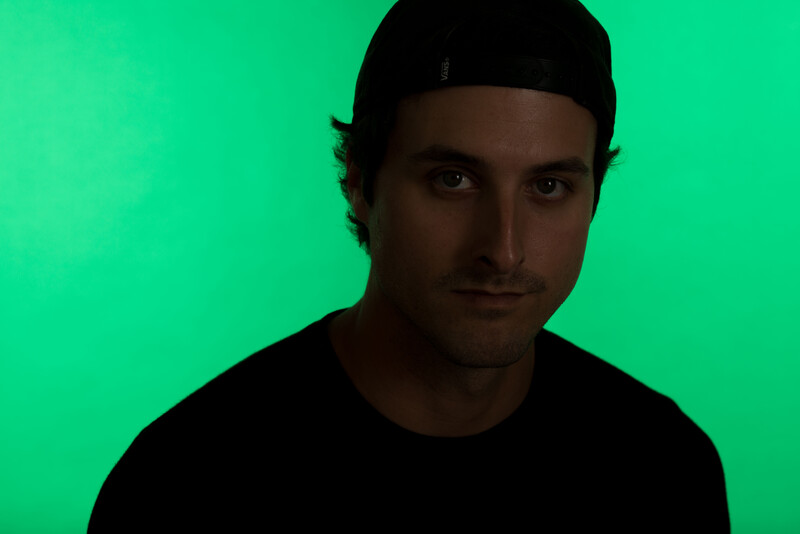
There isn't too much bleed in this image, but if you run into that problem, here is how you eliminate it. You can either bring your subject forward so the light doesn't fall on their face anymore, or you can flag the light with a piece of black foam core. I chose to use the foam core because I will actually use it for something else a little bit later.
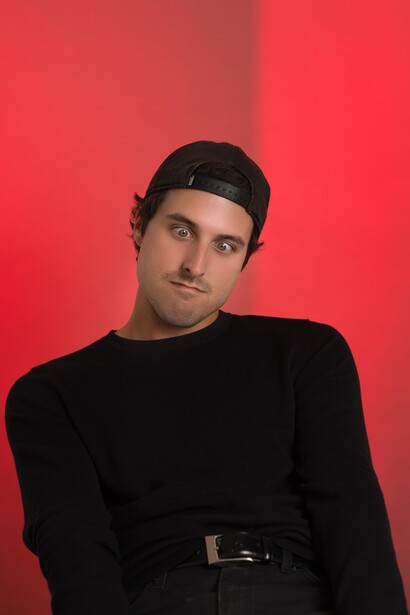

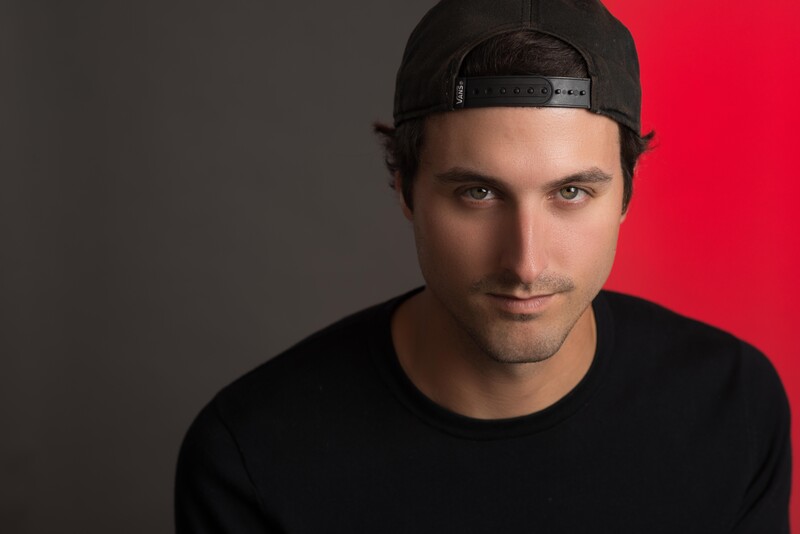
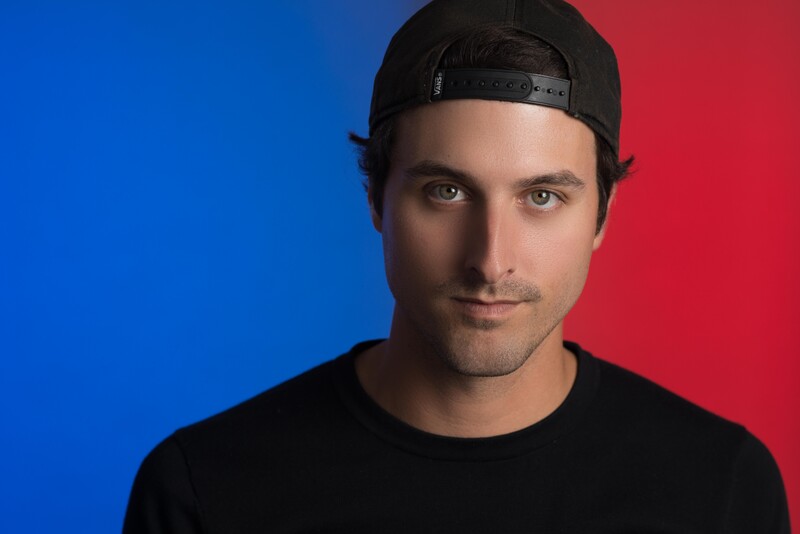
In addition to creating solid colored backgrounds, one of my favorite ways to use gels on my background is to actually split it into two different colors. To achieve this, all you have to do is feather your flags back toward the middle of the backdrop. In some cases you may have to have your flag almost pointed directly at the backdrop at 90º.
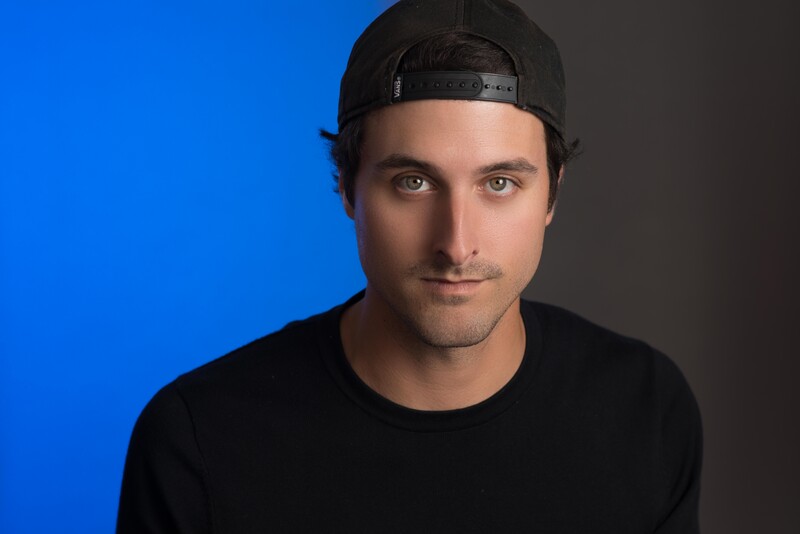
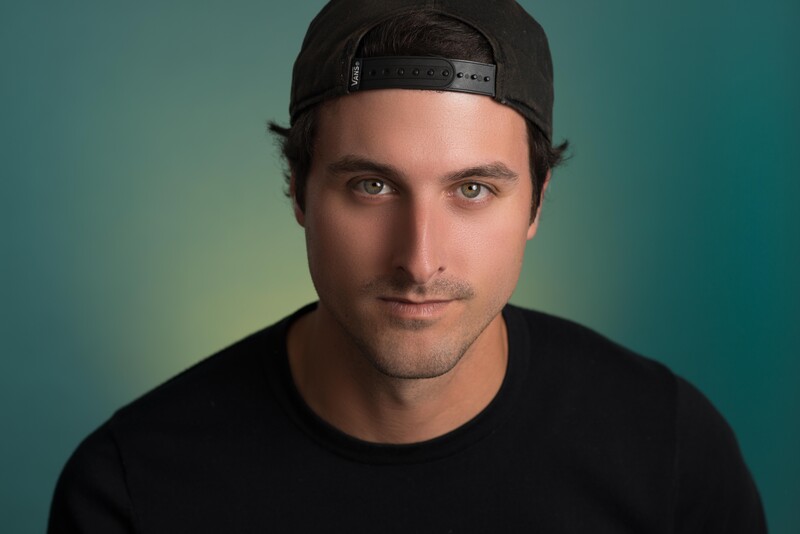
I'll leave you with a couple more images from this session.

Join the Fstoppers community for free
-
Post comments and join in the discussions
-
Browse the site ad-free
-
Share your work and get featured in the community
-
Compete in the photo contests for fun and prizes
54 Comments
Awesome tutorial! Thanks for sharing.
Thanks for checking it out! I'm glad you enjoyed it.
Really good write up Jeff, I will definitely be trying this out myself soon. I enjoy the discussions using minimal gear
Thanks Mark, it's such a simple process and I'm all about using a little gear as possible haha!
I found the tip about the foam core flags very helpful. Thanks!
You're welcome Matthew, thanks for checking it out!
Jeff
Terrific tutorial !
Thanks so much for posting it !!
Please do more !!!
Jay
Thanks so much Jay, I really appreciate that! I am going to try to do more tutorials like this, but if you ever have anything in particular that you want to learn please let me know!
I've been playing around with gels a bit lately and this is a huge help. Thank you!. One problem I kept running into initially was my keylight washing out my background. I was using a single light for my bg and a beauty dish on axis with the camera and angled down at a 45. Your subject is really close to the background and your light is a few feet away with no grid which means you're power has to be higher for proper exposure. Yet you really don't have much light spill on your background. Are you a wizard? lol seriously though, how? Is it purely the angle of your light that is preventing this? Is it the ratio of your bg lights compared to your key?
If I were a wizard I would tell you haha, but part of what prevents my key light from washing out the background is the placement of the flags. They will soak up some of the light that normally would have hit the background. Having it a little off axis definitely helps a little to because I was able to feather the key light away from the background so I didn't contaminate the color. Obviously I could have used a grid and no flags but then I would have had the issue of the color spilling onto my subjects face. Also the higher the power of my background lights, the more saturated the background will be and even if some light from my key spilled onto the background it wouldn't be enough to make a difference. Hope that helped
Very helpful! love your tutorials. quick, to the point, and engaging. Thanks! keep them coming!
I will definitely try to keep them coming but if you have any content you would like covered please let me know!
I struggle with getting a lot of detail in the iris of my subjects eyes. Maybe you could do something based around that?
Yea I could probably throw something together along those lines. To be honest I sharpen my eyes in a super unconventional ass backwards way but it works haha!
Very interesting and well presented article/video. Could you please add the name of the speedlight brackets/arms that you use for the rear flashes to the gear list.
Thanks for checking it out, to be honest the speedlight mounts I was using are essentially a Frankenstein's monster of photography gear haha. There are so many different parts from different flash adaptors ive used over the years to make those. However, any speedlight mount will work. If you search speedlight bracket on amazon you can find them pretty easy. Hope that helps.
Thanks Jeff:) I too have plenty of speedlight mounts, but I thought you may have been using some super-funky ones that allowed the flash to easily mount in portrait mode (vertically).
To my knowledge they're not anything special but if you are using speed lights and want to get them into portrait mode you could just turn the head 90º
Shame.... Not a single mention of Dean Collins that was doing this very thing back in the 80's (and I am sure also in the 70's) using the exact same technique. He even gave it a name "Chromazones". He even came up with a table that showed you how to recreate every color in the spectrum with precise accuracy.
Well I wasn't writing this as a history lesson and to be completely honest I had never heard of Dean Collins until you mentioned him. But I looked him up and you're absolutely right. In fact I may even try to find a copy of his "Best of Lighting" DVD set. I'm sure I could learn a lot! Thanks for pointing that out.
Hats off to Joe who credited Dean Collins for his master class on this subject that he created. No surprise young photographers don't know about the late Collins but his tutorials are worth every penny. Do yourself a favor and learn about Collins work. He shared all he knew and that says a lot.
Yea I seriously want to check out his stuff. I'm embarrassed that I had never heard of him, but I think you're right about it being a generational thing.
Good tip about using grey background. Here is a group shot I did in a very small studio, with the main lights very carefully gridded in order not to light the background. (The hyper-saturated look was a choice of the band.) http://larsdaniel.com/wp-content/gallery/portraetter/Rocqawali6676-Edit…
That looks really awesome! How far away from the background were your subjects? I'm really impressed you were able to pull something like this off in a small space with a group. Bravo!
I use that technique for quite some time... its the perfect way to get some stunning results... https://www.youtube.com/watch?v=FirvOf9klvQ
It really is simple and effective! I love the video man, I especially like how you had your model pulled away from the background to give the image even more depth!
Thank You!!! I really enjoy your videos as well... You really explain in details how this entire process make simply easy and effective.
Thank you! I'm going to try to post something weekly until I run out of ideas haha!
I am working on some videos as well... would be cool to collaborate some time ... that definitely would be a lot of fun.
Yea I just subscribed to your YouTube channel! We should definitely find a way to collaborate together.
Let me know if You have anything in mind... I live in Calgary so I am kind on the edge of the world... but I am sure there is something we could possibly do... seems like we have similar ideas for headshots so lets make some plans :)
That's why I only buy white and black backdrops. And yeah, I know you can make white backdrop into black, but I'd rather have absorbing black color to begin with, less light spill. Great article, appreciate it.
I own a grey backdrop, a white backdrop, and a green screen for the video (that I never use) but I never understood the need to purchase multiple colored backdrops.
Yep, unless you need some texture, no other backdrops are needed. I might try out grey one, and see how it will perform, as in how much power would be needed vs white. Your comment only affirms my hypothesis, that people who think, spend less on stuff and more on how-to. It's good to see someone using brain, to cut costs like that!
You're right, but if I need texture I would almost rather just find the texture I want on location somewhere are use the same technique to get the color I want. When I started out in photography I was broke beyond belief so I always try to do things as cheaply as possible. Although, I have used nice gear before and you definitely get what you pay for in most cases, but quality images can be made with very little money spent.
For sure! I started with an old Nikon and 50mm lens, and only with tricks like this I was able to expand my assortment. Back here in Poland, photogs don't earn that much, and prices are the same, so I had to improvise :). But still, even if I had enormous amount of money, I would cut costs whenever I can. It's really impressive how much can one save using the brain. I appreciate your reply!
I find that it's always best to use your brain haha! But seriously, its amazing how much money you can save by not always purchasing the newest gear and just understanding how to use what you have.
Indeed. In my time I have used old manual lenses for Nikon, that were dirt cheap and did the work, this alone saved me thousands. And then AF was needed [like weddings] I bought bare necessity. I still like to use 105mm AIS when I am shooting couples in the field, not perfectly sharp like newest Sigma etc., but it works, so no point in buying new gear. I also got D600 for main work, quality it produces is really outstanding, and I don't see how any newer body would be better, well maybe D750, but it's minimal difference. Great thing is knowing when to stop buying, and start using. I frequently read about new gear, look at samples etc., and really there is nothing revolutionary nowadays. It's all the same, but sharper, less coma etc. But for me, resolving about 12MPX from D600 24MPX sensor is enough to present to a client. I am aware though that had I choose different path, be it product or wildlife, I would see a need for fastest, sharpest glass. But it's knowing what you need that saves you cash. I could argue that 35mm and 85mm lenses would be enough for 90% of the work people do. Great to see like-minded soul!
Yeah I really have a hard time convincing myself to purchase new gear. I almost always purchase used gear. As for sensor size, I shot for 6 months exclusively with a micro 4/3 Lumix G85 just as a little experiment and none of my clients ever noticed. You can get some really great image quality out of a small sensor. There's a fine line between using your gear as a tool and using it as a crutch.
Oh yeah. M43 came a long way, and with stabilisation and inconspicuous look, you can get pictures otherwise impossible/improbable. I was switching back and forth from crop to FF, and back, and the same thing, none of the clients noticed difference. I am glad that sensor tech have matured, and we have more and more tools to use, allowing to create your artistic vision. And your last statement is really valid nowadays, people buy heavy body/lenses/accessories only to leave it in hotel room, when they are on vacation or something. Smaller unit could be placed into pocket and it would produce images that are of great quality, without the added weight. That's what's important, think ahead, and always made educated purchases.
Absolutely, I have a handful of different bodies I shoot with but I could honestly get away with shooting with my old Nikon D7000 and I don't think any client would be able to tell the difference. They being said, I do have a couple full frame bodies just in case.
Tool will always be tool, it's you that are producing images that your clients love, and its perfect. You can do photography on budget, main thing is to have some creativity, then your gear will not be as limiting as initially seems.
absolutely
Awesome stuff, thank you
Thanks for checking it out!
Great vid. What stands are you using for the flags? Wondering if it's anything lighter/more compact than a light stand.
Thanks for checking it out! The stand I used were just some that I had laying around. For the video I wanted symmetry so I used two matching stands, bit you can definitely use any other stand. I just had a clamp holding the flags so any light stand will work. I personally love the manfrotto nano stands.
Awesome!! Jeff
I've got a new trick to use!
I'm glad you found this helpful! I would love to see some of your results when you get around to using this technique! Have a great week
very nice, but i´m wondering if it´s possible to take shots of the full body trying to make the bg evenly lit...