
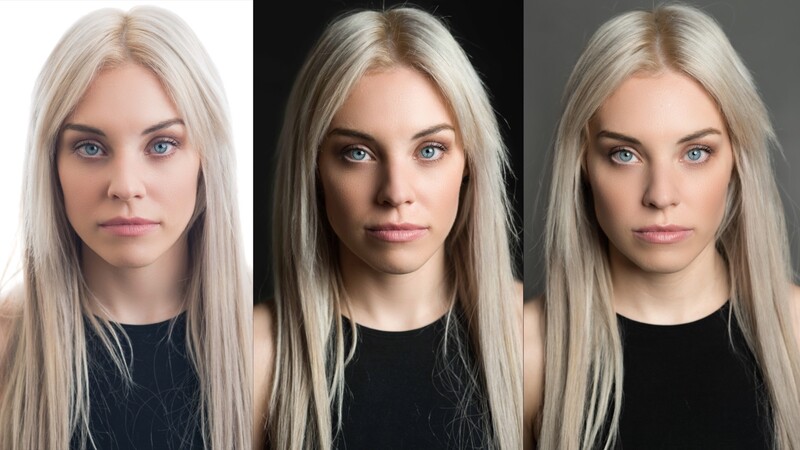
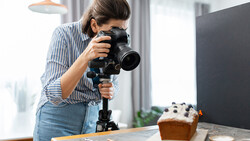
I call it the 3-in-1 Headshot Method. As a professional photographer it is imperative that you are able to adapt to your surrounds and the needs of your clients. I run into a situation quite a bit where my client doesn't know exactly what they want out of their headshot session so it’s my job to give them multiple options. In many cases my clients are very busy and they may only have a few minutes to get the shots they need so that doesn't give me the time to tear down my set and build a whole new one just for one look. Anytime I find myself in a situation like that I try to use my 3-in-1 headshot method which allows me to shoot three very different looks with just two lights and one grey background. Check out this video where I go through my process step by step.
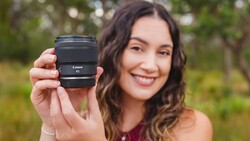
I’m not going to go through all of the gear I used for this setup, because I really want you to understand the concept. This method can be achieved with speed lights just as as easily as I did it with studio strobes. The gear really doesn't matter.
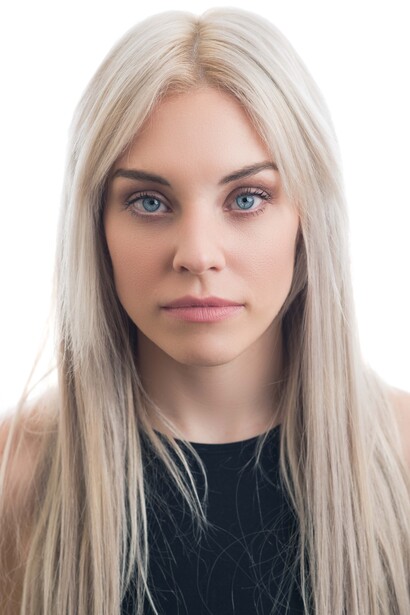
For the first shot, I wanted a white background so I took my strobe and placed it about two feet from the background and blasted it at full power to turn it completely white. It’s important to remember not to have your model stand too close to the background or else your image will have a really hazy effect which doesn't look very good. I had my model stand about five feet from the background but you can really put your model anywhere you want based on your desired look. I had my key light positioned camera right angled down at about 45º in this case but again, you can place your light wherever you think will work best for your situation.

The second shot I needed was a black background. In order to achieve this all I needed to do was turn off the background light and add a grid to my key light in order to prevent any spill of light onto the background. I also increased the power of the key light slightly to adjust for the grid eating up some light.
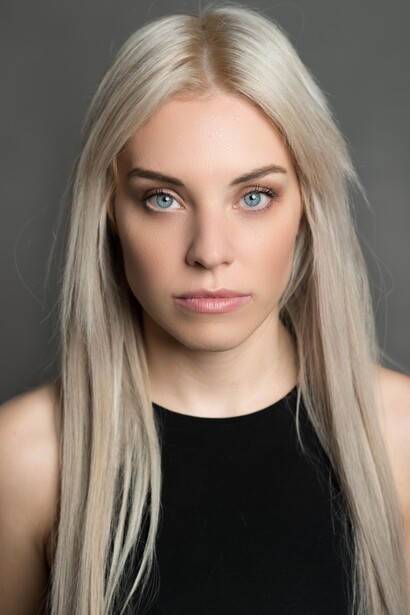
The third and final look I wanted was a grey background. This required the most light adjustment but it was still very minimal. I had my model take a couple steps backward to where she was about two feet from the background. I then brought my key light in to where it was the same distance from her as the previous shots. The only other adjustment I had to make from there was to bring the light just a little bit in front of my model to allow for some of the light to spill onto the background allowing for it to turn grey. I also increased the power of my light again since I no longer had the grid cutting back light.
I encourage you to try this out and let me know what you think. This setup obviously won't work in every situation or get you out of every jam you find yourself in, but it’s really great to have in your back pocket if you need it. Also don't mind my dog at the beginning of the video, she wanted to be in the video and she gets what she wants.


Join the Fstoppers community for free
-
Post comments and join in the discussions
-
Browse the site ad-free
-
Share your work and get featured in the community
-
Compete in the photo contests for fun and prizes
21 Comments
Great insight as usual, Jeff! Love that your dog made a quick appearance in the video... ha! Very informative. Can't wait to give your technique a try.
Thanks, Jeff, for your helpful and well-made tutorial about speed and convenience. A few things come to mind. Lighting the grey background to become white as described degrades the edges of the subjects blond hair. That soft look is nice but may not always be desired. A reversible grey and white popup background would be convenient and provide a clean white background requiring less light. The simple technique for turning the grey background black is helpful to share but this subject's light hair and bare shoulders benefits the pleasing result. A different subject with black hair and dark or black clothing requires extra attention and problem solving. The second strobe may do the trick.
You're absolutely right, that having a reversible white/grey backdrop would be better, but not everyone has that. I just wanted to show people how versatile a simple grey background can be. If I know i'm shooting a high key white headshot this probably would be my go to setup but it's nice to have the option and the versatility if I need it.
Great tutorial, concise and to the point. Sometimes the best setups are the simplest. Thank you!
Thank you, I'm glad you liked it!
Great tutorial, but seems to me that there is a bit of haze on the picture with the white background, and thinking its because of the lightning making the white background and not a white background
you're definitely right about the haziness, but it's not because the background is grey, its because the light is being pointed directly at it and bounding off essentially creating a large backlight. In this tutorial l really just wanted to show the versatility of a great background with minimal gear. To avoid any haze try using two lights for the background, one on either side with a flag to avoid any spill onto your subject and make sure the lights are angled at about 45º to the background. Sorry if that docent make any sense haha, but feel free to shoot me an email or a DM and I can explain in more detail what I mean.
Think I follow your idea of how the setup should be :-)
Let me know if you have anymore questions! I may also do another video with that method as well so keep any eye out for that on my youtube channel.
Excellent. thanks
thanks for checking it out!
Exactly how I've been using my gray bg. I bought a white and black bg thinking I would need to switch back and forth when I first started out and quickly realized how versatile the gray was when you utilize the inverse square law. For the white bg I tend to put my subject almost touching the background light and the keylight closer as well. The keylight becomes a fill for the background. One thing that allows me to do this is having a wall mounted boom arm so that the subject isn't tripping on stand legs. This setup allows me to not have to overpower the background light causing that haziness from the bounce.
That's a really great point! I also sometimes use 2 lights for the background and angle them at 45º so there is no direct bounce. Although for this video I just wanted to use the least amount of gear possible.
Super cute model and fun video! I love the versatility of this idea, but as is, the "black backdrop" example wouldn't work on someone with dark hair. You'd need to add light to separate the hair from the background and modify it so that the light doesn't reach the backdrop. I'd love to see a follow up post on this with someone with dark hair!
This is great and I'm going to have to play around with it. My usual headshot lighting is influenced by Peter Hurley, but I'm always trying new things. Check it out https://312elements.com/
wow, cutest model-girl i've ever seen
to be honest most of this things could be reached even with non-professionals, just by using some photo enhancing tools, for example pixlr or smth like https://photolemur.com or other picrure enhancing soft...
Great tips! I usually only shoot white and grey using a white background. To keep it simple I position the key lights for a grey background, and I just turn the background lights on and off to switch between the two, and not have to fiddle with the key lights during the session. Some examples on my site: https://svheadshot.com.
The girl has soooo deep look!)
What camera do you have? Great photo quality. I have a cheap Sony and usually face the problem with pixelation. The quality is really awful( I usually enhance the pic with https://letsenhance.io/ and then try to make some magic with Photoshop.
This was very interesting to see how another photographer creates quick changes. I actually do something similar with a white background instead of a grey check it out at https://cmqheadshots.com
Great post! In my opinion, the black and grey look awesome, but the white is a little blown out. You could probably get the same effect from a speed light vs a strobe as a background light. We do that for all the headshots here: https://headshots-inc.com. A MagMod MagSphere is also super clutch for distributing the light.