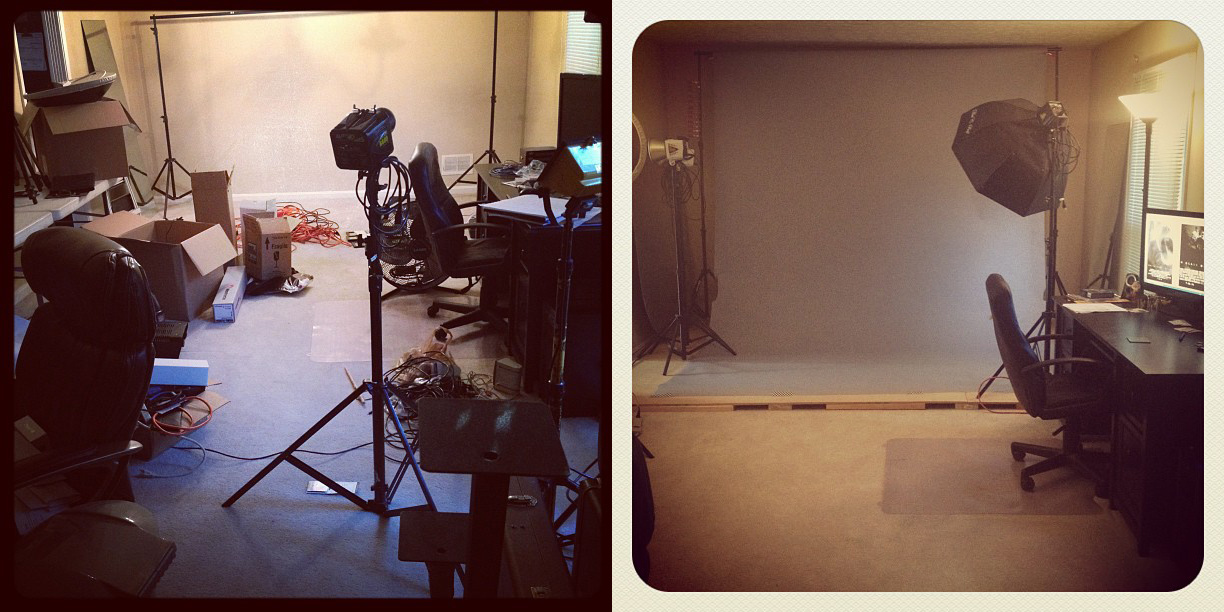
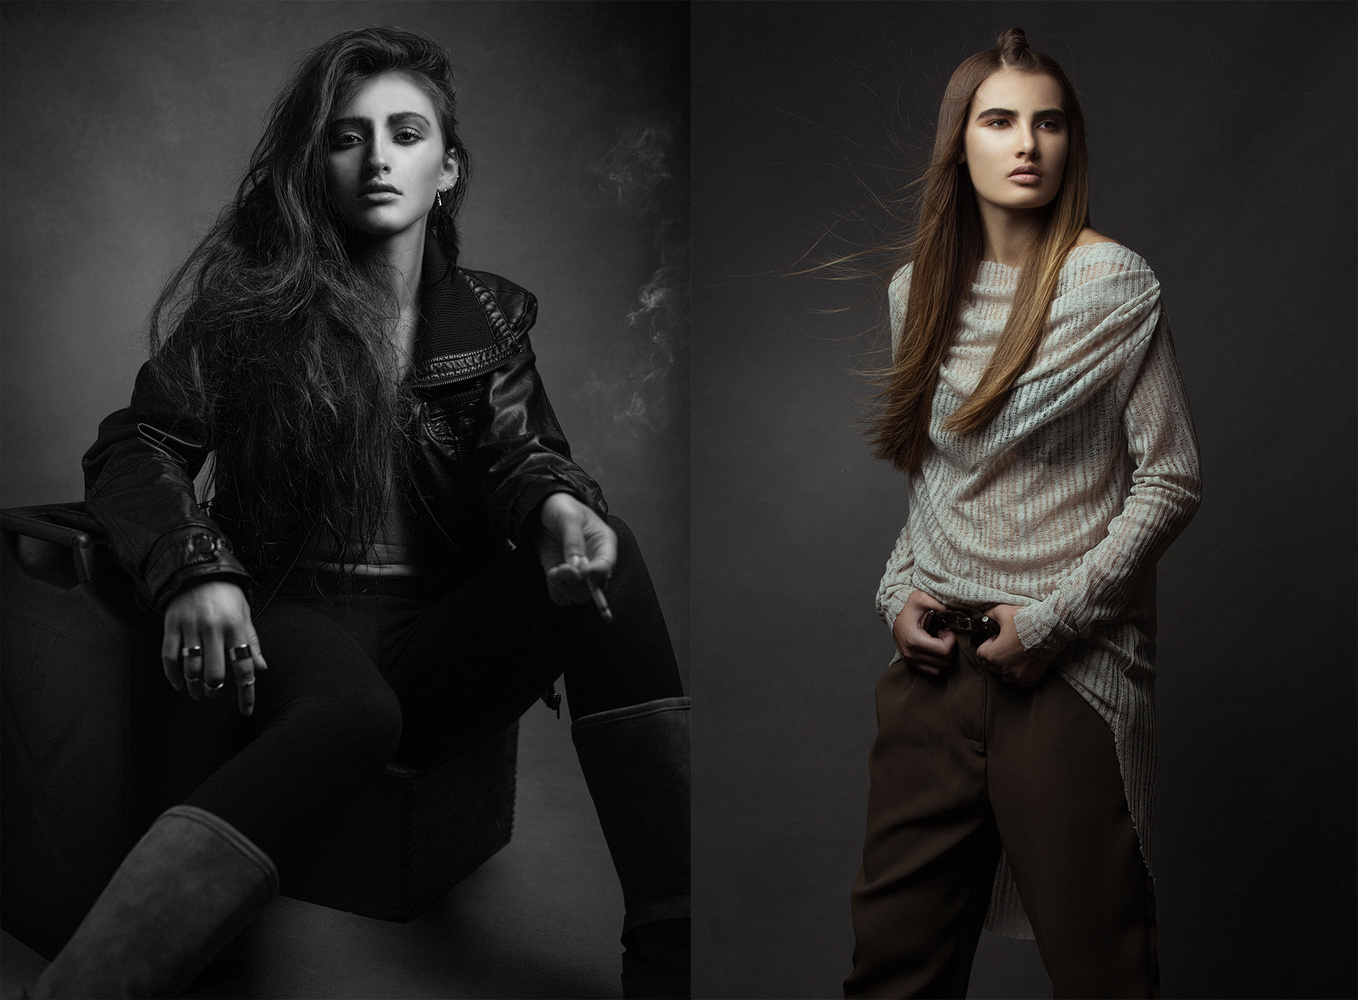
I guess I’ve always been different; I’ve never really yearned for a big studio space. As a freelance photographer, the majority of my clients require that I come to their location and shoot on-site. I have a strict organizational-mobile system to transport all my equipment which includes over 8 strobes, 2 scrims and a plethora of staging props and modifiers. I’m asked quite often about my studio and where I shoot all these incredible portraits and dramatic fashion editorials. The answer is easy; my living room.
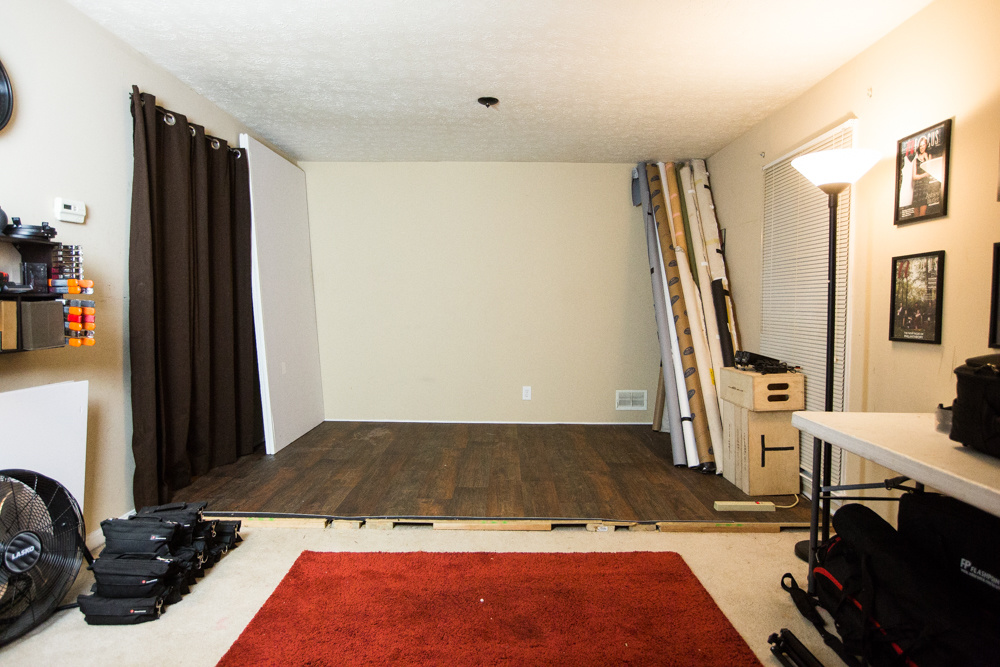
For those that follow my work on regular basis, you've probably tuned into my “First Person Shooter” videos that present me and my team of assistants crammed into a 12’ x 24’ room, with the infamous red rug. And, what we've been able to pull off with the 8’ ceilings is quite the feat. As a full-time photographer a big part of my job is budgeting and making sure the revenue covers the overhead cost of running business. In the small market of Louisville, Kentucky with just over a million people, it’s important to know what expenses take value over others. Having studio-rent is not one of those expenses I’m willing to pay for, nor do I need.
When the opportunity arose to move into my current abode, I noticed a big living room space. It was similar to a long hallway and long enough to shoot full body with a 70-200mm f/2.8; that’s all the motivation I needed to start working. There were a few hurdles I had to overcome before opening my home to clientele, the biggest being the carpeted floor.
Wood Floor
I work in the world of fashion and a big part of shooting fashion is full-body work in which models wear big heels. Heels which poke through seamless paper and canvas with ease, if pranced on over soft flooring such as carpet. To solve this problem I had to construct a hard floor which could sit on the backside of the living space without removing any of the carpet.
Materials:
- 2, 4’ x 8’ Sheets of ½” Medium Density Fiberboard
- 3, 2" x 6" Wood Planks (8' Length)
- 6, 2" x 4" Wood Planks (2' Length)
- 12’ x 8’ Sheet Vinyl Remnant
Tools:
- Wood Screws
- Drill
- Gaff Tape
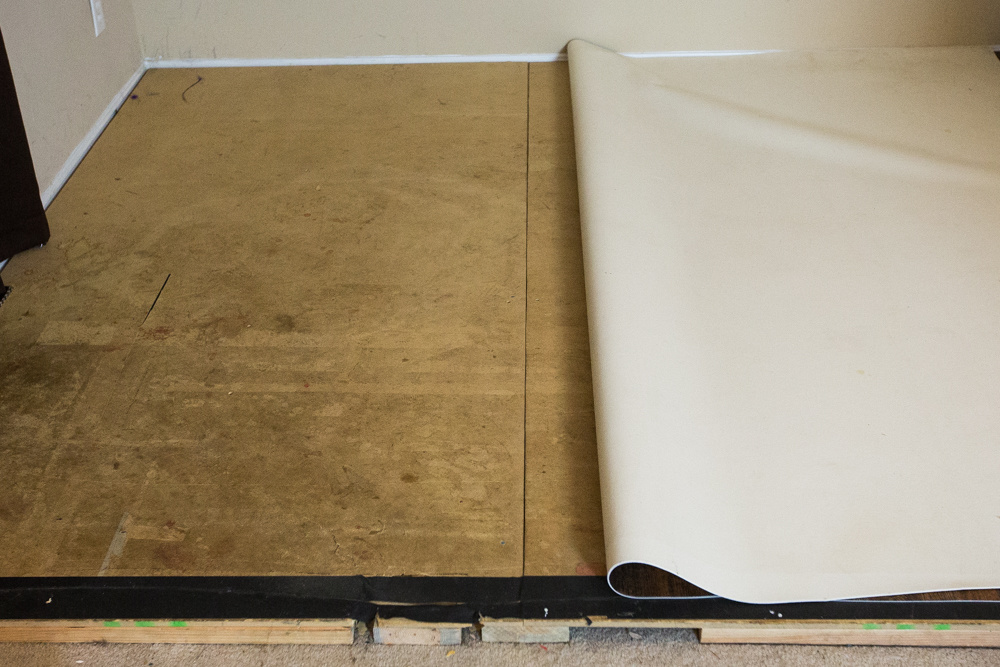
The 2 sheets of Medium Density Fiberboard fit my 12’ width perfectly and all I needed to do was secure the wood planks beneath the Fiberboard to lift it off the carpet. I used the 2" x 6" wood planks along the length of the Fiberboard for the lift and used the 2" x 4" wood planks as stiffeners to cross brace the Fiberboard in sections of 2 feet.
With the help of my “jack of all trades” roommate we anchored the Fiberboard to the wood planks with 1” wood screws.
For nearly a year I used the floor bare, it collected an enormous amount a stains, dirt and cracks due to the high amount of traffic(and parties). It was only recently that I decided to cover all of that nonsense with a “remnant” of vinyl that I purchased from a local flooring installer. It was inexpensive and presents a realistic look, enough to use in my portrait & fashion work. The installation required no glue, just some gaff tape to seal the edges for safety.
Every now and then, I have to stick another 2" x 4" plank underneath the Fiberboard to brace the edge or a crack, but it’s really held strong under a tumultuous amount of strain. It has certainly taken a beating.
Tables & Storage
Luckily, I have a studio closet where I can store staging props and a few other odds and ends. But, an important component of my studio is the white plastic tables upon where I can stage not only my camera and accessories, but also bags and cases underneath. The second table allows an area for hair and makeup or an alternate space to stage lights and modifiers.
Lights and Decoration
When I initially moved into the studio I had to remove the overhead chandlier which provided the only light in the room. So, I went over to my local hardware store and grabbed two floor lamps. Along with the natural light from the side windows, the lights provide plenty of light.
No studio would be complete without some decoration, including prints of your work which is an important addition to any studio. It’s provides a confirmation of confidence in clients, similar to a doctor and his degree. Adorning your studio walls with prints is a sure fire way to cover up an awful beige paint job and add some tenor.
Inspiration Wall
As I’ve touched on in this article “Posing To Perfection - 10 Crucial Steps To Pose A Model,“ it's paramount keep an ongoing inspiration wall full “tearsheets” and ads you may see in magazine such as Vogue, W, Glamour or V Magazine. It will not only help your model pose, but also your inspire your hair stylist and makeup artist while they work.
Advantages & Disadvantages
Honestly, we’d all love to live and shoot in a million dollar studio that has a pristine white cyclorama wall and a brand new kitchen with all the amenities, but for most of us, that’s just an unrealistic delusion. I’ve shot in the huge studios and they are amazing for certain projects, but they also can be intimidating and overwhelming.
Advantages Of A Small Studio
- Intimate Setting
- Convenient
- Your Own Rules
- Your Own Environment & Temperature
Disadvantages Of A Small Studio
- Low Ceilings
- Client Perception
- Clean-Up
- Storage
I had the opportunity to rent out studio space in a large production house earlier this year and did so for 6 months. What happened didn't really shock me; nothing was moved in and it collected dust... I lit a match to $600 a month. I do rent larger studio space for my commercial clients and editorial work, but my living room suits my needs and and is 100% free of any extra expense.
I challenge you to clear out your basement, garage or living room and get busy shooting. No more excuses for studio space, if I can do it, then so can you.


Yessss, I'm about to transform my dinning room into a studio, the time has come:)
Yes Simon! Do it!
Love this. My wife and I turned our dining room into a photo studio. For the first two years of our business we did headshots our little dining room studio. We made a video of the dining room to studio transformation.
https://vimeo.com/79800405
That is awesome Rob! Great to see you using the space so well.
I really enjoyed your video Rob. And I must say the makeup work was stellar...it seemed like it was a different girl!! Inspiring man!
That is a completely ghetto studio...and I mean that as the highest compliment possible! As I mentioned to you before I love this type of DIY stuff and the fact that your end products are so stellar nobody can look down upon it!!
Of all the disadvantages though, the ceiling height seems like it would be the hardest to overcome..how difficult does that make it?
Thank you Jason! I really appreciate the kind words! Gotta make do with what you're given sometimes!
When I bought my home I was on the search for high vaulted ceilings...alas I was stuck with 8ft tall ceilings, but this gives me hope lol
Justin, anything is possible, it can be done. You just have to know a few tricks. Booms and staging props are my secret!
Bravo! Great read and inspiring for those photographers that have been the fence for years! Go out and do it! As for myself, I had to pull the trigger and opened my PAWELECphoto Studio back in August of this year alongside my other media business' office.
Thank you Giancarlo! Congrats on the studio! Cheers on the success.
This article is a great reminder and came at a good time as I have been having the urge to rent a space and move out of the basement - mainly do to the limitations of the 8' ceiling, but like you I really don't want the extra overhead. I do have a question - the white panel leaning up against the wall on the left - what is it constructed out out of.
That is awesome Randy. Thanks for reading! Those are V-Flats, which I breakdown in this article: https://fstoppers.com/bts/studio-essential-how-construct-high-quality-v-...
I just converted 1/2 of my garage into a studio. I call it 'The Cabin'. I built a dividing wall and used skid boards to make a textured wood backdrop and a sliding barn door to have access to the second part of the garage. Only issue is no heat and it's starting to get cold out there! :) Been fun shooting in it though. Highly recommend it to anyone that can find enough space to transform!
Here is a shot taken in 'The Cabin'. https://fstoppers.com/photo/42450
I really want to convert half of my garage into a studio as well, nice shots!
Fantastic Adam! Very cool.
This great! I have a small space and joke to my clients quite often about my ghetto set-ups. I would love to hear about how you pack all your gear and keep it organized n ready to go. I feel like I need a system in place on that!!
Thanks for reading! That very well may be a future article. I do have a pretty good system!
I transformed my dungeon into a "studio" ...I have a few people in there right now. /tosses basket down
LOL!
Well damn.. I just dropped some cash for a 30x32 studio... Damn it Clay... Lol!!! Awesome setup! I might do this to my home as well. Mainly because I might only rent this place out for a month or two and do your method in my office/dining room.
Nothing wrong with a great studio, as long as you're bringing in the clientele! Thanks for checking out the article Wes!
For about a year I used my living room space as my studio... and my spouse almost left me because of it.
It's a great money-saver but makes for quite a stressful environment when you also have to live in the same space with a family. Decided to get a shared studio space at a very reasonable monthly fee, and I get to keep my spouse and living space. Win-win!
I could definitely see the issue with share the space. Fortunately, I live in a bachelor pad and have a great roommate. I'm glad everything worked out!
what tethering app do you use for the ipad? are you shooting raw+jpeg and sending the jpeg?
The photo loaded on that ipad a lot faster then my set up-- just curious
THanks
Didri! I am using the CamRanger. That's it! RAW+JPG.
Thanks for the tip. I use the xsories weye feye but its pretty clunky
I'm in the middle for redoing my basement as my studio. It's similar in size to your living room, 11'x22'. Only 7.5' ceilings, but I've made it work so far. Putting down new flooring and painting over Christmas break.
That's great to hear Kevin! Good for you, making it work! Have a very Merry X-Mas!
Pssst, Clay, Red carpet? Whaaaat?
YES! That's gorgeous!
Heck yeah! I love this article. I have turned my home into a studio and love the "free-ness" of it and the convenience. I know no place better then where you live and I have a true expert when shooting & working in my home studio. I can shoot when ever I want and for as long as I want and I customize the space to fit a nice blend of work and living home type decor. Much of turning your home or "living" space into a studio space it style, function and form. It's not hard when you get the right tools, accessories and necessities to make it happen and to work for your business needs and workflow. I have dreams of having a studio in the future but I will probably just end of finding a place I can live part time closer to the city. I live in LA but currently an outlying city in the suburbs. But I'll get an studio or one bedroom apartment instead of a professional studio space so I can still make it feel like home. I store my props and stuch in my garage and have plenty of dining/living room space to do my shoots. I might have to do a BTS similar to yours show my work space. I am quite proud of it. Thanks @ClayCookPhoto, I subscribed to your YT channel. Looking forward to enjoying your vids.
That is awesome Major! Thanks for sharing. I really appreciate you reading and the kind words! Cheers.
I had mine in my living room, but too many people hated the cat smell, which I could get raid of if I had industrial strength carpet cleaner, and clean it every few days or so.
Well, that's a bummer! I have to deal with a big Rottweiler, but he doesn't seem to bother people.
Nice article. I totally agree, if you let go of excuses and make what you have work, there is nothing left to do but make great work. Today I had my first client in my newly converted garage studio. The room still needs some work, but the client was so happy not to have to rent a studio (and incur all that extra expense) and she is thrilled with the results.
Thank you for reading Ken! That's great, the garage has paid itself off already!
Congrats! Genius
What do you respond to customers who ask "Is this your living room?" or worse they talk to each other "hey dude, I think this is someone's place"
Also what do you make up of personal effects that are around? do you hide them? like the toothbrush in the bathroom or your coats and shoes
Thank you Heri! I clean my house before every shoot and try to make everything presentable. I've never had a client or model complain. It's comfortable and intimate, most actually enjoy it.
So Clay... I have 600sq ft of storage spaces divided among 2 rooms. One of the rooms I wanted to turn into a studio space but I feel like it is too small... The Room is 14'x18' with 7'3" Ceilings. really low right? Is it worth trying to setup a studio with that size?
Steve, anything is possible. I've seen people create a studio in a dining room and made it work. Those are very low ceilings, but who says you couldn't do seated headshots or 3 quarter images? I think that is plenty of space to pull it off.
My wife would go nuts!
Wives can be a problem apparently...
thats awesome, i've still got some things to add and build but i do use my basement living room as my studio. it gets the job done, and as you said no extra expenses.
Awesome Steven! Thanks for sharing your space!
no problem, i love showing people that you don't need a massive expensive studio to create some amazing images.
i'm currently in the process of building some removeable walls to add a few different choices of scenes ranging from nice and bright to dark and moody.
Last few days I was making a plan how to transform small apartment into studio, and you publish this article :) . Thanks a lot Clay!
That is great Nikola! I'm so happy you've been inspired.
I did the same with my own living room. Although the ceiling is really low (only 2,43m high = 95 inches) I'm surprised by how much you can do with such a small space, even for fullbody shots. Just be careful with the background and lens choice.
Anything is possible! It can be done.