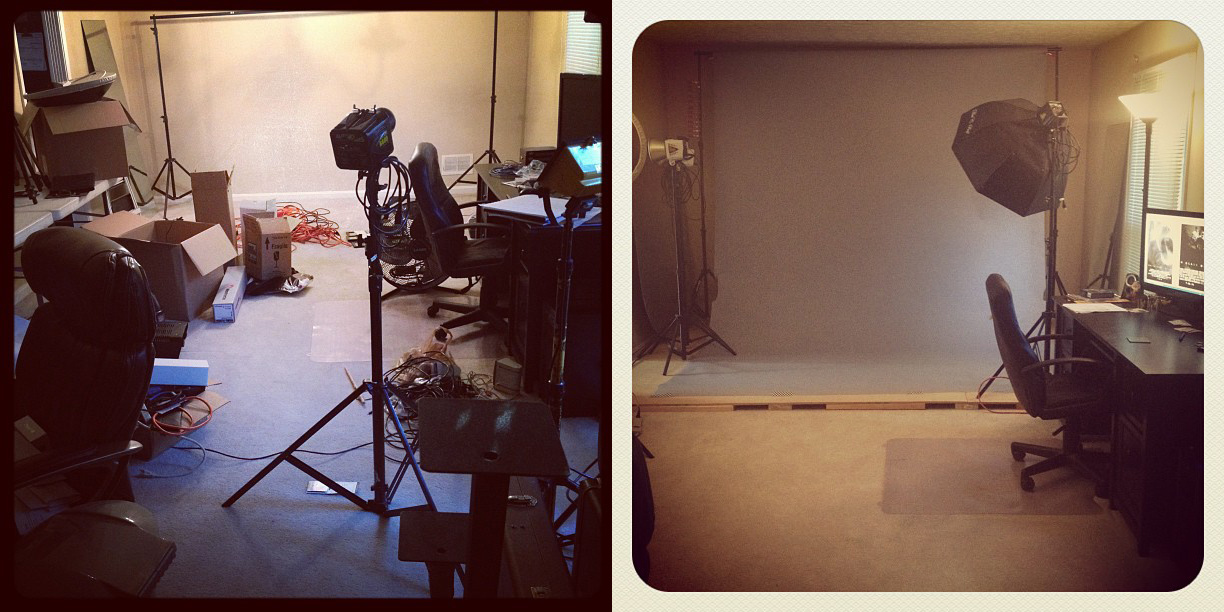
I guess I’ve always been different; I’ve never really yearned for a big studio space. As a freelance photographer, the majority of my clients require that I come to their location and shoot on-site. I have a strict organizational-mobile system to transport all my equipment which includes over 8 strobes, 2 scrims and a plethora of staging props and modifiers. I’m asked quite often about my studio and where I shoot all these incredible portraits and dramatic fashion editorials. The answer is easy; my living room.
For those that follow my work on regular basis, you've probably tuned into my “First Person Shooter” videos that present me and my team of assistants crammed into a 12’ x 24’ room, with the infamous red rug. And, what we've been able to pull off with the 8’ ceilings is quite the feat. As a full-time photographer a big part of my job is budgeting and making sure the revenue covers the overhead cost of running business. In the small market of Louisville, Kentucky with just over a million people, it’s important to know what expenses take value over others. Having studio-rent is not one of those expenses I’m willing to pay for, nor do I need.
When the opportunity arose to move into my current abode, I noticed a big living room space. It was similar to a long hallway and long enough to shoot full body with a 70-200mm f/2.8; that’s all the motivation I needed to start working. There were a few hurdles I had to overcome before opening my home to clientele, the biggest being the carpeted floor.
Wood Floor
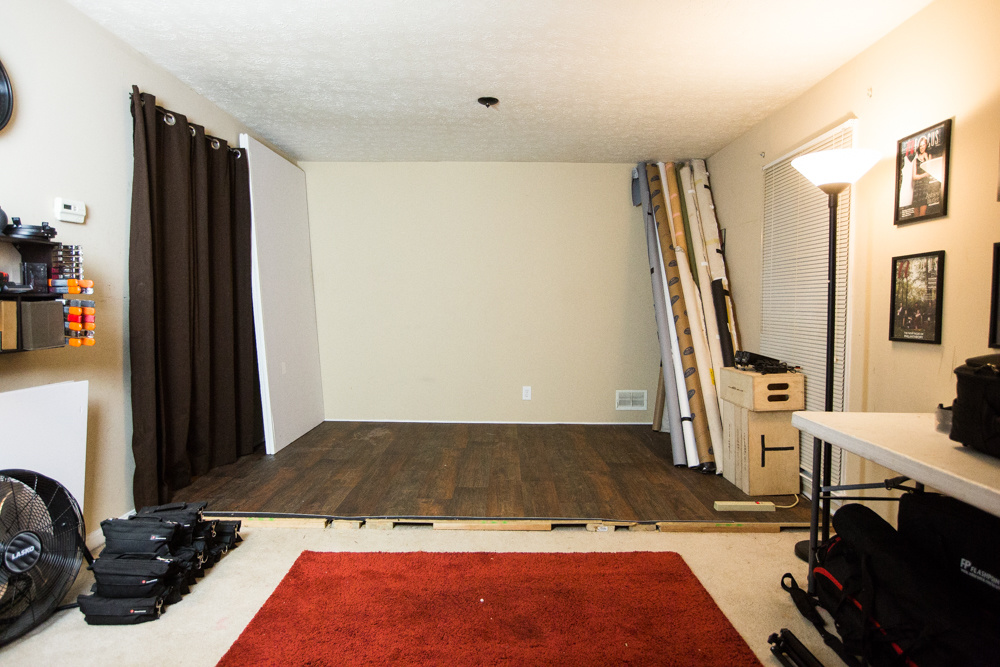
I work in the world of fashion and a big part of shooting fashion is full-body work in which models wear big heels. Heels which poke through seamless paper and canvas with ease, if pranced on over soft flooring such as carpet. To solve this problem I had to construct a hard floor which could sit on the backside of the living space without removing any of the carpet.
Materials:
- 2, 4’ x 8’ Sheets of ½” Medium Density Fiberboard
- 3, 2" x 6" Wood Planks (8' Length)
- 6, 2" x 4" Wood Planks (2' Length)
- 12’ x 8’ Sheet Vinyl Remnant
Tools:
- Wood Screws
- Drill
- Gaff Tape
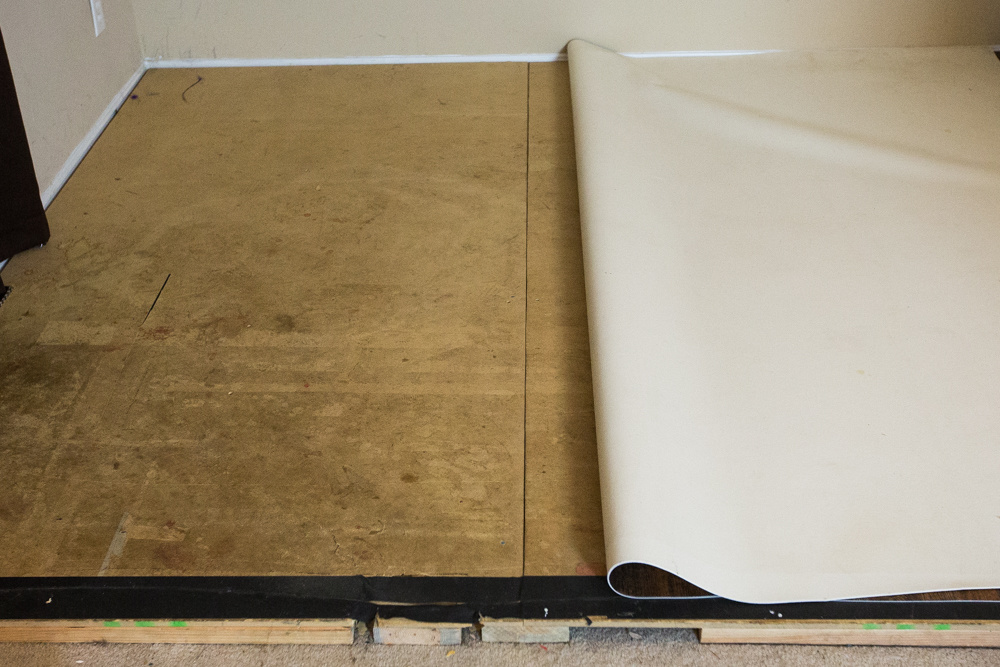
The 2 sheets of Medium Density Fiberboard fit my 12’ width perfectly and all I needed to do was secure the wood planks beneath the Fiberboard to lift it off the carpet. I used the 2" x 6" wood planks along the length of the Fiberboard for the lift and used the 2" x 4" wood planks as stiffeners to cross brace the Fiberboard in sections of 2 feet.
With the help of my “jack of all trades” roommate we anchored the Fiberboard to the wood planks with 1” wood screws.
For nearly a year I used the floor bare, it collected an enormous amount a stains, dirt and cracks due to the high amount of traffic(and parties). It was only recently that I decided to cover all of that nonsense with a “remnant” of vinyl that I purchased from a local flooring installer. It was inexpensive and presents a realistic look, enough to use in my portrait & fashion work. The installation required no glue, just some gaff tape to seal the edges for safety.
Every now and then, I have to stick another 2" x 4" plank underneath the Fiberboard to brace the edge or a crack, but it’s really held strong under a tumultuous amount of strain. It has certainly taken a beating.
Tables & Storage
Luckily, I have a studio closet where I can store staging props and a few other odds and ends. But, an important component of my studio is the white plastic tables upon where I can stage not only my camera and accessories, but also bags and cases underneath. The second table allows an area for hair and makeup or an alternate space to stage lights and modifiers.
Lights and Decoration
When I initially moved into the studio I had to remove the overhead chandlier which provided the only light in the room. So, I went over to my local hardware store and grabbed two floor lamps. Along with the natural light from the side windows, the lights provide plenty of light.
No studio would be complete without some decoration, including prints of your work which is an important addition to any studio. It’s provides a confirmation of confidence in clients, similar to a doctor and his degree. Adorning your studio walls with prints is a sure fire way to cover up an awful beige paint job and add some tenor.
Inspiration Wall
As I’ve touched on in this article “Posing To Perfection - 10 Crucial Steps To Pose A Model,“ it's paramount keep an ongoing inspiration wall full “tearsheets” and ads you may see in magazine such as Vogue, W, Glamour or V Magazine. It will not only help your model pose, but also your inspire your hair stylist and makeup artist while they work.
Advantages & Disadvantages
Honestly, we’d all love to live and shoot in a million dollar studio that has a pristine white cyclorama wall and a brand new kitchen with all the amenities, but for most of us, that’s just an unrealistic delusion. I’ve shot in the huge studios and they are amazing for certain projects, but they also can be intimidating and overwhelming.
Advantages Of A Small Studio
- Intimate Setting
- Convenient
- Your Own Rules
- Your Own Environment & Temperature
Disadvantages Of A Small Studio
- Low Ceilings
- Client Perception
- Clean-Up
- Storage
I had the opportunity to rent out studio space in a large production house earlier this year and did so for 6 months. What happened didn't really shock me; nothing was moved in and it collected dust... I lit a match to $600 a month. I do rent larger studio space for my commercial clients and editorial work, but my living room suits my needs and and is 100% free of any extra expense.
I challenge you to clear out your basement, garage or living room and get busy shooting. No more excuses for studio space, if I can do it, then so can you.


My ceiling is too damn low!! I was thinking about a garage..
A garage will work, just make sure you have the proper amenities such as a heater or air conditioning unit! Cheers and good luck!
Bravo for helping people make the most of their environment and get beyond their excuses for not doing studio work. A great product I used at my old loft to make a temporary floor over carpet is Dricore which is a wood subfloor in 2 ft tile sections that installs with just a mallet in 10 minutes.
http://www.lowes.com/pd_173869-99899-ODRICORE000000_0__?Ntt=dricore&User...
Very cool! Thanks for sharing Scott and thanks for reading!
One of the main reasons we bought our house is because it had a second, detached garage we could turn into a studio for me/music room for my husband. It's still a work in progress but it's so nice! We are still working on making it warm enough, so I have 3 space heaters running for the time being. We painted the concrete floor white at first, but the concrete was just wayyyy too cold. So my husband quickly built up a floor which has already helped! Still need to insulate/drywall the ceiling, which will probably be the biggest help with the heat! He even says he can raise the ceiling joists a foot, which would help tremendously! WOOT! it's a mess at the moment while he is doing some work in there heh.
and before the garage was usable, thankfully our living room worked just fine! we attached wood wall panels from menards onto a big piece of plywood to make a 'floor' over our carpet.
Very cool!
Keep up the great work! Looks awesome so far!
Inspiring. I transformed my open space kitchen/dining/living room into my studio… now I eat out on the patio :P
Awesome Percy! Thanks for reading!
I just made it in my bed room, Big fan of your work, thanks for sharing !
Yes! Awesome!
Really love your work! This has inspired me to turn my basement living room into a studio once and for all.
Thank you Cole! Means a lot!
I had this space the whole time and I did not see it, what I can do with a small space (8x8x16) thanks Clay for gave me the inspiration , you are awesome . Btw I painted the backdrop
I have been trying to do this, but in my house my husband and 8 year old daughter also have my parents living with us. With a basement that is finished, but there is no place for a studio. It's an office/family room/playroom.
This is a very good post..i love this article..i think many people like this article...awesome post...i head this post also in http://www.iamaddictedtoyou.com
My large living room converts into a photographic studio once weekly and a music studio once or twice weekly. Occasionally used for social purposes as well lol.
I am a little bit late to the party , but hey, better late than never !
Just got myself a 20' x 10' Muslin Backdrop, lots of space now and less worries for me ! This is in my basement where I have at least 30 feet long ( full person with 70-200 f2.8). Suspened tiles which can be moved to allow lights to go higher :)
Awesome Archag!
YES. I love these articles. I've turned my living into a home studio also. I've drilled in L brackets in my wall to avoid the added background stands and the rolls go right up there.
When I move out I'll just put some spackle and it'll disappear, but while i'm renting it, the space is mine, baby.
I'm planning on putting a mirror in there against the wall with LED strip light around it to make a DIY vanity mirror. I'd like to avoid hair/makeup being done in my bathroom.