Once I bought a Manfrotto pistol-grip-upside-down ball head, with the typical Manfrotto camera plate. After a while I wanted something more robust, and I choose for an Arca-Swiss compatible ball head from Kirk Enterprises, and a matching L-bracket. The latter was one of the best choices I made.
I used to get a lot of questions about that piece of metal I had underneath my camera. A lot of photographers never heard about a L-bracket before. This was somewhere around 2007, perhaps even earlier. After a while I got tired of the terrible camera plates of the Manfrotto 322RC2 ball head and started looking for something else. I cannot remember how I discovered the L-brackets, but it seemed to be exactly what I needed. I spend a lot of money for a Kirk Enterprises ball head, and a matching L-bracket for my Canon EOS 20D.

I used a Canon EOS 5D for a while, together with a battery grip. Once the RRS L-bracket was mounted, it never came off. Except when I needed to clean the camera.
The L-bracket became part of my cameras since that moment. With every new camera, a new L-bracket came with it. I changed from Kirk Enterprises to Really Right Stuff (RRS) because it had a better design for the Canon EOS 1D mark III, and I stayed with RRS ever since. Even when the much cheaper brands started to sell L-brackets of their own, I stayed with the perfect designed RRS.

My Canon EOS 1D mark III also had a L-bracket. It gave a lot of protection from damage when placing the camera on stage during my concert photography, just like in this example.
About Camera Plates for Tripods
Why did I choose that expensive L-bracket? That is one of the questions I got frequently. To answer that I would like to look at the way we connect a camera to a tripod. It used to be a simple screw, but as time passed manufacturers invented the camera quick connection plate. You would connect a simple plate to the camera, that would click into a slot on the tripod. It was easy and quick. That system was perfected over time and now it is used for almost every tripod.
Unfortunately every manufacturer made its own design, that was not compatible with any other brand. One of those systems was the Arca-Swiss type connection, and eventually that system became the most common one.

The difference between a normal cameraplate and a L-bracket. This L-bracket fits the camera like a glove
I find the Arca-Swiss system very well designed, making it possible to integrate the camera plate in such a way, that it becomes a part of the camera itself. It does not stick out in any way like many other types of camera plates. The design of the Arca-Swiss makes it also possible to prevent the plate from rotating when a camera is placed in the portrait orientation on a tripod. If the common plate is not fastened enough, it can rotate. Especially when a large or heavy lens is connected to the camera. In the worst case scenario a camera can get loose and fall.
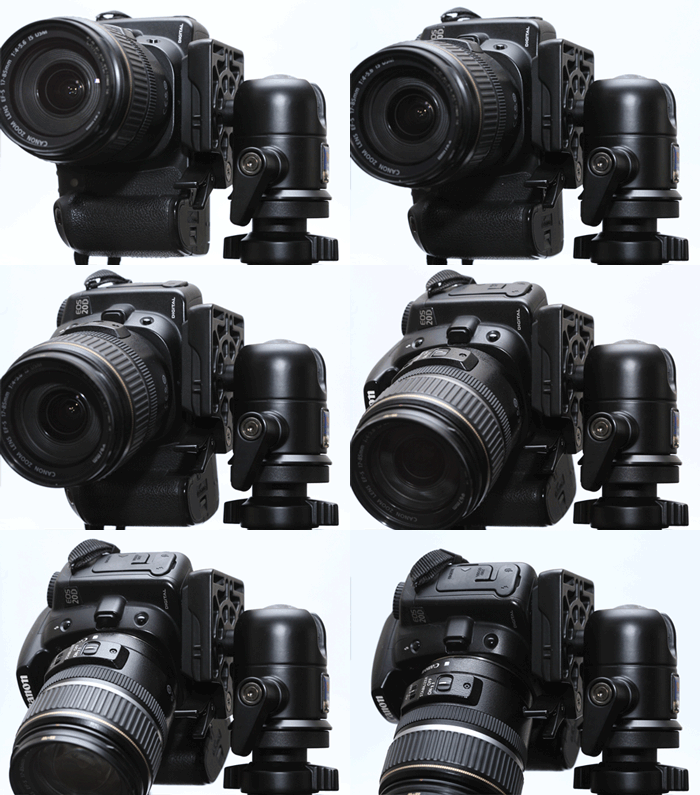
When a normal cameraplate is not connected secure enough, due to the weight of the camera and lens it could unintentionally rotate.

The L-bracket is designed for a specific camera model, like this Kirk Enterprises L-bracket for the Canon EOS 20D. There is no risk this plate will rotate when connected to the tripod.
The design of a good the Arca-Swiss compatible camera plate can prevent the rotation of the camera in portrait position. It was something that I liked very much. But the L-bracket has another benefit that would prevent this unwanted rotation from the camera even more.
A L-bracket is nothing more than a well-designed L-shaped metal camera plate. It not only fits underneath the camera, but also to the side of the camera. This way, the camera can be connected to the tripod in the normal landscape position, but also in the portrait position without the need for flipping over the ball head.
Using a L-Bracket
The real reason for a L-bracket becomes obvious when we connect a camera to the ball head. In landscape position it is not much different from a normal camera plate. But when you need to place the camera in portrait position, a few things will happen with a normal camera plate. First of all, the camera with lens will be tilted 90° towards the left or right of the ball head. With a heavy camera, or a light tripod, the setup may become unstable. But also the composition will change because the camera had a different position.
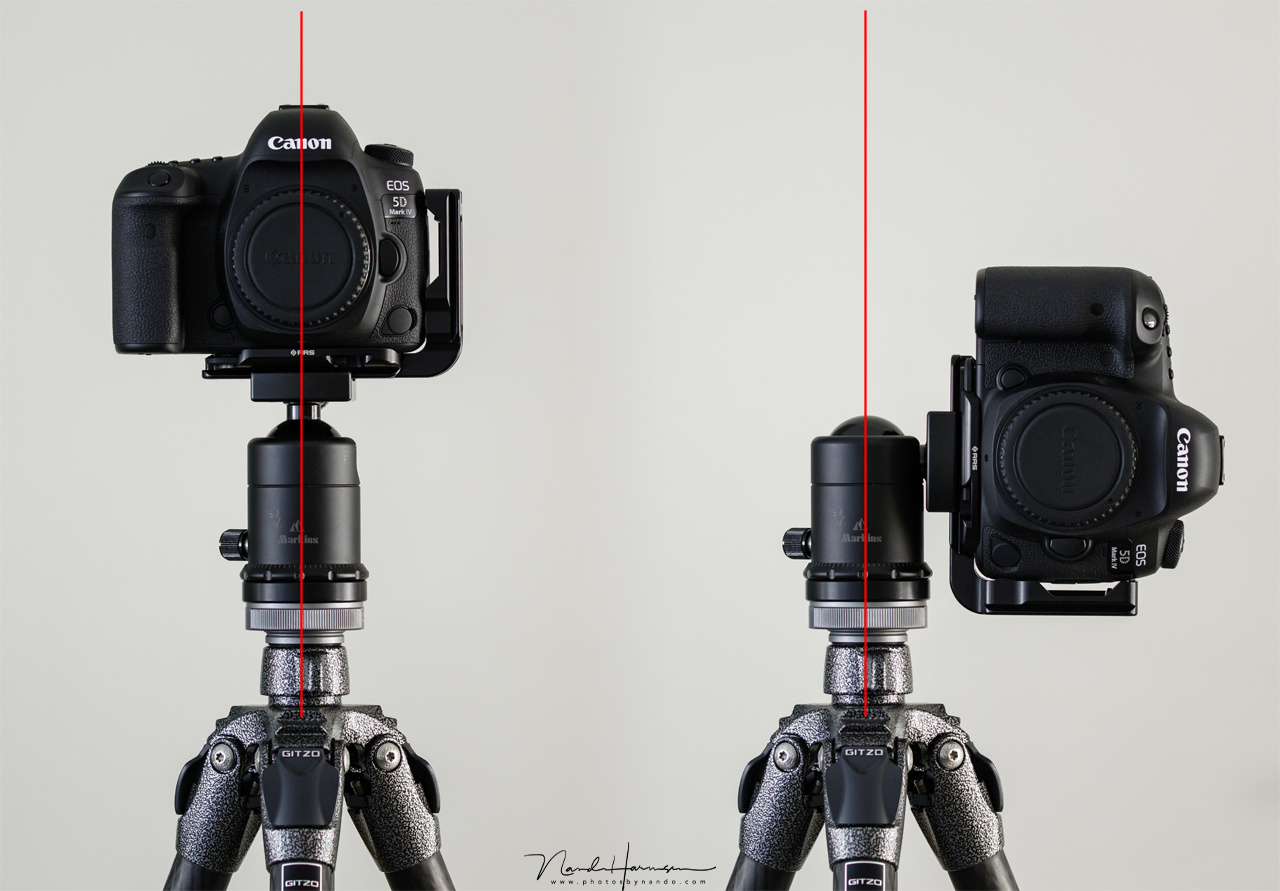
With a regular camera plate it is necessary to flip the camera to the side, placing it next to the tripod. Unless you use a sturdy tripod, the setup may become unstable. You also need to correct the composition offset.
When we use a L-bracket, nothing has changed with the landscape position. When we want to change it into portrait position, we have to disconnect the camera from the ball head, rotate the camera 90°, and connect it again to the ball head. This way, the weight of the camera and lens is still right above the center of the tripod, keeping the setup well in balance. But also the composition remains the same. Sure, it has changed in orientation, but the position of the camera has not changed. It just rotated.
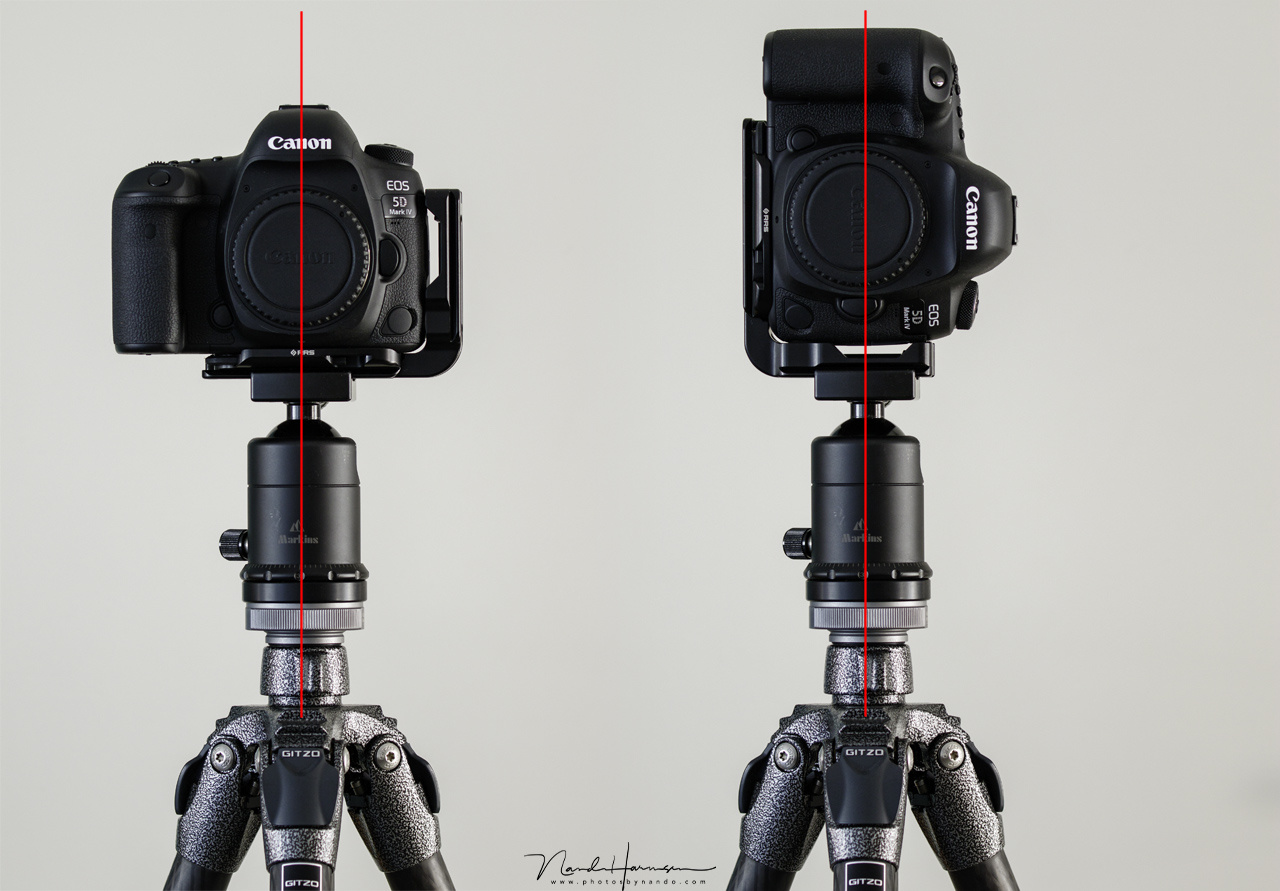
Using a L-bracket the camera stays above the center of the tripod, no matter what orientation it is in. It is much more stable, but also the composition is maintained.
I found the L-bracket very convenient in many situations. It made a lot of unusual tripod setups possible. I also have used a flash bracket for a while, keeping the flash above the camera when switching from landscape to portrait. Another benefit is the ease of panorama setups, reducing parallax with a nodal slide while holding the camera in portrait mode.

A rather unusable tripod setup, made very easy with a L-bracket. With a regular camera plate this would be much more difficult.

I once used a flash bracket for my wedding photography. The L-bracket made this modular system possible. Nowadays I use flash in a much more convenient way, without the need of these brackets.
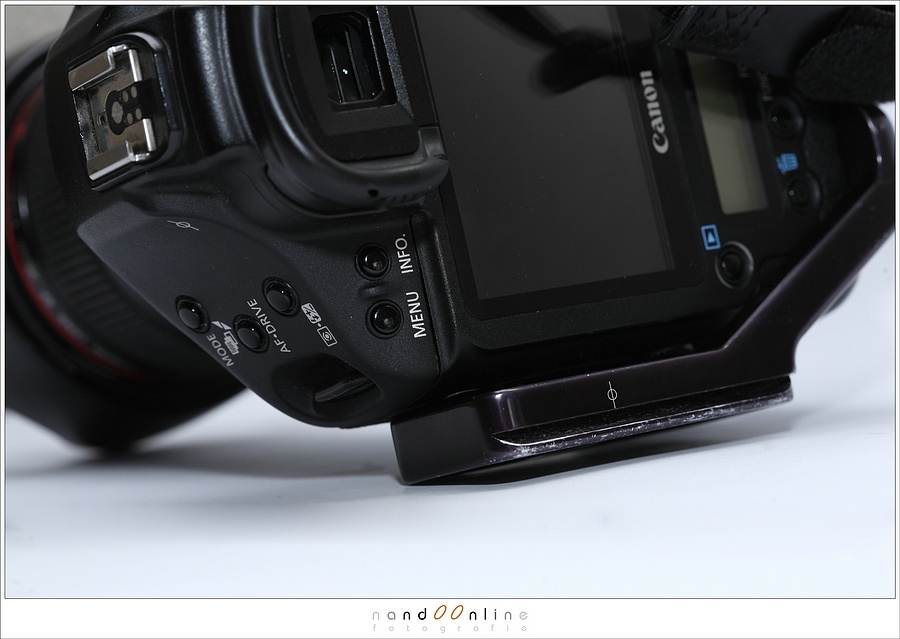
The L-bracket provided a lot of protection throughout the years. It protected the camera when it was placed on stage (concert photography) or a simple rock for support (landscape photography). The L-bracket got scratched, but not the camera.
Another nice benefit was the extra protection I got from the L-bracket. I could lean onto dirty surfaces without the risk of damaging my camera. It once even protected the camera from a fall onto a concrete floor, although that was also a bit of luck.
Nowadays L-brackets come in shapes and sizes. The best ones are the L-brackets that are designed for a certain camera model. These are also the most expensive L-brackets. The dedicated design makes it possible to reach every connection on the camera without the need of removing the L-bracket. The cheaper ones are often universal and may obstruct the use of cables or even battery compartments.
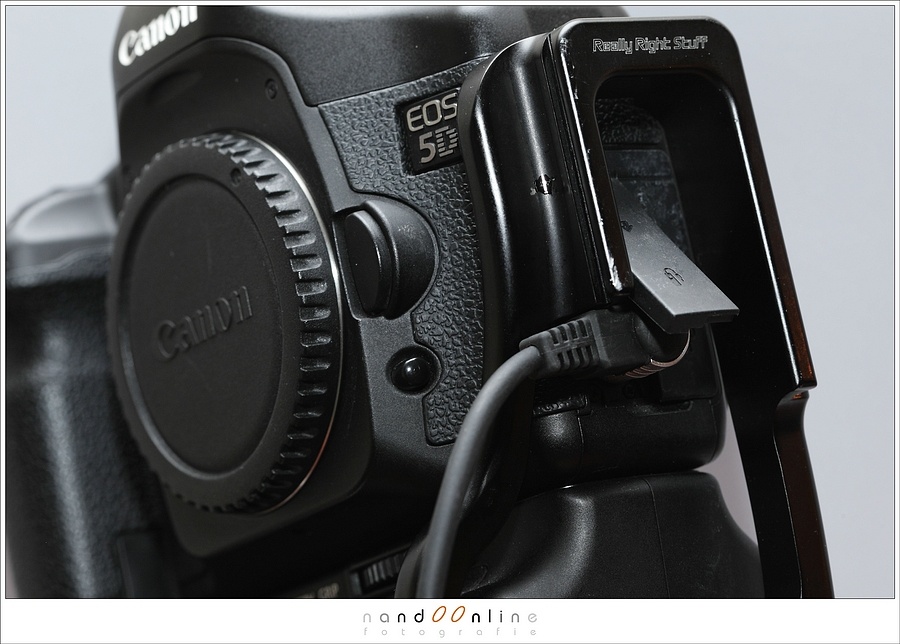
The camera specific L-brackets allow access to every port or connection on the camera. Just like the remote connected to this Canon EOS 5D, with the RRS L-bracket installed.
The L-brackets I use from RRS, and Kirk Enterprises, also have a normal tripod threat, so you still be able to connect straps like a Black Rapid or similar. This way you never have to remove the L-bracket from your camera. It just becomes part of it.
My Final Thoughts
After more than ten years of using L-brackets I know for certain it was one of the best choices I made concerning tripod connections. It made every new camera a bit more expensive, but it was well worth it. When my trusty Canon EOS 5D mark IV cameras have to be replaced, I am sure the next camera will also get that wonderful piece of metal called L-bracket.
What I Like About L-Brackets
- It is completely integrated to the camera body
- A good fixed connection to the tripod
- Composition will be maintained when changing from landscape orientation to portrait on a tripod
- Every compartment and connection slot will still be accessible
- Extra accessories can be used with a L-bracket like nodal slides, macro rails, and flash brackets
- Connection for Black Rapid straps or similar is still possible without removing the L-bracket
- Extra flexibility for positioning the camera with a tripod
- Extra protection
What I Don’t Like About L-Brackets
- The extra weight
- Expensive
- Every camera needs its own designed L-bracket
- Takes more space in a camera bag
These likes and don’t likes are about the more expensive L-brackets, that are designed with a certain camera in mind. Today cheaper L-brackets are available on the market. Some of these brackets are one-size-fits-all. But be aware, these brackets can obstruct accessibility, making it necessary to remove it every time you need to connect a cable, or to change a battery. These brackets are also sticking out, making it more voluminous.
If you use a tripod often, a L-bracket may be a very good choice for you. Most brands have Arca-Swiss compatible ball heads now, making it easier to use L-brackets on many different brands. The L-bracket may be a bit expensive, but I think it is well worth it.
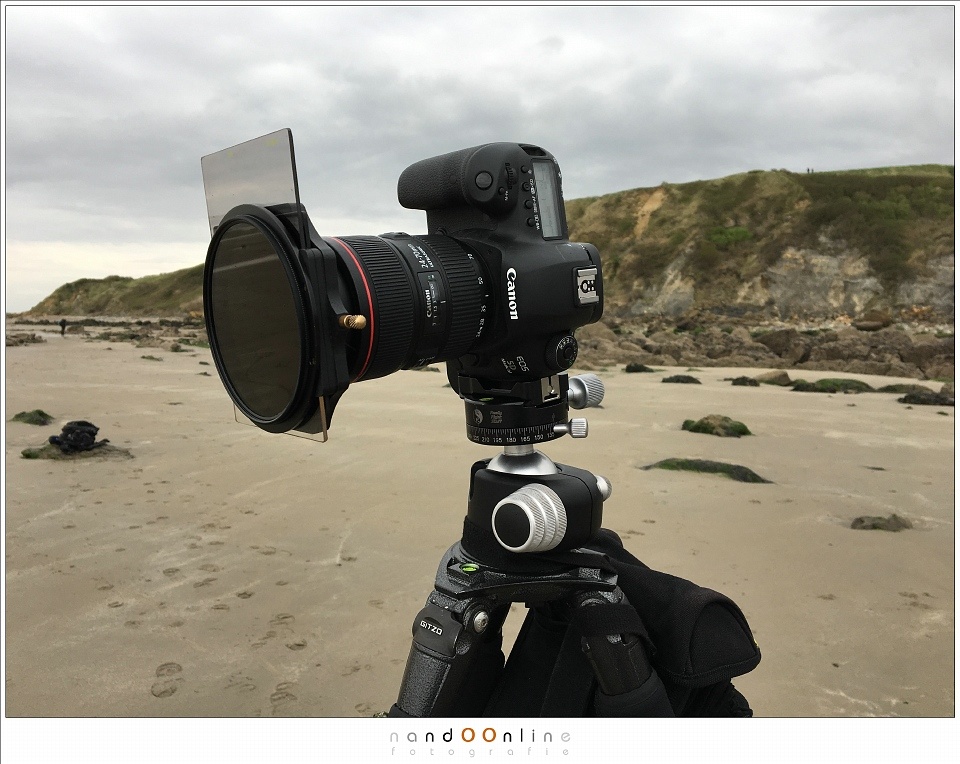
A real world example of a portrait orientated camera, with filters for a long exposure. The L-bracket makes this so much easier.
Do you use a L-bracket? Please let me know what brand and about your experiences. And if you never used a L-bracket, what do you think of it? Would you consider it? I would love to read about it in the comments below.


My primary camera is a 5D mark III. I have a tripod and a monopod. My heads are a rrs ball head, MH01 RRS monopod head, Wimberly 200 gimbal head, manfrotto geared head, and a RRS multirow panorama setup.. I have RRS L-bracket and standard camera plate. I have a BlackRapid camera strap. The tripod and the monopod have B2-LR-II lever release clamps. The heads all have a TH-DVTL-55 dovetail plate. I have a clamp connected to my camera strap so I can quickly attach/detatch the strap from the camera. If I am using my 100-400 zoom I put the strap clamp on the lens foot, thereby reducing stress on the camera lens mount. I put a lever release clamp on the Manfrotto quick release plate. The Manfrotto clamp is not simple or quick to use. The lever release plate stays on the head. I can put a camera or another head on top of the gear head. The L-bracket is required when doing panoramas with the camera in portrait orientation. You need to be able to rotate the camera around the nodal point of the lens. I have a small fortune invested in clamps and plates. The bottom line – I can configure my tripod – head – camera setup in seconds with no tools. I do night sky photography in sometimes challenging conditions. Imagine being at the south rim of the Grand Canyon in January at midnight and the temperature is 8 Degrees. If I want to change my configuration and have to ubscrew/screw a mount and lose the setscrew in the process, I’m in trouble. With the RRS plates I can reconfigure with no tools in a matter of seconds in the dark.