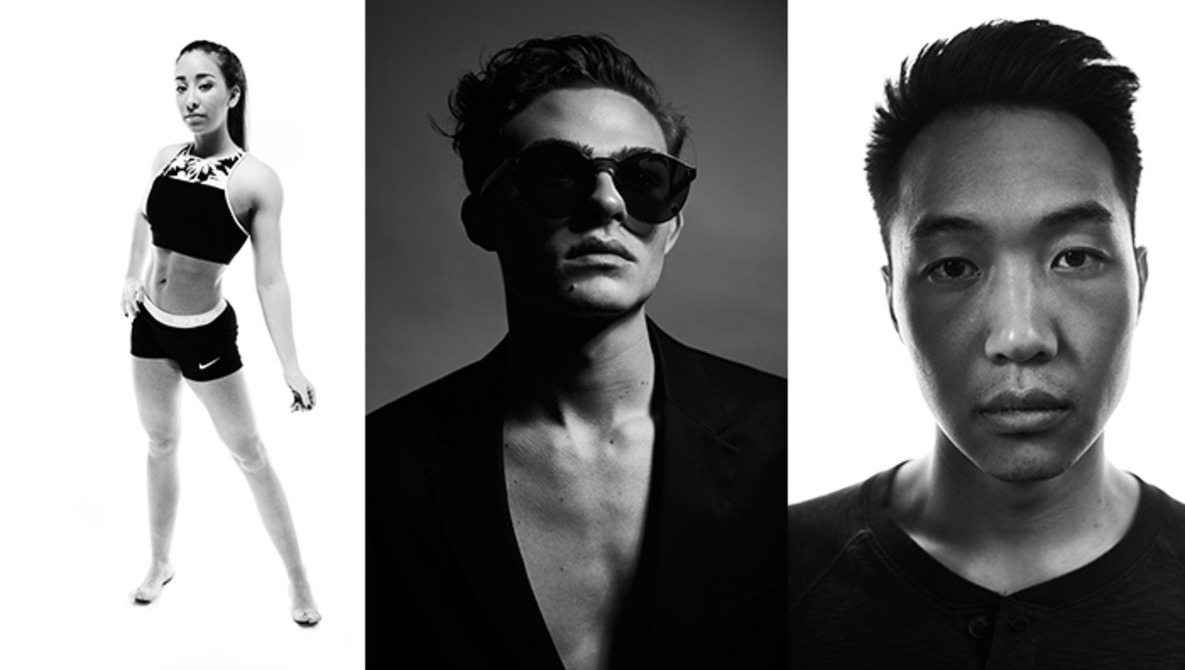
Last week, I took a look at personal projects and showed how I created my most recent portrait series. These personal projects are a great way to grow as a photographer and create new work you have a passion for, as you have the opportunity to create images with full control of the visual style. However, they may not always require you to step out of your comfort zone. To expand your repertoire of photographic knowledge and to create a more diverse, yet consistent portfolio, you need to experiment.
As a portrait photographer, or any genre of photographer really, lighting is everything. Small changes can have a pretty big impact on your image. Refining your technique and having enough tools in your belt is tremendously important. While you may not always use a large variety of lighting styles, understanding them can help you find your own style.
1. A Different Style of Light Modifier
Most of my images involve soft light and relatively wide apertures. For a few images, I decided to try just the opposite. I found a small umbrella, placed it on my Alien Bee, and gave my subject some distance from the light. Distance and a small light source will make for some very harsh light. When you combine that with a small aperture like f/9 or f/11, you’ll find a very high contrast and edgy image. 
2. Restricting Light
I decided to go a little further, however, and introduce a few flags into my setup. Flags are simply a dense black fabric stretched across a frame (often metal) with a stud for mounting them to various stands, clamps, or grip heads. The cloth is so thick that it blocks all light from passing through. If you think grids give you a lot of control, try throwing some flags next to your light to eliminate spill or near a subject's face to create a distinct shadow. The use of flags and hard light allows you to create images with a lot of contrast. 
3. Adding Light
Reflectors or fill lights will add yet another level of control. Should you find your small light source creates shadows that are too dark, a reflector (in my case, it is a piece of matte board covered in aluminum foil) can increase shadow luminosity, while still maintaining a contrasty look. Should you be printing, you’ll do well to avoid pure black areas in the image. 

If you’d like some amazing examples of these techniques, Marco Grob often employs them in his portraiture. His lighting is methodical, and while not always hard light, there is a level of control that he exhibits that allows for a more accurate representation of the creative vision behind an image. Platon is also quite famous for his simple, yet dramatic, hard-lit portraits. For more complex setups with a lot of similar techniques, Blair Bunting has an incredible body of work and some blog content I would recommend looking through.
Stepping out of your comfort zone as a photographer will always help you grow. While you may not be totally pleased with the results, you at least know what you don’t like or what you can try more in the future to perfect it. Even though hard light isn’t often part of my style, using it in a few situations has helped me to gain a deeper understanding of light's behavior. Once you’ve mastered light, you’ve mastered photography.


This is a good read. Thank you.
I would disagree, but to each his own, eh :]
You caused I want to try this method with "flags". I always liked Marco Grob's portraits but never thought about trying this. It's interesting that lot of M. Grob's pics are shot with harsh light. It's simple and recognizable.