
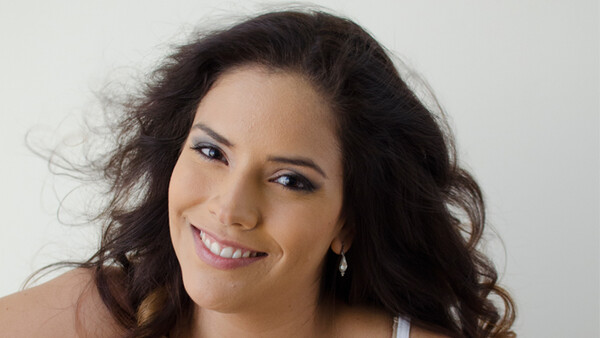
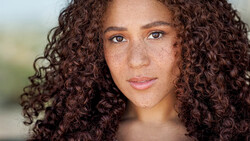
If you are interested in creating the softest light with an amazing wrap around quality, look no further. The book light technique, coined by film maker Shane Hurlbut is so simple and basic, requires the most inexpensive light modifiers, yet gives you the maximum control over the quality of light.
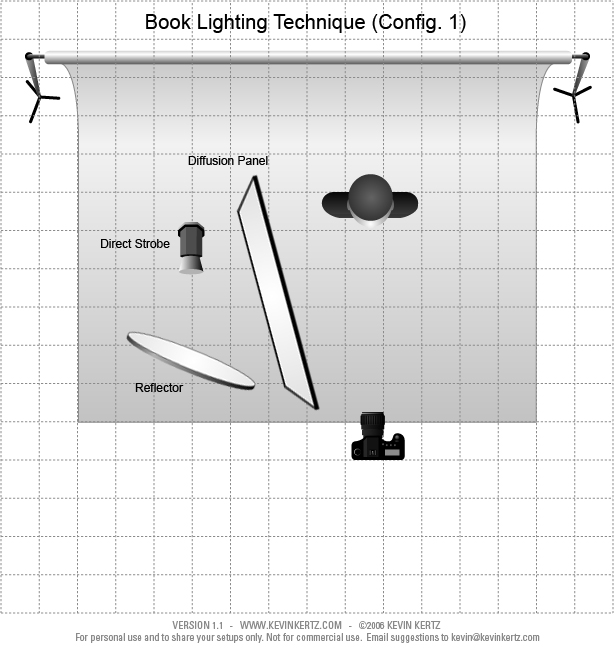
What you need in order to create a book light, is a light source (strobe/speed light/video light), a reflector and a large diffusion panel.
A book light is simply a bounced source of light, that is diffused with another layer of diffusion. The light is positioned 45 degrees to the reflector, and diffusion layer can be joined at the end of your bounce where your space is limited. It creates an image of an open book, and hence the name.
You can make your light softer by increasing the distance between the source and your diffusion layer. In the above example, the reflector has now become the source, not the strobe. So the further you move your diffusion away, the softer the light will get. You can see in the video below, how the shadow softens on the hand, as the distance between the reflector and the diffusion panel increases.
https://www.youtube.com/watch?v=3RK-D5feRgQ
You can use many different diffusions as well as bounce sources to create different types of light quality.
For the bounce/reflector you can use: Foam Core, Bleached/Unbleached Muslin, White Bed Sheet or a White Towel.
For the diffusion panel you can use: White Diffuser Sheets, Silent Grid Cloths or even Frosty Shower Curtains.
For a complete and detailed list of of diffusion panels and bounce sources, be sure to check out Shane's blog.
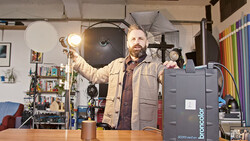
Alternatively, if you have access to double diffused octabox, or a bounced modifier like a photek softlighter, you can replace it with the strobe and reflector to get similar results of soft wrap aroun light. See the diagram below.

Try this soft and beautiful light, and post some of your results in the comments below.
If you're passionate about taking your photography to the next level but aren't sure where to dive in, check out the Well-Rounded Photographer tutorial where you can learn eight different genres of photography in one place. If you purchase it now, or any of our other tutorials, you can save a 15% by using "ARTICLE" at checkout.
Join the Fstoppers community for free
-
Post comments and join in the discussions
-
Browse the site ad-free
-
Share your work and get featured in the community
-
Compete in the photo contests for fun and prizes
20 Comments
I suppose there's any number of variations on this concept. Both versions are essentially a big, "open" softbox. Going straight through 2 diffusion panels would create a similar effect. Version 2 is essentially this, you don't really need the angle at all. Shoot head-on for maximum illumination with version 2. Multiple strobes/lights would be handy.
will test this for my next interview. :)
Didn't Dean Collins used to teach this technique back in the nineties?
If memory serves me correctly, Dean Collins probably did this in the early 80’s and his video series came out sometime around 1985. The motion picture industry has been using large panels to light sets indoors and outdoors since the invention of electricity and lightbulbs.
Assist in any large commercial or advertising studio and you will see lots of foam core panels, large fabrics and frames, grip stands, clamps, and duct tape. It is still faster to light properly than fix 100’s of catalog images a day.
My point …. just because a photographic technique has been around a while doesn’t make it old news or any less useful. Perhaps that technique just works very well, LOL
Quickie lighting self test that explains it all:
Turn off all the automatic “in-camera digital processing modes” on your camera. Take a pic of your subject with a soft box. Take a second pic of your subject with a 5’ x 7’ diffusion panel in front of your speedlight or monohead. For extra credit…take a third pic of your subject with the diffusion panel in front of your soft box.
Open up the unprocessed and uncorrected jpegs on your computer in any basic image viewing program. I think you will be very pleasantly surprised by what a diffusion panel will do for your portrait lighting technique. Now imagine what the same images could look like when shot in RAW and opened in Lightroom...
Just saved you countless hours of Googleing and reading lighting forums for “soft portrait lighting” advice….and gear and “top ten secrets of portrait and fashion lighting DVD” costs, LOL.
PS: panels work for lighting video as well.
Well said Thorsten, and amazing work btw.
Been using large ripstop nylon diffusion panels since 1989. Watched a couple Dean Collins videos and built 5 panels for photo school assignments. I immediately preferred the light quality over the softboxes, and so did my instructors, lol.
In 1989 I shot primarily with transparency film on Hasselblad and large format, Photoshop was not yet available, and computers were rather crude. The diffusion panels allowed me to dial in the lighting and contrast “in camera”.
The Los Angeles fashion photographers I assisted all used large silk or ripstop nylon panels with a strobehead, and feathered the light with foamcore or black flags.
25 years later I still use the ripstop nylon panels for my commercial work. Last year bought a couple of small soft boxes for outdoor and location work. I shoot the softboxes through the diffusion panels, much like what you described in your article. A beauty dish fired through a panel is still one of my favorite lighting modifiers, just gorgeous light quality!
Today I use the panels in 4 different ways: As a V-Bank (book-ends), in front of a mono-head, as extra diffusion for a soft box or octabox, or as large reflector fill.
Ripstop nylon panels may not be as sexy as a $1300 7 foot Elinchrom Octa Bank. But if you want a large and inexpensive diffused light quality….the ripstop nylon costs about $25 for each 5’ x 7’ fabric. I got mine at Hancock Fabrics.
Link to white ripstop nylon @ $5.59 per square yard: http://hancockfabrics.com/white-rip-stop-fabric-1430727.html#q=ripstop&…
In 2008 I made a series of 20 minute videos demonstrating how I use the nylon panels for studio & location fashion and portrait shoots. You may watch them on my FStoppers profile page or here:
http://thorstenottphotography.com/updates/part-3-studio-indoor-portrait…
http://thorstenottphotography.com/updates/part-5-studio-location-fashio…
4 images shot with a single monohead and diffusion panels and book-ends below.
Thanks for sharing your info.
Hm, wish I would have known this trick before my last shots, now I just used huge octa which gave quite the same effect, but still harder light.
Oh well, there's always 'next time' :)
OT: The opposite is actually a little bit of a challenge as well - extremely hard light. I tried out many things and found two things that work: Dedolights for very small subjects and the light blaster (without slides) for bigger subjects. Sunlight is hard too, but for some uses simply still not hard enough.
I love the Hard Box from Profoto to create solar/hard light looks! What do you call light blaster?
It's this speed light modifier here: http://www.light-blaster.com. Let's you shoot through a lens, so you can focus the light to a specific point.
UPDATE: Just checked out the Hardbox. But the shadows do still get unsharp after a little bit of distance. The ideal (extreme) hard light would create a sharp edged shadow meters away. But that's not easy to accomplish. It would have to be a strong point light source. Even the light blaster mentioned is not ideal, because it just focuses a non-point light source on a specific distance from the light blaster lens - but the shadows are still fuzzy.
I never noticed loss of sharpen on the hardbox, but.. maybe.
This tool for speed light looks great, like that tool you have the spot light projectors from profoto and broncolor and also the pulsospot with optical nose that let's you focus the light!
I don't know a lot about diferences of sharpen on an hard light, but, fresnel lens from at more than 15 foot usually looks great! I onlu know the Arris, K5600 and Desisti's.
That is an interesting topic as well, and from what i have seen, the big HMIs do the trick since they are large and hard light sources. In combination with black nets you can create partially cloudy sun. Dedolights are tiny to recreate sunlight on humans.
In order for it to be really hard, the light source would have to be tiny, following the inverse of the credo of "the larger the light source, the softer the light". I'd be really interested in creating razor-sharp shadows - but until now I haven't found the perfect solution yet...
Oh ok, i thought you want to replicate sunlight, which is not always razor sharp even when it gives hard light. Have you tried small bare flashes (zoomable speedlights not studio strobes) at max zoom range and a bit far from the subject....in my experience you can't get razor sharp than that.
Yes, that was actually the first thing I tried. But thanks for your thoughts on this!
Good info here. I "borrowed" on of my dads old 1k video lights and had no way to dim it. (dimmers broke) so I started off with one diffusion panel and it was still a bit harsh. Ended up bouncing/feathering it with the diffuser to get the look right. This fancy diffuser is just a PVC frame with diffused fabric stretched over it.
interesting
That's pretty neat, never thought of that!
Great article! To achieve a similar look would a Westcott Rapid Box along with a deflector plate and diffusion work?
I have not worked with the Rapid Box, but the deflector plate first deflects light back into the box -- then the light bounces from the box -- and then the light goes through a diffusion cloth towards the subject's face. In essence, you get a double bounce of light then through diffusion. Any thoughts with working with this technique?
Here's a Rapid Box link from B&H. https://www.bhphotovideo.com/c/product/1005757-REG/westcott_2035_rapid_…