
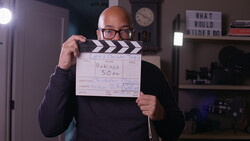
In a way, your journey as a photographer will start out with personal projects. Everything that you shoot for those first few months or years are things that you choose to shoot for fun. Personal projects help you to learn, experiment, and grow as an artist. Actually organizing and creating a series, however, takes a little bit of planning. From brainstorming to gallery showings, I’m going to help you put together a game plan for your next personal project.
Step One: Brainstorm
Let’s start with the planning phase. I always recommend searching for things that you’re passionate about. For those of you that have photography as a hobby, try integrating it into your daily workflow or your day job. This is a great way to spend more time with your camera, thinking creatively and shooting. Maybe you don’t have multiple hobbies and photography is both your day job and passion. Not to worry, there are subjects in every nook and cranny of life.
My time is split between shooting and working at a camera store, so my life is consumed by photography. What I did then was look for a cause or organization that I admired. It took me a little bit, but I slowly stumbled through a few ideas and struck gold. It started with something pretty simple: I had heard of a high school classmate that was training with NASA and majoring in aeronautical engineering. The NASA part was what intrigued me. I figured that there was no way for me to create a project about astronauts or NASA (yet, you never know). However, this classmate could be a piece of the puzzle. I pondered what else to do with the project and spoke to friends and fellow artists. Eventually, it morphed into a series of people doing extraordinary things that are making progress in science or politics.
This idea fell flat on its face. Like all ideas, projects, or inventions, these personal photo series are trial and error. Fortunately, I happened to know the right person who said the right thing at the right time. I was with my friend, hanging out, and I mentioned that I wanted to do this photo series of people doing cool and important stuff. They told me to email her friend, who was a Director of Content for TEDxOhioStateUniversity. This may have been the best news possible.
For those that don’t know, TED (Technology, Entertainment, and Design) talks are conferences in which speakers from around the world (or a local community in the case of TEDx) come to speak on their respective fields, passions, or experiences. Every vocation from science to politics to art shows up at one point or another. TEDx conferences are independently organized events that hold the title and format of TED. TEDxOhioStateUniversity is Ohio State’s TEDx conference. All of the speakers are Ohio State students or faculty, but OSU is an enormous school with a ridiculously diverse body of academics. That was good.
Step Two: Preproduction
I sent an email out, got a response, and then, set up a meeting. In my initial email, I gave them a rough outline of my idea, how I thought we could execute it, and the final outcome. At the meeting, I basically expanded on that initial email. They naturally had a few questions like why I wanted to do the project, how, etc. Naturally, they addressed the elephant in the room: was I looking for funding from them? No! This is a personal project. Getting funding from the organization/group that you reach out to is extremely unlikely. Because you’re asking for permission from these individuals and for them to volunteer their time to your project, keeping money out of the equation makes for a better working relationship. This first meeting went really well.
Expect progress to be slow. Rarely will these projects come together quickly. At the end of the meeting, they said that they would send her notes and my contact info to the board of the TEDx organization. Because the organization was relatively small, there weren’t a lot of hoops or levels of importance to jump through. After a few days, they emailed me and asked myself and my colleague to meet with them to go over the project and basically go over the details again with them and then answer some of their questions regarding the specifics. Expect to explain your project so many times that you could give a TED talk on it.
Thankfully, they were more than willing to let us create these portraits and to work with the speakers. The working relationship with this board of directors was relaxed, because the only things I needed from them were a list of emails and permission to display the work at the conference. The less you ask of your subject, the better. Keep that in mind for your professional work too. After talking with the board, we were given a timeline of the events between the day of our meeting and the conference. The process for scheduling the shoots was a little tricky; I’ll explain in a bit. We had several months, so time never came to be an issue.
They explained to me that they had just selected the speakers (by just, I mean a day or two before I sent the initial email — talk about good timing). This was good news for me because they had to have the press portraits taken of each speaker. Bad news, though: they already had a photographer hired. Good news again: all of the speakers would be in the same place at the same time. In fact, this was the only day aside from the conference itself that they were all together in the same building. This meant that I could at least meet with all of the speakers and explain my project to them and get their input and seal of approval.
To my surprise, I received an overwhelmingly positive reaction. Remember, the less you ask of them, the better. The TEDx board explained to me that the speakers would have coaching sessions for their talks with a member of the TEDx organization in order to refine and consolidate their talk. I then explained to the speakers at this photo session that I would hopefully be meeting with them during one of their coaching sessions to create the portraits. The more convenient it was for them, the better. I will continue to reiterate that point, because if you forget it, your project may fall apart.
After this meeting, I waited a little while. Patience is key. OSU went on their winter break about a week after this meeting, so I couldn’t get anything done. I kept myself distracted by doing an awful lot of test shoots.
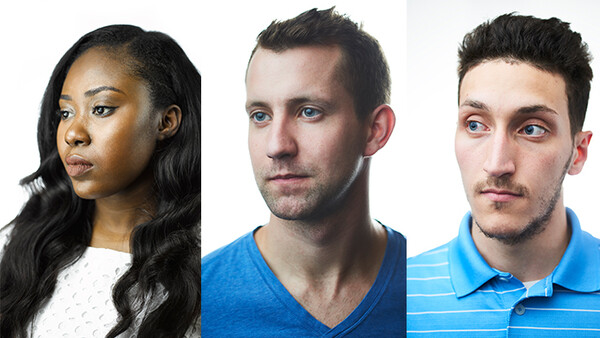
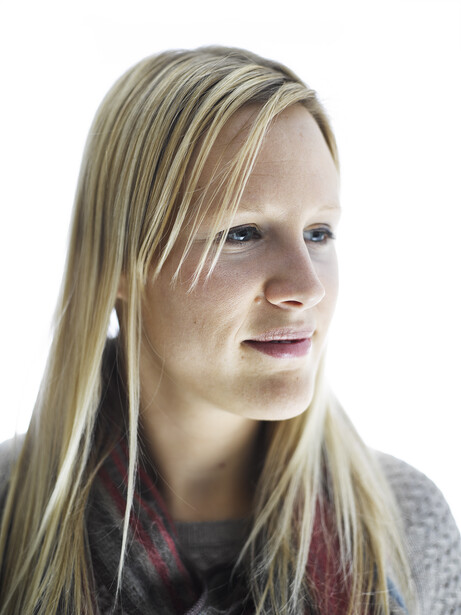
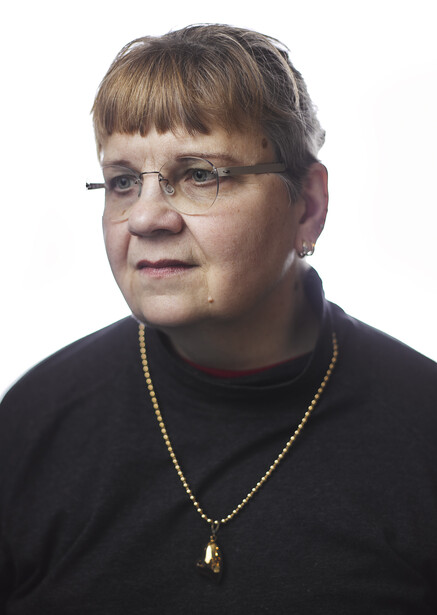
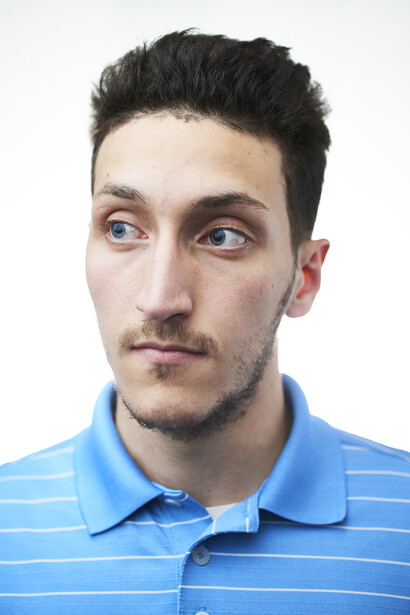
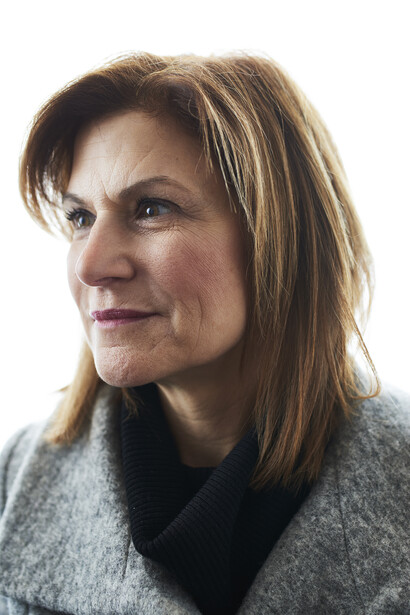
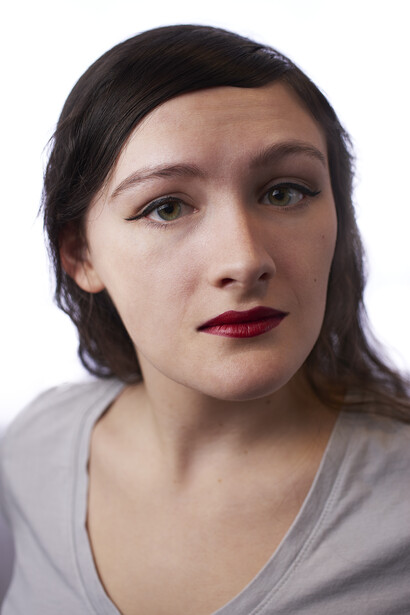
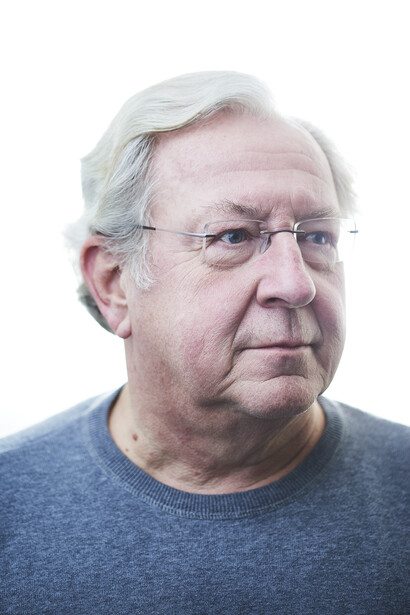
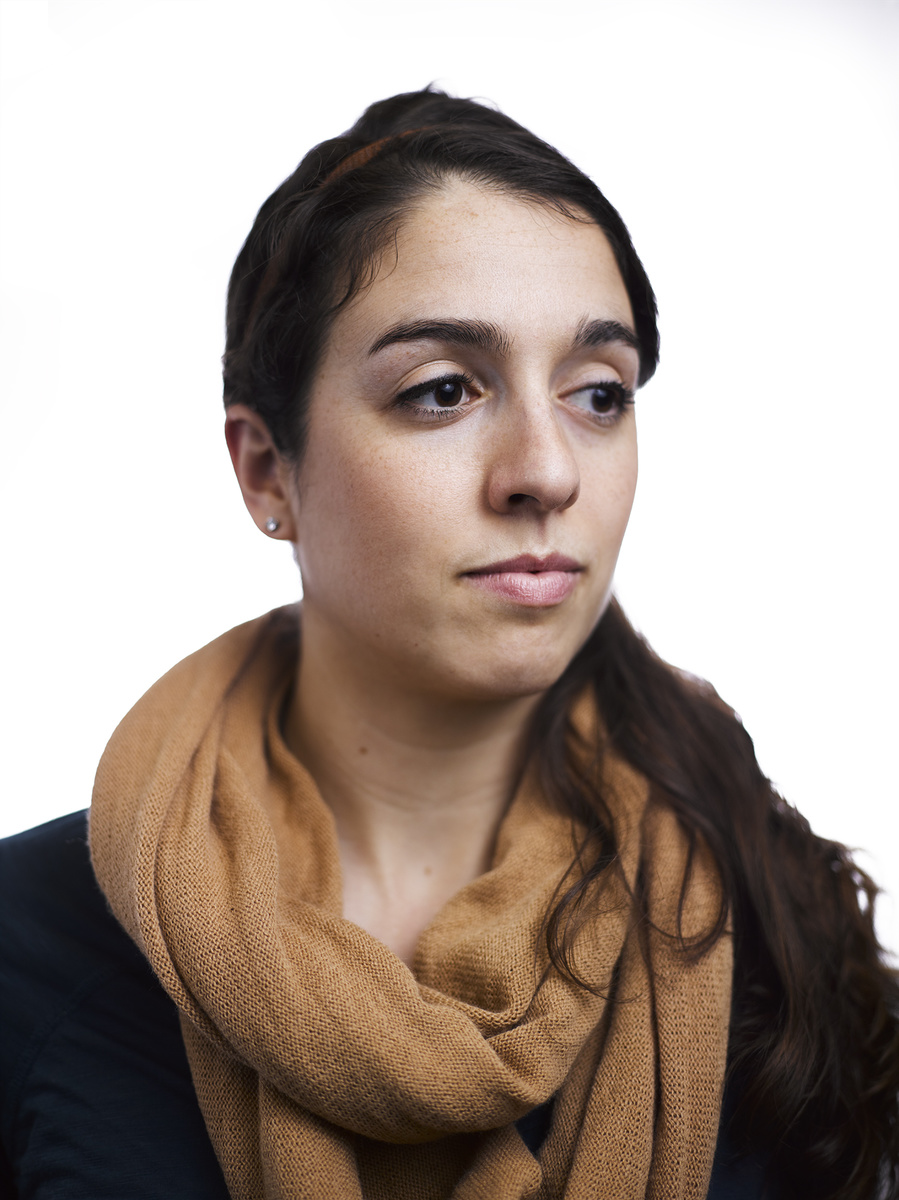
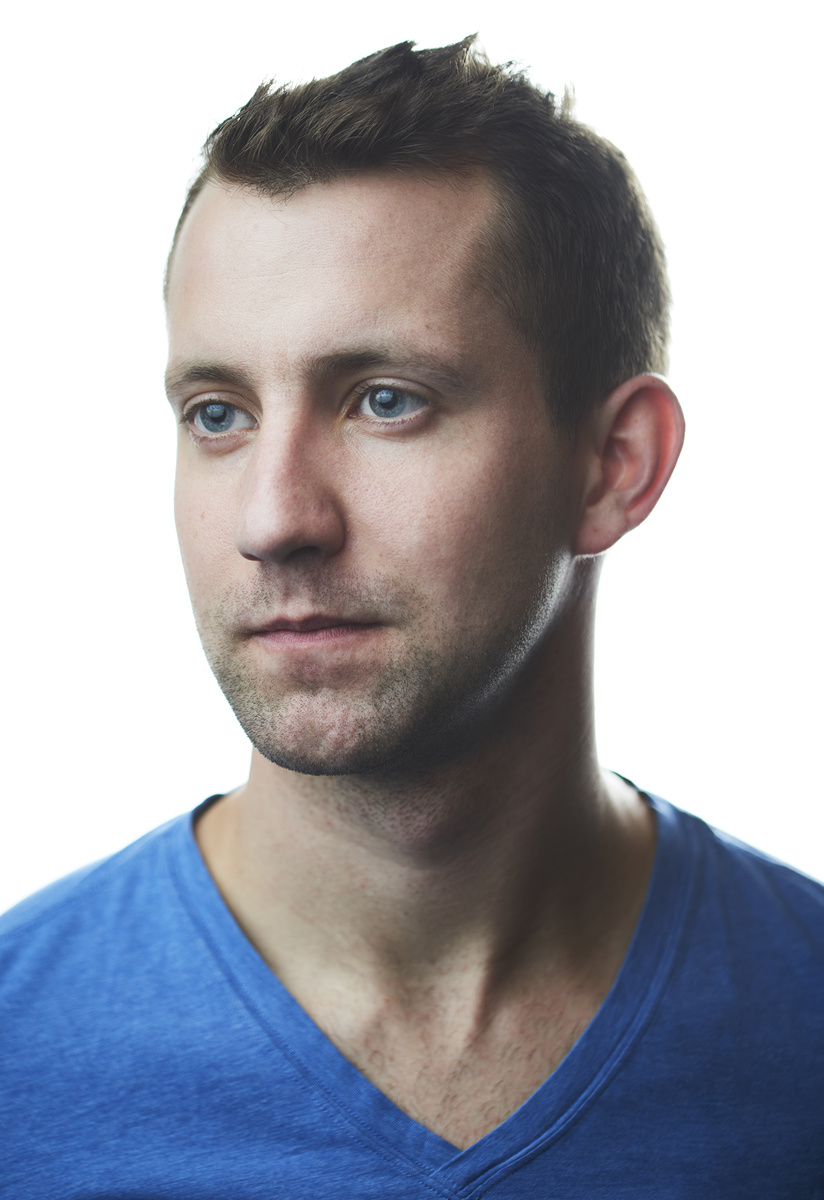
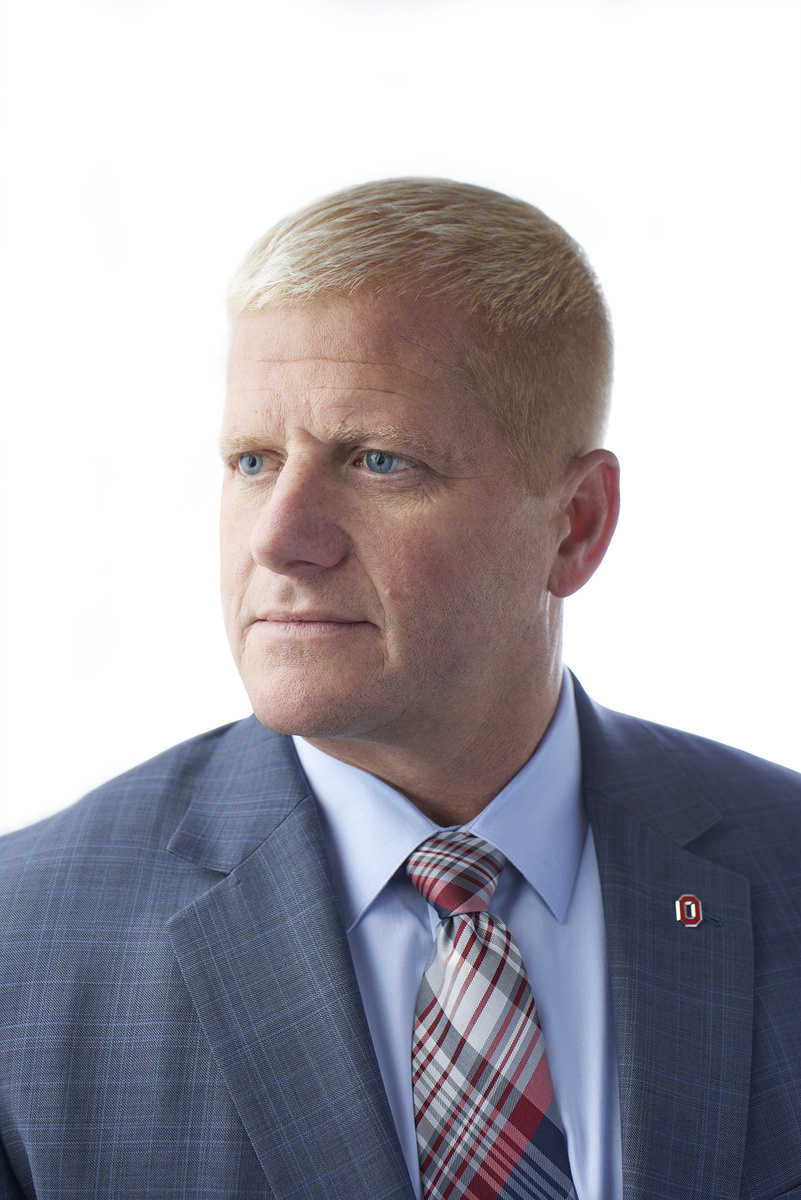
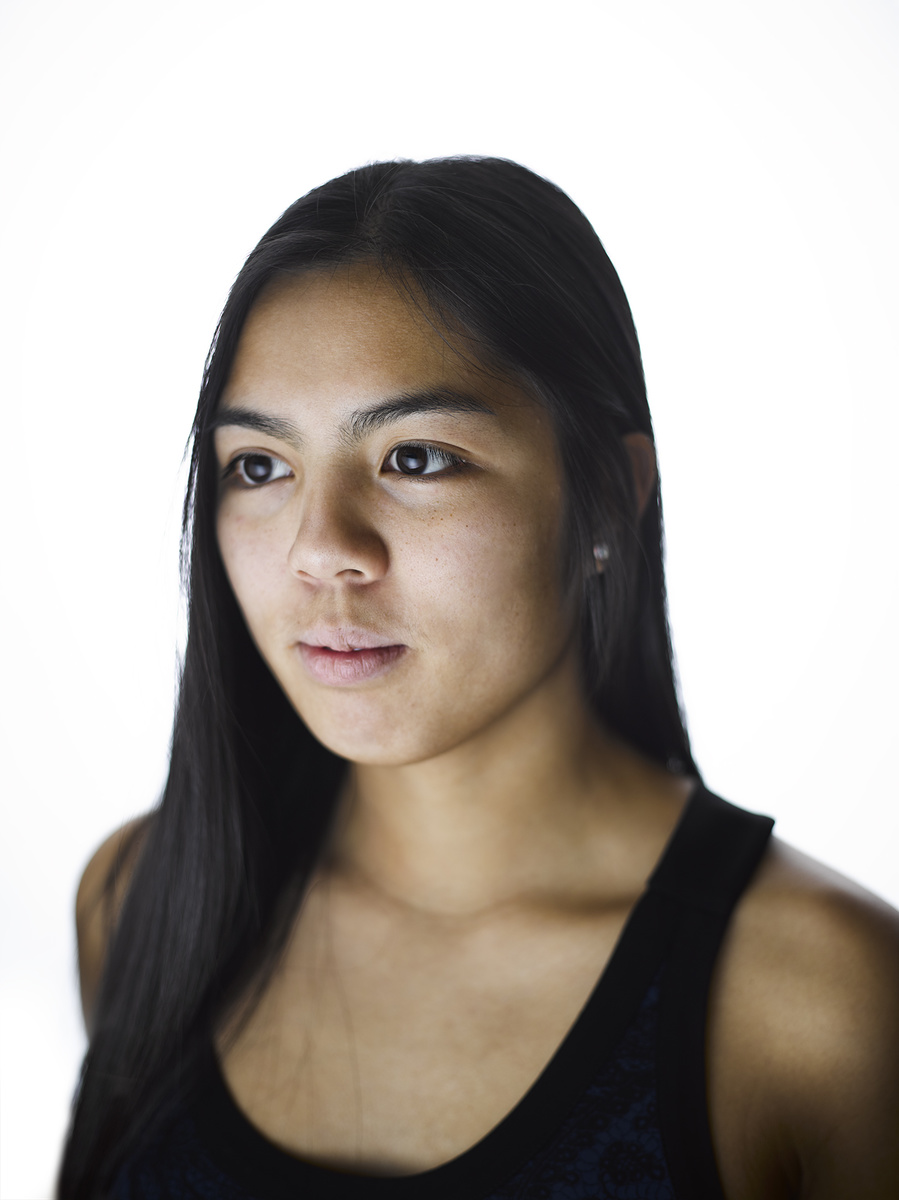
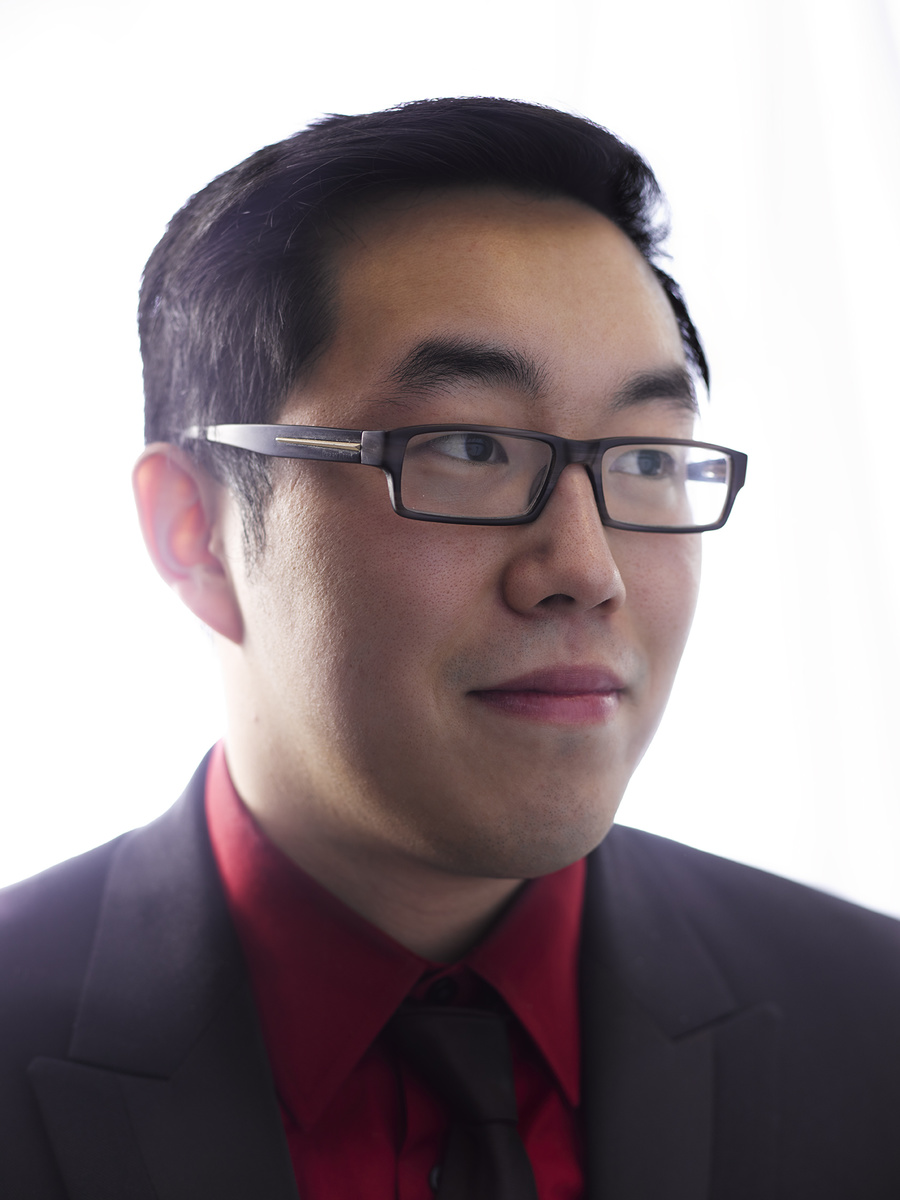
Establishing an overall style for your series is paramount to its artistic success. Alone, a good portrait is a good portrait. Together, however, they all need to look like they belong. While my website has a certain level of diversity to it (yours should too, but only a little), this project (and yours) should not. I thought a bit about the nature of the subjects and tried to form a look around that. I decided on a very high key, yet contrasty look. It took me a few shoots to work it out. I’ll explain the lighting in depth during step three.
After winter break, I shot out emails to every speaker. I reminded them of the project and what I wanted to do and the procedure for how I wanted to shoot it. I got a decent amount of responses and got the ball rolling.
Step Three: Production
Scheduling was tough. The speakers, being working professionals, were constantly busy. I often had to communicate through assistants and secretaries in order to squeeze myself into a 15-minute slot. I planned the shoots to be quick and easy, and the setup evolved throughout the entire project. This ended up being important as the project would not have worked if I tried hour-long shoots. Planning helped me avoid looking like a fool on set.
Once I had time scheduled, it was pretty simple. I’ll break it down.
- Arrive, shake hands, decline coffee (absolutely no time), explain the next fifteen minutes.
- Set up stands, attach lights, plug in triggers, do a quick test to get a rough exposure.
- Ask them to step in, dial in exposure, shoot a bit.
- Shake their hand, pack up, talk about their topic and their background with their vocation.
- Shake hands again, leave.
- Remember, this will only go quickly and smoothly if you practice it and know exactly the shot you’re trying to get. On only one or two shoots did I had the opportunity to try two setups. I think the most I shot in one session was 60 frames.
The lighting was crucial. I needed it to be simple, yet effective and dramatic. The first few shoots were a bit troublesome for one reason: white seamless paper. Taking backdrops around one of the biggest college campuses is a huge pain, because we not only had to carry the paper, but also the stand kit for it. Reducing your stress on set has a lot to do with setup time. Because of this, I ditched the paper. I did try a felt-like backdrop, but I had issues lighting it, as the fabric actually let light through. I settled on using a light modifier as a backdrop. This ended becoming my key light as well with the use of a reflector. Westcott’s 7’ Parabolic Umbrella was my weapon of choice, as the size allowed for much better framing. A large reflector was placed either to the left or right of the subject to illuminate their face. I could fit this entire lighting setup into one large lighting case. No longer would I need to make multiple trips for gear. This lighting setup was what I used for the rest of the frames past the first five.
I shot the images either on a Mamiya Leaf Credo 60 or my Nikon D800. Lighting was a mix of either an LP180R, my Nikon SB-800, or in one instance, a Profoto B1.
Step Four: Post Production
I edited this as I went along. Truthfully, I may wait to edit all of the images together in the future for continuity reasons. I’m certainly thrilled with how they came out, but I feel that it could look even better. Consistency is important in any series.
Editing was a combination of Capture One and Photoshop CC. I used Capture One to add a little clarity, recover shadow detail, and adjust white balance and global exposure. I don’t like to make too many adjustments in Capture One, because I know I’d rather have that info in the final PSD file that I print from.
From Capture One, I use the "Edit With" function to export the image to Photoshop CC as a TIFF. Always use TIFFs if you know you’re printing; you won’t lose any detail this way. Upon opening the image, I always make a new layer and do some cleanup. While I wanted the images to be natural and free of extensive skin smoothing, there were some things to be done. Everyone gets acne from time to time: that's not a natural feature, and it's often distracting, so it was removed. Occasionally, I had to do some tone-matching with a curves layer. After a little dodging and burning, I added an extra curves layer for the final touch of contrast. The images were saved as PSDs and as TIFF files. I kept the PSD of each frame in case something needed fixed. The TIFF went to the printer.
Each print was made on an Epson P7000. Ilford was kind enough to send me two 24” rolls of their incredible Smooth Pearl paper. We used this to print all our tests and final images. I made 15 prints of 15 speakers, and each came out of the printer with incredible detail and tone. There’s a feeling that you get from seeing your work printed at a such a large scale, and every print gives you a feeling of awe when you see it finished. I can guarantee that there’s a print shop near you that can print whatever size you desire should you not have access to your own printer.
After printing them, they were rolled up and put in sleeves before being taken to my colleague's house. We decided that we were going to mount the prints to foam core instead of matting or framing. The reasons for this were basically cost and portability. Custom framing for prints of that size can be obscene. Trying to move prints of that size is difficult enough on foamcore, let alone heavy frames. We bought several sheets of foamcore and a few cans of spray mount and went at it. The foamcore sheets were 40x60”, perfectly sized for two prints. The foam core and the back of the prints were sprayed with the adhesive before we laid the prints out and smoothed them down using a squeegee. We trimmed it right down to the edges of the print for a clean, frameless look. From here, all we had to do was hang them. Using some 3M sticky tabs, we adhered them to the stone wall in the lobby the evening before the event. We were finally done. In all, it was a great project and one that I hope to continue with at other conferences. Let me highlight a few key things to keep in mind.
- Be patient.
- Understand your subject
- Make everything convenient for them; otherwise, your project may fall apart.
- Be quick; time will likely be slim with your subject.
- Have passion for what you’re shooting.
- Personal projects are for growth and learning.
For anyone feeling like they’re in a creative rut, I highly recommend creating a series of your own. With full creative direction and control, you’ll learn a lot about photography, yourself, and forming professional relationships.


Join the Fstoppers community for free
-
Post comments and join in the discussions
-
Browse the site ad-free
-
Share your work and get featured in the community
-
Compete in the photo contests for fun and prizes
9 Comments
Spencer, what an enjoyable mix of vision, gumption to start noodling with ideas and then the sheer volume of dogged legwork to pull it all off. I'll keep on the lookout for your future articles. Appreciate the thoroughness.
Here's a simple yet very pleasing experiment from a shoot last week:
http://lifeascinema.blogspot.com/2016/03/citizen-kane.html
These fluffy, no brainer articles are fine. But It’s incredibly odd that Fstoppers, a photography/photographer based community has yet to post an article covering what is going on with B&H right now.
Hey Alice - what's going on with B&H? Pardon my ignorance as I live in the UK...
You will have to use Google.
>alice
Personally, I wouldn't classify Spencer's article as "fluffy." For me, it was educational and inspiring. That's what I come here for. I get breaking, hard news elsewhere. We probably all do, right? Just as I don't find it "incredibly odd" news sites don't run thoughtful feature-length, photo-enthusiat stories like Spencer's. And if you're trying to hint at a conspiracy or lack of something then you should come out and say it.
I like to think that people are smart enough to get what I am "hinting" anyway. This isn't a news site, but when something "new worthy" happens in the photography community, I expect it to be discussed in forums like this.
If you don't see why Fstoppers SHOULD be covering this particular story, and regular news articles don't cover "photo-enthusiast stories like Spencer's", may the universe be with you. Your analogy is bogus btw, and I won't indulge you any further.
I'm not looking for foreign policy here, I'm talking about a major photography related news story, that is not being discussed in a major, photography based community.
I see Fstoppers trying so hard to find relevant content on a weekly basis, yet here is a story ripe for the picking, and crickets.
Very nice and inspiring article ! Just few questions : why did you choose that people don t look at the camera and also not on the same side to give more homogeneity of your work ?
I felt like it may have been too intense for the subject matter. While I wanted a fair bit of contrast in the images, I wanted them to feel sort of peaceful and serene. As far as them looking in different directions, I think it would've have been too monotonous and the series as a whole may have been uninteresting.
It's a good example of a good idea and following through with the right people to make it happen!
But as a photo series there is a lot of inconsistency in the photography, the color temps are sort of warm or cool the lighting style changes a lot from person to person weakening the "series" look and feel.
Some of the folks look pensive/sad/melancholy a couple look thoughtful, I don't think they all should be happy smily face but there's a certain glumness to most of the shots you showed, which is emphasized by the repeated look of the subjects. Is that the thread that ties them together...?