
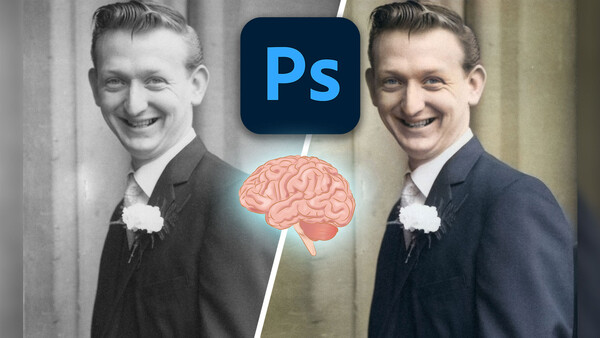
Did you know that using artificial intelligence wizardry, Adobe Sensei, Photoshop CC can now colorize your black and white photos in just a few clicks? Well, find out how to do it, and how to do a little tweaking to make some realistic colorized images from your black and white photographs.
Using Adobe Photoshop CC's new neural filters we can fast-track the process of colorizing black and white photographs. The beta version of the Colorize feature in the Neural Filters in Photoshop CC is powered by Adobe Sensei and does a fantastic job at colorizing black and white images. But it does need a little helping along, so after running it through the new tool I'll be walking you through some additional steps to perfect the colorization process.


Start With a Neural Filter
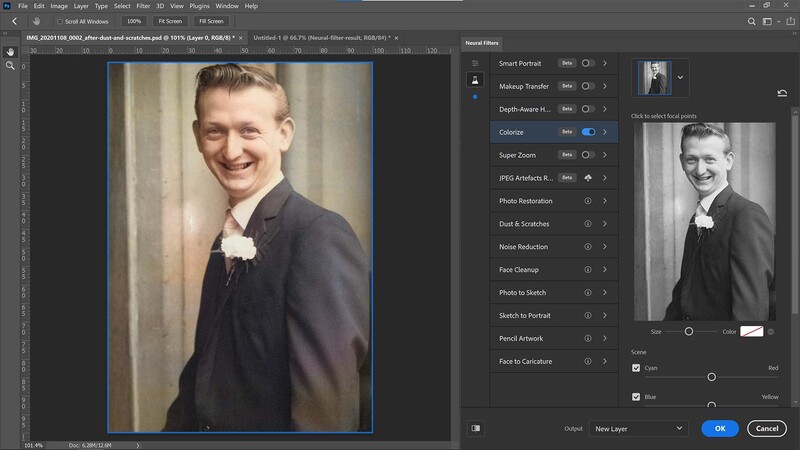
The first step we'll take is to use Photoshop CC's newest feature: neural filters. Head to Filter>Neural Filters and you'll spot there are six beta tools to choose from. We'll head to the Colorize tool by clicking on it. At this point Photoshop CC calls in Adobe Sensei to run a scan of your image and process an automatic colorization process on the black and white image. Impressively, this does a fantastic job at coloring in the photograph.
As you can see in the screenshot above the jacket is mostly colored blue, the skin tone is quite close on the face, and the stone behind is realistically beige as well. This gets us 50% of the way there with choosing colors and shades for our scene, but as you can see there are many areas which could be improved upon such as the bottom-right of the jacket which features magentas and yellows. The face doesn't look quite right either and there's some blotching on the stonework behind our subject. But there's more you can do in the Colorize filter.
Set Selective Pins
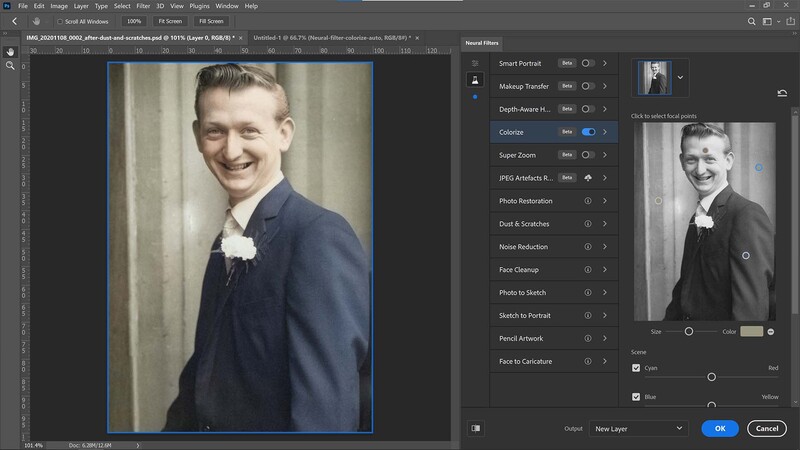
In the thumbnail on the right of the window we see an option for dropping pins on the photo. From here we can choose a color to correspond with each pin dropped (with a color swatch box) and a size slider (to determine the spread of the affected area where the pin is placed). I spent some time dropping in four pins, one to the jacket, another to the face, and then a couple on the stone either side of our subject.
Analyze the Results

After clicking OK Photoshop runs the process and brings you back to the original document. We now have the original black and white layer beneath the newly colorized layer. At this point it's worth taking a step back and looking at the photo to decide how to improve things further. If you want to stop here, that's fine, the software has done a brilliant job in just a few clicks of colorizing this black and white shot, but I can spot a few issues here that need addressing.
Desaturate White Clothes
Unfortunately, I wasn't quite selective enough with my drop pins and the shirt is tinged with magenta tones. So I'm going to duplicate the colorized layer and desaturated it (Ctrl+Shift+U, or Cmd+Shift+U on a Mac). Then I'll add a layer mask to reveal only the white shirt and the white flower in our subject's lapel.
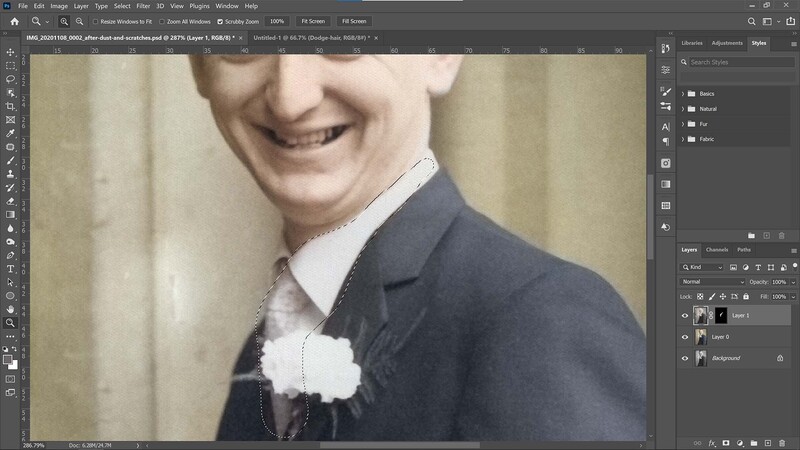
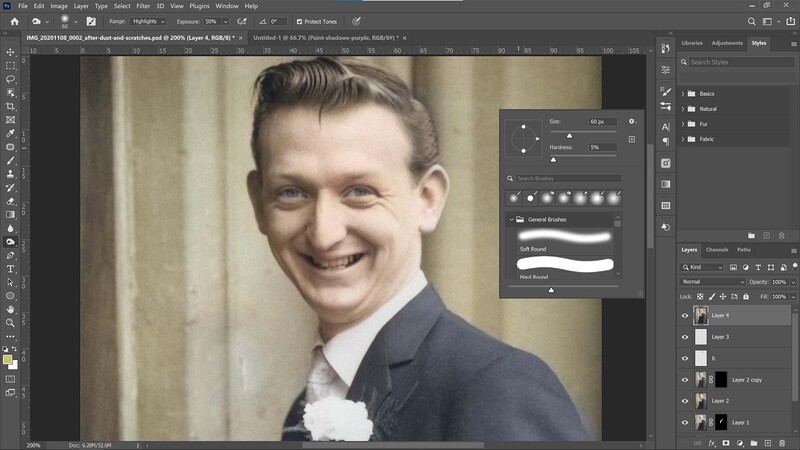
Dodge the Hair
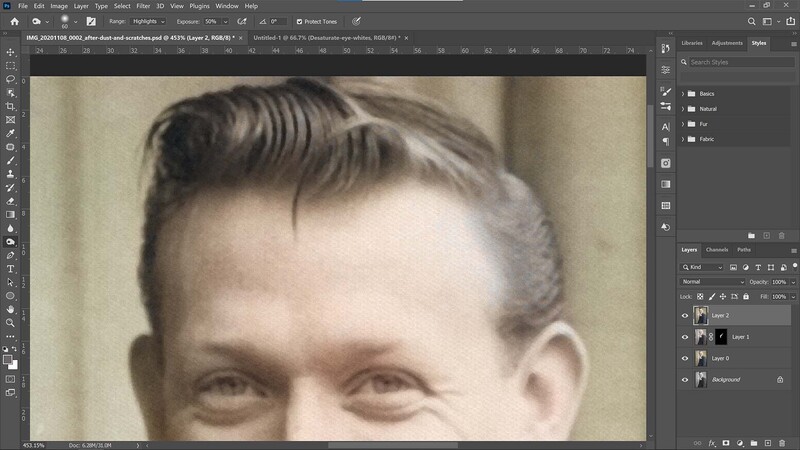
The hair lacks tonal depth with the highlights and shadows both blending to a midtone. In order to correct this I created a new layer and merged all the visible layers into one (Ctrl+Alt+Shift+E) then use the burn tool set to 50% and highlights to darken the shadowed areas of the hair. I also used the dodge tool set to 20% and highlights to brush in the bright areas of the hair.
Change the Eyes
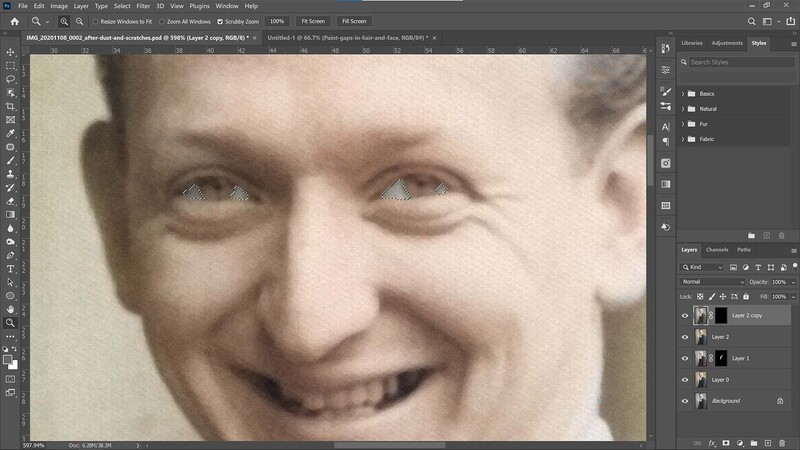
Looking closer at the portrait I notice that the colorization process has left the eyes the same color as the rest of our subject's skin. So I duplicated the layer, desaturated it again, and brushed on a mask at 75% to reveal only the whites of the eyes. I didn't mask it in full because there would be some natural light bouncing into the eyes, applying some color.
Paint Over Gaps
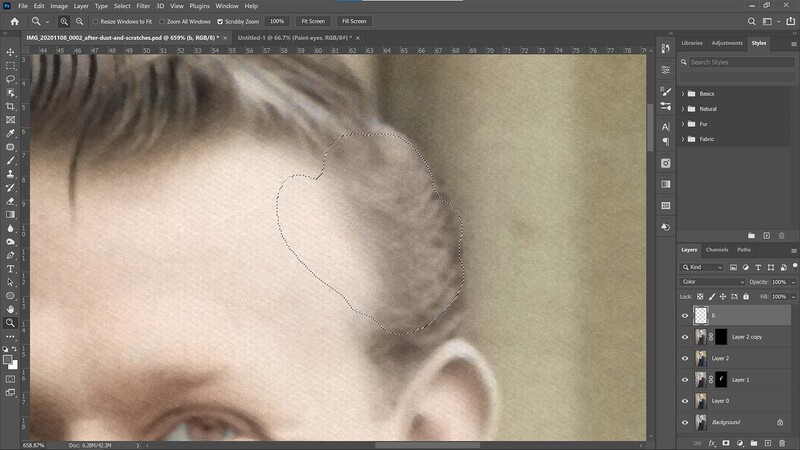
There was also some color missing on the side of the head, so I used the eyedropper tool to select the pinkish-brown tone from my subject's brow and then made a new layer (Ctrl+Shift+N or Cmd+Shift+N on a Mac) and painted the brush over the area. I then set the layer blending mode to Color to allow the area to become saturated.
Color the Eyes
I wasn't quite finished with the eyes because after a quick phone call I discovered that my subject's iris' were not brown but in fact a steely blue. So I used the same technique as in the previous step where I made a new layer and brushed in some weak gray with a tinge of magenta. I applied a Color layer blending mode and dropped the opacity to 71%.
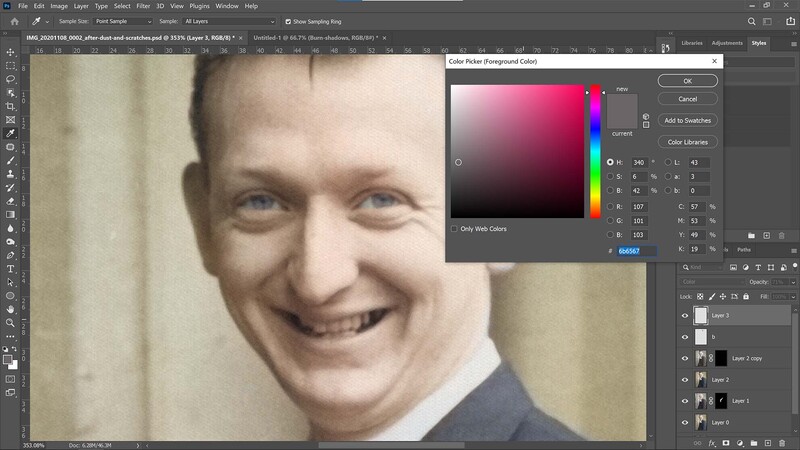
Burn Shadows
To improve the shading on the face I decided to merge all the visible layers to a new layer and use a soft burn toolset to 50% and highlights. I then set about burning the shaded portions of the face, including crease lines around the eyes. I felt as if this gave much more dimensionality to the photo and more realistically emulated the shading in the jacket and stonework behind.
Brush in Purple
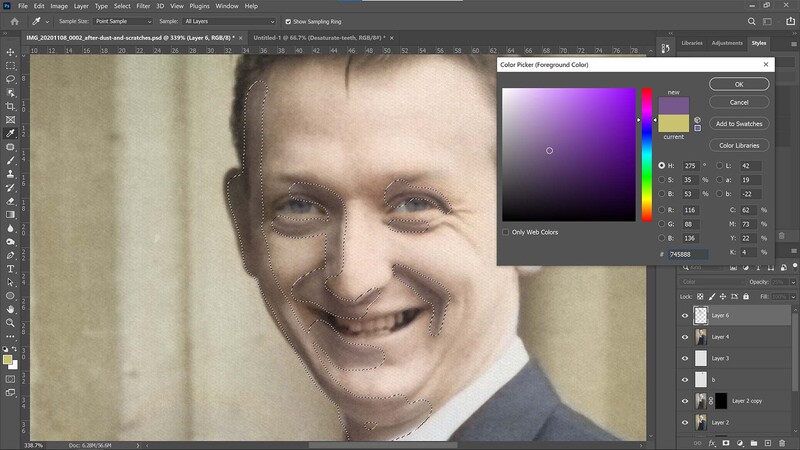
Nobody's face is all one color all the time, so it looks strange to have our subject one continuous muted orange. So I made a new layer to paint some color into the shaded side. Shade is normally much bluer than an area lit with direct sun, and knowing our subject's skin tone is already slightly warmer, I decided to mix a little blue and red to create a purple. I painted this in with a soft brush and then changed the blending mode to Color and dropped the opacity to 25%.
Correct Teeth

Following on from my desaturation theme in previous steps I duplicated a merged layer and used the Hue/Saturation tool to colorize the photo to a grayish brown. I then added a layer mask and selected only the teeth so that they'd look more realistic than the existing orange color they were.
Spot Any Mistakes
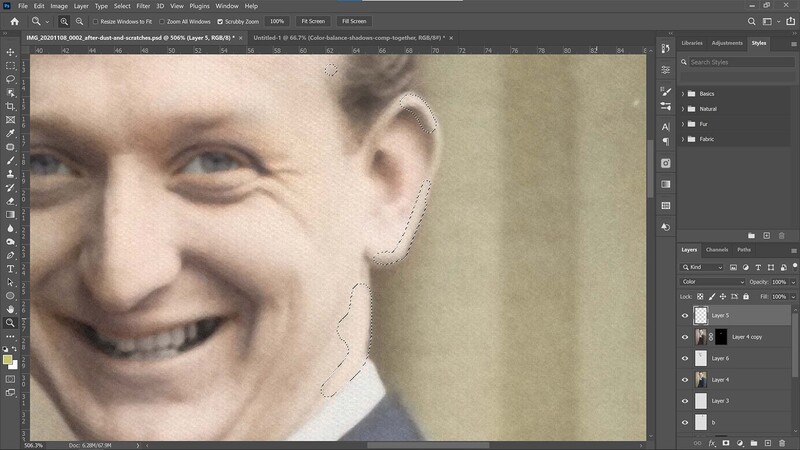
After some careful scouring over the whole photograph, I noticed there were a few sections that were devoid of color. This was a mistake from using the Colorize filter earlier which didn't pick up everything in the shot. It mostly happened around areas of low contrast such as the side of the face here. So I copied my earlier technique of brushing in color and adjusting the blending mode to Color.
Balance the Color
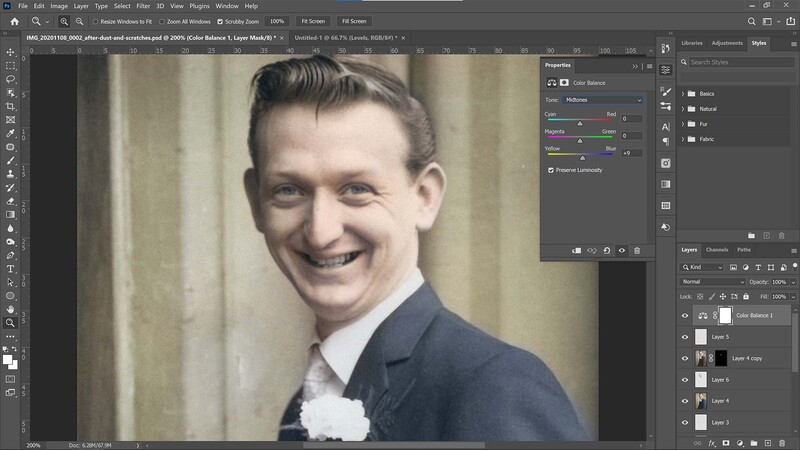
The whole photo is now really starting to come together and it looks so much better than what I started with. But I still wasn't convinced that the colors were quite right. I added an adjustment layer and adjusted the Midtones to +9 on the Blue slider. That's because I can quite easily tell that the subject is standing in shade thanks to the soft, wrapping light on his face and jacket.

I also boosted the Cyan (-7) and Yellow (-4) in the shadows to eke out a little more warmth in the subject as the previous step made things a little too cool and blue. Now, I think I've struck a good balance between the skin tones, the jacket, stonework in the back, and the brown hair. It's nearly done.
Levels Adjustment
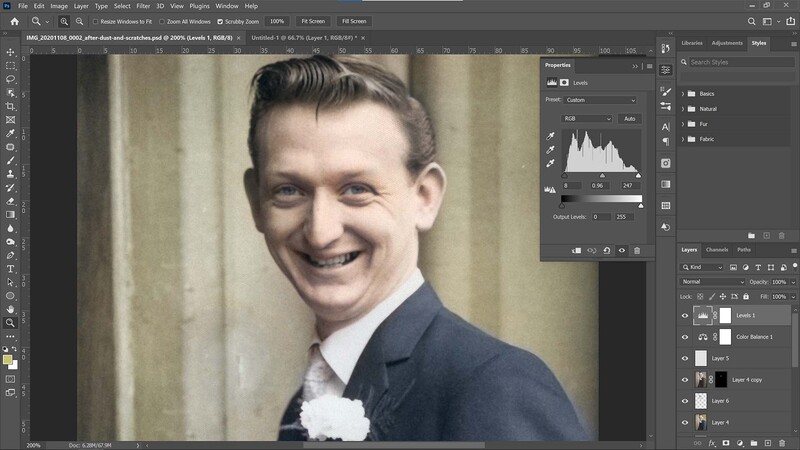
One final adjustment I wanted to make was to introduce a levels adjustment with the shadows and highlights brought in slightly to boost the contrast. This made the portrait a little darker than I wanted so I adjusted the midtones to 0.96 to lighten things slightly. I could definitely spend much more time fine-tuning the portrait, and I think I'd like to experiment with more painting of the skin and eyes to introduce the complex colors and tones that are present in real life. However, I feel the balance between a quick colorization thanks to a new filter and a little time spent fine-tuning the portrait has made a realistic colorization of the original black and white photo and transforms it into a whole new light.
Main image illustration by Sykes Office used under creative commons


4 Comments
Horrible and bloatware while program error popups are all over Photoshop right now. Stockholders don't excited for fixing software issues, just crap most people won't use.
For everybody's sake there at Adobe, I sure hope this works on people with dark skin, too!
future is now )
that looks absolutely amazing