

Non-destructive editing is crucial to preserving original image detail. It keeps the highest quality image available and will allow for countless re-editing in the future, but how do you do it in Photoshop CC?
Right from the moment we capture a photograph we're trying to preserve as much detail as possible. We keep ISO low to reduce noise and keep shutter speeds fast enough to make sure things are sharp and clear. So why should it be any different when editing images in Photoshop?
Without knowing you're probably degrading image quality through basic editing techniques in Photoshop CC by adding filters and adjustments that degrade the photo. But fortunately, there's a way to edit non-destructively in Photoshop to preserve the image detail. In fact, there's more than one way, here are nine different methods you can use to edit whilst preserving detail, whether you're working with raw, JPEG, or TIFF files.
1. Use Adjustment Layers
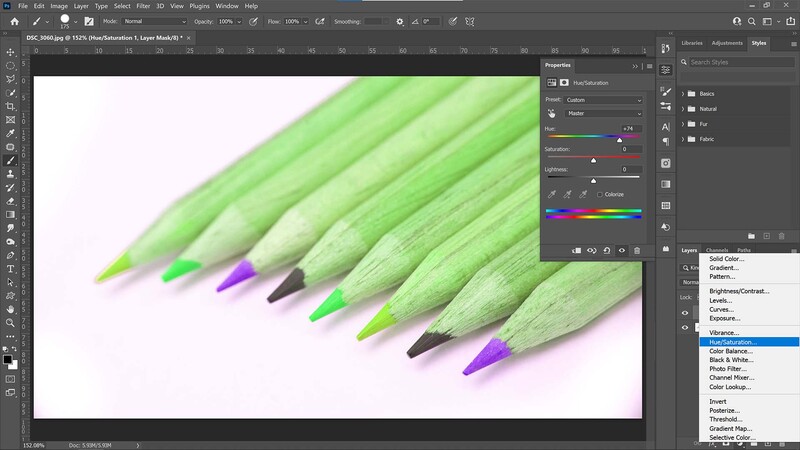
An adjustment layer can be added to any image file open in Photoshop to allow for non-destructive editing. They sit on a separate layer and make changes to the layer (or layers) underneath in the Layers palette. Adjustment layers can be responsible for color and tonal adjustments such as exposure, color balance, and the channel mixer.
2. Transform Layers to Smart Objects
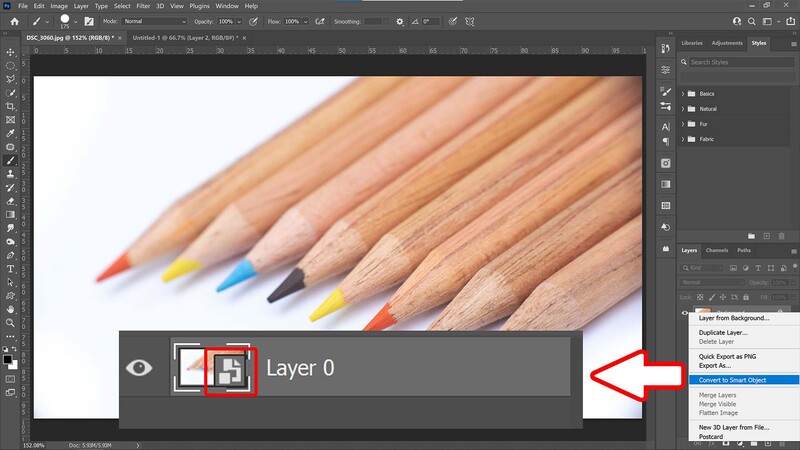
If files need to be rescaled, warped, or rotated then the best way to process them in Photoshop CC is to transform them into Smart Objects. Smart Objects enable non-destructive editing for the aforementioned and also give rise to the use of Smart Filters which also edit non-destructively. To do this simply right-click on the layer in the layers palette and choose Convert to Smart Object. The layer is converted when you see the little paper icon in the layer thumbnail. To switch back right-click again and choose Rasterize Layer.
3. Use Smart Filters to Make Changes
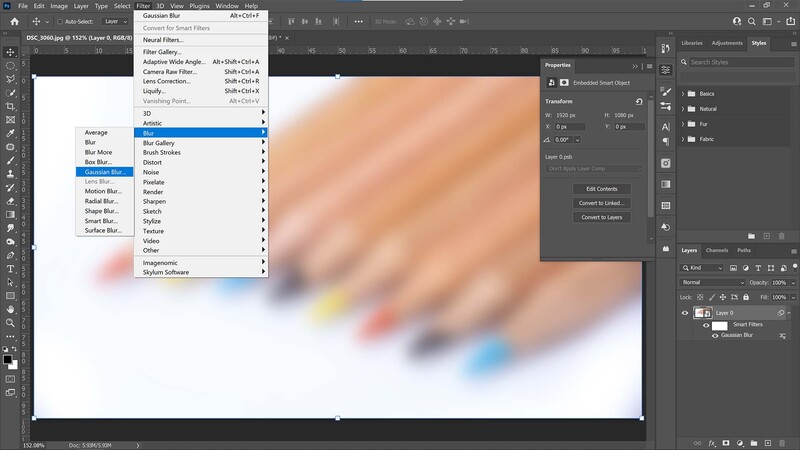
Once an image layer is converted to a Smart Object filters can be applied using the traditional methods. Head to Filter at the top of the window and choose from any of the filters in the drop-down list that appears. In this example I'm using the Gaussian Blur filter which I accessed from Filter>Blur>Gaussian Blur.
Photoshop will then process the request and apply the Smart Filter to the layer, with the filter appearing in a sub-layer beneath the layer. Each filter you apply to this layer will now appear beneath it under the sub-layer Smart Filters. From here you can make them visible or invisible by clicking on the eye icon, or if you wish to make changes simply double-click any of the filters for the respective edit window to appear.
4. Adjust Tonal Values With Smart Objects
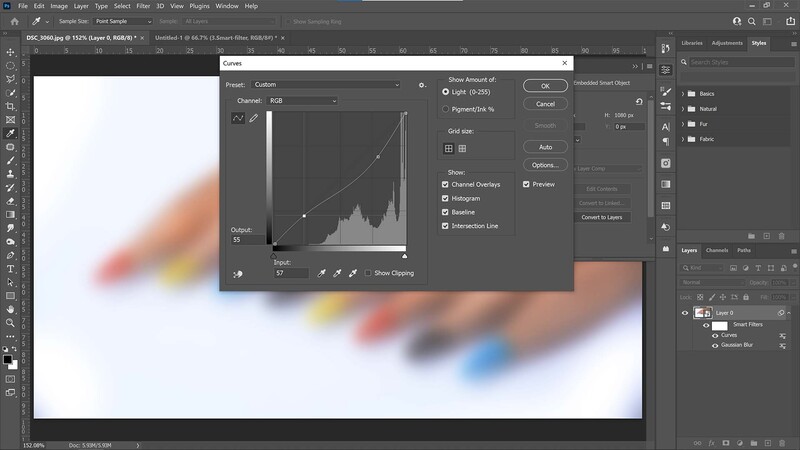
It's not just image filters that work with Smart Objects. Standard adjustments such as Levels, Curves, and Photo Filters can also be applied using this method. With the Smart Object layer selected head to Image>Adjustments and choose from any of the options available. The adjustments will appear in the Smart Filters sub-layer in the layers palette right next to the other Smart Filters.
5. Retouch on a Different Layer
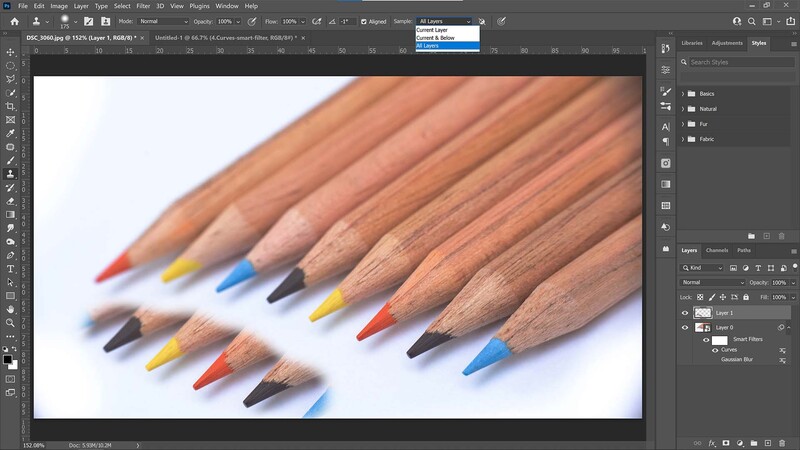
Retouching non-destructively is easy in Photoshop CC. This technique will work whether you're working with a Smart Object or with a Raster layer. Create a new layer (Ctrl, Shift + N, or CMD, Shift + N on a Mac) and grab either the Clone Stamp, Healing Brush, Content-Aware Patch, Content-Aware Move, or Spot Healing Brush tool. In the toolbar at the top of the window select All Layers from the Sample drop-down window. Now make your retouching changes as normal and the changes will appear on the new layer, instead of altering the original layer. You can change these retouches or delete them at any time without impacting the original.
6. Edit With Adobe Camera Raw
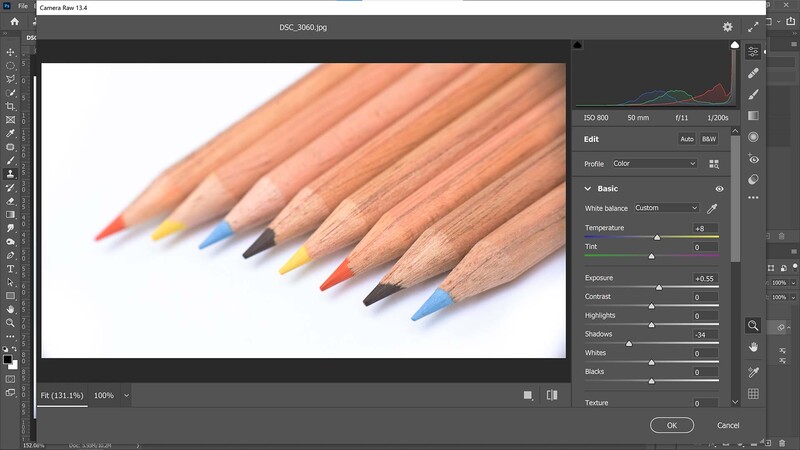
Adobe Camera Raw can process not just raw files, but also JPEGs and TIFFs. Opening a raw image in Photoshop CC will automatically load ACR but if you need to load a JPEG or TIFF simply open the image as normal and head to Filter>Camera Raw Filter.
The way ACR works is to save all the settings changes you make in a separate file on the storage device, usually a .xmp. This means no changes are stored onto the original image file leaving it completely undisturbed.
7. Edit a Camera Raw File as a Smart Object

One downside to editing raw files with Camera Raw in Photoshop CC is that once the settings have been made and the image file has been opened into Photoshop you can't redo them without losing the original edits. That means potentially hours of editing time that needs to be redone. However, you can get around this by opening Camera Raw files as Smart Objects.
Open your raw file in ACR as normal and once you're done editing simply click on the text at the bottom of the window. This will take you to the workflow tab where you need to tick Open in Photoshop as Smart Objects. You may also have the option in the ACR window of opening directly at an Object with the drop-down arrow next to the Open button. Now all you have to do is double-click on the layer and ACR will open back up again.
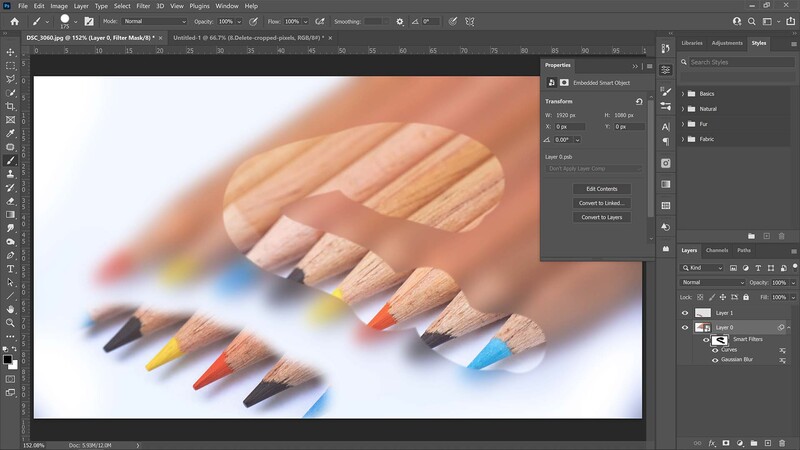
8. Non-Destructive Cropping
Making cropping changes to images is something that's needed on a regular basis to fit all kinds of format options. This can be done non-destructively by selecting the Cropping tool (C), making the desired crop and then unticking the Delete Cropped Pixels button from the options bar at the top of the window. Photoshop will now simply hide all the areas of the image you've cropped, leaving you to alter the cropping later to reveal those hidden areas.
9. All Kinds of Masks
Layer and Vector masks are handy for non-destructive editing because they make changes not the original file but to a pre-determined area set out in the mask itself, therefore the pixels that are hidden don't get affected.
Masks work on almost any kind of layer whether an adjustment layer or the original image layer, but Smart Filters can also be masked with the same technique. Simply click on the mask you wish to make changes to and use the Brush tool (B) to paint over the desired area. Remember the rhyme: white reveals, black conceals.
If you'd like to take your photo editing to a new level, make sure to check out the variety of Photoshop tutorials and plugins that will speed up your workflow and help you create stunning, professional work. Save 15% by using "ARTICLE" at checkout.


Join the Fstoppers community for free
-
Post comments and join in the discussions
-
Browse the site ad-free
-
Share your work and get featured in the community
-
Compete in the photo contests for fun and prizes
5 Comments
1. Always save a copy of the original file before starting post processing.
2. Save the file to the same specific folder with the file’s name each significant step along the way.
That way you can go back to earlier stages without losing all of your work.
3 I like to save alternate versions of potentially “final” versions to compare until I settle on the best one.
4 Now you can safely delete everything but the original file and the best final file to save storage space.
Can't you just save the Ps edited photo as a copy and keep the orginal with all its orginal files?
Yes, but the idea behind non-destructive editing is that you should be able to go back and make tweaks to your edit without having to redo a bunch of work. If later you feel that you forgot to retouch a hair or maybe you blurred something too strong or didn't like the color grade you applied, then you should be able to go back and make that correction without having to redo all the work that happened after that or reconstruct all the layers above that correction.
Thanks Thatcher I see. One more question though...if I've saved a copy of the edited photo can't I just go to it and edit from where I left off? Or do I have more flexibility if I do the complex editing described in the article?
Any ideas on using blending modes? I tend to work on layers in different blending modes to make changes to a picture. Mostly 'color' or 'luminosity'.