
Rawtherapee and Darktable are two advanced editing programs for photographers. The best part is they are free. But which one suits you? Here, you’ll find out.
Free and Open Software Is Surprisingly Useful
During the last months, I spent a lot of time working with free and open programs for photography development. I got my hands on the popular software Darktable and RawTherapee. While both of them were surprisingly working well, they somehow couldn’t completely replace Adobe Lightroom. But, what are we talking about? A yearly subscription plan for professional creatives competing against the power of open software and community-driven development. Of course there will be some downsides.
But I was also surprised how small these were. You can read how close RawTherapee’s usability and editing interface comes to the mighty Adobe Lightroom in my last week's article. And here, you will find out about some surprising advantages of the more advanced but also complicated Darktable.
Strengths and Weaknesses of Darktable
Darktable was the first software I used after a decade of experience with Adobe. In the beginning, it was really hard to deal with new concepts of editing and to not have all those shortcuts which are written deeply into my muscle memory. With little or no expectations, my first impression still was disappointing. But as I wanted to write a fair review of the program, I had to be patient. Of course, a few sessions of editing with Darktable couldn’t replace my years of experience with Adobe. Still, I found the program really hard to understand. There is simply too much going on in the software — too much to discover, too much to consider.
Once you find a suitable workflow, however, this program will help you gain full control of your image. Still, there are far too many panels and sliders. I have the feeling that wherever I shifted one slider in Lightroom, I need to shift three sliders in Darktable: make an adjustment, counterbalance it, and soften the effect.
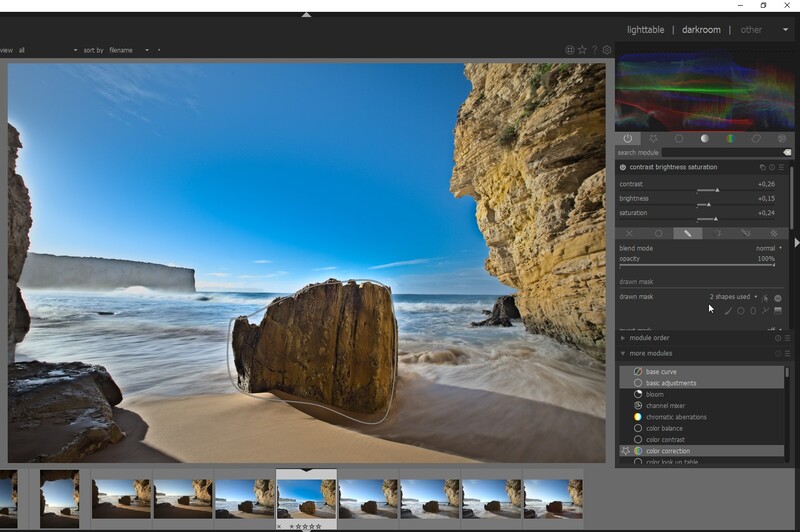
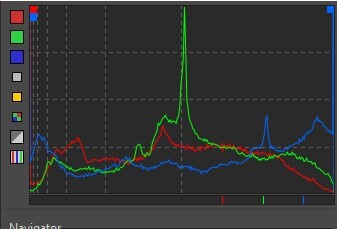
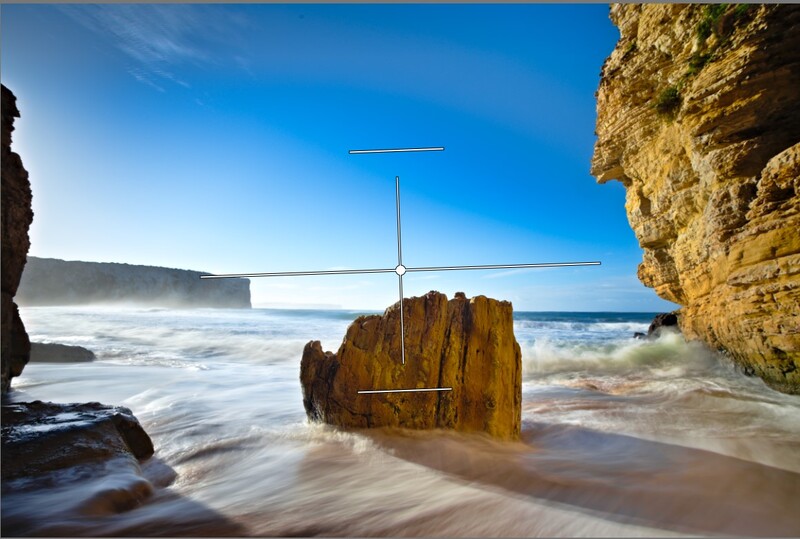
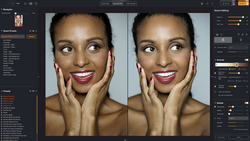
Yet, I also learned to love the program for its local adjustments. It’s so easy to add just any shape or path to your photograph. Where Lightroom just offers you limited adjustments to the local masks, Darktable gives you full control. This way, you can edit any area of the picture completely the way you want. That’s not always needed, but there were times when I missed the "Vibrance" slider or a proper tone curve in my local adjustments in Lightroom.
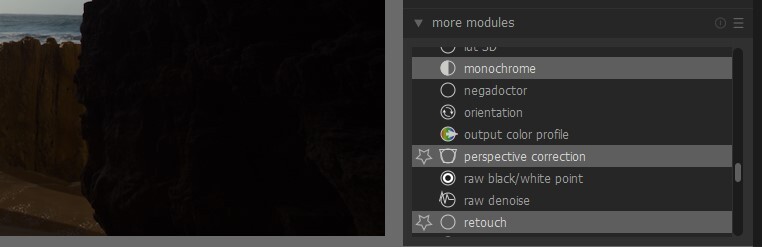
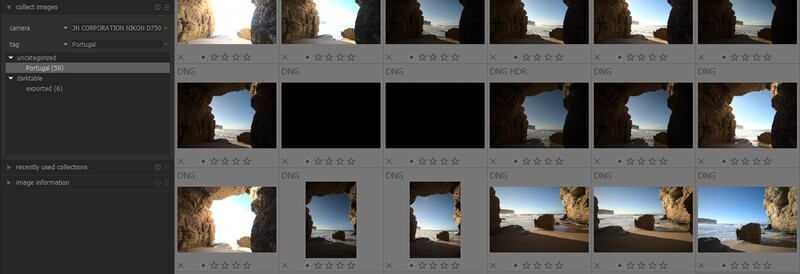
Although Darktable offers you all those options and possibilities within a modern user interface, it’s quite untidy. Selecting the right modules takes some time, and often, you can’t see the forest for the trees.
Strengths and Weaknesses of RawTherapee
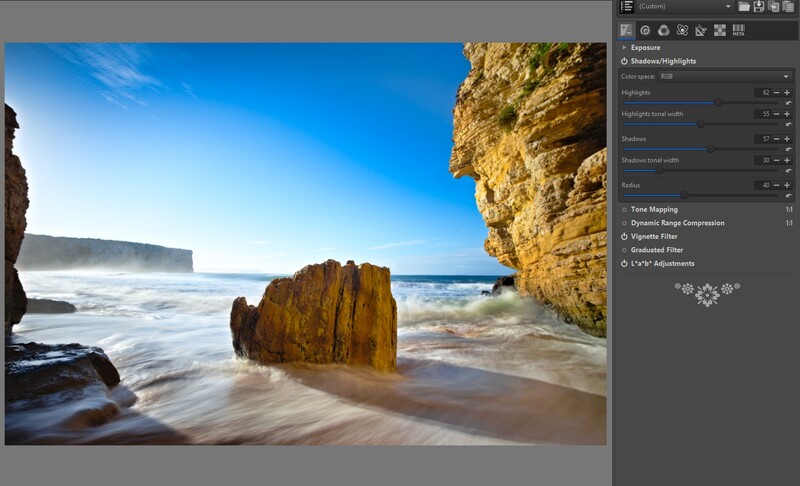
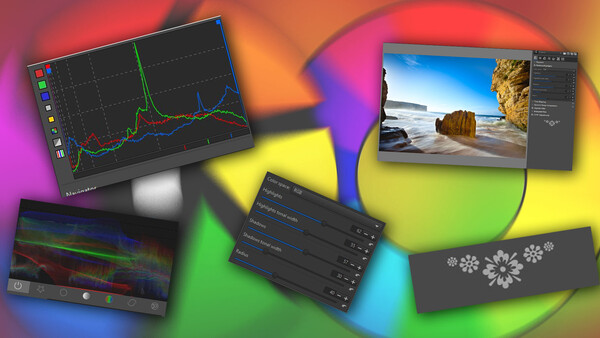
RawTherapee works exactly the opposite way. Its design looks a little bit like software from the late 2000s (did I already mention the weird flower stamps in the lower right corner?), but its menu is as neat and structured as possible. Everything is just where you expect it to be.
Instead of taking days to understand the program, most of its basic functions were clear at first sight. User experience and intuitive interfaces are the key features for any software, at least to me. It doesn’t matter if we are talking about open source or commercial products. The user should be the focus. Well done, RawTherapee.
As much as I like shifting sliders or adjusting my overall exposure and contrast settings, I do miss the ability to apply local adjustments. In my last article, I stated that there are some hints that local adjustments are probably coming soon, but they are not ready to be published yet. I also miss the ability to organize and tag my photographs within the software. Yes, it’s only a raw developer, but I also need to find my raw files.
Finally, the biggest downside of Rawtherapee is its speed. After several adjustments, the program will take its time to render your latest shift of a slider. That's not the best foundation for developing a full-day wedding shoot.
Which Raw Editor Should You Choose?
If money wasn’t an issue, I’d recommend you use Lightroom. As we’re still not living in a perfect world, I’d recommend you start with RawTherapee.
Especially when you are new to digital editing, this program won’t overwhelm you with modules, sliders, and theory. RawTherapee allows you to pull and push some sliders, watch the effect, and learn. Stick to the exposure, detail, color, and transform panels, and you will soon achieve great results. The program is easy to understand, and as long as you only use it for some of your personal pieces of art, you will be fine with the overall performance. In fact, you will only feel a little difference from Lightroom in the beginning.
Do you already know the difference between L*a*b and RGB? Are you familiar with parametric masks such as luminosity or color channels? Well, you can at least give Darktable a try then. Bring some time and persistence. You’ll probably need to read the manual, watch some tutorials (of which I didn’t find many really good ones), and count on the supportive community around the program. You will be rewarded with a powerful program, and you will also be able to tag your images and find them anytime you need them.
The Perfect Free and Open Raw Editor
A perfect free and open raw editor would look like this: The power of Darktable combined with the menu structure of RawTherapee. When you edit, the local adjustments would work just as fine as they do in Darktable, but you wouldn't suffer from not being unable to easily scroll through your side menu (which is quite complicated in Darktable).
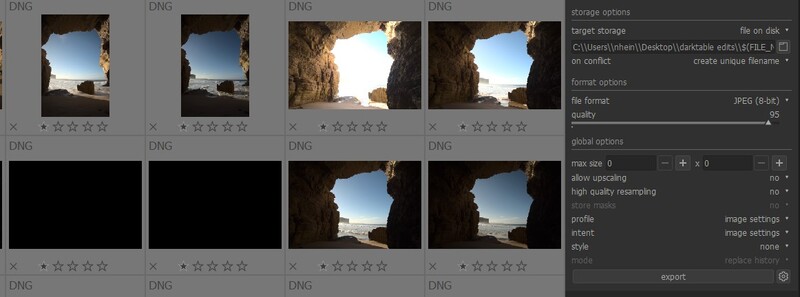
You could import your photographs into a library and find them quickly among your giant hodgepodge of photographs. Whenever you’re done editing, you could also apply different default-export options (Darktable) and even queue the exports to export them when you take a break and don’t need the computer's memory for editing (RawTherapee). And well, the performance… would probably be as fast as Lightroom.
After all, the coders of both programs have done a great job offering us different tools to edit raw files for free. Whichever software you choose, it’s worth trying. Give it some time and be patient; it’ll pay off — by a few hundred dollars a year.
If you're passionate about taking your photography to the next level but aren't sure where to dive in, check out the Well-Rounded Photographer tutorial where you can learn eight different genres of photography in one place. If you purchase it now, or any of our other tutorials, you can save a 15% by using "ARTICLE" at checkout.


Join the Fstoppers community for free
-
Post comments and join in the discussions
-
Browse the site ad-free
-
Share your work and get featured in the community
-
Compete in the photo contests for fun and prizes
20 Comments
Thanks for the article, you restate most of what I would say on the topic. I started using RawTherapee a few years ago and then switched over to Darktable because of the amount of features. Since about a year I have a free Adobe Suite account from my workplace, so I can use Lightroom for free, too, but after 3 years using Darktable I just can't switch. I would rather pay for Darktable than use Lightroom for free.
Thats for two reasons, first is obvious: I became used to my workflow in Darktable, so if anybody is starting out new I would always recommend the free option. Why lock yourself in for the next few decades by learning the costly one.
Second, there are many more options in Darktable. A good example for me (Mostly Landscape and Astro) is parametric masks on everything, including noise reduction. Being used to Darktable I am took it for granted that every module has a mask and I tend to use duplicates of modules with different masks to alter various parts of an image each to my liking. And the raw noise reduction has a built-in coarse/ fine adjustment. So useful if you get used to it.
Another one I wan to highlight is the contrast equalizer, it took me some time to understand it. But it can be used for so many things.
So in conclusion: I understand why Lightroom is so popular (ease of usage, Tutorials) but for most beginners I would recommend something else because the price does not justify its value. Still, probably not Darktable because you really need to dive deep to get something out of it. It took me about a year to get a better image out of Darktable than the "auto" feature in RawTherapee produced.
I fully agree with you. I use darktable myself, although I also paid for Aftershot (and Bibble before). I could never quite get the results I wanted with Rawtherapee. Tools in RT didn't behave the way I expected them.
The only things I find annoying about darktable are two:
- The default order the tools are applied isn't quite logical: If I use any film simulation it clips highlights and cannot be recovered, unless the tool is moved up in the stack manually (i.e., it's lossy)
- The multi-image selection is very confusing: Sometimes it's not easy to understand why one selects multiple images yet the controls apply to a single image, why selection behave differenly in each view, and why selection in edit mode scrolls all thumbnails, so I no more know which one was the one I previously viewed.
Edit: When I wrote "film simulations" I was referring to the LUT 3D tool.
Yes, combination of Layers is neither logical nor easy. A good example is this tutorial here [1] (which is also something I like to refer to if somebody asks me what is possible using DT). He has to save the image multiple times and reload and intermediate edit to prevent a later tool to mess with an earlier set mask.
[1] https://www.youtube.com/watch?v=D4_0mkkSIKo
His stated reason for doing saves in between is a lack of understanding as to how input/output adjustments work, and why module order is important, (and initially fixed).
In the normal workflow, highlight reconstruction is one of the first things in the pipeline, and LUT 3D is one of the last. There is no way for LUT 3d to interfere with highlight reconstruction.
I find the order of the tools to be most logical. Things which will affect most other things come first. Things which affect very little else come last. That is precisely how it must be. If one follows the workflow from the bottom modules to the top, it is easy as pie.
One does not do their exposure and filmic RGB, then try to do highlight reconstruction. Rather, do one's highlight reconstruction first, then fix exposure later. Same thing with LUT. After exposure, contrast, curves, etc, ae aplied, do the LUT 3D.
Karim, I'm not referring to highlight reconstruction. I'm referring to properly exposed photos with wide dynamic range. But Luts often increase highlights, and the tool ends up clipping the highlights at that point.
If they are clipped, you just cannot e.g. increase local contrast or adjust local exposure in certain areas. You need to perform those operations before clipping.
So any further local adjustments in that area won't do anything, unless you constantly move the lut3d tool up in the stack. It makes the process very time consuming, and confusing at first.
I wish I could just change the default to put Luts at the end.
That said, I very much like the new workflow better. Happy that I ended up switching. Unfortunately I was not aware of the new workflow, and the app has been defaulting to the old one until I was curious enough to try it.
Come to think of it, I have no idea where LUT lies in the old workflow, but in the new workflow, it is close to the end.
Regarding clipping, because darktable uses a floating-point pixel pipeline, nothing Clips until final export. Everything can be brought back into gamut along the way, or gamut adjusted at the very end.
With a 16-bit integer workflow, whenever values would have gone above 65535 in 1 module, they all get set to 65535. There is no way to remember what they are supposed to be. A 16-bit integer cannot hold a higher number. When they later get adjusted down by another module, they all move down together. This is Lightroom/Photoshop Behaviour.
In a 32-bit floating-point workflow, or even a 16-bit floating-point workflow, any value above 1.0 can still be stored, it is simply a matter of precision. When values would have gone above 1.0 by one module, they all get set appropriately. When they later get adjusted down by another module, they all move down accordingly. Highlights are NOT lost.
That being said, your LUT may be the culprit. It seems to be replacing darker hues with lighter hues. It may be because it is RGB based, and not HSV/HSL based, so that changes in hue/saturation, results in changes in overall brightness. That is not the fault of darktable.
There is an in-depth tutorial on the darktable website about using LUTs of various forms with the application. I do not often use LUTs, so I am probably not the best person to help further with this issue.
Hope I have been somewhat helpful.
That's my understading too, I believe the tool is not doing anything wrong. I believe that the LUTs just exchanges some discrete (integer) values for others. It is the behavior I expect, unless the tool interpolates values, but I may have to look at the code.
An example is Velvia film simulation, which just flattens the highlights. But then when I add a tone-curve, it's applied after the LUT tool. So the tonecurve is useless around those highlights. I just rearrange them, move the tonecurve down or LUT3d up, and do local adjustments with the tonecurve tool as desired.
Thanks for the pointers, I will check that tutorial and see if it clarifies anything.
The reason for choosing App1 over App 2 cannot be that App1 is more familiar, if the person doing the choosing is a newbie. For the beginner, the app must be chosen on merit of the app. For that reason, Lr falls behind just about all of its competitors, including proprietary and open alternatives.
Lr does not offer the creative industry de facto intermediary file format, OpenEXR. Lr does not really offer GPU acceleration, nor multi-threading. It does not offer 32-bit floating point pixel pipeline, (much less 16-bit fp pixpeline).
If one wants little to no banding in subtle colour changes, (or in dark areas), one need fp processing.
If one truly wants a fast workflow, one wants to buy a 16 threaded CPU and use it, instead of the fastest, most expensive, single-threaded workload CPU. Better yet, a half decent GPU and put it to work. [ASIDE] I get tired of hearing the advice given to photographers, “Get the most expensive four to eight thread CPU, and do not waste your money on a graphics card. You will not need them for photography work.” Only really true with Lr & Ps. Even my image encoders —for the most part— are multi threaded. [/ASIDE]
If one is a beginner, one can take up darktable, read the manual, read the wiki, watch the online tutorials, and be up and running in no time flat. One does not need to know all the modules of darktable on day one, anymore than a new darkroom user needs to understand bas relief printing, much less multi-grade paper, on day one.
Darktable makes this easy by hiding unnecessary modules to begin with, by choosing the default module order, (or even the [workflow: beginner] option), and having the person work from left to right, bottom to top. It is not nearly as complicated as many make it out to be. I rarely touch nine modules in my normal workflow. I might touch 14 to 16 in a very complex workflow, and I have been doing photography since 1980, teaching it since 1981. (There are over 40 modules, total, some of which are only legacy, since the introduction of the filmic workflow).
But what about when one wants to use one of these hidden modules? Remembering which tab it is under? No problem! Just type in what one wants to do! If I type in, “local,” then three modules are offered; [Local contrast], (obviously), to manipulate local and global contrast separately, [Contrast equaliser], to add or remove local contrast/sharpness/actuance, and [astrophoto denoise], (previously known as, ‘de-noise, non-local means’). Of course, searching for “denoise” brings up four modules; [Astophoto denoise], [surface blur], —formely known as, ‘denoise (bilateral filter)’,— [denoise (profiled)], and [raw denoise]. [ASIDE] I typically use [denoise (profiled)] with wavelets, and parametric masks. [/ASIDE]
Coming from any other app is only difficult because of familiarity to that other app.
We're not talking about familiarity here but about software that's easy to learn. I understand that you work with darktable for years and that you will get along quite well. However, it took me not even a day to understand Lightroom when I fisrt used it. I still don't feel comfortable with darktable now. RawTherapee was totally different. Not because it's closer to Lightroom, but because it's as easy to understand. Especially for beginners, that's an important factor. If you teach children how to paint, you will give them a brush, a paper and some paint. You don't teach them about color theory and chemicals, you make it easy for them to discover it themselves. When they fell in love with painting and understand that it's what they want to do, you may teach them composition, color theory, and history of art. If you start with that, those children will never touch a paintbrush again.
Also: I use LIghtroom on a 5-year-old laptop. And it's quite speedy.
I did not start with darktable. I went through several various software titles on various platforms before settling on darktable (for the second time).
One of the first things I was taught —and incorrectly so— in kindergarten was the primary colours, and mixing them. [ASIDE] Red, yellow, and blue. Yeah, right! They meant magenta, yellow, and cyan, but who cares? It worked. [/ASIDE]. I was never taught “colour theory” in kindergarten, though, and that is my point.
Darktable has a layout of the tabs, for various types of modules. Each set of modules in the tabs are stacked in a certain order. If one simply follows that order, —first tab, bottom to top, second tab, bottom to top, third tab, bottom to top, etc.,— then it becomes easy.
I see many tutorials start with something akin to, “the first thing I notice about this photo is [whatever aspect], so let's start by fixing that.” The problem with this paradigm is the pixel pipeline, which does not match any darkroom workflow in reality.
For a beginner, who has never touched any software titles before, it is NOT a hard thing to grasp. I guess it was easy for me, not because I used several different titles before, but because I started in the days of an actual darkroom, where an “un-sharp mask” was an actual un-sharp mask. This results in the sliders in the sharpening module making perfect sense.
Coming from an actual darkroom workflow, the darktable workflow, where things are done in a particular fixed order, also makes perfect sense. It is only complicated to those who did not have a darkroom background, and/or are used to a particular workflow of non-linear processing.
I encourage people to try look at Darktable again with either the 3.x default workflow setting, or even the “workflow: beginner” setting, and it will become quite simple.
When it comes to more complex tasks such as wavelet decomposition and blemish removal, I will totally understand any difficulties that such an undertaking will present. (Still, digitally is much easier than the (good?!?) old days with bleach/farmer's reducer, dyes, & paint brushes, much less preparing a registered un-sharp mask for simple sharpening 😉).
I had subscription at Adobe Photography plan, but when i started to use darktable and understand it i never look back. I auto apply modules in every photo and the same photo, the colors, are simply better at darktable than lightroom.
If money isn’t an issue the best raw editor by far is capture One.
That's said i sometime use rawtherapee on my linux laptop and is very good.
I would just want to add a suggestion for another RAW-editor (or maybe it should be called RAW -develooer),. Its controls for lighting and color adjusments are more refined than in ACR / Lightroom (which I use), and it can be used as plug. The program use called Photo- Ninja, but I actually never hear anyone at all talk about it.
I am a Capture One owner but I also use Rawtherapee and Darktable. The beauty of FOSS is that you can use both for free and decide what you like best. However, it is not a case of "either or" as you can use both if you want. Sometimes I find Rawtherapee easier to get on with and sometimes I like the workflow and the results in Darktable better. And one day I'll understand Wavelets well enough to use them!
«…it is not a case of "either or" as you can use both….»
Quite true. I still have RawTherapee on my system for those rare times I might need to handle a Pentax PixelShift image, or something else which I cannot easily do in darktable.
I still have The GIMP & Krita, for those rare times I need to go beyond the retouching capabilities of darktable, or need to create a digital backdrop replacement.
I still have Hugin and Entangle for those rare times….
[EDIT]
Before someone says, “…or one can do it all in Adobe CC Lr/Ps,…” it makes no sense to get a program less capable at 99% of what I do, simply for the convenience of not switching programs for 1% of what I do. My belief is that US$120 per year is better spent on developers of what I do 99% of the time, with the hardware which I do have.
Until this year, I was running my workflow on a ten year old AMD Phenom II X6 & an nVidia GTX 760. My software took advantage of my six threads, and my GPU. Now I have a Ryzen 7, (and the same GPU), and my software takes advantage of my 16 threads (and GPU). Even with my old system, my catalog was not slow.
When Adobe catches up to its competitors, open or proprietary, then maybe one can say, “but Adobe CC does it all for only $120 per year.” Even then, amateurs/hobbyists can practice their craft for less.
[/EDIT]
They both have unfriendly UI compared to Adobe stuff (LR or ACR)
The UI design is particularly important in how usable a software title can be. It isn't just an aesthetics issue. It not only affects overall usability and how easy it is to learn, it also affects how effective it is in making the changes the individual tools offer.
«…unfriendly UI….»?!?
For darktable, go left-to right, bottom to top. Use darkroom terminology. How unfriendly is that?
For RawTherapee, the tabs are in two groups, (manipulative, presentation),with each group of tabs sorted reverse alphabetically, (R-L; Meta, Raw, Transform, & Advanced, Colour, Detail, Exposure). Not the best choice , if you ask me. Nevertheless, easy to find, easy to see, easy to use.
How easy is it in Lr to choose one out of sixteen different BTA on one's BCA raw image? How easy is it to handle Pentax PixelShift? How well does Lr handle Pentax PixelShift? (RawTherapee handles it better than the app which comes with the camera).
The RT UI makes finding and using that so simple that a 3-week old fetus can do it.
I would honestly like to know what is really “unfriendly” about it, aside from, “not laid out in a fashion which I would expect.”
Nils Heininger I strongly recommend trying ART. One of the still active Raw Therapee developers forked it, made the user interface simpler and added the darktable local adjustments to raw therapee. It really is just awesome.
https://bitbucket.org/agriggio/art/wiki/Home