
Adobe's Lightroom masking feature introduced just under a year ago revolutionized the workflow for many photographers by automating the tedious task of creating individual masks for specific parts of an image. This AI masking feature allows photographers to easily separate the foreground from the background, easily break down the parts of a portrait, and apply various edits to each individual part.
Object selection was added to help define and edit individual parts of an image. All these helped speed up a photographer's workflow, allowing time to focus on the creative side of photography.
In the latest update, 24.2, you now have the ability to carry these edits through all your images from a set via AI technology. The masks that you set the parameters for are now saved and applied to all your images thanks to AI technology. If your model moves position in your shoot, the AI calculates the masks relative to the new position and applies them to hair, face, skin, pupils, and whatever you have set the mask's edits to, speeding up your entire editing process. There are some caveats that I have found, but I'll get to those at the end.
In this article, we'll be looking at the basic forms of the edits using Person Masks Option. However, it works for other AI masking options and images.
Set Your Edit
Set your baseline for your edits in terms of the basic edits, and then, choose your masks, which, in this case, is the person.
Choose Your Masks
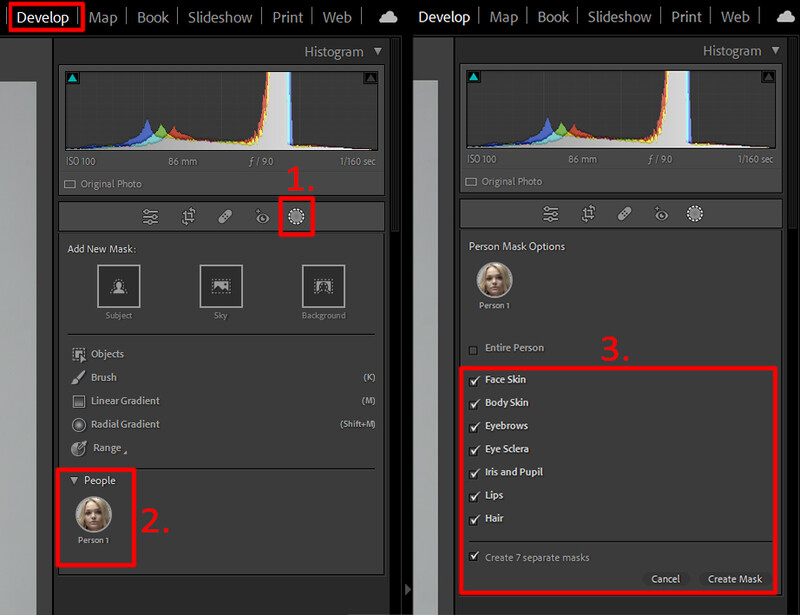
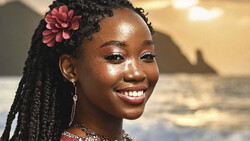
Adobe added the person selection to Lightroom’s masking feature just under a year ago. It detects the person or people within your frame so that you can make individual masks for everyone in the image.
- First, select the masking tool, and Lightroom will quickly detect if there are any people in the frame.
- An icon will then appear with a thumbnail of that person. Select the icon.
- In the dropdown that appears, deselect Entire Person, and select the masks that you want for your edit.
In this example, I selected all seven. Remember to select create seven separate masks and then click Create Mask.
Edit Your Masks
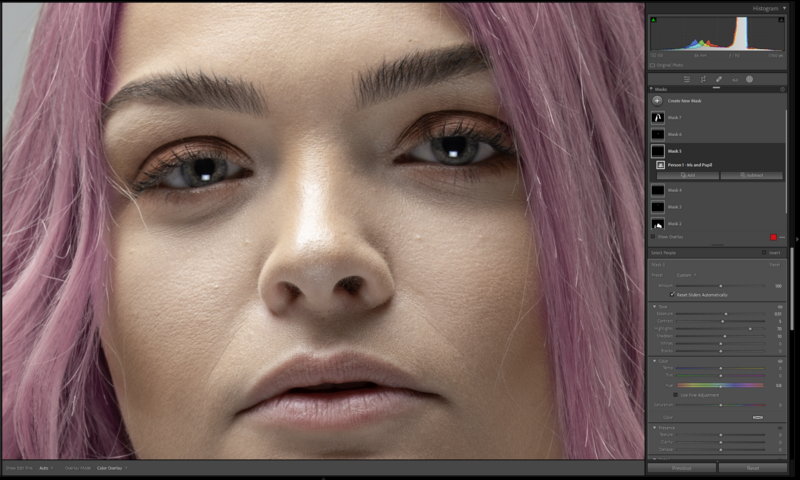
Choose how you want to edit your masks by clicking on the mask and then edit to suit. Although in this case, I selected all the masks, I only decided to edit four of them: the hair, iris and pupil, the face skin, and the body skin. Should I decide in another one of the images I want to edit the remaining masks, as they are already created, I can.
Save Your Preset
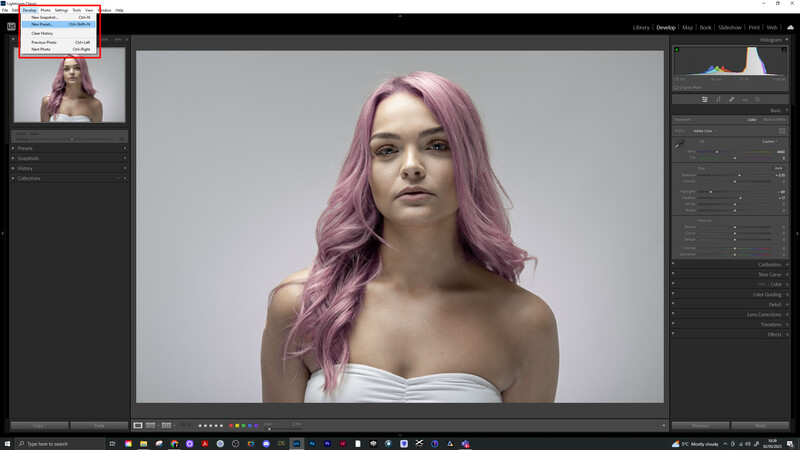
Once you’re happy with your edits, it’s time to save them as a preset. Go to Develop > New preset.
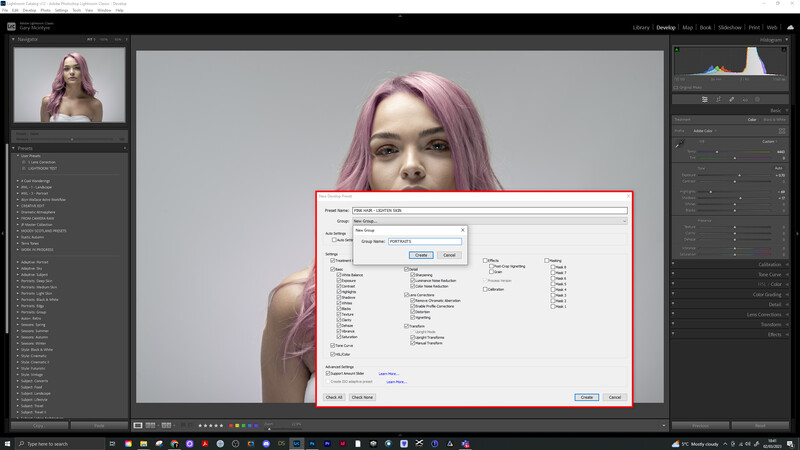
In the pop-up window that appears, name your new preset and, if desired, create a new group. If you don’t create a new group, the new preset will fall into the default User Group usually found at the top of the presets.
Tick All The Boxes
Well, you don’t have to tick all the boxes depending on what edits you have used in your image, but you must ensure that you select Masking and check all the masks that you want to carry forward. As mentioned earlier, I checked all so that it speeds up the editing process should I want to edit a particular mask later within the image.
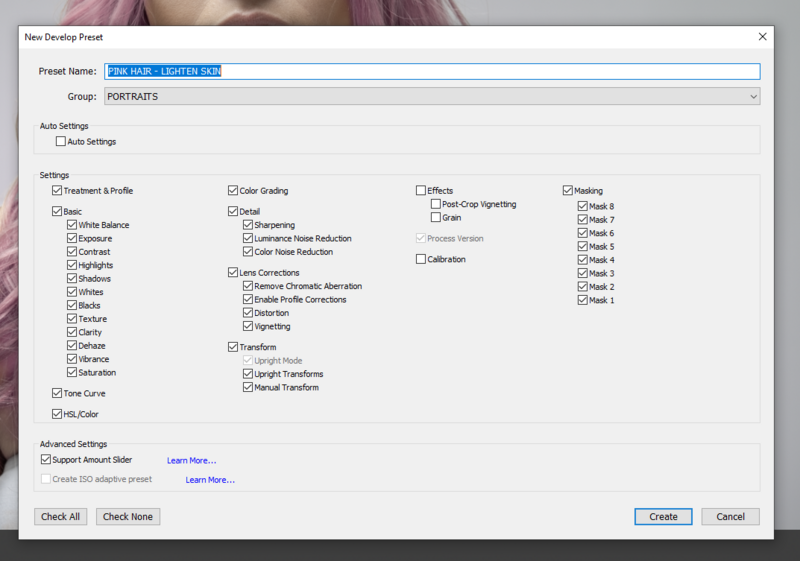
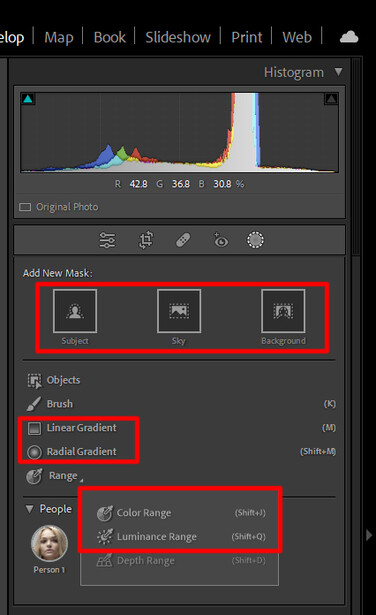
What Masks Can You Use?
You can add any of the AI masks indicated below depending on the genre of photography that you shoot, and these will be carried through with your new preset. The other masks that work when carried over to different images are Background, Sky, Subject, Linear, Radial, Color, and Luminance. Admittedly, at the time of writing, I haven’t yet tried objects, and that is simply because with objects, you have to define them first by painting over them, and this may cause anomalies, which I'll cover at the end.
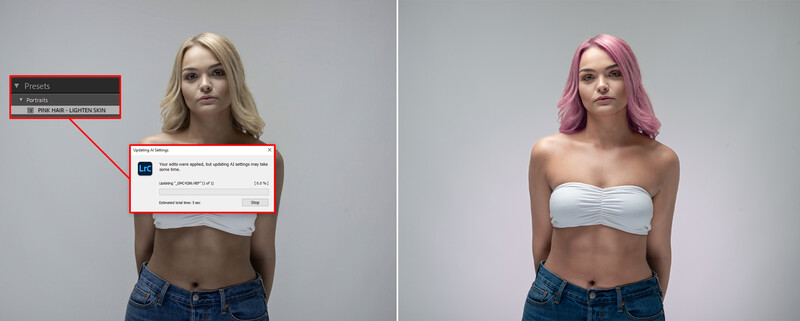
Apply to All Your Images
Now that your new preset has been created, apply it to all the images from your shoot and let Lightroom’s AI do its thing. The progress pop-up window that appears will indicate how long the estimated time is for processing. Voila, your images are edited.

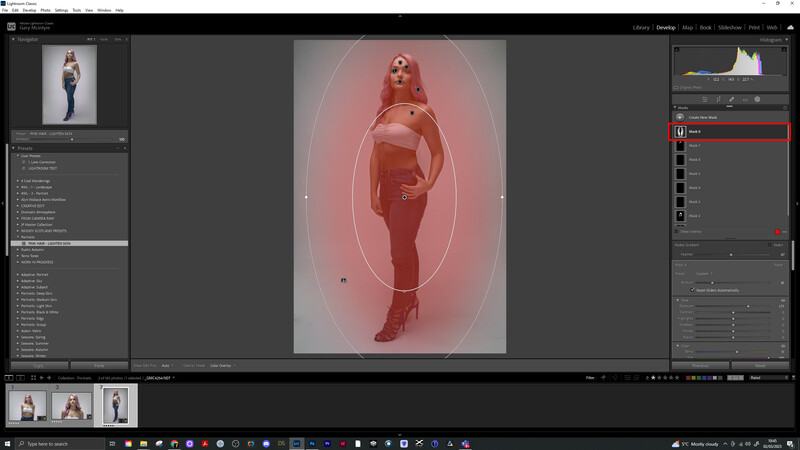
Moveable Masks
Now that your new preset has been applied to other images without any work, you have the option to move and adjust any of the masks you have created. In this example, I’ve increased the size of the radial filter and moved it up from its original location to best suit this image from the same shoot.
Anomalies
The masks that Lightroom's AI creates are based on the people selected and how Lightroom detects the elements within them. Say, for example, it's a male with a beard and the AI, while detecting the skin on the face, omits the beard. Don't add to that mask via any means before creating the preset, as this is not part of LIghtroom's AI detection. When you do this, this part of the mask you have added (or subtracted from) continues to be an area carried over in the rest of the preset in the exact same position. So, if your model moves position, all the AI and all other edits are applied wherever they have moved to, and the added/subtracted area remains static, creating anomalies in your edits. At this point, you can go in and adjust them to suit by adding or subtracting.
Camera Raw
Another point to note is that if you follow the same process in Camera Raw using the masking features there and then save the preset, it will automatically be added to Lightroom's presets under the same group and name that you created in Camera Raw. If you already have Lightroom open, you will have to reboot it to allow the changes to take place, then a new preset to be added. When I created the preset in Lightroom to see if it updated the presets in Camera Raw, it didn't, so be aware of that. Perhaps it was a step I missed, so if it worked for you, please let me know in the comments below.
Conclusion
Hands down, this is a massive time-saver. The AI's ability to automatically detect and select objects within an image and apply the masks and edits throughout the remaining images is particularly impressive, making it accessible to photographers at all skill levels. You could make presets for individual parts of an image — in this example, a person, hair, skin, face, etc. and apply them with a click of a button to any shoot you do. With the continued advancements in AI technology, I would expect we can see further exciting developments in photo editing.


Join the Fstoppers community for free
-
Post comments and join in the discussions
-
Browse the site ad-free
-
Share your work and get featured in the community
-
Compete in the photo contests for fun and prizes
1 Comment
Yes agree, Photoshop has this feature too. Not workable for every image that has tattoos, etc and they eye enhancement is sketchy. I like this new AI Adobe has done.